Equalizer In iTunes: Boosting Audio Quality for Every Genre

Oct 24, 2025 • Filed to: Device Data Management • Proven solutions
Dr.Fone Basic:
Better Control for Your Phone
Manage, transfer, back up, restore, and mirror your device
The equalizer in iTunes is an essential tool feature for every music enthusiast and iTunes user. It allows you to fine-tune your audio to suit your personal preferences, enhancing the overall listening experience. In this guide, we'll walk you through the steps to access and adjust the equalizer settings in iTunes, explain the different frequency bands, and share best practices for using the equalizer effectively.
- Part 1. Introduction to the Equalizer in iTunes
- Part 2. Improving Sound Quality with the iTunes Equalizer
- Part 3. Steps to Access and Adjust the iTunes Equalizer Settings
- Part 4. Understanding the Different Frequency Bands
- Part 5. Best Practices for Using the Equalizer For iTunes

- Part 6. Bonus Tip - Transfer Your iTunes Playlists to Both iOS and Android Devices
Part 1. Introduction to the Equalizer in iTunes
The equalizer (EQ) in iTunes is a powerful tool that adjusts the balance between different frequency components in an audio signal. Whether you're looking to enhance the bass, boost the treble, or create a custom sound profile, the equalizer gives you the control you need to improve the sound quality of your music.
Part 2. Improving Sound Quality with the iTunes Equalizer
Using the iTunes equalizer settings can significantly improve your listening experience by allowing you to modify the sound to match your environment or personal taste. This powerful tool gives you the flexibility to fine-tune audio settings to create the perfect soundscape for any situation. For instance, you can:
- Enhance the bass for a richer, fuller sound, making your music feel more immersive and powerful.
- Boost the mids for clearer vocals, ensuring that lyrics and dialogue are more pronounced and easier to understand.
- Increase the treble for more detailed highs, which can add a crisp, sparkling quality to your music and bring out intricate details often missed.
By experimenting with these adjustments, you can create a custom listening experience that suits your preferences and enhances your enjoyment of music, podcasts, or any other audio content.
Part 3. Steps to Access and Adjust the iTunes Equalizer Settings
In this section, we will provide a comprehensive guide on how to adjust the equalizer settings in iTunes. Understanding how to use the equalizer effectively can greatly enhance your audio listening experience by tailoring the sound to fit your specific needs. Whether you are looking to create a custom sound profile or simply want to know how to adjust EQ on an iPhone, the following steps will walk you through the process clearly and concisely.
For iPhone users
Step 1: Open the Settings app on your iPhone.

Step 2: Scroll down and select Music.
Step 3: Under the Playback section, tap on EQ.

Step 4: You will see a list of preset equalizer settings. Browse through the options and select one that best suits your listening preference.

If you want to customize further, you may need to explore apps that offer more advanced equalizer settings, as iOS’s built-in EQ does not offer manual adjustments.
Once selected, your chosen EQ setting will be applied to all music played through the Music app on your iPhone.
For Mac Users:

Step 1: Open iTunes and play any song.
Step 2: In the menu bar, go to Window > Equalizer.
Step 3: The Equalizer window will open. Here you can select presets or manually adjust the sliders.
For Windows Users:
Step 1: Open iTunes and play any song.
Step 2: In the menu bar, go to View > Show Equalizer.
Step 3: The Equalizer window will appear, allowing you to choose presets or adjust the sliders manually.
Part 4. Understanding the Different Frequency Bands
The iTunes equalizer consists of 10 bands, each representing a specific range of frequencies that allow for precise audio adjustments to enhance your listening experience:
- 32 Hz: Sub-bass. This band affects the rumble and depth of the sound, adding a profound and immersive low-end foundation that can make the music feel more powerful and intense.
- 64 Hz: Bass. Enhancing this range adds punch to the sound, making bass lines more prominent and providing a robust, thumping quality to the music.
- 125 Hz: Low-midrange. This frequency influences the warmth and fullness of the audio. Adjusting it can make the sound richer and more enveloping.
- 250 Hz: Mid-bass. This band impacts the body and weight of the sound, affecting instruments like guitars and vocals, giving them a more solid and grounded presence.
- 500 Hz: Midrange. This crucial frequency band affects the definition and clarity of the audio. Fine-tuning it can help bring out the detail in vocals and instruments, ensuring they stand out distinctly.
- 1 kHz: Upper midrange. Influences presence and vocal clarity. Adjustments here can make vocals and lead instruments more pronounced and clearer in the mix.
- 2 kHz: Low treble. Adding detail and brightness, this range can make the audio sound more lively and crisp, enhancing the nuances of both vocals and instruments.
- 4 kHz: Treble. This band affects the sharpness and sibilance, making the high frequencies more articulate and defined, which is crucial for clarity in vocals and high-pitched instruments.
- 8 kHz: High treble. Enhances sparkle and airiness in the sound, providing a sense of space and openness that can make the music feel more ethereal and expansive.
- 16 kHz: Ultrasonic. This highest band adds brilliance and sheen to the sound, giving it a polished and pristine quality that can elevate the overall listening experience.
Understanding these bands helps you make precise adjustments to tailor the audio output to your liking. Whether you're aiming for a bass-heavy sound, clearer vocals, or a more balanced mix, knowing how each frequency band affects the audio enables you to customize your listening experience to suit your preferences perfectly.
Part 5. Best Practices for Using the Equalizer For iTunes
When it comes to optimizing your audio experience, using the equalizer can make a significant difference. By understanding and implementing best practices, you can achieve a balanced, clear sound tailored to your preferences. With EQ for iTunes, you have the tools at your fingertips to fine-tune your music.
- Start with Presets: iTunes offers several presets like "Rock," "Jazz," and "Classical." Use these as a starting point and tweak them based on your preference. These presets are designed to enhance the listening experience for specific genres, providing a balanced sound that you can further customize.
- Avoid Over-Boosting: Too much boost can distort the sound and may lead to an unpleasant listening experience. Make small adjustments and listen carefully after each change to ensure the sound remains clear and crisp.
- Match the Genre: Different genres benefit from different EQ settings. For instance, rock music might require more bass, whereas classical music may need more emphasis on mid and high frequencies. Experiment with various settings to find what works best for each type of music you listen to frequently.
- Use Quality Headphones or Speakers: To fully appreciate the changes made by the equalizer, use good-quality headphones or speakers. Poor audio equipment can mask the subtle differences made by EQ adjustments, so investing in better hardware can significantly enhance your listening experience.
Bonus Tip - Transfer Your iTunes Playlists to Both iOS and Android Devices
To take your music experience to the next level, consider using Wondershare Dr.Fone - iTunes Manager. This versatile tool allows you to seamlessly transfer your iTunes playlists to both iOS and Android devices, so your carefully curated playlists are always with you, no matter which device you're using.
With Wondershare Dr.Fone, you can also back up your music library, manage your media files, and even recover lost songs effortlessly. It's a comprehensive solution designed to optimize your music management, ensuring you never miss a beat, whether you're at home, on the go, or switching between different gadgets.
Dr.Fone - Phone Manager (iOS)
Transfer Your iTunes Playlists to Both iOS and Android Devices
- Transfer, manage, export/import your music, photos, videos, contacts, SMS, Apps, etc.
- Back up your music, photos, videos, contacts, SMS, Apps, etc., to the computer and restore them easily.
- Transfer music, photos, videos, contacts, messages, etc., from one smartphone to another.
- Transfer media files between iOS devices and iTunes.
- Fully compatible with the newest iOS system.


How to Use Dr.Fone Basic - iTunes Manager:
If you seek to transfer media data from iOS to iTunes with Dr. Fone's iTunes Library feature, this guide will be pretty helpful for you. Find out how Dr.Fone helps in executing this task.
Step 1: Access iTunes Library
Launch Dr.Fone on your computer and connect it to your iPhone via Wireless or USB. Open the iPhone section from the left panel and select iTunes Library from the homepage options.

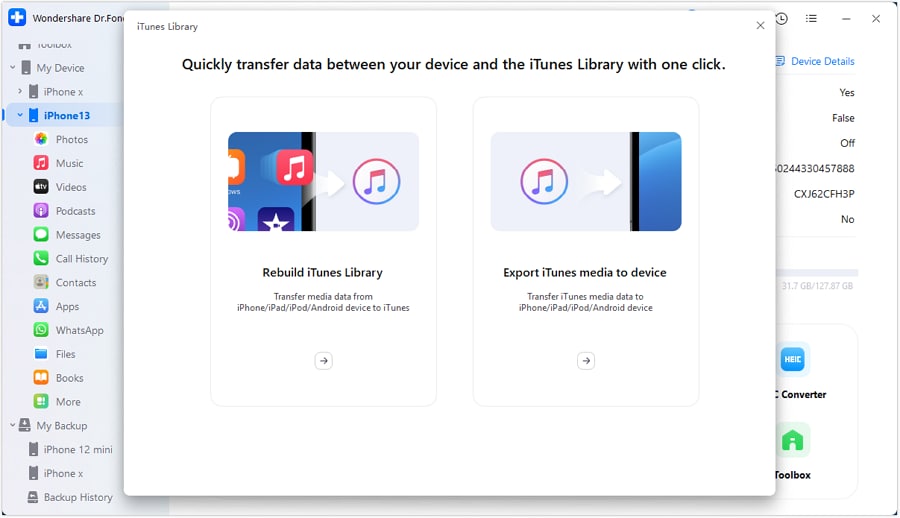
Step 2: Choose the Right Operation for iTunes
When the new window appears, select the appropriate function for the iTunes Library. Choose Rebuild iTunes Library to transfer media from your iOS device to iTunes.
Step 3: Initiate the Process
In the next window, click Start to begin copying data from the iPhone to iTunes.

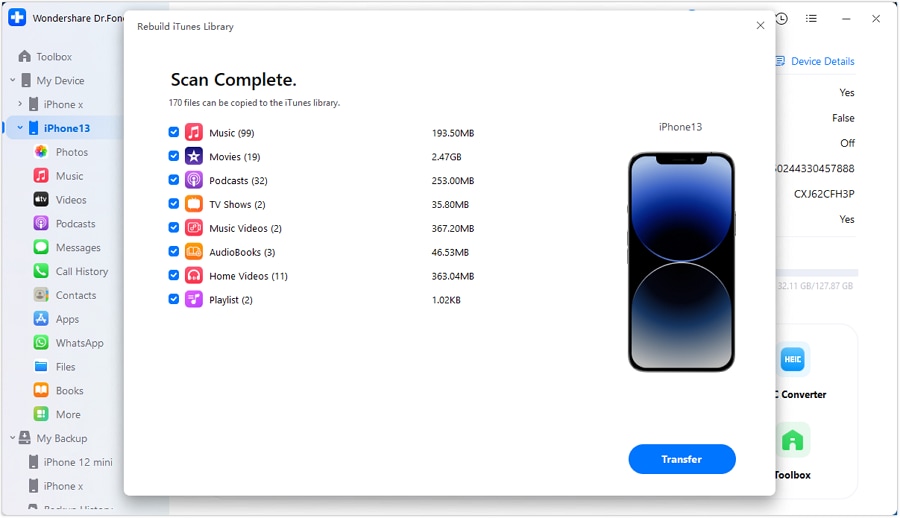
Step 4: Choose File Types and Continue
After the iOS device scan is complete, a list of supported file types will appear in the next window. Select the data you want to transfer and click Transfer to proceed.
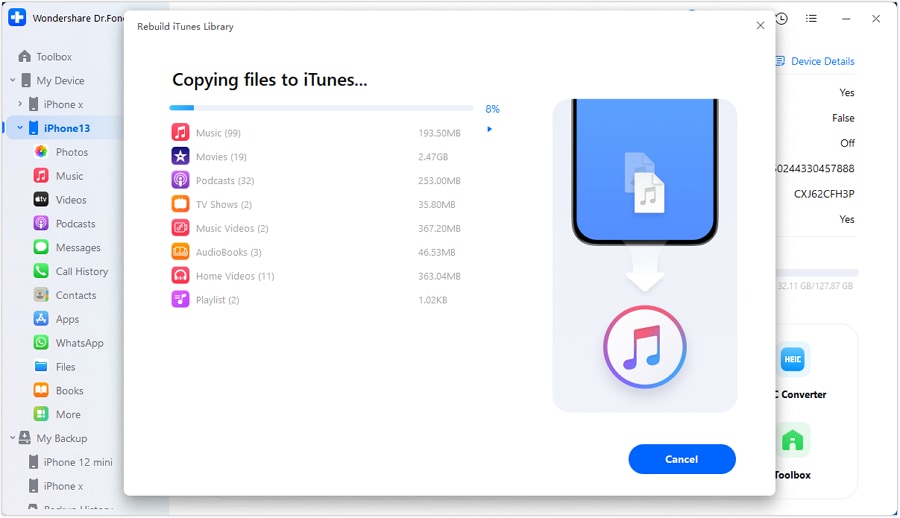
Step 5: Monitor Transfer Progress
The next window will show a progress bar. Wait a few moments for the data to transfer from the iOS device to iTunes. To cancel the transfer, click Cancel.
Step 6: Verify Data Transfer Success
A prompt window will appear indicating the process is complete. Click OK to finalize.

With Dr.Fone Basic, you can ensure that your favorite tunes are always at your fingertips, enhancing your listening experience wherever you go.
FAQs
Dr.Fone Basic:
Better Control for Your Phone
Manage, transfer, back up, restore, and mirror your device


iTunes Manage
- iTunes Backup
- 1. Does iTunes Backup Photos
- 2. Forgot iTunes Backup Password
- 3. Fix iTunes Corrupt Backup
- 4. Fix iTunes Backup Session Failed
- 5. Change iTunes Backup Location
- 6. View Files on iTunes Backup
- 7. Backup WhatsApp Using iTunes
- 8. Top 5 iTunes Backup Managers
- 9. Top 6 Free iTunes Backup Extractor
- 10. Backup iMessage Without iTunes
- iTunes Restore
- 1. Restore Photos from iTunes Backup
- 2. Restore Data from iTunes Backup
- 3. Restore WhatsApp Using iTunes
- iTunes Rebuild
- 1. Transfer iPad Purchases to iTunes
- 2. Transfer iPad Music to iTunes
- 3. Transfer iPod Music to iTunes
- 4. Transfer Android Music to iTunes
- 5. Import Multiple Lyrics to iTunes
- iTunes Transfer
- 1. Sync iTunes Media to iCloud
- 2. Sync iTunes Media to Android
- 3. Transfer iTunes Music to iPod
- 4. Transfer iTunes Music to Flash Drive
- 5. Transfer iTunes Music to Android
- 6. Transfer iTunes Music to Google Play
- 7. Put iTunes Audiobooks to Android
- 8. Copy iTunes Playlists to Hard Drive
- 9. Move iTunes Library to PC / Mac
- 10. Export iPhone Contacts from iTunes
- 11. Export Playlist from iTunes
- iTunes Plugins/Alternatives
- 1. Top 3 iTunes Plugins
- 2. Top 20 Alternatives to iTunes
- 3. Top 3 iTunes Alternatives for Android
- 4. Top 5 iTunes Remote for Android
- iTunes Problems
- 1. Fix iTunes Error 11
- 2. Fix iTunes Error 1100
- 3. Fix iTunes Error 2005/2003
- 4. Locked Out Of iTunes
- 5. Forgot iTunes Password
- 6. Account Has Been Disabled in iTunes
- iTunes Tricks
- 1. Change the iTunes Skin
- 2. Use File Sharing in iTunes
- 3. Use Home Sharing in iTunes
- 4. Recover iPhone Data from iTunes
- 5. See iTunes Purchase History
- 6. Get Free iTunes Cards Legally
- 7. iTunes Visualizers Download
- 8. Watch iTunes Movie on Android
- 9. Update iTunes On Your Computer
- 10. Install iTunes on Windows / Mac
- ● Manage/transfer/recover data
- ● Unlock screen/activate/FRP lock
- ● Fix most iOS and Android issues
- Manage Now Manage Now Manage Now


Daisy Raines
staff Editor