iTunes Photo Recovery: How to Safeguard Your Cherished Memories on iPhones

Aug 27, 2025 • Filed to: Data Recovery Solutions • Proven solutions
Accidentally deleted some precious photos from your iPhone? While the Recently Deleted album offers a quick way to retrieve images within 30 days, it doesn’t help if the time window has passed or if the photos were permanently removed. In such cases, iTunes photo recovery becomes one of the most effective solutions for restoring your lost media.
Apple understands the significance of preserving cherished memories captured in the form of photos on your iPhones. To ensure that users can safeguard these precious moments, Apple offers various options, one of which is utilizing iTunes.
Using iTunes to back up your iPhone regularly is one of the smartest ways to protect your valuable data—especially your photo library. With each backup, iTunes securely stores a complete snapshot of your device, including your photos, videos, and app data. This means that even if images are accidentally deleted or lost due to system issues, iTunes photo recovery can help you get them back.
So now, we'll learn how to recover photos using two methods – one using iTunes photo recovery and the other without using iTunes.
Part 1: What is iTunes Backup and Photo Recovery
Think iTunes is only for managing your music? Think again. iTunes is a powerful tool for creating full iPhone backups, including your photos, contacts, messages, and app data. By connecting your iPhone to your Mac or PC and syncing it with iTunes, you can easily set up a secure, comprehensive backup.
These backups are essential for iTunes photo recovery, ensuring that your images are safely stored and can be restored anytime. Regular iTunes backups give you peace of mind—if your photos are accidentally deleted or lost, you’ll have a reliable way to recover them.
When you back up your iPhone with iTunes, your photos are safely included—but not stored as separate image files. Instead, iTunes creates a single encrypted backup file that contains all your data, including photos, messages, contacts, and more. This centralized format makes iTunes photo recovery possible when you restore your device or use recovery tools to extract photos from the backup.
These backup files are stored on your computer's local drive. They are not accessible directly through regular file explorers. iTunes encrypts the backup for security reasons, protecting your personal information from unauthorized access for iTunes photo recovery.
Part 2: How to Restore Photos Using iTunes
Assuming you have already backed up your data using iTunes, now is the time to learn how to restore those valuable photos back to your iPhone. With a few simple steps, you can have your memories back in no time.
How to recover photos from iTunes backup:
- Step 1: Connect your device to the computer with the iTunes backups. Launch iTunes and select your device.
- Step 2: On the next window, click on "General." Then, click on "Restore iPhone."

- Step 3: A drop-down menu will appear, showing the available backups. Choose the backup location that has the photos you want to restore.
- Step 4: Before the restoration process begins, iTunes will ask for confirmation. Click on "Restore" to proceed.
You will now begin to recover photos from iTunes backup. After that, your precious memories will soon be back on your iPhone. Remember, restoring from a backup will replace the current data on your device, so be sure to have the right backup selected.
Part 3: How to Restore Photos without iTunes
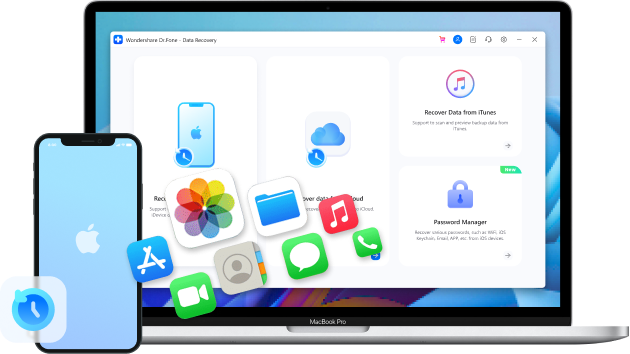
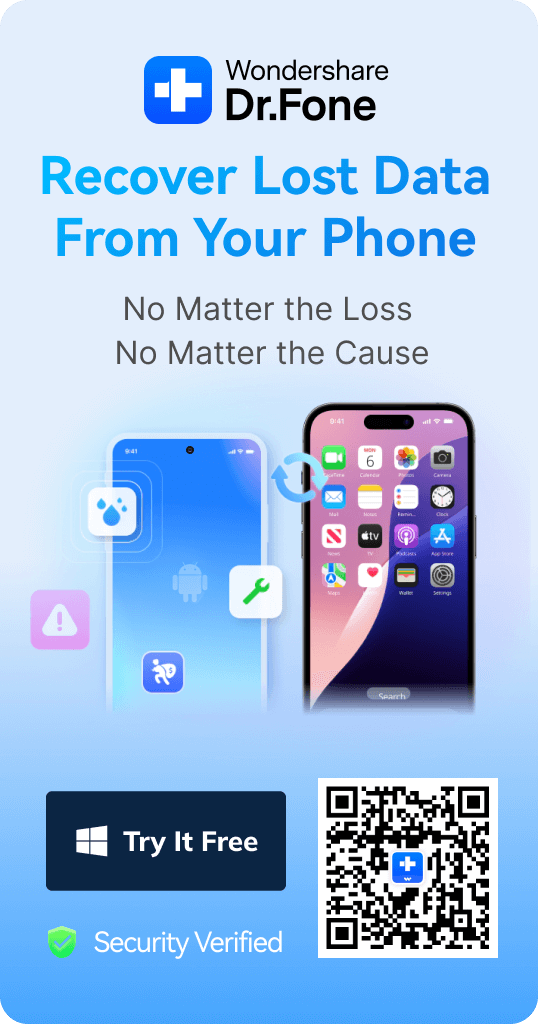
Dr.Fone is a reliable data recovery tool that offers an easy way to recover deleted photos from your iPhone—without needing iTunes. Whether your images were lost due to accidental deletion, system crash, or update failure, Dr.Fone simplifies photo recovery with a clean interface and powerful features.
One standout advantage is its preview feature, allowing you to view recoverable photos before restoring them. If you're looking for an alternative to iTunes photo recovery, Dr.Fone provides a fast, user-friendly, and effective solution.
Dr.Fone - Data Recovery (iOS)
World's 1st iPhone and iPad data recovery software
- Provide three ways to recover iPhone data.
- Scan iOS devices to recover photos, videos, contacts, messages, notes, etc.
- Extract and preview all content in iCloud/iTunes backup files.
- Selectively restore what you want from iCloud/iTunes backup to your device or computer.
- Compatible with the latest iOS versions and iPhone models.


Key Features of Dr.Fone - Data Recovery:
- User-friendly interface. Dr.Fone is designed to be intuitive.
- Fone supports a broad range of devices and ensures wider accessibility.
- You can choose specific file types for recovery, streamlining the process and saving time.
- Your data is handled securely, ensuring a safe recovery process.
Now, how to recover photos from iPhone backup using Dr.Fone Data Recovery tool:
- Step 1: Launch Dr.Fone Data Recovery and connect your iPhone.
To initiate the data recovery process, first, connect your iPhone and launch the Dr.Fone Data Recovery tool from the Toolbox.

- Step 2: Select "Recover Data from iOS."
In the following window, choose "iOS" as the device type and click on "Recover Data from iOS device."

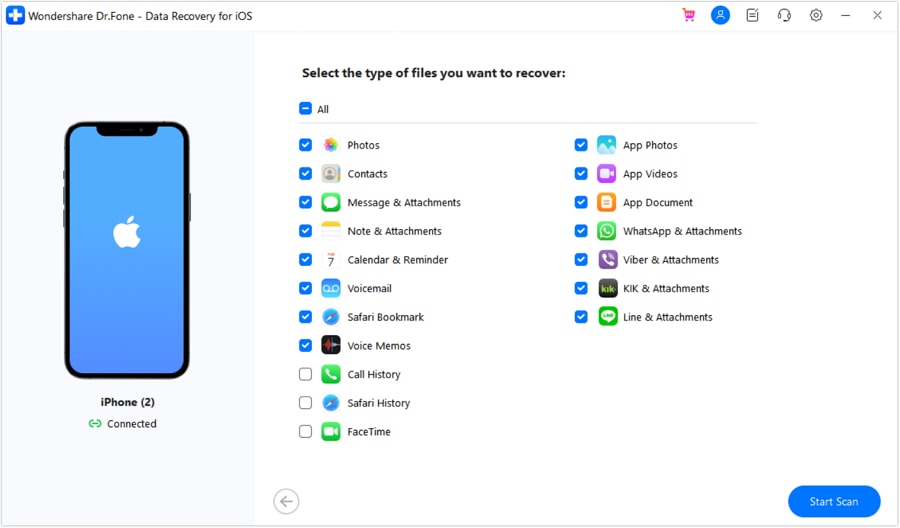
- Step 3: Choose the file types you need for recovery.
On your screen, you'll see a list of available file types for recovery. Simply select the specific file types you want to recover or exclude any unnecessary ones. Once you've made your selections, click "Start Scan" to begin the scanning process.
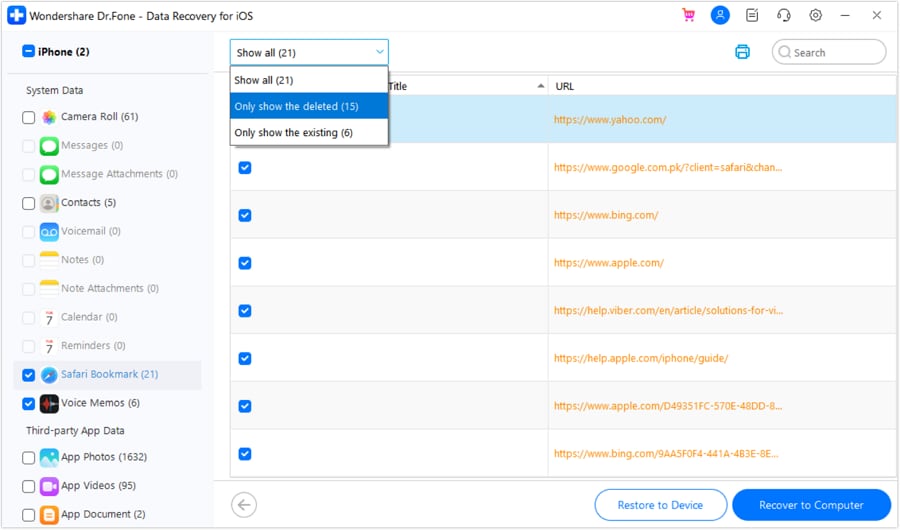
- Step 4: Filter and select the data you want to recover.
Once the scanning is complete, you can browse through and preview the data you wish to recover. You can use the tabs at the top to filter the display results, whether you want to view all data, existing data, or deleted data.
After choosing the data for recovery, click the "Restore to Device" button to start the restoration process. Set the location where you want to restore the data and click "Continue."
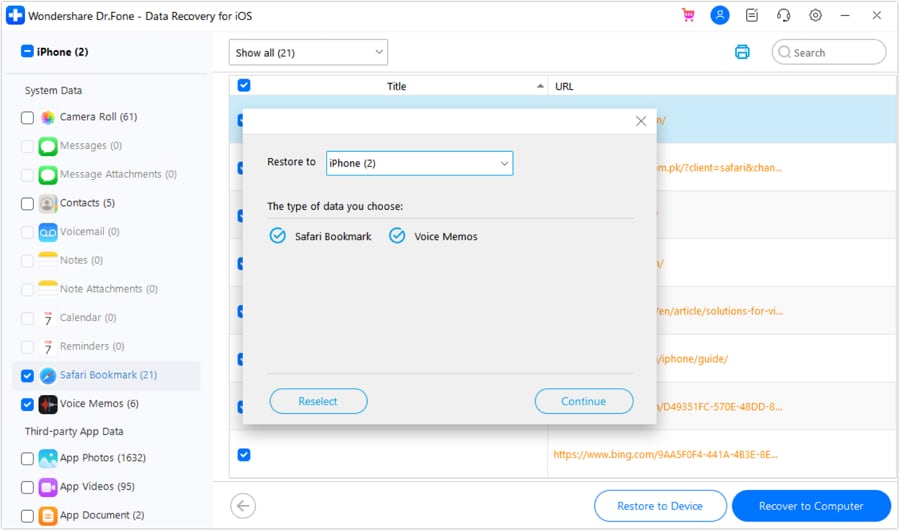
Note: Before restoring the data to your device, ensure you have disabled the Find My service on your iPhone. Once you've done this, proceed by clicking "OK" on the computer to continue with the restoration.
If you want to recover the data to your computer instead, select the desired data and click "Recover to Computer." You'll be prompted to set a location for the recovered data. Define the location and click "Recover" to start the process.
Congratulations! Your data is now safely recovered and stored on your computer.
Conclusion
iTunes remains a powerful tool for iPhone users, especially when it comes to data backup and photo recovery. With regular backups, iTunes offers a dependable way to protect your important data—including photos, messages, and app content. In cases of accidental deletion, device failure, or data migration to a new phone, iTunes photo recovery provides a simple and effective method to restore your memories and essential files.
Although iTunes provides a simple and effective recovery process, it lacks the flexibility of selectively restoring specific files. For users seeking more control, third-party solutions like Dr.Fone - Data Recovery (iOS) offer a granular approach with preview features.


iTunes Manage
- iTunes Backup
- 1. Does iTunes Backup Photos
- 2. Forgot iTunes Backup Password
- 3. Fix iTunes Corrupt Backup
- 4. Fix iTunes Backup Session Failed
- 5. Change iTunes Backup Location
- 6. View Files on iTunes Backup
- 7. Backup WhatsApp Using iTunes
- 8. Top 5 iTunes Backup Managers
- 9. Top 6 Free iTunes Backup Extractor
- 10. Backup iMessage Without iTunes
- iTunes Restore
- 1. Restore Photos from iTunes Backup
- 2. Restore Data from iTunes Backup
- 3. Restore WhatsApp Using iTunes
- iTunes Rebuild
- 1. Transfer iPad Purchases to iTunes
- 2. Transfer iPad Music to iTunes
- 3. Transfer iPod Music to iTunes
- 4. Transfer Android Music to iTunes
- 5. Import Multiple Lyrics to iTunes
- iTunes Transfer
- 1. Sync iTunes Media to iCloud
- 2. Sync iTunes Media to Android
- 3. Transfer iTunes Music to iPod
- 4. Transfer iTunes Music to Flash Drive
- 5. Transfer iTunes Music to Android
- 6. Transfer iTunes Music to Google Play
- 7. Put iTunes Audiobooks to Android
- 8. Copy iTunes Playlists to Hard Drive
- 9. Move iTunes Library to PC / Mac
- 10. Export iPhone Contacts from iTunes
- 11. Export Playlist from iTunes
- iTunes Plugins/Alternatives
- 1. Top 3 iTunes Plugins
- 2. Top 20 Alternatives to iTunes
- 3. Top 3 iTunes Alternatives for Android
- 4. Top 5 iTunes Remote for Android
- iTunes Problems
- 1. Fix iTunes Error 11
- 2. Fix iTunes Error 1100
- 3. Fix iTunes Error 2005/2003
- 4. Locked Out Of iTunes
- 5. Forgot iTunes Password
- 6. Account Has Been Disabled in iTunes
- iTunes Tricks
- 1. Change the iTunes Skin
- 2. Use File Sharing in iTunes
- 3. Use Home Sharing in iTunes
- 4. Recover iPhone Data from iTunes
- 5. See iTunes Purchase History
- 6. Get Free iTunes Cards Legally
- 7. iTunes Visualizers Download
- 8. Watch iTunes Movie on Android
- 9. Update iTunes On Your Computer
- 10. Install iTunes on Windows / Mac
- ● Manage/transfer/recover data
- ● Unlock screen/activate/FRP lock
- ● Fix most iOS and Android issues
- Manage Now Manage Now Manage Now

Selena Lee
chief Editor