How to Transfer Pictures from Phone to Computer

Jun 30, 2026 • Filed to: Device Data Management • Proven solutions
 TL;DR:
You can transfer photos from an iOS or Android device to a computer using a direct USB connection, wirelessly via Dropbox, or through Dr.Fone - Phone Manager.
● Direct USB transfers require selecting the "Media Transfer" option instead of "Charge Only" to work, though this manual method carries a risk of malware spreading between devices.
● Dropbox provides a wireless alternative that also backs up files to the cloud, but it consumes mobile data or WiFi and operates slower than wired solutions.
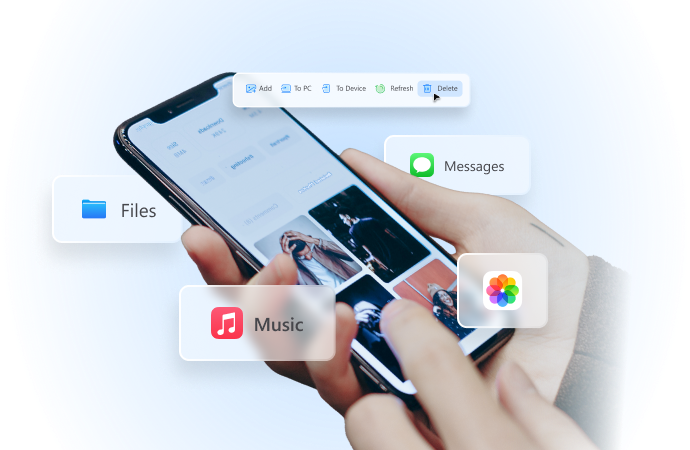
● Dr.Fone - Phone Manager offers one-click complete backups or selective photo exports for Mac and Windows, with stated compatibility up to iOS 11 and Android 8.0.
Ask AI for a summary
 ChatGPT
 Perplexity
 Gemini
 Claude
 Grok
Grok
Dr.Fone Basic:
Better Control for Your Phone
Manage, transfer, back up, restore, and mirror your device
I have over 5,000 photos that have been synced to Facebook over time. They were all downloaded onto my phone, and now my phone’s memory is getting all used up. How can I transfer photos to my computer from the Moments app on my phone?
If you wish to learn how to transfer pictures from phone to computer, then you have come to the right place. We all know how great our photos are. To keep them safe, we transfer it to our PC or Mac promptly. If you are finding it hard to transfer photos from your iPhone or Android device to your computer, then don’t worry. We have provided three easy and smart solutions to teach you how to transfer pictures from phone to computer in a trouble-free manner.
How to import pictures and videos from Phone to Windows PC directly
Manually transferring photos from your smartphone to your computer is one of the simplest methods available. This approach works across a range of devices—including iPhone, Android, iPad, and iPod Touch—making it highly versatile. However, it's important to note that while this method is straightforward, it may not offer the best security. During the transfer, there is a risk that malware could move between devices, potentially compromising both your phone and computer.
To transfer pictures from your phone to your computer, start by connecting your device using a USB or Lightning cable. Ensure you select the "Media Transfer" option instead of "Charge Only" so that your computer can recognize your device and access your photos efficiently.

When your device connects to your computer, the system automatically recognizes it and a pop-up notification appears. Click the “Import Pictures and Videos” option to initiate a secure and efficient photo transfer process.

If you’ve transferred files before or are running the latest version of Windows, you may see a pop-up notification on your screen. This prompt allows you to either import all items at once or review each file individually before transferring, ensuring a customized and secure file transfer process.

How to transfer pictures from phone to computer using Dropbox
If you prefer to transfer pictures from your phone to your computer without cables, consider using Dropbox. This cloud-based solution lets you upload your photos directly from your phone and later download them onto your computer. This wireless transfer method not only offers convenience but also ensures that your photos are safely backed up.
Keep in mind that transferring photos via Dropbox will consume some of your WiFi or mobile data, and it might not be as fast as wired solutions. However, if you prefer a wireless method to transfer pictures from your phone to your computer, follow these steps.
Step 1 Upload photos to Dropbox
Install Dropbox on your phone. You can download it from Play Store, App Store, or its dedicated website. To upload pictures, launch Dropbox on your phone.
Now, create a new folder and tap on the Upload icon. This will open your device’s storage. You can select the files you wish to upload to the cloud. Wait for a while as your selected photos will be uploaded to Dropbox.

You can also turn on the option of auto-sync, by visiting Dropbox settings and selecting the Turn on “Camera Uploads” option.

Step 2 Download photos from Dropbox
After uploading your photos to Dropbox from your phone, sign in to your account on the Dropbox website using the same credentials. Navigate to the folder containing your images and select the ones you want to save. Click the “Download” button to transfer the pictures to your computer, then move them to your local storage as needed.

How to transfer pictures from phone to the computer using the File Transfer tool
Dr.Fone - Phone Manager (iOS) provides an extremely safe and reliable way to transfer pictures from your phone to the computer. Since it is compatible with almost every iOS and Android device (including iOS 11 and Android 8.0), it provides a one-stop solution to manage your data. With it, you can quickly transfer your pictures from one device to another or can even perform a phone-to-phone transfer.
Dr.Fone - Phone Manager (iOS)
Transfer MP3 to iPhone/iPad/iPod without iTunes
- Transfer, manage, export/import your music, photos, videos, contacts, SMS, Apps, etc.
- Backup your music, photos, videos, contacts, SMS, Apps, etc. to computer and restore them easily.
- Transfer music, photos, videos, contacts, messages, etc. from one smartphone to another.
- Transfer media files between iOS devices and iTunes.
- Fully compatible with iOS 7, iOS 8, iOS 9, iOS 10, iOS 11 and iPod.


Dr.Fone - Phone Manager (iOS) is fully compatible with all major versions of Mac and Windows, offering an intuitive one-click interface to effortlessly transfer pictures from your phone to your computer. In our guide, we provide two distinct methods to help you make the most of Dr.Fone - Phone Manager (iOS) for a seamless photo transfer experience.
1. Transfer All Photos from iPhone to PC in 1 Click
If you wish to keep your photos safe, then you can simply take a complete backup of your gallery/camera roll on your computer. It can be done in the following way. This file transfer tool supports both iPhone and Android devices.
Step 1. Connect your device to the system. Launch Dr.Fone on your system and choose “Phone Manager” from all functions.

Click on the option of “Transfer Device Photos to PC” or “Transfer Device Photos to Mac.”

Step 2. A new browser window will open. Just provide the location where you wish to save the backup. Click on the “Ok” button to commence it.
A new browser window will appear, prompting you to choose the destination folder for your backup. After selecting your desired location and clicking "Ok," the backup process will begin, securely transferring your photos to the specified destination.
2. Transfer Photos from iPhone to PC Selectively
Dr.Fone can also be used to selectively transfer photos from your device to PC. To learn how to transfer photos from phone to computer, follow these steps:
Step 1. Connect your device to the system and launch Dr.Fone. Visit the “Photos” section to commence the process.
Step 2. From here, you can see that your pictures are divided into different albums. Just select the desired photos and click on the “Export” button. From here, select the “Export to PC” option.
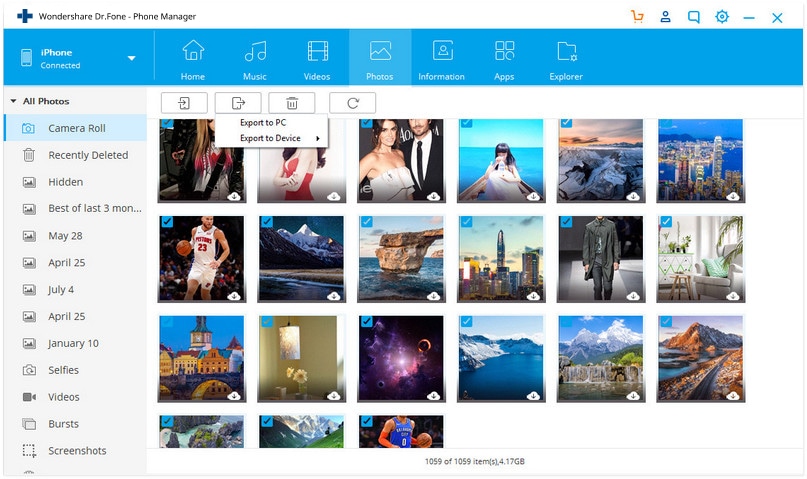
Step 3. You can also simply select the images, right-click, and choose the option of “Export to PC”.
You can also transfer an entire album or all the photos of the same type (since these photos are segregated according to their type in the left panel.) To move an entire section, just select and right-click it. Now, click on the “Export to PC” option and follow the same drill.
Conclusion
Who knew that moving photos from phone to computer could be so easy? With Dr.Fone, you can simply move your data from one device to another in a seamless manner. Now when you know how to transfer pictures from phone to computer, you can easily manage your data. This file transfer tool could also help you transfer music from the phone to the computer fast. Explore various other features provide by Dr.Fone and make the most out of your device.
Dr.Fone Basic:
Better Control for Your Phone
Manage, transfer, back up, restore, and mirror your device


iPhone Photos
- Convert HEIC to JPG
- 1. Convert HEIC to JPG on Linux
- 2. Convert HEIC to JPG Windows
- 3. Best HEIC Converter Online
- 4. Convert HEIC to JPG High Quality
- Export iPhone Photos
- 1. Upload iPhone Photos to Google Drive
- 2. Transfer Photo from iPhone to PC
- 3. Transfer Photo from iPhone to iPhone
- 4. Transfer from iPhone to iPhone
- 5. Transfer from iPhone to iPad
- 6. Move iPhone Photo to External Drive
- 7. Transfer from iPhone to Flash Drive
- 8. Extract Photos from iPhone
- 9. Download Photo from iPhone
- Import Photos to iPhone
- 1. Transfer from Laptop to iPhone
- 2. Transfer Photo from Camera to iPhone
- 3. Transfer Photo from Mac to iPhone
- 4. Transfer Photos from PC to iPhone
- 5. Transfer from iPhone to PC
- 6. Transfer from Android to iPhone
- 7. Transfer from Samsung to iPhone
- Manage iPhone Photos
- 1. Back up iPhone Photos
- 2. Get Photos off iPhone
- 3. Send Large Size Photos from iPhone
- 4. Photo/Video Compressor Apps
- 5. Delete Photos from iPhone/iPad
- 6. iPhone Photos Disappeared Suddenly
- 7. iPhone Photoshop Alternatives
- Recover iPhone Photos
- 1. Restore Deleted Photos from iPhone
- 2. Recover Photos from iPod Touch
- 3. Recover Deleted Picture from iPhone
- Transfer iPhone Photos to Mac
- Transfer iPhone Photos to PC
- 1. Transfer Data from iPhone to PC
- 2. Transfer Photo to Computer
- 3. Transfer Photo to PC without iTunes
- 4. Transfer Library to Computer
- 5. Send Photo from iPhone to Computer
- 6. Import Photo from iPhone to Windows
- 7. Transfer Photo to Windows
- Transfer Photos from Google Drive
- 1. Download from Google Drive to iPhone
- 2. Transfer from Google Photo to iPhone
- 3. Download from iCloud to iPhone
- Transfer Photos to Google Drive
- Image Convert Tips
- ● Manage/transfer/recover data
- ● Unlock screen/activate/FRP lock
- ● Fix most iOS and Android issues
- Free Download Free Download


Bhavya Kaushik
contributor Editor