
My iPhone Photos Disappeard Suddenly. Here's The Essential Fix!
Aug 27, 2025 • Filed to: Phone Repair Solutions • Proven solutions
It is not an isolated incident when you upgrade iPhone’s iOS only to find out that iPhone photos disappeared randomly. You may panic a little in such a situation but it is worth noting that there is something you can do to get your missing photos back.
There can be various reasons due to which your iPhone photos disappeared. Some of the most common ones are:
- Low storage due to heavy Apps, multiple photos, videos, and other data occupying the iPhone’s internal memory.
- Turning off PhotoStream or making other changes to the Camera Roll settings.
- iOS upgrade or other background operations that place in your iPhone without your knowledge.
This article will show you how to get your missing photos back. Sit back, relax, and read on to know more. Alternatively, you can try having a 360 camera to take your favorite pictures and store the images on the SD card.
Part 1: Restart Your iPhone, iPad, or iPod Touch
Follow these simple steps to restart your iOS device, as it can help in recovering photos disappeared from the iPhone.
- Step 1. Press and hold the Sleep/Wake button until the slider appears.
- Step 2. Then drag the slider to turn off your device.
- Step 2. Now, press and hold the Sleep/Wake button again until you see the Apple logo.
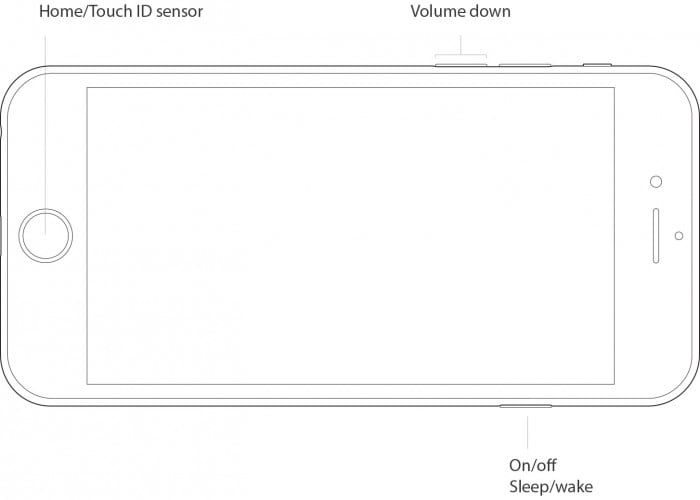
Another method is to force restart your iOS device if it is not responding.
Follow these steps to force restart your device and get back the iPhone photos disappeared:
- iPhone 7/iPhone 7 Plus: Press and hold both the Sleep/Wake and Volume Down buttons for at least ten seconds, until you see the Apple Logo.
- iPhone 6s/other iPhone: Press and hold both the Sleep/Wake and Home buttons for at least ten seconds, until you see the Apple Logo.
Part 2: Check the “Recently Deleted” Album
If you want to retrieve a photo you previously deleted in Camera Roll/Photos App for OS X, you will rightly look for the Trash folder. However now, even if you see the sidebar in the Photos app, you won’t see a Trash folder. So, what does one do to recover a deleted photo?
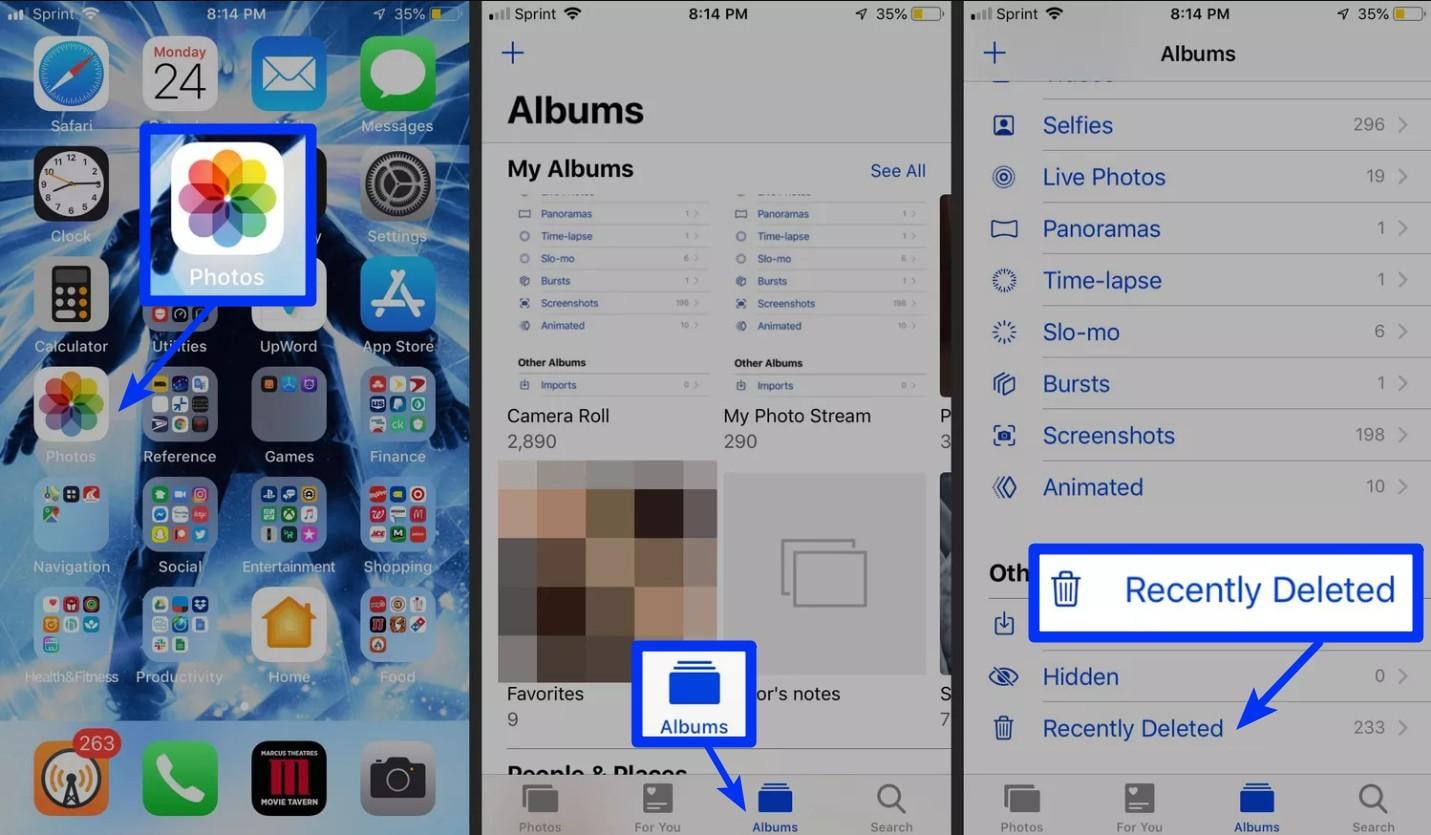
- It’s simple as only need to go to Album > Show Recently Deleted. You will see all of your deleted photos and my pictures disappeared from my phone, with the number of days remaining before each is permanently deleted.
Part 3: Check If “iCloud Photo Library” is Turned on and Set It Up
If you want your Mac’s photos to wirelessly sync to all your other iOS devices and vice versa, you must set up the iCloud Photo Library.
Apple’s photo sync service lets you back up your images on all your devices, as well as access them (online or offline) on the said devices. If you’re willing to pay for the extra iCloud storage space, you can store an incredible amount of photos and videos, all accessible at the touch of a button or on a multitouch screen.
Here’s how to set it up on your iPhone:
- Visit Settings > Tap on Apple ID/your name > Select iCloud > Select Photos and simply turn on iCloud Photo Library as shown below:

Part 4: Restore from iPhone/iTunes Backups
iTunes is the most trusted and reliable software to back up and restores your iPhone. If you have backed up your iPhone in the past using iTunes, you can recover all the data stored in the backup in a jiffy. All you need to do is:
- Step 1. Plugin your iPhone to the computer/Mac on which iTunes is installed, using which a backup was created.
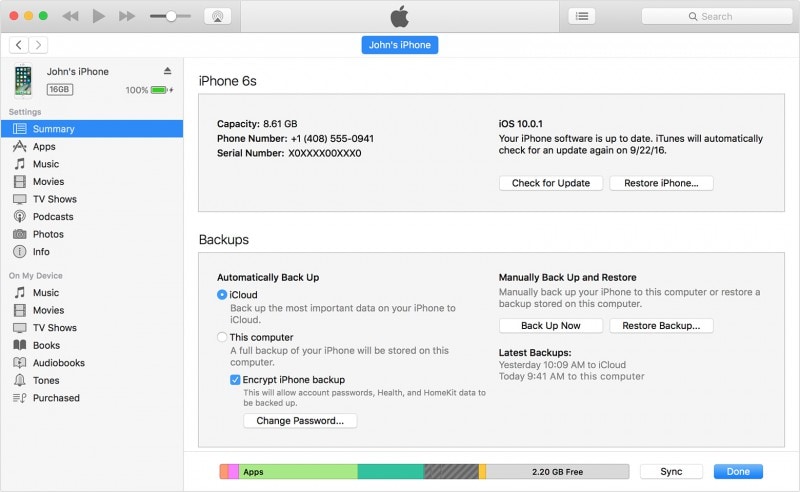
- Step 2. You may be asked to trust the computer and feed in your passcode. Do so, and select “Restore Backup”. A list of backups will appear before you with their respective sizes and time of creation. Choose the most recent backup to solve iPhone photos disappeared problem. Finally, hit “Restore” as shown in the screenshot below and wait until all the data is restored on your iPhone successfully. Do not disconnect your iPhone from iTunes as it will disturb the sync process.
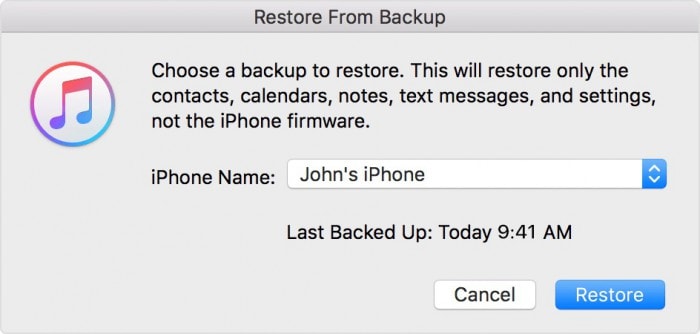
- Step 3. The only draw back of using this technique is that it erases all the data stored on your iPhone to restore a selected backup and its contents. To overcome such a problem, the technique cited below will come in handy.
Part 5: Recover disappeared iPhone photos without iTunes
Dr.Fone - Data Recovery (iOS) has made life much simpler and easier as never before. Users who have an iPhone, iPad, and iPod touch can use this excellent toolkit to recover their lost data, especially photos. Moreover, this toolkit is 100% safe and secure and guarantees no data loss. So let us go through its detailed guide right away to get back iPhone photos disappeared.

Dr.Fone - Data Recovery (iOS)
Recover Deleted Photos from iPhone
- Selectively recovers iPhone data from internal memory, iCloud, and iTunes.
- Retrieve deleted photos, WhatsApp, messages, and 18+ other data types.
- Works perfectly with all iPhone, iPad, and iPod touch.
- Original phone data will never be overwritten during recovery.
- Step-by-step instructions provided during the recovery.
To recover iOS data, especially photos, with the help of Dr.Fone - Data Recovery (iOS), below-mentioned steps are required. The detailed process is as follows:
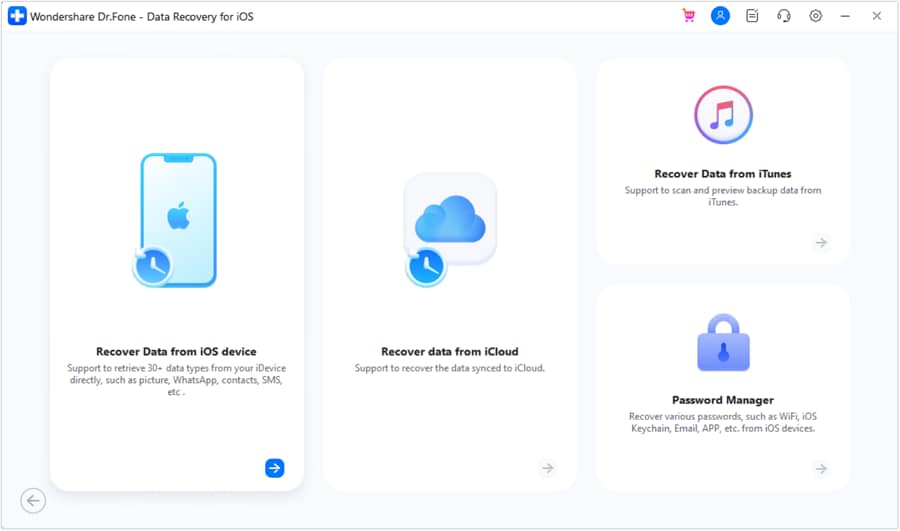
Step 1: Connect the iOS device to the PC
Firstly launch, the Dr.Fone toolkit > now connect iPhone to the PC through USB, after that click on “Data Recovery” > “iOS” > then select “Recover Data from iOS Device”.
Step 2: Scanning of the device to check data loss.
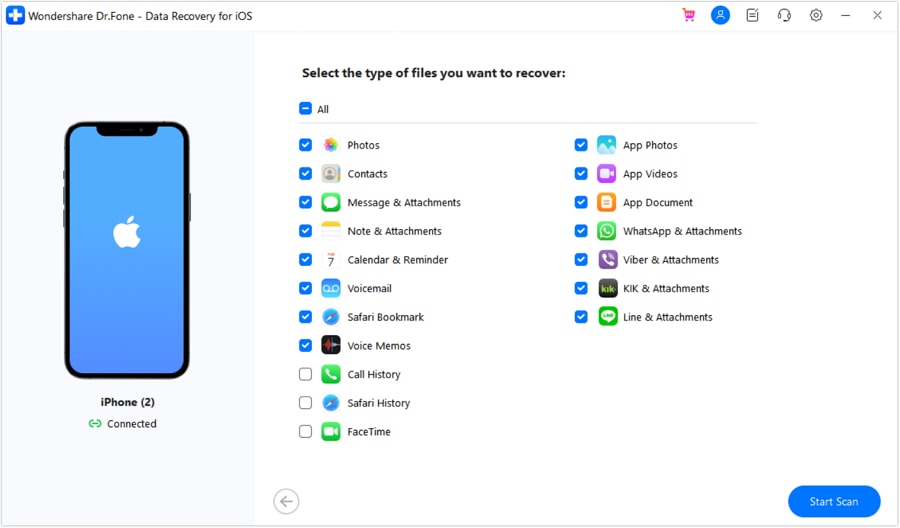
Next step to recover iPhone photos disappeared, is to click on “Start Scan” option to scan lost data (In case during the scan process you see your lost data, then you can pause the scanning to make the process stop), if you have not backup the data before, this tool is hard to scan all your medial file and recover them. If you just want to recover some text content such as Messages (SMS, iMessage & MMS), Contacts, Call history, Calendar, Notes, Reminder, Safari bookmark, App document (like Kindle, Keynote, WhatsApp history, etc., this tool can definitely.
Step 3: Preview of Scanned data
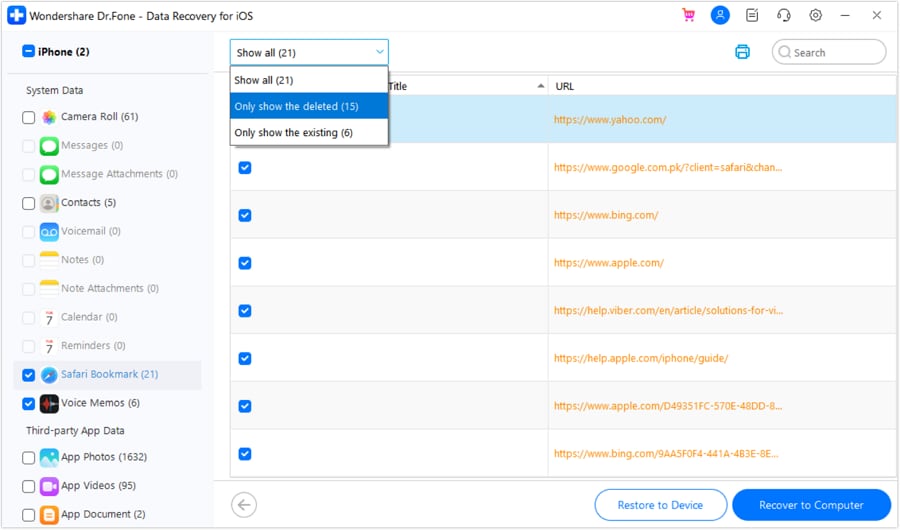
To filter deleted data, click on “Only show the deleted” items and after that from the left side select the file type to preview the found data or photos. Here at the top, there is a search box, type-specific file keyword to preview the data.
Step 4: Recovering your iPhone data
Once you find out your lost data > tick mark at the box in front of them to select > then click on the “Recover” option either to your Device or to the Computer.
Conclusion
With the help of all the above information and tutorial, I believe you can now easily recover/restore your lost photos on the iPhone. If you ever face the challenge of photos disappeared from the iPhone problem, don’t fret, as the solution listed above is tried and tested by experts and users who vouch for their efficiency and effectiveness. Dr.Fone toolkit iOS Data Recovery is one of a kind software and worth a try. So go ahead, experience a whole new world of data retrieval and recovery.
iPhone Photos
- Convert HEIC to JPG
- 1. Convert HEIC to JPG on Linux
- 2. Convert HEIC to JPG Windows
- 3. Best HEIC Converter Online
- 4. Convert HEIC to JPG High Quality
- Export iPhone Photos
- 1. Upload iPhone Photos to Google Drive
- 2. Transfer Photo from iPhone to PC
- 3. Transfer Photo from iPhone to iPhone
- 4. Transfer from iPhone to iPhone
- 5. Transfer from iPhone to iPad
- 6. Move iPhone Photo to External Drive
- 7. Transfer from iPhone to Flash Drive
- 8. Extract Photos from iPhone
- 9. Download Photo from iPhone
- Import Photos to iPhone
- 1. Transfer from Laptop to iPhone
- 2. Transfer Photo from Camera to iPhone
- 3. Transfer Photo from Mac to iPhone
- 4. Transfer Photos from PC to iPhone
- 5. Transfer from iPhone to PC
- 6. Transfer from Android to iPhone
- 7. Transfer from Samsung to iPhone
- Manage iPhone Photos
- 1. Back up iPhone Photos
- 2. Get Photos off iPhone
- 3. Send Large Size Photos from iPhone
- 4. Photo/Video Compressor Apps
- 5. Delete Photos from iPhone/iPad
- 6. iPhone Photos Disappeared Suddenly
- 7. iPhone Photoshop Alternatives
- Recover iPhone Photos
- 1. Restore Deleted Photos from iPhone
- 2. Recover Photos from iPod Touch
- 3. Recover Deleted Picture from iPhone
- Transfer iPhone Photos to Mac
- Transfer iPhone Photos to PC
- 1. Transfer Data from iPhone to PC
- 2. Transfer Photo to Computer
- 3. Transfer Photo to PC without iTunes
- 4. Transfer Library to Computer
- 5. Send Photo from iPhone to Computer
- 6. Import Photo from iPhone to Windows
- 7. Transfer Photo to Windows
- Transfer Photos from Google Drive
- 1. Download from Google Drive to iPhone
- 2. Transfer from Google Photo to iPhone
- 3. Download from iCloud to iPhone
- Transfer Photos to Google Drive
- Image Convert Tips
- ● Manage/transfer/recover data
- ● Unlock screen/activate/FRP lock
- ● Fix most iOS and Android issues
- Learn More Learn More




Selena Lee
chief Editor