Recover photos, messages, WhatsApp, and more — no backup
needed.
Recover photos, messages, WhatsApp, and more — no backup
needed.

 100% Security Verified | No Subscription Required | No Malware

 :
: 
 ChatGPT
 Perplexity
 Gemini
 Claude
 Grok
Grok
It's a sinking feeling many of us have experienced: you accidentally delete a cherished photo or an important message thread from your iPhone. In that moment, you might think those memories or crucial pieces of information are gone forever. Fortunately, that's often not the case. Modern technology provides several ways to get your data back, whether you have a backup or not.
This comprehensive guide will walk you through the most reliable methods for recovering deleted pictures and messages on your iPhone. We'll cover everything from simple, built-in iOS features to advanced data recovery software that can retrieve files you thought were permanently lost. Discover the step-by-step solutions to restore your valuable data today.
For photos shared through a third-party chat app, the recovery path may differ; this guide explains how to recover deleted Kik pictures using app-specific and iPhone recovery options.
In this article
Part 1. The Ultimate Solution: Recover Pictures & Messages Without Data Loss
When you need a reliable and flexible way to recover your data, a dedicated tool like Dr.Fone - Data Recovery (iOS) is your best bet. Unlike Apple's methods, it doesn't require you to erase your device. It offers three powerful recovery modes to maximize your chances of success, allowing you to preview and selectively recover exactly what you need.
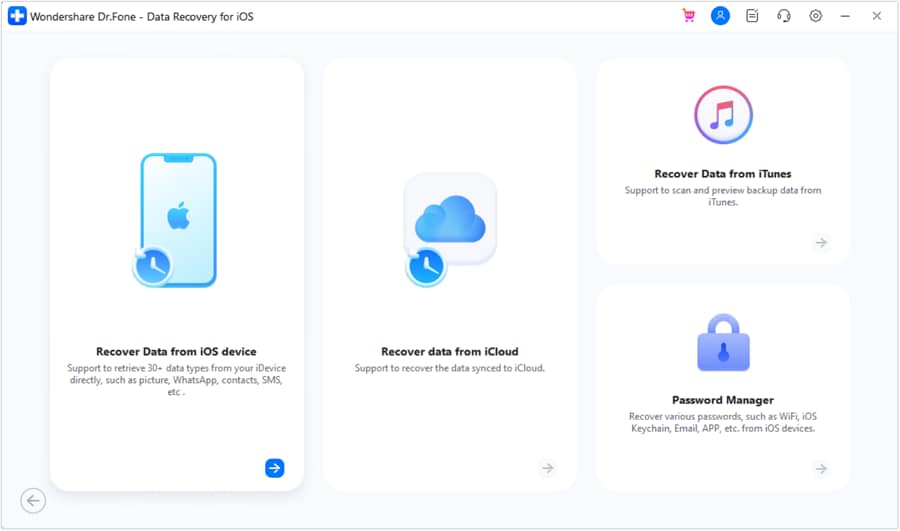
Method 1: Recover Directly from Your iPhone (No Backup Needed)
This is the most direct method and is ideal if you don't have a recent backup. When data is deleted, it isn't immediately erased; it becomes invisible and marked for overwriting. Dr.Fone can scan your iPhone's internal storage to find and recover these hidden files before they are permanently lost.
-
Step 1 Connect Your iPhone and Launch Dr.Fone
Download and install Dr.Fone on your computer. Open the program, select "Data Recovery" from the main toolkit. Connect your iPhone to the computer using a USB cable and trust the computer if prompted on your device.
-
Step 2 Select Data Types to Scan
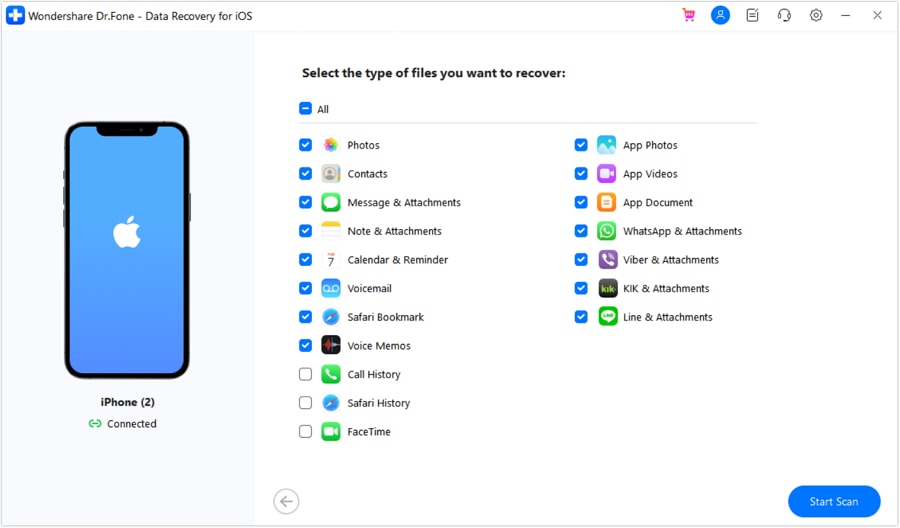
Once your iPhone is detected, you will see a list of data types you can recover. To save time, deselect all and then check the boxes for "Photos," "Messages & Attachments," and any other data you wish to retrieve. Click the "Start Scan" button to begin the process.
-
Step 3 Preview and Recover Your Data
After the scan completes, all found data will be categorized on the left panel. Click on "Photos" and "Messages" to preview the items. You can filter to show only the deleted items. Select the specific pictures and conversations you want to recover, then click "Recover to Computer" or "Restore to Device" to save them.
 Recovers data after deletion, crashes, or device damage.
- Supports photos, messages, contacts, WhatsApp, and more.
- Supports all major iPhone, iPad, and iPod models.
- Preview and recover only what you need.

Method 2: Selectively Extract from an iTunes Backup
If you have previously backed up your iPhone to your computer using iTunes (or Finder on macOS Catalina and later), Dr.Fone can extract data from this backup file without restoring it to your iPhone, thus preserving your current data.
-
Step 1 Choose the iTunes Backup Recovery Mode
In the Dr.Fone Data Recovery module, select "Recover from iTunes Backup File" from the left sidebar. The software will automatically detect and list all iTunes backup files on your computer.
-
Step 2 Scan the Backup File
Choose the most relevant backup file from the list (usually the most recent one before the data loss occurred) and click "Start Scan." Dr.Fone will begin extracting all the data contained within that backup.
-
Step 3 Preview and Extract Pictures and Messages
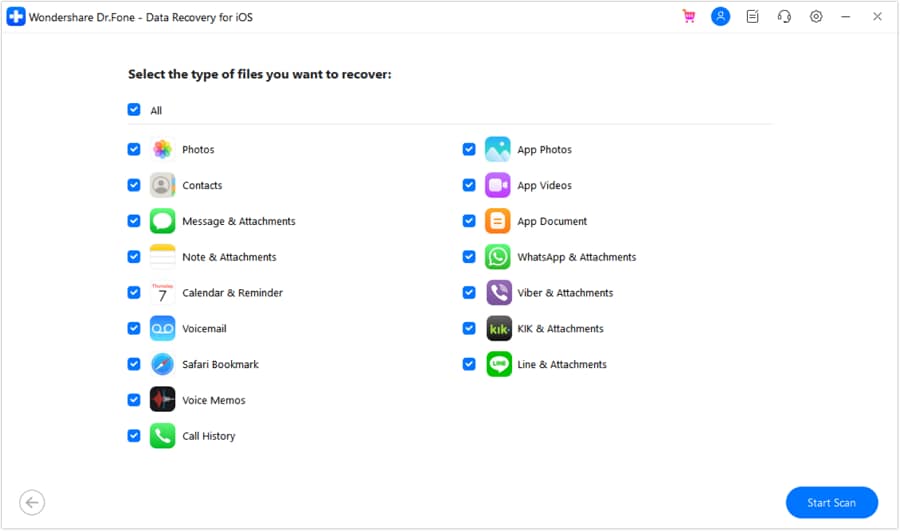
Once the extraction is complete, you can browse all the data in the backup file, just like in the previous method. Navigate to the Photos and Messages categories, select the files you need, and click "Recover to Computer" to save them.
Method 3: Selectively Download from an iCloud Backup
Similarly, if you back up your iPhone to iCloud, Dr.Fone allows you to access and download data from your iCloud backup without the need to factory reset your device.
-
Step 1 Sign in to Your iCloud Account
Select the "Recover from iCloud Backup File" mode. You will be prompted to sign in with your Apple ID and password. Dr.Fone ensures your privacy and security during this process.
-
Step 2 Download and Scan the iCloud Backup
After logging in, a list of your iCloud backup files will be displayed. Choose the one containing your deleted data and click the "Download" button. In the next window, select "Photos" and "Messages" to reduce download time, then proceed to scan the backup.
-
Step 3 Preview and Recover from iCloud
After the scan, preview the recovered photos and messages. Check the items you wish to retrieve and click "Recover to Computer" to save them directly to your PC or Mac.
Part 2. Official Apple Methods to Restore Pictures & Messages
Apple provides some built-in options for data recovery. While these methods are free, they often come with significant limitations, such as the risk of overwriting existing data. It's always best to try these simpler solutions first.
Method 4: Check the 'Recently Deleted' Folders
Both the Photos and Messages apps have a safety net for accidental deletions. This should always be your first stop.
For Photos:
- Open the Photos app and tap on the "Albums" tab.
- Scroll down to the "Utilities" section and tap on "Recently Deleted."
- Here, you'll find photos and videos deleted in the last 30 days.
- Tap "Select," choose the pictures you want back, and tap "Recover."
For Messages (iOS 16 and later):
- Open the Messages app.
- Tap "Edit" or "Filters" in the top-left corner.
- Select "Show Recently Deleted."
- Choose the conversations you want to restore and tap "Recover." Messages are kept here for up to 40 days.
Method 5: Restore from an iCloud Backup (Erases Device)
If the 'Recently Deleted' folders don't contain your items, you can restore your entire device from a previous iCloud backup. Be warned: this process will erase all content and settings currently on your iPhone and replace it with the data from the backup.
-
Step 1 Erase Your iPhone
Go to Settings > General > Transfer or Reset iPhone > Erase All Content and Settings. You must do this to get to the setup screen where you can restore a backup.
-
Step 2 Restore from iCloud
Follow the on-screen setup instructions until you reach the "Apps & Data" screen. Tap "Restore from iCloud Backup" and sign in with your Apple ID.
-
Step 3 Choose a Backup
Select the most recent backup that predates the deletion of your pictures and messages. The restore process will begin, and your iPhone will restart once it's complete.
Method 6: Restore from an iTunes/Finder Backup (Erases Device)
This method is similar to restoring from iCloud but uses a backup saved on your computer. It also erases your current data.
-
Step 1 Connect to Your Computer
Connect your iPhone to the computer you used for backing up. Open iTunes (on older PCs/Macs) or Finder (on macOS Catalina or newer).
-
Step 2 Locate and Restore Backup
Select your iPhone when it appears. In the Summary/General tab, click on "Restore Backup..."
-
Step 3 Select the Backup
Choose the most relevant backup from the list and click "Restore." Keep your device connected until the process finishes and it restarts.
Part 3. Comparison of All Recovery Methods
To help you decide which method is best for your situation, here's a quick comparison table outlining the key features and limitations of each approach.
| Feature | Dr.Fone - Data Recovery | Recently Deleted | iCloud Backup Restore | iTunes/Finder Restore |
|---|---|---|---|---|
| Preview Before Recovery | ||||
| Selective Recovery | ||||
| Erases Current Data | ||||
| Recovers Without Backup | ||||
| Time Limit | None | 30-40 days | Depends on backup date | Depends on backup date |
| Ease of Use | Very High | Very High | Moderate | Moderate |
Conclusion
Losing important pictures and messages from your iPhone can be stressful, but it's rarely a permanent problem. We've explored several effective methods, from the simple 'Recently Deleted' check to full backup restores via iCloud and iTunes. While Apple's native solutions are useful, they come with the significant drawback of erasing your current data.
For the most comprehensive, flexible, and safe recovery process, Dr.Fone - Data Recovery (iOS) stands out. Its ability to recover data directly from the device without a backup, and to selectively restore from backups without overwriting your phone, makes it the superior choice for nearly every data loss scenario. By choosing the right method, you can confidently retrieve your valuable memories and information.
FAQ
-
1. Can I recover picture messages that were deleted a year ago?
The chances of recovering data deleted a long time ago without a backup are very low. When a file is deleted, the space it occupied is marked as available. Over time, new data will overwrite this space, making the old data permanently unrecoverable. Your best bet is to find an old iTunes or iCloud backup from that time. A tool like Dr.Fone can help you scan those backups to find the data. -
2. Will using a third-party recovery tool void my iPhone's warranty?
No, using reputable data recovery software like Dr.Fone will not void your iPhone's warranty. The software runs on your computer and simply reads the data on your iPhone or in your backup files. It does not modify your phone's hardware or operating system in a way that would affect your warranty. -
3. Do I need to turn off 'Find My iPhone' to recover data?
For direct recovery from the device or from an iTunes backup using Dr.Fone, you generally do not need to turn off 'Find My iPhone.' However, if you are restoring your entire device using Apple's official iCloud restore method, 'Find My iPhone' must be disabled by erasing the device first. -
4. What's the difference between recovering a picture from a message and from the Photos app?
Pictures you take with your camera are saved to the Photos app. Pictures sent or received via iMessage or SMS are stored within the Messages app's data. When you use a recovery tool, these are often categorized separately. You should scan for both 'Photos' and 'Message Attachments' to ensure you find the specific picture you're looking for, regardless of its origin.
 Add Wondershare Dr.Fone as a preferred source on Google