5 Tutorials on How to Transfer Photos From iPhone to New iPhone

May 22, 2026 • Filed to: Data Transfer Solutions • Proven solutions
 TL;DR:
You can transfer photos between iPhones using native wireless options like iCloud synchronization, AirDrop, and Shared Albums, or execute a wired migration using Wondershare Dr.Fone desktop software.
● Shared Albums provide private access across iOS devices but restrict storage to a maximum of 5000 files and limit compatibility to specific formats like HEIF, JPEG, RAW, PNG, GIF, TIFF, HEVC, MP4, QuickTime, H.264, and MPEG-4.
● AirDrop and Mail are best suited for wirelessly sending a few photos, whereas iCloud Links are optimal for sharing specific image groups via messaging platforms provided iCloud Photos is enabled.
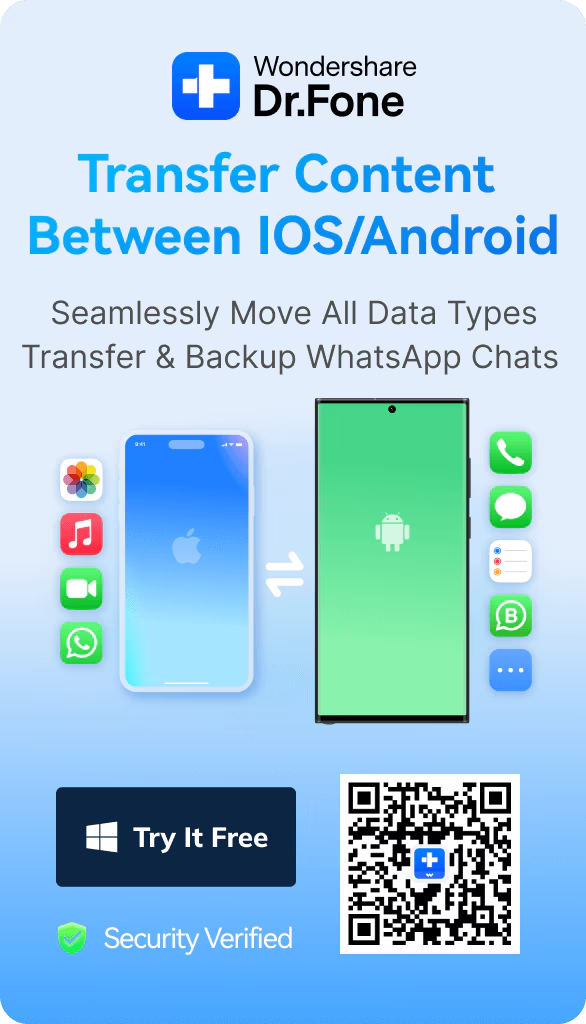
● Wondershare Dr.Fone requires a desktop computer and data cables to directly move files from a source iPhone to a target iPhone, featuring a local backup tool to secure data before initiating the transfer.
Ask AI for a summary
 ChatGPT
 Perplexity
 Gemini
 Claude
 Grok
Grok
When it comes to camera systems, the iPhone is certainly ahead of others. It has high-performing lenses and professional camera features that support various photography styles. For instance, you may use the Priotize Faster Shooting option to capture multiple photos at a time. Another thing is that you may enable Action Mode when shooting videos to keep the frame stable throughout the duration. Simply put, you can surely do a lot of things using your iPhone camera
Let’s say you’re planning to share your stunning snaps and footage with others. Is it possible to facilitate the transfer with little to no effort? The short answer is absolutely yes. There are many easy ways to move your media files between two iPhones. In no time, you can surely find the best tutorial on how to transfer photos from iPhone to iPhone. Just choose one that matches perfectly your current situation.
In this article, we will talk about the iPhone’s Shared Album feature and its main benefits to users. We will also provide some tutorials on how to transfer pictures from iPhone to iPhone quickly and easily. Continue reading below to learn more.
- Everything You Need to Know About Shared Album
- How to Transfer Photos From iPhone to iPhone in Easy Steps?

- BONUS TIP: Back Up Your Photos First
Everything You Need to Know About Shared Album
The Photos mobile application on iOS devices is a very powerful gallery software. It provides numerous options to help you organize and manage all your media files in one place. When it comes to data transfer, Photos offers users some channels to facilitate such procedures. One of which is through the syncing feature called Shared Album. It’s basically an ordinary folder where you can move and store your media files. But as the name suggests, you can share this folder with others by simply granting them access to it. Don’t worry. Your Shared Albums remain private on the platform. Only the people you add as subscribers can view its content and make changes. Therefore, the Shared Album feature is the best answer to the question: “How to transfer photos from iPhone to iPhone.”
It’s true to say that Shared Album is a great iOS feature. However, it’s important to point out that it also has a few limitations. First on the list is the type of files supported by this feature. For images, Shared Album is compatible with photos in HEIF, JPEG, RAW, PNG, GIF, and TIFF formats. On the one hand, video formats supported by Shared Album include HEVC, MP4, QuickTime, H.264, and MPEG-4. Another thing to consider is the capacity of the Shared Album folder. By default, you can only store up to 5000 photos or videos in the album.
Do you find Shared Album a useful tool, though? If so, here are the tutorials on how to activate this feature and create one in the Photos app.
How to Activate Shared Album?
Here’s how to activate Shared Album on Settings.
- Step 1: Go to Settings.
- Step 2: Click your Apple ID Profile.

- Step 3: Click iCloud.
- Step 4: Click Photos.

- Step 5: Toggle on the radio button next to Shared Albums.

How to Create Shared Albums in Photos
Here’s how to create Shared Albums in Photos.
- Step 1: Go to the Photos.
- Step 2: Click the Album tab.
- Step 3: Click the + icon at the top-left corner of your screen to add a new folder.

- Step 4: Click New Shared Album.

- Step 5: Rename the Shared Album and then click Create.
How to Transfer Photos From iPhone to iPhone in Easy Steps?
Undoubtedly, the Shared Album feature is a very convenient way to move media files from one iPhone to another. Imagine all you have to do is consolidate all the files in a Shared Album folder and add subscribers. From there, you can easily access the album on multiple iOS devices and download the files. But it’s important to note that there are other photo transfer methods you can try apart from using Shared Album. Check out the 5 tutorials below on how to transfer photos from iPhone to iPhone.
Method 1: Transfer photos from iPhone to iPhone by enabling iCloud photos.
How do I transfer photos from iPhone to iPhone? Well, the easiest way is to sync the photos to iCloud and enable the iCloud photos on both devices. Don’t worry. It’s very easy to set up. Here’s how to transfer photos from iPhone to iPhone using iCloud.
- Step 1: On your device that contains the files, go to Settings.
- Step 2: Click on the Apple ID Profile.
- Step 3: Click Photos.

- Step 4: Toggle on the radio button next to Sync This iPhone. From then on, your iPhone will sync your photos to iCloud.

- Step 5: Do the same series of steps on the other iPhone. Once the synchronization has been completed, open the Photos app. Find the newly synced iCloud photos on the All Photos album.
Method 2: Transfer photos from iPhone to iPhone using AirDrop.
If you’re just sending a few pieces of photos, AirDrop is indeed a great transfer medium. It’s basically a wireless sharing option allowing users to send files between two iOS devices. Do you want to try it? Here’s how to transfer photos from iPhone to iPhone using AirDrop.
- Step 1: Toggle on the Wi-Fi and Bluetooth connectivity on both iPhones. After that, find the AirDrop option on the two devices and then switch it on. Choose Everyone.

- Step 2: On the device that contains the files, go to Photos. Select the images you want to transfer. After that, click the Share button at the bottom-left corner of your screen.
- Step 3: Choose AirDrop.

- Step 4: Select the recipient from the provided list. After that, accept the AirDrop request on the other device.
Method 3: Transfer photos from iPhone to iPhone via Mail.
Another reliable method you can try is to email the photos from one iPhone to another. Like AirDrop, it works great if you’re just moving a few bits of files to another device. Don’t work. The process will not take much time. Here’s how to transfer photos from iPhone to iPhone via Mail.
- Step 1: On the device containing the files, go to the Photos app.
- Step 2: Select the specific photos you want to transfer. After that, click the Share icon at the bottom-left corner of your screen.
- Step 3: Choose Mail among the given options.

- Step 4: Key in the email address of the recipient. Subsequently, click the Send icon.
- Step 5: Open the email on the other iPhone. Then, download the photos sent as email attachments.
Method 4: Transfer photos from iPhone to iPhone using iCloud Link.
Let’s say you’re sending one photo to another iPhone user. What is the best transfer option in this case? If you’re currently using iCloud photos might as well send files through the iCloud link. Don’t worry. It’s not that hard to get such details. Here’s how to transfer photos from iPhone to iPhone using the iCloud link.
- Step 1: On the device where your files are stored, go to the Photos app.
- Step 2: Select the specific group of images you want to transfer. Right after, click the Share icon at the bottom-left corner of your screen.
- Step 3: Scroll down and find the Copy iCloud Link. Click on it.

- Step 4: Share the iCloud link via Messages, Mail, or internet messaging platform. On the other iPhone device, access the link and then download the photos from there.
Method 5: Transfer photos from iPhone to iPhone using Wondershare Dr.Fone.
The first four tutorials above on how to transfer pictures from iPhone to iPhone are very easy to follow. But if you wish to explore another convenient option, Wondershare Dr.Fone can help you with that. Its phone transfer feature has a powerful facility that can move your photos and other files between two mobile devices. Here’s how to use it in easy steps.
- Step 1: Download Wondershare Dr.Fone from its official website. Then, install it on your computer.
- Step 2: Open the newly installed software on your desktop. After it fully loads, connect your two iPhones using a data cable.
- Step 3: Access the left-side panel and then click Toolbox. On the main dashboard, click Phone Transfer.

- Step 4: Set the iPhone that contains the photos as the Source and the other iPhone as the Target. Alternatively, click the Flip button to modify the transfer path according to your liking.

- Step 5: Click Photos as the category of the files. Right after, click Start Transfer to proceed.

- Step 6: Wait while Wondershare Dr.Fone is facilitating the transfer. If you wish to terminate the progress, simply click Cancel.

- Step 7: After completing the process, click OK to wrap it up. Check your files from their respective locations afterward.

BONUS TIP: Back Up Your Photos First
The tutorials above on how to transfer all photos from iPhone to iPhone are safe to initiate. You can be sure about that. But as an additional layer of protection, it’s best to back up your iPhone first before the transfer. Don’t worry. Wondershare Dr.Fone. simplifies the backup process for you. Here’s a quick tutorial to get you started.
- Step 1: Launch the Wondershare Dr.Fone on your computer. After it fully loads up, connect your iPhone using a data cable.
- Step 2: Access the left-side panel and then click My Backup. On the main dashboard, click Back Up Now.

- Step 3: Follow the on-screen instructions for SMS backup. After that, click OK to proceed.

- Step 4: Wait while Wondershare Dr.Fone is backing up your files.

- Step 5: After completing the backup process, click View Backups or Open in Folder to check your files.

Conclusion
Transferring photos between two iOS devices is very easy. In fact, you can instantly complete the migration process with just the snap of a finger. Refer to the five tutorials above on how to transfer photos from iPhone to iPhone enumerated. One of them can certainly fit your situation and help you in this regard. For a more convenient file transfer option, download Wondershare Dr.Fone for free. It has a potent phone transfer feature that can aid in the transfer of your dearly cherished photos.


iPhone Photos
- Convert HEIC to JPG
- 1. Convert HEIC to JPG on Linux
- 2. Convert HEIC to JPG Windows
- 3. Best HEIC Converter Online
- 4. Convert HEIC to JPG High Quality
- Export iPhone Photos
- 1. Upload iPhone Photos to Google Drive
- 2. Transfer Photo from iPhone to PC
- 3. Transfer Photo from iPhone to iPhone
- 4. Transfer from iPhone to iPhone
- 5. Transfer from iPhone to iPad
- 6. Move iPhone Photo to External Drive
- 7. Transfer from iPhone to Flash Drive
- 8. Extract Photos from iPhone
- 9. Download Photo from iPhone
- Import Photos to iPhone
- 1. Transfer from Laptop to iPhone
- 2. Transfer Photo from Camera to iPhone
- 3. Transfer Photo from Mac to iPhone
- 4. Transfer Photos from PC to iPhone
- 5. Transfer from iPhone to PC
- 6. Transfer from Android to iPhone
- 7. Transfer from Samsung to iPhone
- Manage iPhone Photos
- 1. Back up iPhone Photos
- 2. Get Photos off iPhone
- 3. Send Large Size Photos from iPhone
- 4. Photo/Video Compressor Apps
- 5. Delete Photos from iPhone/iPad
- 6. iPhone Photos Disappeared Suddenly
- 7. iPhone Photoshop Alternatives
- Recover iPhone Photos
- 1. Restore Deleted Photos from iPhone
- 2. Recover Photos from iPod Touch
- 3. Recover Deleted Picture from iPhone
- Transfer iPhone Photos to Mac
- Transfer iPhone Photos to PC
- 1. Transfer Data from iPhone to PC
- 2. Transfer Photo to Computer
- 3. Transfer Photo to PC without iTunes
- 4. Transfer Library to Computer
- 5. Send Photo from iPhone to Computer
- 6. Import Photo from iPhone to Windows
- 7. Transfer Photo to Windows
- Transfer Photos from Google Drive
- 1. Download from Google Drive to iPhone
- 2. Transfer from Google Photo to iPhone
- 3. Download from iCloud to iPhone
- Transfer Photos to Google Drive
- Image Convert Tips
- ● Manage/transfer/recover data
- ● Unlock screen/activate/FRP lock
- ● Fix most iOS and Android issues
- Free Download Free Download

Alice MJ
staff Editor