How to Remove Google FRP Lock on TECNO/Infinix/itel?
If your TECNO, Infinix, or itel phone is stuck on the Google verification screen after a reset, you need a clear FRP removal process that matches your device brand. In this situation, using the correct tool path matters, especially when the phone cannot move past the setup screen.
Wondershare Dr.Fone offers a guided way to handle this with Dr.Fone – Screen Unlock (Android). Its Remove Google FRP Lock on TECNO/Infinix/itel function helps you go through the process on a computer, with the required device detection and driver preparation handled inside the workflow.
Follow the guide below to remove the FRP lock on your device. Before you begin, make sure you are using the latest version of Wondershare Dr.Fone, and keep your phone properly connected during the operation.
Supported Devices:
- Tecno Phones: Camon, Spark, Pova, Phantom, Pop, Pouvoir, MegaPad series
- Infinix Phones: Hot, Note, Zero, Smart, GT, Xpad series
- itel Phones: Support for the majority of itel series and models
These cover multiple generations and MediaTek-based models.
See the full list >>
Upgrade to the Newest Dr.Fone
Manage Your Phone Wherever You Go
🔔 Disclaimer:
Dr.Fone is purposefully designed to remove the lock, restoring your device to its full potential. This software is intended exclusively for personal use. Any form of misuse, including but not limited to using Dr.Fone for commercial or illegal purposes, is strictly prohibited.
Step-by-Step Guide to Remove Google FRP Lock on TECNO/Infinix/itel Phones
Step 1Open the Screen Unlock Tool
Launch Wondershare Dr.Fone on your computer and connect TECNO/Infinix/itel phone to begin. From the main interface, go to Toolbox > Screen Unlock to open the dedicated toolkit in a new window.

Step 2Access Remove FRP Lock Function
On the next screen, choose Android to continue.

Then, choose Remove Google FRP Lock from the options. This selection starts the process for Google account verification removal.

Step 3Select the Brand for TECNO/Infinix/itel
When the supported brand list appears, choose TECNO/Infinix/itel and click Start. This tells the software which device branch to use for the FRP bypass setup.

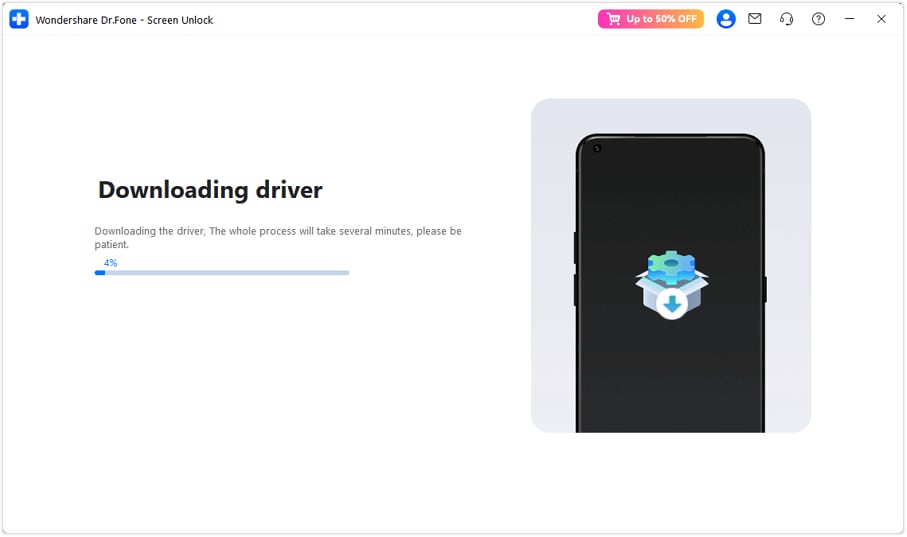
Step 4Download Required Driver
Dr.Fone will automatically detect your phone model and start downloading the proper USB driver for your device. Wait until the download finishes, and the software will continue to the next stage automatically.
Step 5Power off the Phone and Reconnect It
When prompted, turn off the phone and reconnect it as instructed by the program. This step prepares the device for the FRP removal process and allows Dr.Fone to continue device communication correctly.
Note: Ensure the phone is unplugged while turning off, and when you reconnect, only the device being unlocked should remain connected to the computer.

Step 6Remove FRP Lock
After the device is reconnected, Dr.Fone will detect it again and begin removing the FRP lock. Wait until the process is fully completed, and do not disconnect the phone while the software is working.

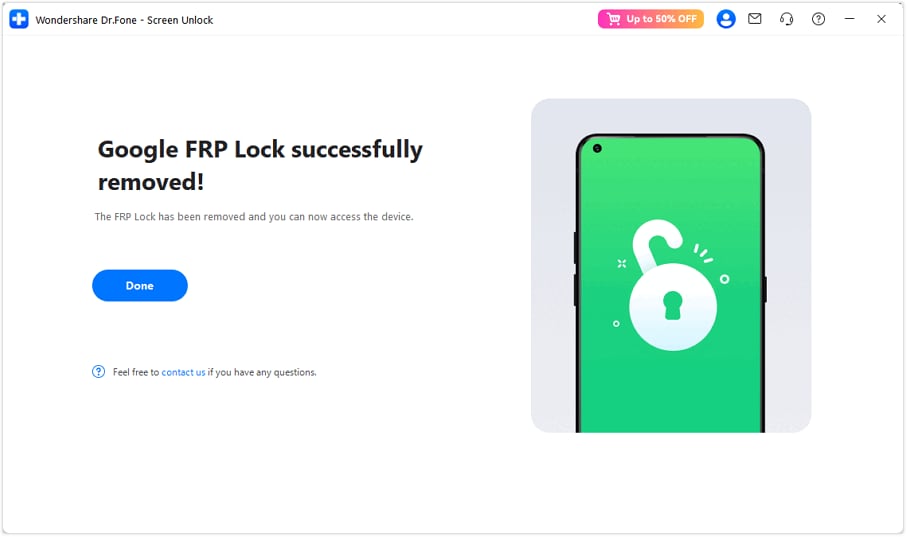
Step 7FRP Removal Completed Successfully
Once the operation is finished, a confirmation message will appear on the screen. You can then turn on your TECNO, Infinix, or itel phone, and it will boot to the home screen without requiring Google verification.
WHAT YOU'LL NEED
Solution center on YouTube
Dr.Fone provides a complete set of tools for solving all iOS/Android phone problems.
| Name |
Model |
SoC |
| Tecno AX8 | Tecno_AX8 | MT6757 |
| Tecno CA8 | Tecno_CA8 | MT6763 |
| Tecno Camon 11 | CF7 | CF7k | CF7S | MT6761 |
| Tecno Camon 11 Pro | CF8 | MT6765 |
| Tecno CX Air | Tecno_CX_Air | MT6763 |
| Tecno F2 LTE | Tecno_F2_LTE | MT6739 |
| Tecno F4 | Tecno_F4 | MT6739 |
| Tecno A9 Phantom 6 Plus | A9-H971A-M | MT6797 |
| Tecno Phantom 6 | A6-H551C1-M | MT6755 |
| Tecno Phantom 9 | AB7-H618A | MT6765 |
| Tecno Camon 12 | CC7 | MT6765 |
| Tecno Camon 12 Pro | CC9 | MT6765 |
| Tecno Camon 15 | CD7 | MT6765 |
| Tecno Camon 15 Air | CD6 | CD6S | MT6765 |
| Tecno Camon 15 Premier | CD8j | MT6765 |
| Tecno Camon 15 Pro | CD8 | MT6765 |
| Tecno Camon 16 S | CD6j | MT6765 |
| Tecno Spark 5 Pro | KD7H | KD7S | MT6765 |
| Tecno Camon 12 Air | KC3 | CC6 | MT6761 |
| Tecno Spark 3 | KB7 | KB7J | MT6761 |
| Tecno Spark 3 Pro | KB8 | MT6761 |
| Tecno Spark 4 | KC2 | KC2J | KC8S | MT6761 |
| Tecno Spark 5 Air | KD6 | KD6A | MT6761 |
| Tecno Camon 16 | CE7 | CE9H | MT6768 |
| Tecno Camon 16 Pro | CE8 | MT6768 |
| Tecno Camon 16 SE | CE7J | MT6768 |
| Tecno Camon 17 | CG6 | CG6J | MT6768 |
| Tecno Camon 17P | CG7 | CG7N | MT6768 |
| Tecno Camon 16 Premier | CE9 | MT6785 |
| Tecno Camon 17 Pro | CG8 | MT6785 |
| Tecno Phantom X | AC8 | MT6785 |
| Tecno Camon X | Camon X | MT6763 |
| Tecno Camon X Pro | Camon X Pro | MT6763 |
| Tecno Spark 7 Pro | KF8 | MT6768 |
| Tecno Spark 6 Go | KE5 | KE5j | KE5S | MT6765 |
| Tecno Spark Go | KC1 | MT6761 |
| Tecno Spark 7 | KF6 | KF6h | KF6i | KF6j | KF6k | MT6765 |
| Tecno Spark 7T | KF6p | MT6765 |
| Tecno Pova | LD7 | LD7j | MT6768 |
| Tecno Spark Power 2 Air | Spark_Power_2_Air | MT6761 |
| Tecno Spark Go 2020 / 2021 | KE5 | MT6761 |
| Tecno Spark Go Plus | Spark_Go_Plus | MT6761 |
| Tecno Spark Power | Tecno_Spark_Power | MT6761 |
| Tecno Camon i4 / Camon 11S | CB7 | MT6761 |
| Tecno Camon IClick2 | ID6 | MT6765 |
| Tecno Camon iAce 2X | Camon_iAce_2X | MT6761 |
| Tecno Camon iAce | Camon_iAce | MT6739W |
| Tecno Camon iClick | Camon_iClick | MT6763 |
| Tecno Camon i Sky | Camon_i_Sky | MT6739W |
| Tecno Spark 7P | KF7j | MT6771 |
| Tecno Pouvoir 4 | LC7 | LC7S | MT6761 |
| Tecno Spark 8 | KG6 | MT6765 |
| Tecno Spark 4 Air | KC6 | KC6S | KC1j | MT6761 |
| Tecno Camon 18 | CH6 | CH6N | MT6768 |
| Tecno Spark 8P | 8P | MT6768 |
| Tecno Camon 18 Premier | CH9 | CH9n | MT6781 |
| Tecno Camon 18P | CH7 | CH7n | MT6781 |
| Tecno Pova 2 | LE7 | LE7n | MT6768 |
| Tecno Phantom 8 | AX8 | MT6757 |
| Tecno IN2 | H391 | MT6739 |
| Tecno Camon 18T | CH6T | MT6768 |
| Tecno Pova Neo | LE6 | MT6762 |
| Tecno Pouvoir 2 | LA7 | MT6739 |
| Tecno Pouvoir 2 Pro | LA7 Pro | MT6739 |
| Tecno Pouvoir 3 | LB7 | MT6739W |
| Tecno Pouvoir 3 Air | LC6 | LC6a | MT6761 |
| Tecno Pouvoir 3 Plus | LB8 | LB8a | MT6765 |
| Tecno Spark 4 Lite | BB4k | MT6761 |
| Tecno Spark 6 | KE7 | MT6768 |
| Tecno Spark 6 Air | KE6 | KE6j | MT6761 |
| Tecno Spark 7 Go | KF6m | MT6765 |
| Tecno Pova 5G | Pova_5G | MT6877 |
| Tecno Spark Go 2023 | BF7 | MT6761 |
| Tecno Pop 5 Pro | BD4j | BD4H | MT6761 |
| Tecno Camon 19 | CI6 | CI6H | MT6769 |
| Tecno Spark 10 | KI5Q | KI5N | MT6765 |
| Tecno Spark 20 | KJ5 | MT6768 |
| Tecno Pova Neo 3 | LH6 | LH6n | MT6768 |
| Tecno Spark 20C | BG7 | BG7n | MT6765 |
| Tecno Camon 20 | CK6 | MT6768 |
| Tecno Spark 10 Pro | KI7 | MT6768 |
| Tecno Spark 10 5G | KI8 | MT6833 |
| Tecno Pop 7 Pro | BF7H | MT6761 |
| Tecno Spark Power 2 | LC8 | MT6765 |
| Tecno Spark Go 2022 | KG5 | KG5h | MT6761 |
| Tecno Spark 9 | KG5p | MT6765 |
| Tecno Spark 9T | KH6 | MT6765 |
| Tecno Spark 8T | KG6p | MT6765 |
| Tecno Spark 8 Pro | KG8 | MZ-TECNO KG8 | Mobile KG8 | MT6768 |
| Tecno Camon 19 Neo | CH6I | MT6768 |
| Tecno Camon 20 Premier | CK9n | MT6893 |
| Tecno Camon 20 Pro 5G | CK8n | MT6893 |
| Tecno Phantom V Flip | AD11 | MT6893 |
| Tecno Pova 4 | Lg7n | MT6789 |
| Tecno Pova 4 Pro | Lg8n | MT6789 |
| Tecno Pova 5 | Lh7n | MT6789 |
| Tecno Spark 20 Pro | Kj6 | MT6789 |
| Tecno Spark 20 Pro Plus | KJ7 | KJ7s | MT6789 |
| Tecno Camon 30 4G | CL6 | CL6k | CL6s | MT6789 |
| Tecno Camon 20 Pro | Ck7n | MT6789 |
| Tecno Camon 20s Pro 5G | CK8nB | MT6891 |
| Tecno Spark 8 Pro | KG8 | MT6768 |
| Tecno Pova Neo 2 | LG6N | MT6768 |
| Tecno Camon 19 Pro 5G | CI7n | MT6833 |
| Tecno Pova 5 Pro | LH8n | MT6833 |
| Tecno Pova 6 Pro | LI9 | MT6833 |
| Tecno Phantom V Flip2 | AE11 | MT6891 |
| Tecno Spark 30C | KL5 | KL5n | KL5s | MT6768 |
| Tecno Spark 30 | KL6 | MT6768 |
| Tecno MegaPad 10 | T1001 | MT6768 |
| Tecno Camon 30S | CLA5 | MT6789 |
| Tecno Camon 30S Pro | CLA6 | MT6789 |
| Tecno Spark 30 Pro | KL7 | MT6789 |
| Tecno Megapad 11 | T1101 | MT6789 |
| Tecno Pova 6 | LI7 | MT6789 |
| Tecno Pova 6 Neo | LI6 | MT6789 |
| Tecno Camon 30 5G | CL7 | MT6855 |
| Tecno Spark 30 5G | KL8 | KL8s | MT6835 |
| Tecno Spark 30C 5G | KL8h | MT6835 |
| Tecno Phantom X2 5G | AD8 | MT6983 |
| Tecno Phantom X2 Pro 5G | AD9 | MT6983 |
| Tecno Phantom V Fold | AD10 | MT6983 |
| Tecno Phantom V Fold2 | AE10 | MT6983 |
| Tecno Pop 4 LTE | Bc1s | MT6739 |
| Tecno Pop 9 | KL4 | MT6835 |
| Tecno Pova 6 Neo 5G | KL8 | MT6835 |
| Tecno Pova 7 4G | LJ6 | MT6835 |
| Tecno Pova 7 Pro 5G | LJ8 | MT6878 |
| Tecno Pova 7 5G | LJ7 | MT6878 |
| Tecno Pova Curve 5G | LJ8k | MT6878 |
| Tecno Camon 40 Pro 5G | CM7 | MT6878 |
| Tecno Pova Slim 5G | KM9 | MT6835 |
| Tecno Spark 40 Pro+ | KM7 | MT6789 |
| Tecno Spark 40 | KM5 | MT6768 |
| Tecno Spark Go 1S | KL4h | MT6765 |
| Infinix X604 | Infinix_X604 | MT6763 |
| Infinix Zero 5 | X603 | MT6757 |
| Infinix Note 5 | X604 | MT6763 |
| Infinix Note 5 Stylus | X605 | MT6763 |
| Infinix Smart HD 2021 | X612 | X612B | MT6761 |
| Infinix Hot 7 | X624 | X624B | MT6765 |
| Infinix S4 | X626 | X626B | MT6765 |
| Infinix Smart 3 Plus | X627 | X627V | X627W | MT6761 |
| Infinix Hot 8 | X650B | X650C | X650D | MT6765 |
| Infinix S5 | X652 | MT6765 |
| Infinix S5 lite | X652 | X652A | X652B | X652C | MT6765 |
| Infinix Hot 9 | X655 | X655C | X655D | X655F | MT6765 |
| Infinix Hot 9 Pro | X655F | MT6765 |
| Infinix Smart 5 | X657 | X657B | X657C | MT6761 |
| Infinix S5 Pro | X660 | X660B | X660B | MT6765 |
| Infinix Smart 4 Plus | X680D | MT6765 |
| Infinix Hot 10 | X682B | MT6768 |
| Infinix Hot 10 | X682C | MT6768 |
| Infinix Zero 8 | X687 | MT6785 |
| Infinix Hot 10 Play | X688C | X688B | MT6765 |
| Infinix Hot 10s | X689 | X689B | X689D | MT6768 |
| Infinix Hot 10T | X689 | X698B | X698C | X698D | X698F | MT6768 |
| Infinix Hot 11 | X662 | X662B | MT6768 |
| Infinix Hot 9 Play | X689B | MT6768 |
| Infinix Note 7 | X690 | MT6768 |
| Infinix Note 7 | X690B | X690C | MT6768 |
| Infinix Note 8 | X692 | MT6768 |
| Infinix Smart 2 | X5515 | X5515F | X5515I | MT6739 |
| Infinix Smart 3 | X5516 | X5516B | X5516C | MT6761 |
| Infinix Note 8i | X683 | MT6768 |
| Infinix Zero 8i | X687B | MT6785 |
| Infinix Note 10 Pro | X695 | X695C | X695D | MT6785 |
| Infinix Note 10 | X693 | MT6768 |
| Infinix Hot 10i | X659B | X659 | MT6768 |
| Infinix Smart 4 | X663 | X663B | MT6761 |
| Infinix Note 11s | X689 | MT6781 |
| Infinix Note 11 Pro | X697 | MT6781 |
| Infinix Hot 11s | X6812 | MT6768 |
| Infinix Hot 11 Play | X688B | X689F | MT6765 |
| Infinix Note 11i | X663 | X663B | X663C | MT6768 |
| Infinix Note 11 | X662 | X662B | X662F | MT6768 |
| Infinix Zero X Pro | X6811B | X6811 | MT6785 |
| Infinix Hot 10i | X658E | X658B | MT6768 |
| Infinix Note 7 Lite | X656 | MT6768 |
| Infinix Smart 4 | X653 | X653C | MT6761 |
| Infinix Note 6 | X610B | MT6765 |
| Infinix Smart 2 Pro | X5514 | MT6739 |
| Infinix Hot 7 Pro | X625 | MT6757 |
| Infinix Zero 5 Pro | X603B | MT6757 |
| Infinix Zero 5G | Zero_5G | MT6877 |
| Infinix Smart 7 | X6515 | MT6761 |
| Infinix Hot 20i | X665E | MT6765 |
| Infinix Hot 30 | X6831 | MT6768 |
| Infinix Hot 12 Play | X6816 | MT6765 |
| Infinix Smart 6 Plus | X6823c | MT6765 |
| Infinix Hot 20 Play | X6825 | MT6765 |
| Infinix Note 30 5G | X6711 | MT6833 |
| Infinix Hot 20 5G | X666B | X666C | MT6833 |
| Infinix Hot 40 | X6836 | MT6768 |
| Infinix Hot 30 Play NFC | X6835B | X6835 | MT6765 |
| Infinix Note 12 | X6817 | MT6768 |
| Infinix Note 12 Pro 5G | X671B | MT6833 |
| Infinix Note 12 5G | X671 | MT6833 |
| Infinix Note 12i | X6819 | MT6768 |
| Infinix Hot 30 5G | X6832 | MT6833 |
| Infinix Hot 30i [MTK] | X669C | MT6765 |
| Infinix GT 10 Pro | X6739 | MT6893 |
| Infinix Note 30 VIP | X6710 | MT6893 |
| Infinix Zero 30 | X6731 | MT6891 |
| Infinix Note 12 Pro | X676b | MT6789 |
| Infinix Note 30 | X6833B | X6716B | MT6789 |
| Infinix Note 30 Pro | X678b | MT6789 |
| Infinix Hot 40 Pro | X6837 | MT6789 |
| Infinix Note 30i | X6716B | MT6768 |
| Infinix Note 40 Pro 4G | X6850 | MT6789 |
| Infinix Smart 8 Pro | X6525B | MT6765 |
| Infinix Hot 50i | X6531 | X6531B | MT6768 |
| Infinix Zero Flip 5G | X6962 | MT6891 |
| Infinix Note 40 | X6853 | MT6789 |
| Infinix Note 40S | X6850B | MT6789 |
| Infinix Zero 40 4G | X6860 | MT6789 |
| Infinix Hot 50 4G | X6532 | MT6789 |
| Infinix Hot 50 Pro 4G | X6881 | MT6789 |
| Infinix Hot 50 Pro+ | X6880 | MT6789 |
| Infinix Xpad | X1101 | MT6789 |
| Infinix Hot 50 5G | X6720 | X6720B | MT6835 |
| Infinix Note 40X 5G | X6838 | MT6835 |
| Infinix Note 40 Pro 5G | X6851 | MT6855 |
| Infinix Note 40 Pro Plus 5G | X6851B | MT6855 |
| Infinix Note 40 5G | X6852 | MT6855 |
| Infinix Zero 40 5G | X6861 | MT6895 |
| Infinix GT 20 Pro 5G | X6871 | MT6895 |
| Infinix Note 50 | X6858 | MT6835 |
| Infinix Note 50x | X6857B | MT6878 |
| Infinix Note 50s | X6870 | MT6878 |
| Infinix Note 12 G96 | X670 | MT6789 |
| Infinix Note 50 Pro+ 5G | X6856 | MT6897 |
