7 Best Ways to Fix Face ID Not Working on iPhone X/12/13

May 22, 2026 • Filed to: Phone Repair Solutions • Proven solutions
 TL;DR:
To restore Face ID functionality on your iPhone X, 12, or 13, you must clear any TrueDepth camera obstructions, verify you have not triggered an automatic security lockout, or utilize system resets and standard iOS repair software.
● Face ID automatically disables and requires a manual passcode entry if the device has not been unlocked in 48 hours, a passcode was not used in the last 6.5 days, you accumulate five failed recognition attempts, or Emergency SOS was activated.
● The TrueDepth sensor array only operates in portrait mode on these devices and will fail to authenticate if obstructed by dirty glass, misaligned phone cases, or infrared-blocking sunglasses.
● If restarting and updating iOS fail, you can delete your existing facial recognition data via the Reset Face ID setting or use Wondershare Dr.Fone-System Repair in Standard Repair mode to fix underlying software bugs without erasing device data.
Ask AI for a summary
 ChatGPT
 Perplexity
 Gemini
 Claude
 Grok
Grok
If you own an iPhone, you know how helpful Face ID is. It is an Apple multi-factor authentication (MFA) feature for unlocking your iPhones using facial recognition. This feature is simple and secure compared to other identification solutions, such as fingerprint sensors in Android smartphones.
However, as impressive as it is, the Face ID not working on iPhone X still occurs occasionally. Have you encountered a similar problem, such as Face ID being unavailable? Please try again later. This article will discuss fixing this problem on your iPhone X/12/13.
Part 1: Why Is Face ID Not Working on iPhone X/12/13?
- Wear a mask or makeup
Face ID does not operate by default if your mouth and nose are covered. Make sure your eyes aren't blocked if you're wearing a face mask or cosmetics and have already set up Face ID using a mask. If you're wearing a face mask, you may need to raise your iPhone.
- You last unlocked your iPhone in the last 48 hours.
You'll need to enter your passcode if you last unlocked your iPhone in the last 48 hours.
- You last used a passcode to unlock it in the last 6.5 days.
If you last used a passcode in the last six and a half days and Face ID hasn't unlocked the device in the last four hours, you'll be prompted to enter one. Face ID will not work in this situation.
- Five wrong attempts at face recognition
Users have five attempts to unlock the iPhone by looking at the facial recognition cameras on the front. If you cannot unlock it using Face ID, you will be prompted to enter a passcode.
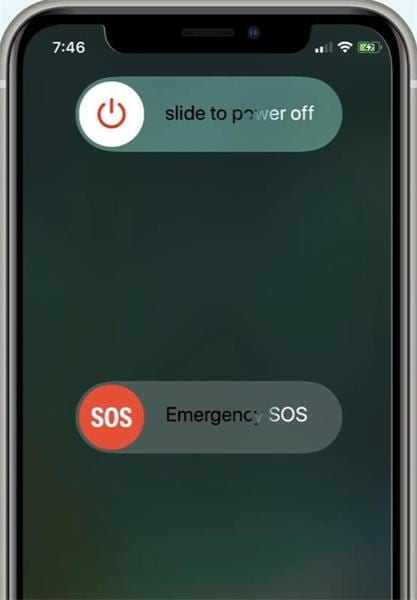
- You used emergency SOS.
Suppose you utilize Emergency SOS by simultaneously pushing and holding the volume and side buttons for 2 seconds. In that case, the iPhone will not unlock with Face ID (presumably to stop muggers from getting you to unlock your iPhone by looking at it).
Part 2: 7 Ways to Fix Face ID Not Working on iPhone X/12/13
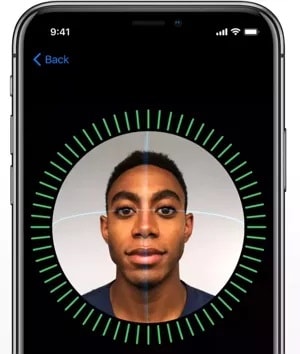
1.Check your TrueDepth camera
- Face ID may not function properly if the lens and sensor array on the iPhone's camera is obstructed. If you have a case on your iPhone, be sure it isn't blocking your view. While you're about it, look for any marks on the glass.
- Face ID can, of course, only be used on the iPhone in portrait mode. However, it would help to ensure that you hold the iPhone vertically.
- Face ID issues can also arise if the device's camera is dirty. So, if you're confident that the camera isn't obstructed in any way, clean the device's camera to eliminate any dirt that might interfere with the camera's performance.
2.Restart your iPhone
If you don't notice any problems with the TrueDepth camera, it's time to restart your iPhone. It is how you do it to fix face id not working on iPhone 12:
- Hold the power button for a few seconds until the power off option shows.
- To turn on the smartphone, long press the power button once more.
- Enter the passcode first, and then use Face ID to validate whether or not it is working.
3.Make sure your Face is clean
If the camera is not the issue, the Face ID issue could be due to your Face. Cleaning your Face can assist you in unlocking your phone using Face ID. According to Apple, wearing sunglasses that block infrared wavelengths can also interfere with the TrueDepth sensor's operation.
As a result, before using Face ID, remove your glasses or any other facial covering. If you must wear a face mask, there are ways to keep your mask on while configuring your Face ID. So, the function recognizes you even while wearing your mask.
4.Update your iPhone to the latest version
iPhone users update their smartphones to the most recent iOS version as soon as possible to take advantage of the most recent features. However, iOS sometimes contains several flaws that cause Face ID difficulties.
If this is the case, an update to the most recent version of iOS will resolve the issue. It is because an update includes not only a system or function upgrade but also mending patches and bug fixes.
It is usually preferable to wait for a stable release before updating your iPhones. If your face id not working on iPhone X correctly, seek stable iOS updates—they'll almost certainly fix the problem.

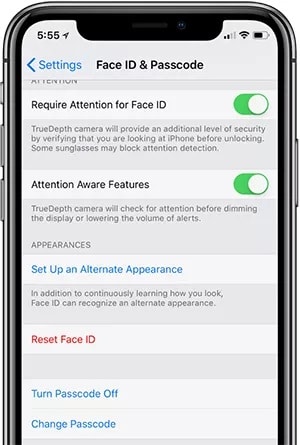
5.Reset Face ID
You may want the scanner to perform well if you want to use Face ID. If you set up the face scanner and then decide not to use it, just reset the settings and remove the face recognition data from your smartphone. It's a viable option that you should consider if nothing else works out. After resetting the Face ID, a software glitch will likely be rectified.
- On your iPhone, open the Settings app.
- You must now select Face ID & Passcode. Enter the passcode for your iPhone. After that, select Reset Face ID.
- That's it! You will now delete the Face ID data from your device, as well as the mathematical representations of your Face.
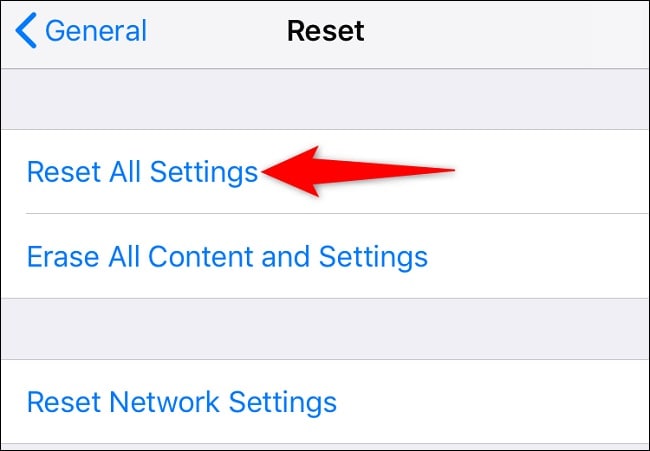
6.Reset All Settings
If your iPhone Face ID fails to identify your Face, you can try resetting all settings even after you create a new Face ID. It will restore iPhone's basic settings without erasing any data, and resetting all settings work for many iPhone problems, including Wi-Fi disconnection errors.
It is simple to restore all of your settings. Navigate to Settings > General > Reset > Reset All Settings and follow the prompts.
7.Dr.Fone-System Repair
If an update isn't available and face id not working iPhone 12, it's time to try a more advanced iOS system recovery option. Wondershare Dr.Fone-System Repair, an iOS system recovery solution that can quickly solve this and other issues without harming the device's data or other capabilities, is one of the best.
Dr.Fone can repair iOS systems and iOS stuck difficulties on iOS devices. It will resolve over 150 of the most frequent difficulties, such as an iPhone stuck on the Apple Logo, a boot loop, or in recovery mode. It is one of the most excellent alternatives because it will not affect your iOS device's data.
Steps:
Step 1: After successfully installing Dr.Fone, start it on your PC. Select "System Repair" from the drop-down menu on the homepage.

Step 2: After that, you must specify the type of smartphone you are repairing. Choose "iOS" because iPhones are being dealt with.

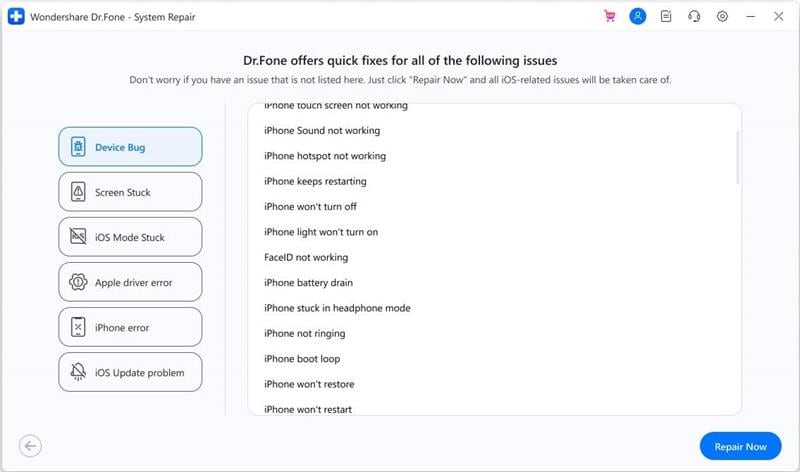
Step 3: You will be taken to a new screen where you must pick "iOS Repair" to repair the iPhone's system faults.

Step 4: Even if the iOS system issue on your device is not listed, you can still select "Repair Now" and start with the recovery process.
Step 5: To begin with the iOS repair, choose "Standard Repair" from the two options. This mode will attempt to fix your iOS device while protecting all data from loss.

Step 6: You must boot your iOS device into Recovery Mode. You must first trust the computer to complete this process. To do so:
Connect the device to the computer using a USB cable and enter the password for the lock screen.
Tap the "Trust" option that appears in the pop-up window.
Following successful coverage, click "Enter Recovery Mode" to proceed. If your device is unresponsive or performing strangely, select the "Guide to Recovery Mode" option.

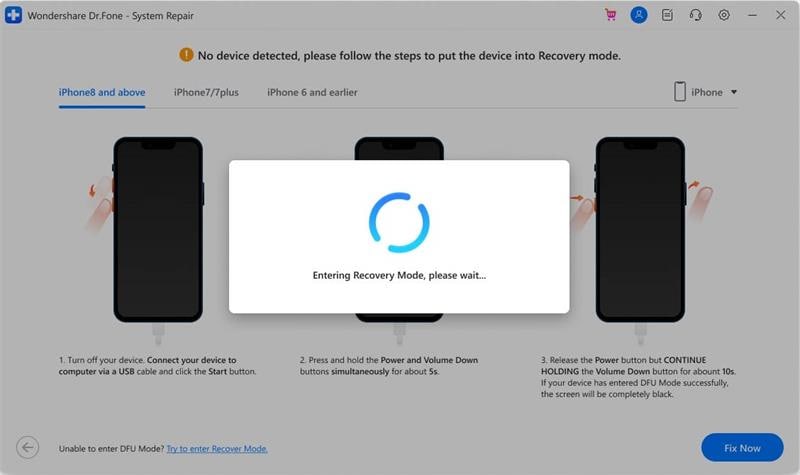
Step 7: Depending on your model, follow the on-screen instructions to boot your device into Recovery Mode.
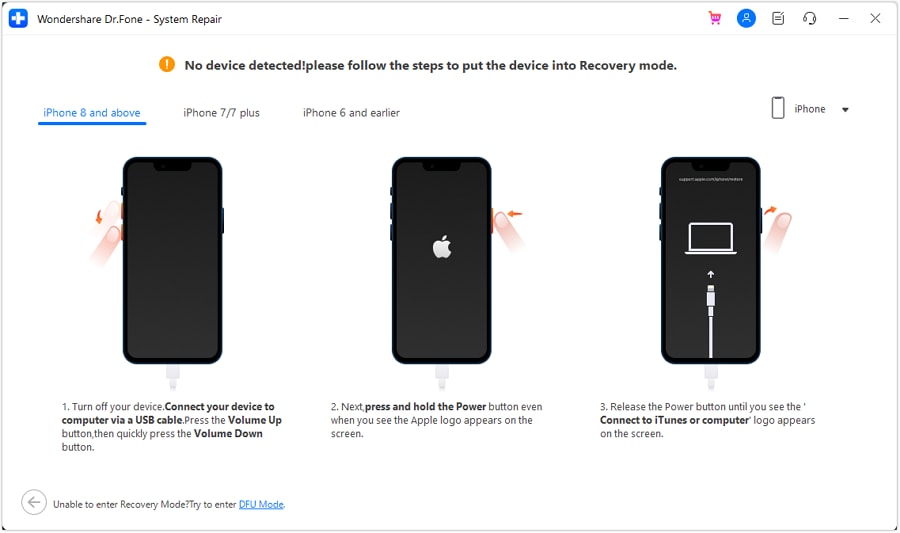
Step 8: The platform recognizes the device as soon as it enters Recovery Mode.
Step 9: The following window displays a list of different iOS firmware that can be installed on the iOS device. Click "Download" to begin the installation process for any of them.

Step 10: The iOS firmware begins to download and is displayed in the progress bar across the PC.

Step 11: After downloading the firmware, the platform validates it before installing it on iOS to avoid difficulties.
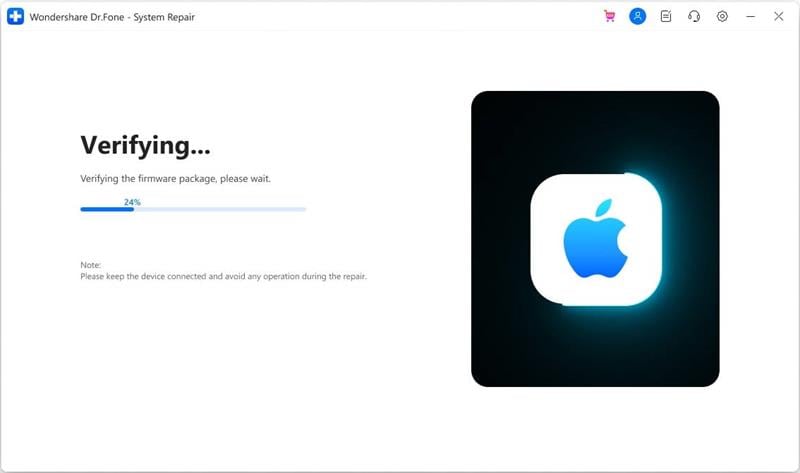
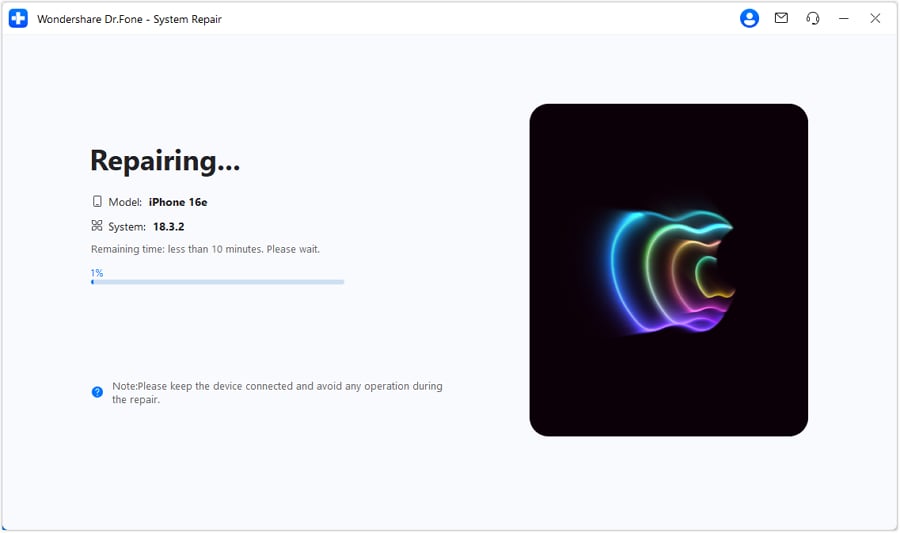
Step 12: After verifying the iOS firmware, select the "Repair Now" option to begin the iOS system recovery process. A progress bar depicts the repair procedure on the following screen.
Step 13: When you're finished, the prompt window displays the successful completion of the process. To finish the execution, press the "Done" button.

Conclusion
Every year, Apple introduces new advancements to its iPhones from every angle, including privacy and security, and Face ID is an example of this. However, many people have reported problems with its operation, which is improving with each new version.
If your face ID not working on iPhone 13, you can try any of the solutions listed above. Furthermore, if your Face ID stops working or you forget your passcode or Apple ID, you can utilize Wondershare Dr.Fone-System Repair.


iPhone 13 Issues
- Apps Keeps Stopping
- 1. iPhone 13 Safari Not Working
- 2. iPhone 13 Apps Keep Crashing
- 3. iPhone 13 Apps Stuck on Loading
- 4. iPhone 13 WhatsApp Calls Don't Work
- 5. iPhone 13 Won't Download Apps
- 6. iPhone 13 Apps Not Opening
- 7. iPhone 13 Apps Won't Update
- 8. iPhone 13 Safari Freezes
- 9. iPhone 13 Safari Not Loading Pages
- iPhone 13 Charging Issues
- 1. iPhone 13 Battery Draining Fast
- 2. iPhone 13 Overheating
- 3. iPhone 13 Overheats While Charging
- 4. iPhone 13 Won't Charge
- iPhone 13 Not Working
- 1. iPhone 13 Overheating And Won't On
- 2. iPhone 11/12/13 Won't Turn On
- 3. iPhone 13 Restarts
- 4. iPhone 13 Problems
- iPhone 13 Screen Issues
- 1. iPhone 13 Touch Screen Not Working
- 2. iPhone 13 Stuck on White Screen
- 3. iPhone 13 Frozen Screen
- 4. iPhone 13 Black Screen
- 5. iPhone 13 Camera Black Screen
- 6. iPhone 13 Goes Black During Call
- iPhone 13 Services Fail
- 1. iPhone 13 Face ID Not Working
- 2. iPhone 13 Not Ringing
- 3. iPhone 13 Call Failed
- 4. iPhone 13 Poor Call Quality
- 5. iPhone 13 iMessage Not Working
- 6. iPhone 13 Dropping Calls
- 7. iPhone 13 No Service Problem
- 8. iPhone 13 Not Receiving Calls
- 9. iPhone 13 SIM Failure/No SIM Card
- 10. iPhone 13 iMessage Not Syncing
- 11. iPhone 13 Hotspot Not Working
- iPhone 13 Tips
- ● Manage/transfer/recover data
- ● Unlock screen/activate/FRP lock
- ● Fix most iOS and Android issues
- Free Download Free Download Free Download


James Davis
staff Editor
Generally rated4.5(105participated)