
Fix Unfortunately Settings Has Stopped on Android Quickly
Dec 16, 2025 • Filed to: Phone Repair Solutions • Proven solutions
Struggling with the "Unfortunately, Settings has stopped" error on your Android device? This common issue causes the Settings app to crash or freeze, blocking essential tasks like updating software, changing wallpapers, or configuring Wi-Fi. Fortunately, proven troubleshooting techniques can quickly resolve the error.
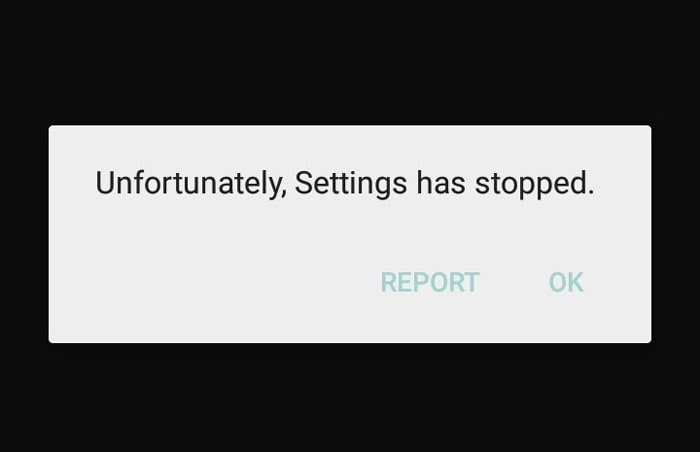
The "Unfortunately, Settings has stopped" error on Android can result from custom ROMs, low storage, outdated OS versions, or corrupted system files. If your Android Settings app is unresponsive, this guide is for you. We'll explore common causes and provide step-by-step fixes for Samsung, Google, OnePlus, and more.
- Part 1: Clear the cache of Settings and Google Play Service
- Part 2: Clear the Android phone’s RAM and retry
- Part 3: Uninstall the Google update
- Part 4: Uninstall the custom ROM or re-flash the stock ROM
- Part 5: Wipe cache partition to restore Settings
- Part 6: Factory reset your Android
- Part 7: Check and update Android OS
Part 1: Clear the cache of Settings and Google Play Service
Corrupted cache files may be causing the "Unfortunately, Settings has stopped" error. As a first step, clear the Settings cache to restore proper functionality. The process is similar for clearing the Google Play Services cache. Here's how to clear the Settings cache:
- Step 1: Open "Settings" on your Android device and choose "Apps & Notifications" / "Apps" / "Application Manager" (the option may differ on different devices).
- Step 2: In the list of applications, look for "Settings" and open it.
- Step 3: Now, select "Storage" followed by "Clear Cache".
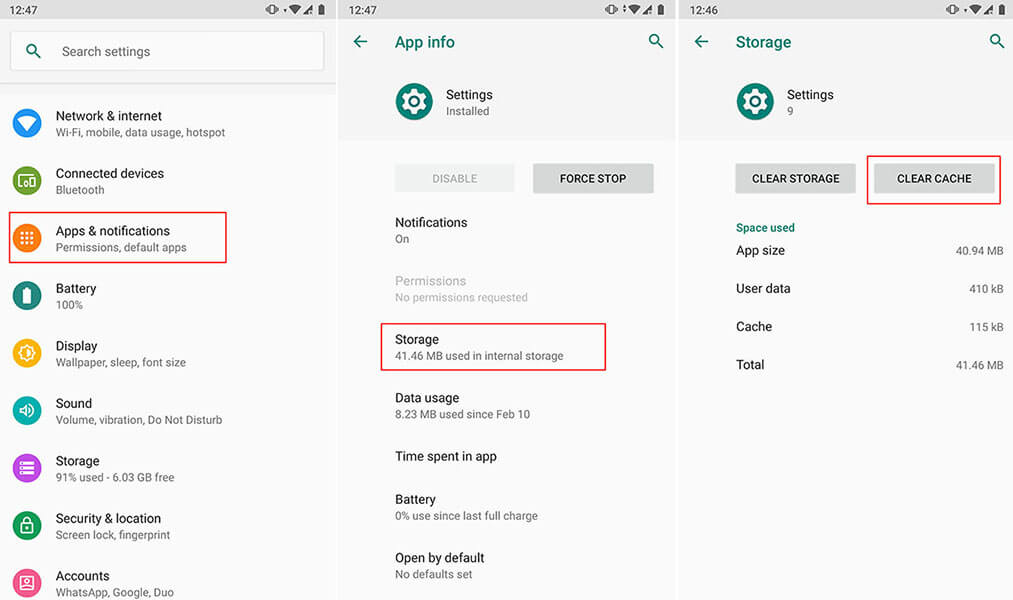
Note: In some phones, the "Clear Cache" option may come after tapping on "Force Stop". Therefore, go accordingly without getting confused.
Part 2: Clear the Android phone’s RAM and retry
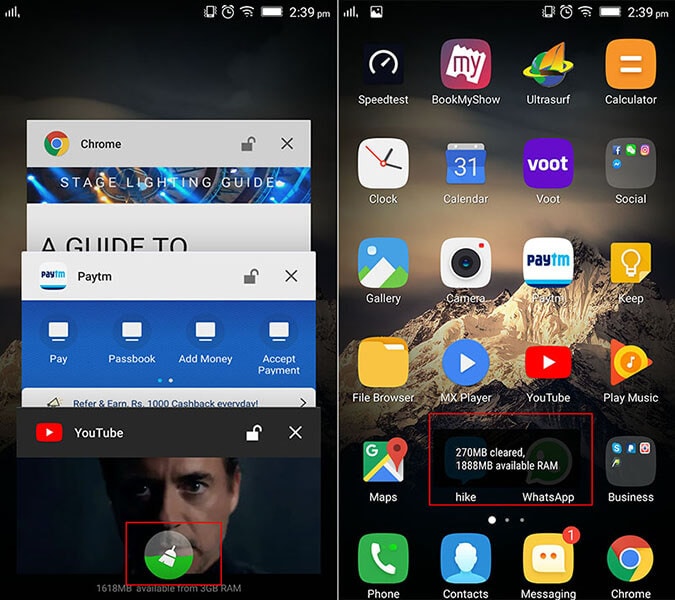
Clearing your device's RAM by closing unused background apps can effectively fix the "Unfortunately, Settings has stopped" error on Android. When RAM is overloaded, performance issues like freezing, slow response, and app crashes may occur, affecting the Settings app.
- Step 1: Firstly, you need to go to the Recent apps screen. For this, long-press the Home key.
Note: Please note that different devices have different ways to go to the Recent apps screen. Do it according to the device you own. - Step 2: Now, swipe the apps and tap on the clear option. You will be able to notice the amount of RAM cleared
Part 3: Uninstall the Google update
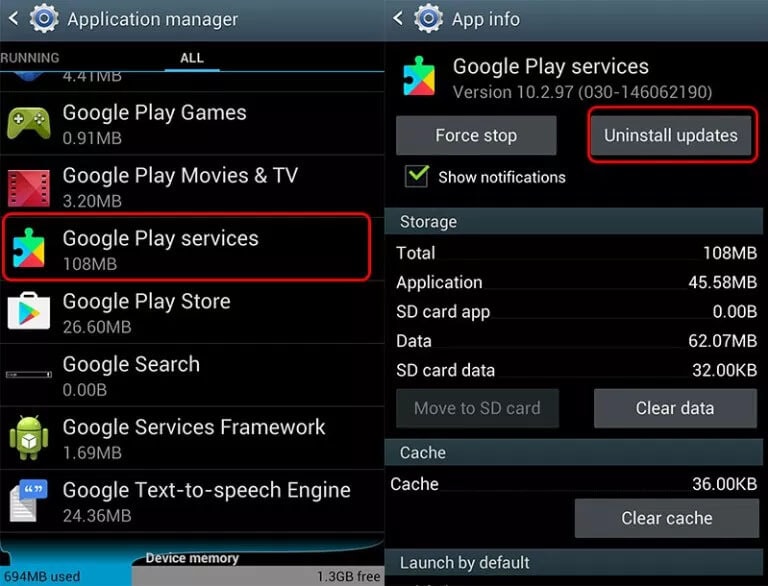
Uninstalling Google Play Store updates has helped many users fix the "Unfortunately, Settings has stopped" error. If other solutions fail, try this method. Follow these steps:
- Step 1: Open “Settings” on your Android and tap on “Application manager” or “Apps” or “Application.
- Step 2: Now, head to all the apps and select “Google Play Store” from there.
- Step 3: Tap on “Uninstall Updates” and restart your device to check if the crashing Settings issue has been resolved.
Part 4: Uninstall the custom ROM or re-flash the stock ROM
Using a custom ROM can cause the "Unfortunately, Settings has stopped" error due to incompatibility or installation issues. To fix it, uninstall the custom ROM or re-flash your device with the stock ROM using Dr.Fone - System Repair (Android). This one-click tool safely restores your device and resolves system issues on all Samsung models, along with other Android problems.

Dr.Fone - System Repair (Android)
Android repair tool to fix "Unfortunately, Settings Has Stopped"
- You needn’t be a tech-savvy to use this
- Supports a wide range of Android devices easily, 1000+ being more precise
- One-click tool and supports any sort of Android system issue
- Higher success rate along with millions of trusted users
- Trustworthy and offers an extremely easy interface
How to fix crashing Settings using Dr.Fone - System Repair (Android)
Step 1: Download Tool
Visit the official website of Dr.Fone and download the toolbox from there. Go for the installation process and wait until the installation gets over. Launch it now and choose the “System Repair” tab from the main window.

Step 2: Get the Phone Connected
With the help of a USB cable, plug your Android phone into the PC. Upon proper connection, hit on the “Android Repair” option from the left panel.

Step 3: Feed Correct Information
In the next window, you need to fill in some necessary information like the name and model of the mobile device. Enter details like country and career. Check once and hit on “Next”.

Step 4: Enter Download Mode
Now, you need to take your device into Download mode. For this, you need to follow the onscreen instruction according to your device. Click “Next” and you will notice the firmware downloading progress on your screen.

Step 5: Repair the Issue
Once the firmware is completely downloaded, your Android device will automatically start getting repaired. Stay there and you will receive a notification that the repair is done.

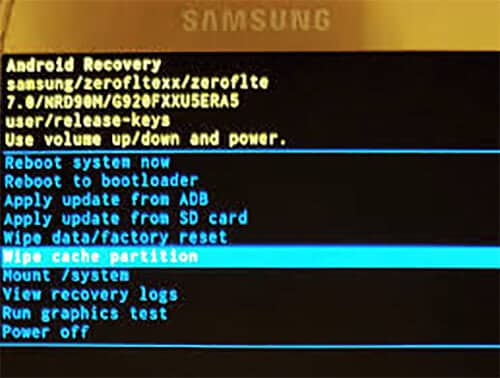
Part 5: Wipe cache partition to restore Settings
Wiping the cache partition is a key step in fixing the "Unfortunately, Settings has stopped" error on Android. Accumulated cache can slow your device and trigger app crashes. To clear it, boot into recovery mode—Samsung users press Home, Power, and Volume Up; HTC and LG users press Volume Down and Power; Nexus users use Volume Up, Volume Down, and Power.
- Step 1: Primarily, turn off the device and enter the recovery mode by pressing the respective key combinations.
- Step 2: You will notice a Recovery screen on your device.
- Step 3: On showing up the recovery screen, look for the “Wipe Cache partition” option and use the “Volume Down” and “Volume Up” buttons to scroll down and up respectively.
- Step 4: On reaching the required option, press the “Power” button to start wiping.
- Step 5: Once finished, click the reboot option and the device will be rebooted, fixing the issue hopefully.
Part 6: Factory reset your Android
You can also opt for Factory resetting your device to fix the issue of Settings keeps stopping. By removing everything from the device, it will make your device run properly. If you have important data on your device, please make sure to create a backup before taking action if you don’t want to lose it. The steps are as follows.
- Step 1: In the “Settings, go to “Backup and Reset”.
- Step 2: Tap on “Factory data reset” followed by “Reset device”.
- Step 3: Wait for the completion of the process and check if Settings is stopping or not after it gets rebooted.

Part 7: Check and update Android OS
An outdated operating system can trigger errors like "Unfortunately, Settings has stopped". Keeping your Android OS updated ensures optimal performance with essential bug fixes, security patches, and performance enhancements. If your device runs an older OS, it may experience crashes and errors.
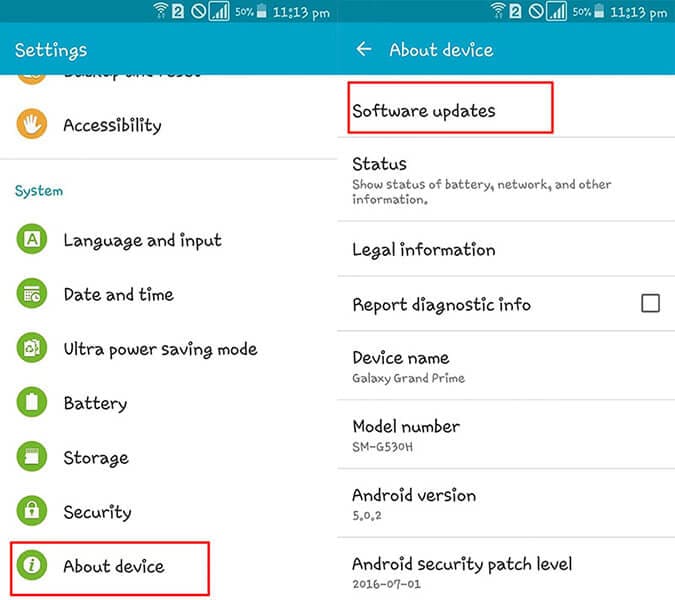
- Step 1: Go to “Settings” and tap “About Phone” on your device.
- Step 2: Now, hit on “System Update” and the device will look for any available update.
- Step 3: If there is any, go along with the prompts to install it and make your phone even smarter.
Ditch the hassle of multiple apps and simplify your mobile experience with Dr.Fone App, the ultimate all-in-one solution for iOS and Android users. Unlock your device, change your GPS location, and transfer WhatsApp data with ease. Plus, recover lost data from Android devices and transfer files, photos, and music between devices with ease. Fix common system issues and get the most out of Dr.Fone App with our "Tips" section below.
Dr.Fone App (iOS) & Dr.Fone App (Android)
Your One-Stop Expert for Screen Unlock, Smart Clean, Data Recovery, Change Location, and Phone Management of Mobile Devices!
- Effortlessly unlock various locks on your device.
- Instantly free up storage space by smart clean.
- Rapidly recover different kinds of lost phone data and information.
- Easily changes GPS location on Android devices.
- Easily manage cluttered and private device content.
Conclusion
If your Android device displays the "Unfortunately, Settings has stopped" error, it could be due to outdated software, cache issues, or custom ROM conflicts. Try clearing the cache, updating your system, or removing custom ROMs to resolve the problem.
For iOS users facing similar problems, we recommend using Dr.Fone-System Repair (iOS). It's known for fixing many iOS problems without losing any data. Remember, a well-working device is just a few steps away!
Android Stopped
- Apps Keep Stopping
- 1. Make Instagram Work Properly
- 2. Fix App Has Stopped Error
- 3. Fixe Gmail Not Working on Android
- 4. Fixe Spotify Keeps Crashing
- 5. Fix Chrome Crashes on Android
- 6. Fix Snapchat has Stopped
- 7. Fix TouchWiz has stopped
- 8. Fix WhatsApp has stopped
- 9. Solve YouTube App Crashing
- 10. Fix Apps Keep Crashing on Android
- 11.Fix Android App Not Installed
- 12.Fix WhatsApp issues on Android
- 13.Fix App Won't Open on Android
- Google Services Crash
- 1. Uninstall Google Play Service
- 2. Fix Google Maps Not Working
- 3. Fix Google Services Has Stopped
- 4. Fix Google Services Won't Update
- 5. Fix Google Play Store Not Working
- 6. Fix Play Store Stuck on Downloading
- Android Services Fail
- 1. Fix Phone Keep Disconnecting
- 2. Fix Android SystemUI Has Stopped
- 3. Fix Process Acore Has Stopped
- 4. Fix Process Media Has Stopped
- 5. the .com.android.phone Has Stopped
- 6. Fix Android Not Receiving Texts
- 7. Fix Bluetooth Not Working
- 8. Fix Home Button Not Working
- 9. Fix SIM not provisioned MM#2 Error
- 10.Fix Phone Has Stopped on Samsung
- 11.Fix Settings Has Stopped on Android
- 12.Fix Video Not Playing on Android
- 13.Fix Wi-Fi Not Working on Android
- 14.Fix Contacts Has Stopped Error
- 15.Fix Android System Crash Issue
- 16.Fix Process System Isn't Responding
- 17.Fix GPS Signal Not Found
- ● Manage/transfer/recover data
- ● Unlock screen/activate/FRP lock
- ● Fix most iOS and Android issues
- Repair Now Repair Now Repair Now


Alice MJ
staff Editor
Generally rated4.5(105participated)