How to Fix iPhone Error 2009 During Restore or Update

Oct 20, 2026 • Filed to: Phone Repair Solutions • Proven solutions
 TL;DR:
- Error 2009 is usually a restore/update connection error, not immediate proof that the iPhone is permanently damaged.
- Check the USB cable, USB port, computer, and Apple Devices/iTunes/Finder version first.
- If your iPhone must enter Recovery Mode and the button steps feel too complicated, Dr.Fone - System Repair can enter or exit Recovery Mode in one click.
- Use Dr.Fone Standard Repair when you want to repair iOS without erasing data first; avoid Advanced Repair unless you have a backup because it can erase the device.
- If the same iPhone works on another computer, repair iTunes components on the original Windows PC.
Ask AI for a summary
 ChatGPT
 Perplexity
 Gemini
 Claude
 Grok
Grok
iPhone error 2009, also shown as iTunes error 2009 or "The iPhone could not be restored. An unknown error occurred (2009)," usually means the restore or update process lost a stable connection between your iPhone, iPad, or iPod touch and the computer. The most common causes are a faulty USB cable, a weak USB port, an interrupted connection, outdated Apple Devices/iTunes/Finder software, security software interference, or damaged iTunes components.
Start with the USB connection before you erase the device. Use an Apple-certified cable, plug directly into the computer, try another USB port, restart both devices, and make sure your Mac, Apple Devices app, or iTunes is up to date. If the error continues, repair the iOS system in Standard Repair mode or repair iTunes components before you repeat a full Restore.
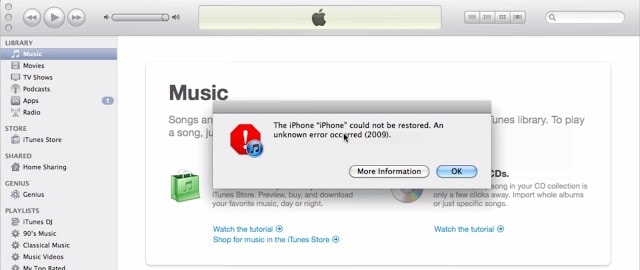
The iPhone could not be restored. An unknown error occurred (error 2009)
- What does iPhone error 2009 mean?
- What should you try first?
- Fix 1. Check the USB cable, USB port, and computer
- Fix 2. Update Apple Devices, iTunes, Finder, macOS, or Windows
- Fix 3. Use Recovery Mode Update, or enter Recovery Mode in one click with Dr.Fone
- Fix 4. Repair iOS with Dr.Fone Standard Repair without data loss
- Fix 5. Repair iTunes components with Dr.Fone - iTunes Repair
- Fix 6. Check security software, VPN, and firewall settings
- Fix 7. Try another computer or contact Apple Support
- FAQs
What does iPhone error 2009 mean?
iPhone error 2009 appears when your computer cannot keep a stable restore or update connection with the device. You may see it in iTunes, Finder, or the Apple Devices app on Windows, especially while restoring an iPhone or iPad in Recovery Mode.
In practical terms, error 2009 points to the restore environment. The problem may be the USB cable, the USB port, the computer, Apple software, security software, iTunes components, or the iOS system state. That is why the safest path is to test the connection first, then repair the software layer, and only use Restore when Update or Standard Repair cannot complete the job.
What should you try first?
| Symptom | Most likely area | Next step |
|---|---|---|
| Error 2009 appears immediately after connecting the iPhone | USB cable, USB port, or computer | Fix 1 |
| The restore starts, then stops with "could not be restored error 2009" | USB stability, security software, or iOS system | Fix 1, then Fix 3 or Fix 4 |
| Windows shows Apple Devices error 2009 or iTunes error 2009 | Apple Devices/iTunes version or iTunes components | Fix 2, then Fix 5 |
| The iPhone is stuck in Recovery Mode and button steps are confusing | Recovery Mode workflow | Fix 3 |
| The same iPhone restores on another computer | Original computer or iTunes components | Fix 5 |
| Several cables, ports, and computers all fail | Possible hardware issue | Fix 7 |
Fix 1. Check the USB cable, USB port, and computer
Start here because error 2009 is commonly tied to the USB connection between the iPhone and the computer.
- Disconnect the iPhone, iPad, or iPod touch from the computer.
- Use the cable that came with your device, or another Apple-certified USB cable.
- Plug the cable directly into the computer. Do not use a USB hub, keyboard port, dock, or monitor port.
- Try another USB port on the same computer.
- Restart the computer and restart the iPhone or iPad.
- Reconnect the device, unlock it if possible, tap Trust if prompted, and try Update or Restore again.
If the error changes, the device disconnects, or the restore only fails on one port, the connection is likely the main problem.
Fix 2. Update Apple Devices, iTunes, Finder, macOS, or Windows
Use the current Apple software for your computer before you repeat the restore.
- On Windows, use the latest Apple Devices app or the latest version of iTunes, depending on your setup.
- On macOS Catalina or later, use Finder to update or restore the device.
- On older macOS versions, use iTunes.
- Install available macOS or Windows updates, then restart the computer.
After updating, reconnect the iPhone directly to the computer and try the update or restore again. If you are using Windows and Apple Devices or iTunes still cannot keep the connection stable, move to the iTunes repair step below.
Fix 3. Use Recovery Mode Update, or enter Recovery Mode in one click with Dr.Fone
If the device is stuck during update or restore, Recovery Mode can help your computer reinstall iOS. When you see the choice between Update and Restore, choose Update first. Update tries to reinstall the system without erasing your personal data. Restore should be saved for later because it erases the device unless you have a usable backup.
Manual Recovery Mode button steps can be frustrating, especially when the iPhone is unresponsive or you are not sure which button combination matches your model. If you want a simpler path, Dr.Fone - System Repair includes free one-click tools to enter/exit Recovery Mode and exit DFU Mode on iPhone or iPad without button combinations.
Use this option when:
- you cannot enter Recovery Mode with the manual button sequence,
- your iPhone exits Recovery Mode before the update starts,
- the screen is stuck on the computer/cable recovery screen, or
- you want to avoid repeating complicated button timing steps.
After entering Recovery Mode, return to Finder, Apple Devices, or iTunes and choose Update first. If Update still fails with error 2009, move to Standard Repair before using Restore.
Fix 4. Repair iOS with Dr.Fone Standard Repair without data loss
If USB checks and Update do not fix iPhone error 2009, the iOS system may be unstable enough to interrupt the restore process. Dr.Fone - System Repair (iOS) can repair common iPhone and iPad system problems in Standard Repair mode while keeping existing data.

Dr.Fone - System Repair
Fix iPhone error 2009 (iTunes Error 2009) without data loss
- Fast, easy and reliable.
- Fix with various iOS system issues like stuck in recovery mode, white Apple logo, black screen, looping on start, etc.
- Fixes other problems with your valuable hardware, along with iTunes errors, such as error 4005, iPhone error 14, iTunes error 50, error 1009, iTunes error 27 and more.
- Work for all models of iPhone, iPad and iPod touch.


Important: Standard Repair is the first choice when you want to avoid data loss. Advanced Repair is for more serious issues and can erase the device, so back up your iPhone or iPad before using it.
- Step 1. Install and open Dr.Fone on your Windows PC or Mac, then choose System Repair from the main dashboard.

- Step 2. Select iPhone, choose iOS Repair, and continue with Standard Repair first.
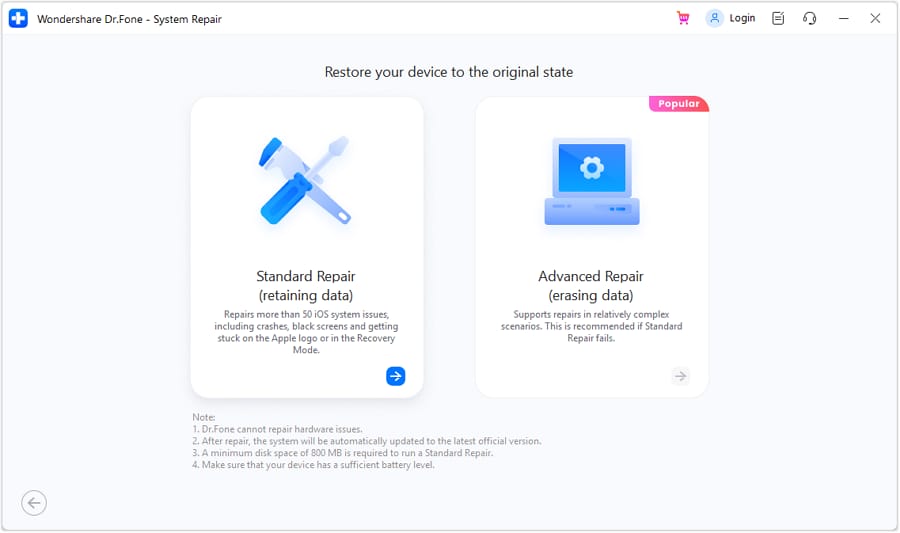
- Step 3. Connect your iPhone to the computer and follow the on-screen instructions to put the device into the required mode if Dr.Fone asks for it.
- Step 4. Confirm the detected device model and download the matching iOS firmware package.
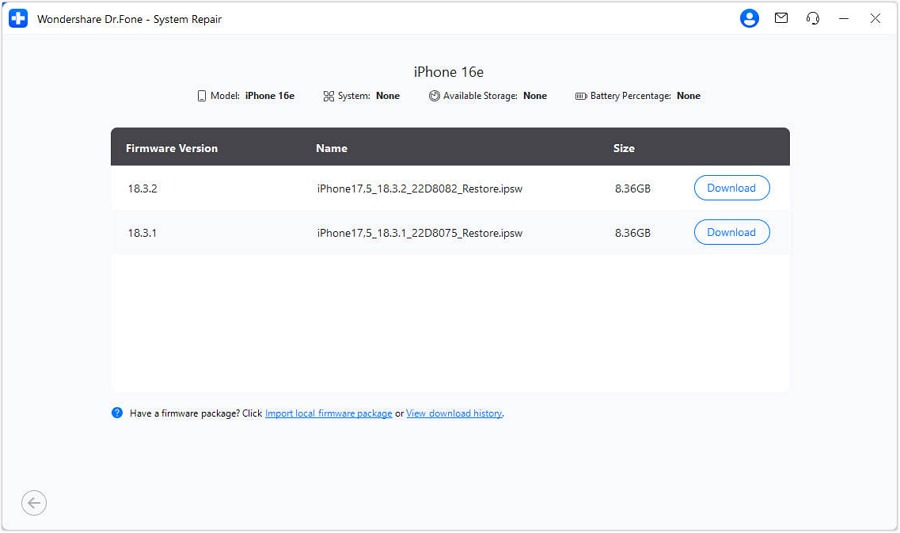
- Step 5. Start the repair and keep the iPhone connected until the process finishes and the device restarts.
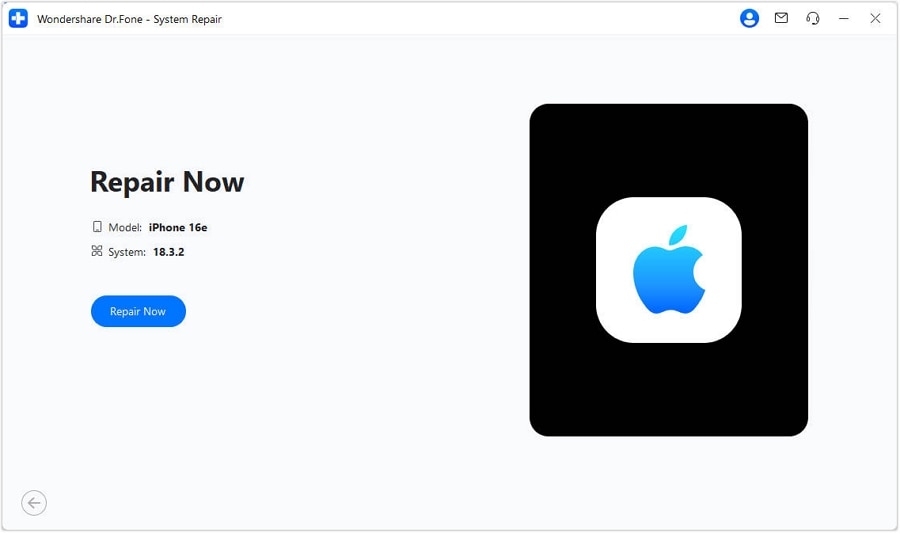
After Standard Repair completes, retry the update or restore only if you still need it. If error 2009 appears again on the same computer, the computer-side Apple software may need repair.
Fix 5. Repair iTunes components with Dr.Fone - iTunes Repair
If error 2009 appears mainly on a Windows PC, and the same device works with another computer or cable, the problem may be damaged iTunes components or connection services. Dr.Fone - iTunes Repair is designed to repair iTunes errors, connection issues, restore issues, and sync issues on Windows.
Dr.Fone - iTunes Repair
Easiest Solution to Fix iTunes Error 2009
- Fix all iTunes errors like iTunes error 2009, error 21, error 4013, error 4015, etc.
- Fix any iTunes connection and sync issues.
- Get rid of iTunes issues without affecting existing data in iTunes or iPhone
- Fastest solution in the industry to repair iTunes to normal.
Use this fix when:
- iTunes freezes, crashes, or cannot detect the iPhone reliably,
- Apple Devices or iTunes shows connection or restore errors,
- the device disconnects even with a stable cable,
- other iTunes errors appear together with error 2009, or
- another computer can update or restore the same iPhone.
- Step 1. Install and launch Dr.Fone on your Windows PC.
- Step 2. Open System Repair, choose iPhone, then select iTunes Repair.

- Step 3. Choose the repair option that matches your issue, such as iTunes connection issues or iTunes errors.
- Step 4. Click Repair and wait while Dr.Fone checks and repairs the iTunes components.
- Step 5. If the standard iTunes repair does not resolve the problem, use Advanced Repair from the result screen.
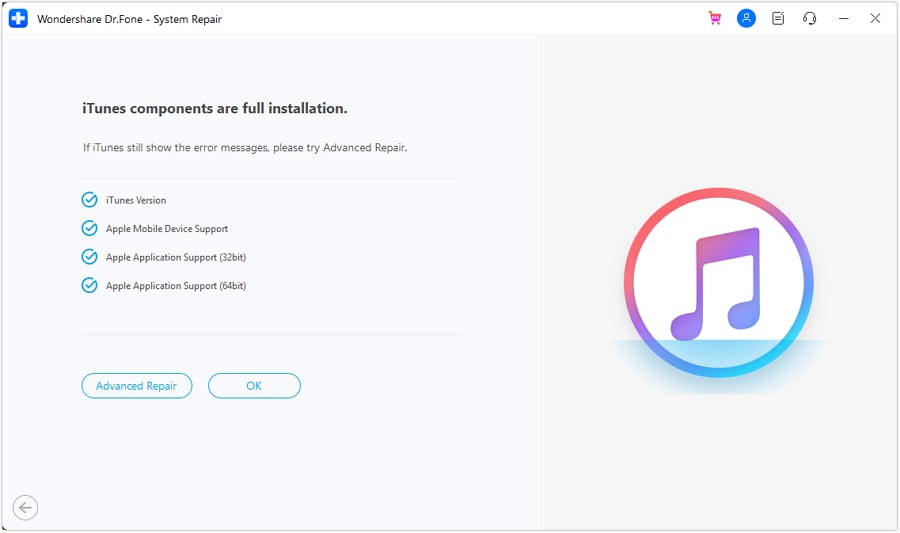
After the repair, restart the computer, reconnect the iPhone directly to a USB port, and try the update or restore again.
Fix 6. Check security software, VPN, and firewall settings
Security software can interrupt the connection between your iPhone and Apple Devices or iTunes. Before disabling protection, update the security app and restart the computer.
Then check whether your antivirus, firewall, VPN, proxy, or device-management software is blocking Apple software, iTunes components, USB drivers, or firmware downloads. If you temporarily turn off security software for testing, turn it back on after the restore attempt.
If your organization manages the computer, use a personal computer or another trusted network instead of changing managed security settings.
Fix 7. Try another computer or contact Apple Support
If error 2009 continues after you try another Apple-certified cable, another USB port, updated Apple software, and another computer, the issue may involve hardware or a deeper device-side failure.
Stop repeating restore attempts if the iPhone disconnects constantly, gets hot, shows signs of liquid damage, or fails on several computers. Contact Apple Support or an authorized service provider so the device and cable connection can be checked safely.
FAQs
 Q1. What does error 2009 mean on iPhone?Q2. How do I fix "iPhone could not be restored error 2009" without losing data?Q3. Can iPad error 2009 be fixed the same way?Q4. Why does my iPhone 12 Pro Max show error 2009?Q5. What is Apple Devices error 2009 on Windows?Q6. Does Dr.Fone fix iTunes error 2009?
iPhone error 2009 is usually a restore or update connection problem, not a reason to erase the device immediately. Start with the USB cable, port, computer, and Apple software version. If the device needs Recovery Mode, choose Update before Restore. If the restore still fails, use Dr.Fone Standard Repair to repair iOS without data loss first, or Dr.Fone iTunes Repair when the Windows iTunes environment is the problem.


iPhone Errors
- Errors 0 ... 100
- 1. iPhone Error 6
- 2. iPhone/iTunes Error 9
- 3. iPhone Error 10
- 4. iPhone/iTunes Error 21
- 5. iPhone Error 35
- 6. iTunes Error 40 on iPhone/iPad
- 7. iPhone Error 47
- 8. iPhone Error 69
- 9. iPhone Error 75
- 10. iPhone Error 78
- Errors 1xxx
- 1. iPhone Error 1009
- 2. iPhone Error 1015
- 3. iPhone/iTunes Error 1100
- 4. iPhone Error 1110
- 5. iPhone Error 1667
- Errors 2xxx
- Errors 3xxx
- 1. iTunes Error 3004
- 2. iTunes Error 3014
- 3. iTunes/iPhone Error 3194
- 4. iPhone Error 3503
- 5. iPhone/iTunes Error 3600
- Errors 4xxx
- Other iPhone Errors
- 1. iPhone Error 7005
- 2. iPhone/iTunes Error 9006
- 3. iPhone Error 0xe8000015
- 4. iPhone Cellular Update Failed Error
- 5. iPhone Activation Error
- 6. iPhone SSL Error
- Other iPhone Issues
- ● Manage/transfer/recover data
- ● Unlock screen/activate/FRP lock
- ● Fix most iOS and Android issues
- Free Download Free Download Free Download




Alice MJ
staff Editor
Generally rated4.5(105participated)