
iPhone Showing Cellular Update Failed Error? Get a Solution!

Feb 11, 2026 • Filed to: Phone Repair Solutions • Proven solutions
Many iPhone users have encountered the “Cellular Update Failed” error after installing the iOS 26 Beta update. While the update completes successfully, the device may suddenly show no service or prevent access to cellular networks. This issue is especially common on older devices or during beta installations. Although Apple has resolved similar bugs in the past through firmware patches, not all users find immediate relief—prompting the need for quick fixes and workarounds.
If you’re facing the “Cellular Update Failed” issue after installing the iOS 26 Beta update, you’re not alone. This guide covers everything you need to know—what causes the error, how it affects your iPhone, and the most effective ways to fix it quickly.
- Part 1: About iPhone Cellular Update Failed Error
- What is a "Cellular Update Failed" Error on your iPhone?
- Why Does My iPhone Says Cellular Update Failed?
- Part 2: How to Fix Cellular Update Failed on iPhone?
- Cellular Update Failed on iOS 26 Beta
- Recommended Methods for Other iPhones
- The Most Effective Way to Fix iPhone Cellular Update Failed (Avoid Data Loss) with Dr.Fone - System Repair
- Part 3: FAQs About Cellular on iPhone
Part 1: About iPhone Cellular Update Failed Error
First, let’s break down what the “Cellular Update Failed” error means and why it may appear after the iOS 26 Beta update. Understanding the root causes can help you troubleshoot the issue effectively and restore your iPhone’s network functionality.
1. What is a "Cellular Update Failed" Error on your iPhone?
The “Cellular Update Failed” error commonly appears after installing the iOS 26 Beta update, causing your iPhone to lose cellular signal completely. When this happens, you can't make calls, send texts, or access mobile data—effectively cutting off all network functions.
The iOS update proved quite costly to them, and they were unable to utilize one of the major compartments of having a smartphone device. Thus, the error "Cellular Update Failed" started appearing on their iPhone screens. This can be quite troublesome for many iPhone users; therefore, it needs to be resolved.

2. Why Does My iPhone Says Cellular Update Failed?
Although you might have updated your iOS and started facing this issue on your device, it never really is the case. When the error was reported, it was discovered that it happened because of hardware anomalies and faults. Though it does relate to updating the device to the latest iOS version, at times, the software update is not fully covered.
In many cases, the “Cellular Update Failed” error after installing the iOS 26 Beta update may stem from a combination of software glitches and underlying hardware issues. While some users find relief by reinstalling or updating iOS again, others may need deeper troubleshooting or even professional diagnostics. Understanding whether the cause is software-related or hardware-based is key to applying the right fix.
Part 2: How to Fix Cellular Update Failed on iPhone?
Now that you know the main causes of the “Cellular Update Failed” error on your iPhone after the iOS 26 Beta update, it’s time to explore effective fixes. We’ll dive deep into practical solutions to help you resolve the issue and choose the best approach for your device.
1. Cellular Update Failed on iOS 26 Beta
When the “Cellular Update Failed” error surfaced, Apple identified it as a hardware-related issue affecting certain devices. While the original fix targeted specific older models, the recent iOS 26 Beta update has brought similar challenges to a broader range of iPhones. Apple continues to address these issues through software updates and support programs to help affected users restore cellular functionality.
2. Recommended Methods for Other iPhones
What if you have another iPhone model and face the same iOS update failure mentioned above? Under such insights, resolving this problem through Apple Support sounds expensive and time-taking. We've highlighted some remedies that can prove helpful in resolving cellular errors on your iPhone. You should definitely try out these methods if you have an iPhone 8 or above.
Solution 1: Force Restart iPhone
Cellular issues with iPhones can be temporary and easily resolvable. Usually, glitches while updating or using iPhone can cause such errors, which can be pretty troublesome. If you have no knowledge about dealing with such errors, this can prolong quite much. However, the first thing that you should try is to force restart your iPhone. Rather than putting the focus on your device's settings, you should consider doing this:
For iPhone 8 and Later iPhones
Step 1: You must press and leave the "Volume Up" button, followed by the "Volume Down" button, in the exact chronology.
Step 2: Next, press and hold the "Power" button on the side until the Apple logo appears on the screen.
For iPhone 7 and 7 Plus
Step 1: Press and hold the "Volume Down" and "Power" buttons on the side of your iPhone.
Step 2: Keep holding until you see the Apple logo screen on your iPhone, which depicts the completion of force restarting the iPhone.
For iPhone 6 and Earlier iPhones
Step 1: Since these iPhones have the Home button, hold the "Home" and "Power" buttons on the top of the device.
Step 2: Make sure to keep holding the buttons until the Apple logo appears on the device.

Solution 2: Check for a Carrier Settings Update
Cellular carrier updates can also be a solution to the iPhone "Cellular Update Failed" error. The process is quite simple to execute, which can be understood with the help of the following details:
Step 1: Open the "Settings" of your iPhone and redirect to the "General" settings in the list. Lead to the next window and select the option of "About" to open the details of your iPhone.

Step 2: If any update is available, you will immediately receive a pop-up showing the option of updating the Carrier Settings Update. Select "Update" to successfully update carrier settings and resolve the existing problem.

Solution 3: Turn Airplane Mode On and Off on iPhone
Another quick solution for such a condition is to turn your Airplane mode on and off. Practicing this usually refreshes the network settings and resolves all cellular issues with your iPhone. To perform this, you must follow this simple guideline:
Step 1: Launch the "Settings" of your iPhone and find the option of "Airplane Mode."
Step 2: You will have to turn on the toggle against the option and turn it off again after a few seconds.

Solution 4: Turn Off Wi-Fi Calling and Voice LTE
As a regular cellular network user, you might have to turn off the "Wi-Fi Calling" and "Voice LTE" options on your iPhone. Performing these actions might resume your cellular network on the device. Since you are looking for a guide for it, find out your answers in the steps provided below:
Step 1: Proceed into your iPhone's "Settings" and look for the "Phone" option in the list.
Step 2: On the next screen, scroll down to locate the "Wi-Fi Calling" option and proceed next. Turn off the toggle showing the option of "Wi-Fi Calling on This iPhone."

Step 3: Lead back to the previous section and find the "Cellular Data Options" in the options. As you lead next, tap on the "Enable LTE" option and select the "Data Only" option to disable the Voice LTE feature.

Solution 5: Reinsert SIM Card into iPhone
Since the problem involves the SIM card that provides the cellular network, you should consider reinserting the SIM card into your iPhone again. A temporary glitch might have caused a problem, which requires you to reinsert the card again. Performing this might resolve all concerns related to the "Cellular Update Failed" error on your iPhone.

Solution 6: Reset Network Settings on iPhone
If the problem persists and you are not able to resolve the network issues with your iPhone, the only best thing to do is to reset the network settings on the device. For that, you will have to look into the details provided below:
Step 1: Access the "Settings" of your iPhone and locate the "General" settings option in the list.

Step 2: Proceed to find the "Transfer or Reset iPhone" option by scrolling down and leading next to select "Reset" from the bottom of the screen.

Step 3: On the pop-up menu, tap "Reset Network Settings" and follow the on-screen instructions to reset all network settings on your iPhone.

Solution 7: Update iPhone System
As stated, there is one prominent chance of having issues with the iOS update itself. Although you have executed updating your iPhone to the latest version, it is not always the case. You should always check out the updates on your iPhone if such problems as the "Cellular Update Failed" error occurs. Let's find out how you can update your iPhone effectively:
Step 1: Launch the "Settings" on the iPhone and find the "General" tab by scrolling down the list.

Step 2: Look for the "Software Update" option on the next screen to access the next window that detects any updates.

Step 3: If there are updates to be installed, select the "Download and Install" option and execute successfully.

3. The Most Effective Way to Fix iPhone Cellular Update Failed (Avoid Data Loss) with Dr.Fone - System Repair
When faced with the “Cellular Update Failed” error after the iOS 26 Beta update, many users worry about losing data while fixing the issue. Luckily, Dr.Fone - System Repair (iOS) offers a reliable solution to fix various iPhone errors—including Cellular Update Failed, Error 4013, and Error 75—without risking your data.
Key Features of Dr.Fone - System Repair (iOS)
While you recognize Dr.Fone - System Repair (iOS) as the best option for repairing system issues on iOS devices, some prominent things make the tool the best in the market. We have highlighted these points for you below for a better understanding.
- It repairs more than 150 iOS system errors without issues while saving all the device's data.
- You can consider upgrading and downgrading your iPhone with the help of this tool without requiring iTunes.
- Supports all major iPhone models, including iPhone 14 and iOS 16.
The Best Solution for iOS 26 Beta Issues
Tips: Dr.Fone - System Repair now enables zero-data-loss solutions for iOS 26 Beta crashes (boot loops/black screen/failed updates) and one-click downgrades to signed versions (e.g. iOS 18.5), completing in 10 minutes. Supports all iPhone models, bypassing iTunes factory reset risks. Downgrades require open Apple signing windows (real-time tool verification). Pre-export critical data when reverting from iOS 26.
Step-by-Step Guide on How to Resolve the "Cellular Update Failed" Error using Dr.Fone
As you have understood why Dr.Fone - System Repair (iOS) stands among the best, we will now look into how you can resolve iOS errors easily:
Step 1: Launch Dr.Fone and Access System Repair
You must download and install the latest version of Dr.Fone on your computer. Proceed to access "System Repair" from the list of options and select "iOS" as the nature of your device.

Step 2: Select Error and Mode of Repair
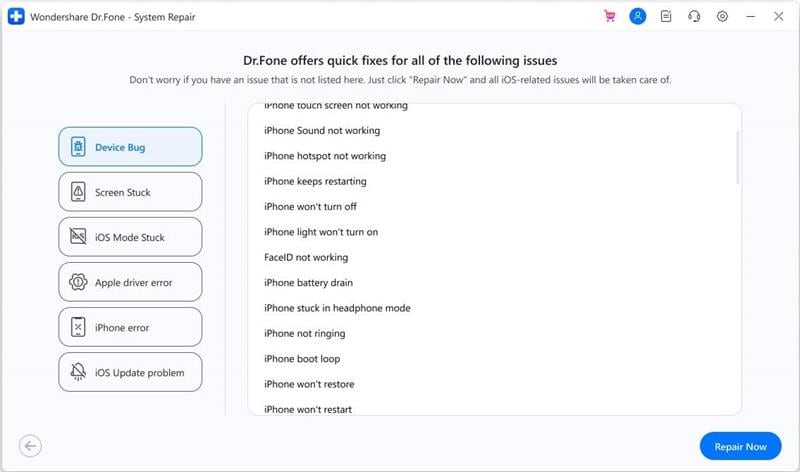
Next, you will have to select "iOS Repair" to perform the system repair on your device. In the next window, you will have to find and choose the specific error you have been facing. If you are unable to find it, no worries, as Dr.Fone automatically searches for the error after you click "Repair Now." Following this, you will have to define "Standard Mode" as the repairing mode.
Step 3: Put iPhone in Recovery Mode
You will then have to put the iPhone into Recovery Mode, for which you must execute the process and select the "Enter Recovery Mode" option. If you cannot perform this due to any particular issue, click the "Guide to Recovery Mode" button and follow the on-screen instructions to lead your device to Recovery Mode.

Step 4: Select iOS Firmware and Download
Once done, Dr.Fone automatically detects the iPhone in Recovery Mode and proceeds to display the iOS firmware in the next window. Select any of them by clicking on the "Download" button.

Step 5: Verify and Install iOS Firmware
The iOS firmware downloads and is verified by the platform. Once done, click the "Repair Now" button to install the iOS firmware on your device.

Part 3: FAQs About Cellular on iPhone
1. What is cellular on iPhone?
Cellular on iPhone is defined as the network service that connects you to the internet when it is not connected to a Wi-Fi network. It is an alternative that provides you access to the internet.
2. Is it better to use Wi-Fi or cellular?
It is considered better to use a Wi-Fi network for your iPhone as it does not require as much battery as a cellular network.
3. What are the steps to update the carrier settings on an iPhone?
If you wish to update your carrier settings, you must open "Settings" and lead to the "General" settings of your iPhone. There, open the "About" section and wait to observe the automatic pop-up of updating the Carrier Settings on your iPhone.
4. How to update your iPhone over a cellular network?
To update your iPhone on the cellular network, you must ensure the connection first. Then, proceed to "Settings," open the "General" section and select the "Software Update" option. As the iPhone checks for an update and shows one, select "Download and Install." A prompt appears that takes confirmation of installing the update using the cellular network. Accept the prompt and let the process conclude.
Conclusion
This guide has outlined the best solutions for fixing the “Cellular Update Failed” error after the iOS 26 Beta update. From built-in fixes to advanced tools, we've covered proven methods to restore your iPhone’s cellular function. Among them, Dr.Fone - System Repair (iOS) stands out as a reliable, data-safe solution for resolving iOS system issues without hassle.


Upgrade & Downgrade
- iOS Beta Install
- 1. Download iOS Beta Profile
- 2. Download the iOS 13 Beta
- 3. iOS 16 Beta Download
- 4. Uninstall iOS Beta
- 5. Install iPhone Beta Profile
- 6. Install Mac Beta Profile
- 7. Install iOS 15 Beta Profile
- 8. Upgrade iPad to iOS 14
- iOS News
- 1. Update iPhone 4s to iOS 9
- 2. Cheaper iPhone
- 3. Customize iPhone Home Screen
- 4. Know About iOS 15 Lock Screen
- 5. Add Lyrics to Song on Apple Music
- 6. Current iOS Version
- 7. Current iOS for iPad
- 8. iOS 19 and the iOS 26 Rumor
- iPhone Downgrade Tips
- 1. Downgrade iOS Like a Pro
- 2. Roll Back to an Older iOS Version
- 3. Downgrade to iOS 15
- 4. Install Developer Profile
- 5. Downgrade iOS without iTunes
- 6. Downgrade to iOS 14
- 7. Download and Install the iOS 16
- iPhone Update Tips
- 1. iPhone & iPad Security Updates
- 2. Undo an Update on iPhone
- 3. Update iPhone with/without iTunes
- 4. Fix iPhone Checking for Update Stuck
- 5. Fix iPad Software Update Failed
- 6. Fix iPhone Stuck On Update
- 7. Fix iPhone Won't Update
- 8. Fix Update Server Not Be Contacted
- 9. Fix iPhone Stuck on Update Requested
- 10. Resolve iPhone Cellular
- 11. Resolve iPhone Error 1110
- 12. Fix iPhone Frozen
- iOS 11/12 Problems
- 1. Fix iPhone Stuck on Waiting
- 2. Fix iPhone Can't Make Calls
- 3. Fix iPhone Stuck on Logo
- 4. Fix Photos Disappeared from iPhone
- 5. Fix iPhone Keeps Freezing
- iOS 13/14 Problems
- 1. Fix CarPlay Not Connecting
- 2. Fix Resolve Apps Won't Open
- 3. Fix Song/Playlist Missing
- 4. Fix iPhone Asking for Passcode
- 5. Fix Map Voice Navigation Won't Work
- 6. Fix iMessage Not Working
- 7. Recover Deleted Data on iOS 14
- 8. Recover Disappeared Notes on iOS 14
- iOS 15 Problems
- iOS 16 Problems
- 1. Fix iPhone Wi-Fi Not Working
- 2. Fix iOS 16 Battery Drain Issues
- 3. Fix Screen Mirroring Not Working
- 4. Fix Apple CarPlay is Not Supported
- 5. Fix iPhone Screen Not Responding
- 6. Fix iPhone Apps Keep Crashing
- 7. Fix Call Failed iPhone Issue
- 8. Fix iPhone Stuck On Apple Logo
- 9. Counter iPhone Heating Problems
- 10. Fix iPhone Stuck in Boot Loop
- 11. Fix iPhone Bluetooth Not Working
- iOS 17 Problems
- 1. iPhone Freezing After Update
- 2. iOS 17 Wallpapers Blurry at Top
- 3. Fix iPhone Charging Slow
- 4. Enable Live Activities iOS 17
- 5. Fix iOS 17 Apps Crashing
- 6. Fix iPhone Stuck on Verifying Update
- 7. Overheating after 17 Update
- 8. Fix iOS 17 Keyboard Bug
- 9. Fix iOS 17 Green Screen Issue
- 10. iOS 17 Bugs & Fixes
- 11. No iOS 17 Update on Your iPhone
- 12. iOS 17 Unable to Download
- 13. Missing contacts with iOS 17 update
- iOS 18 Problems
- 1. iOS 18 Black Screen
- 2. iPadOS 18 Math Notes Issues
- 3. iPhone Email Not Working
- 4. iPhone Contacts Disappeared
- 5. iPhone Stuck in Restore Mode
- 6. iPhone Stuck on Preparing Update
- 7. iPhone Flashlight Not Working
- 8. iPhone Bluetooth Issues
- 9. Stuck on Terms and Conditions
- 10. Frozen iPhone iOS 18
- 11. iOS 18 Beta Boot Loop Issue
- 12. iOS 18 Beta Overheating
- 13. iOS 18 Beta Volume Bug
- iOS 26 Topics


James Davis
staff Editor
Generally rated4.5(105participated)