100% Security Verified | No Subscription Required | No Malware
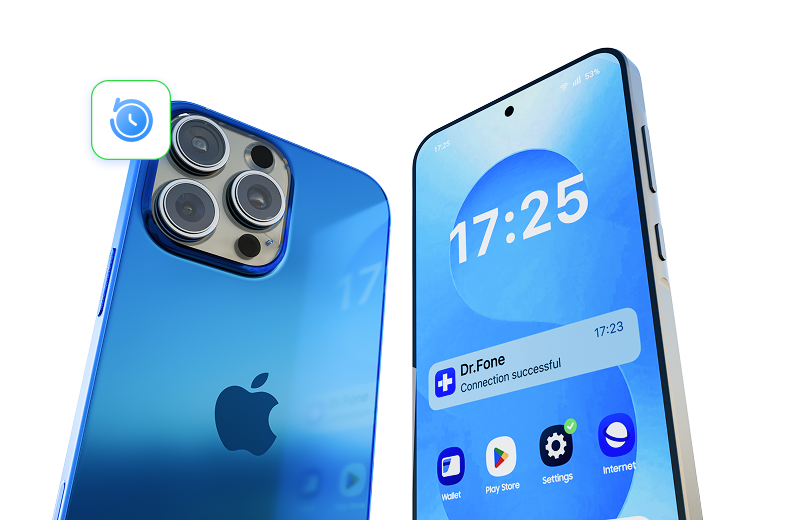

 :
: 
 ChatGPT
 Perplexity
 Gemini
 Claude
 Grok
Grok

I forgot the passcode to my iPod Touch and am locked out. I know I have to reset it, but I have thousands of photos and notes on it that I haven't backed up recently. Is there any way to recover data from an iPod Touch before unlocking or resetting it?
Apple Community User
Getting locked out of an iPod Touch is a common issue, especially if you have forgotten your screen lock password. When this happens, the standard procedure to unlock the device involves resetting it as a new device. However, this process typically wipes all existing files, leaving many users anxious about permanent data loss.
If you find yourself in this frustrating situation, do not panic. It is entirely possible to retrieve your valuable files before performing a factory reset. In this comprehensive 2026 guide, we will explore the best methods to securely recover data from your iPod Touch before unlocking it, ensuring that your photos, music, and documents remain safe.
In this article
Part 1. 3 Ways to Recover Data Before Unlocking iPod Touch
When dealing with a locked iPod Touch, you essentially have three main strategies to recover your data before you proceed to safely unlock the device. Depending on your backup habits and the current state of your device, you can choose the method that best fits your needs. Let's break down these three approaches in detail.
1-1. Sync the Data with iTunes Before Unlocking iPod Touch
If you have previously synced your iPod Touch with iTunes on a trusted computer, you might be able to back up your remaining data before resetting the lock screen. Since the computer is already trusted, iTunes may not require you to unlock the iPod Touch to initiate a sync. Follow these simple steps to sync content on your iPod Touch with your computer.
-
Step 1 Connect your iPod Touch to your computer
Launch the iTunes program on your PC or Mac. Connect the locked iPod Touch to your computer using a certified Apple USB cable. Once recognized, you should see the iPod Touch appear as a small device icon in the upper-left corner of the iTunes interface.

-
Step 2 Access the sync settings
Click on this device icon. Then, look under the Settings section on the left part of the window. Here, you will find a list of content types you can sync, such as Music, Movies, TV Shows, and Photos.

-
Step 3 Customize your content preferences
Click on the specific content type that you want to sync. You should then see additional options and checkboxes on the right panel to customize your exact sync settings for that media category.
-
Step 4 Apply and start the sync process
Repeat this selection process for each content type that you want to sync. Finally, click Apply at the bottom right corner to save your preferences. If the syncing process doesn't start automatically, manually click Sync to back up your iPod Touch data.
1-2. Recover Data from iCloud Before Unlocking iPod Touch
If you have forgotten your passcode and never synced with iTunes, your next best option relies on iCloud. In this scenario, you first need to erase the device to bypass the lock screen, and then recover the data onto the device by restoring from an existing iCloud Backup. Here is how to do it safely.
-
Step 1 Log into iCloud Find My
From another computer or mobile device, open a web browser and go to https://www.icloud.com/. Find the Find iPhone section and sign in securely with your Apple ID and password.

-
Step 2 Select your locked iPod Touch
Click on the All Devices dropdown menu at the top of the screen. From the list of connected Apple devices, select the locked iPod Touch you want to erase.
-
Step 3 Erase the device to remove the passcode
Click the Erase iPod Touch button. This action will remotely wipe the device, clearing its forgotten passcode in the process. Your iPod Touch will then restart and return to the initial setup screen.
-
Step 4 Restore data from your iCloud backup
Turn on the iPod and follow the prompts on the setup screen. Once you reach the Apps & Data screen, choose the option that says Restore from iCloud Backup.

-
Step 5 Complete the data recovery
Sign in with your Apple ID once more and select the most recent or relevant backup archive. Ensure that your device stays connected to a stable Wi-Fi network to successfully download and complete the data recovery process.

1-3. The Best Way to Recover Data from Your Locked iPod Touch
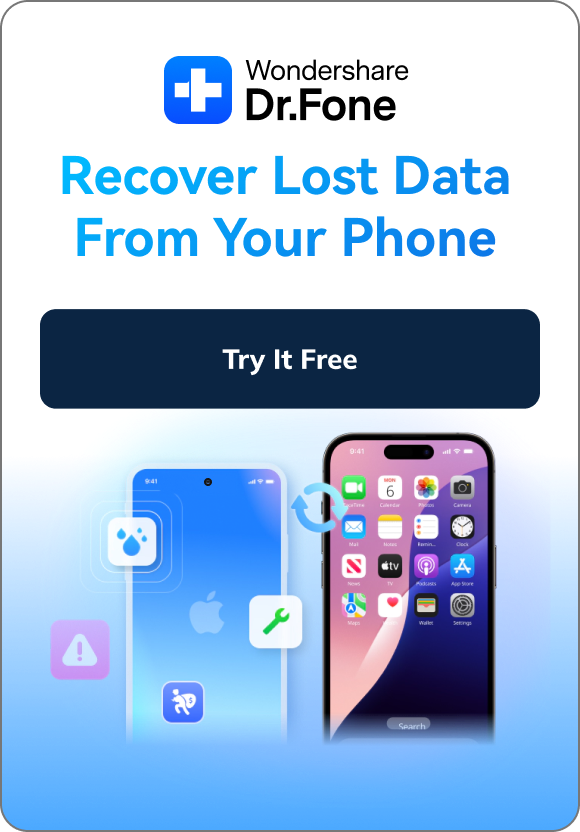
While you can certainly use iCloud or sync with iTunes to recover your data before unlocking your device, these methods often require prerequisites like previous syncs or up-to-date cloud backups. By far the easiest, quickest, and most reliable way to recover data from your locked iPod Touch without strictly depending on prior backups is to use a professional data recovery tool. Dr.Fone - iPhone Data Recovery is highly recommended for this purpose.
This powerful recovery program gives you three flexible ways to recover your data and can even be used to recover files from your device if it has been physically damaged or stuck in a boot loop.
 Recovers data after deletion, crashes, or device damage.
- Supports photos, messages, contacts, WhatsApp, and more.
- Supports all major iPhone, iPad, and iPod models.
- Preview and recover only what you need.

Let's take a closer look at how you can use Dr.Fone to successfully recover data from a locked iPod Touch under various scenarios.
Option 1: Recover Directly from the iPod
If you don't have an iTunes or iCloud backup, your best bet is to extract data directly from the device's internal memory.
-
Step 1 Connect your iPod Touch and select Recovery Mode
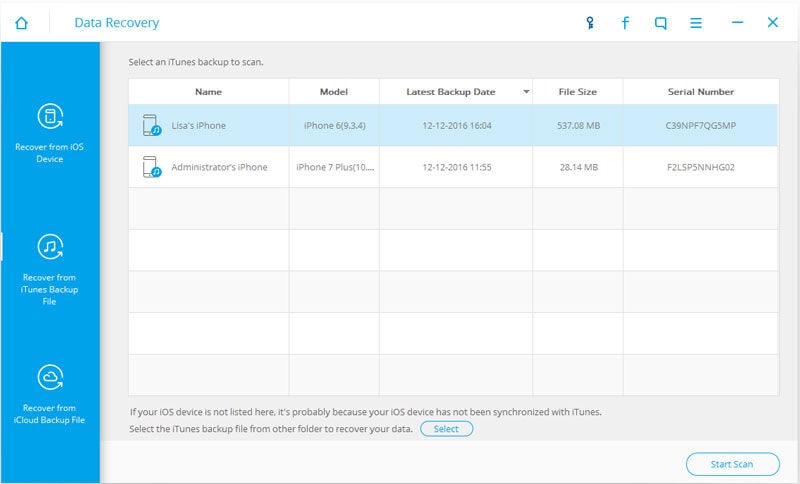
First, download and launch the Dr.Fone software on your computer. Select the Data Recovery module from the main interface. Use a reliable factory USB cable to connect the iPod Touch to your PC or Mac. It will take a few seconds for the software to detect your iPod device. Once recognized, select the Recover from iOS Device tab on the left.
 Note: If you have not backed up the data before and the device is severely locked down, it might be challenging to scan certain encrypted media content. However, Dr.Fone maximizes your chances of retrieving available fragments.
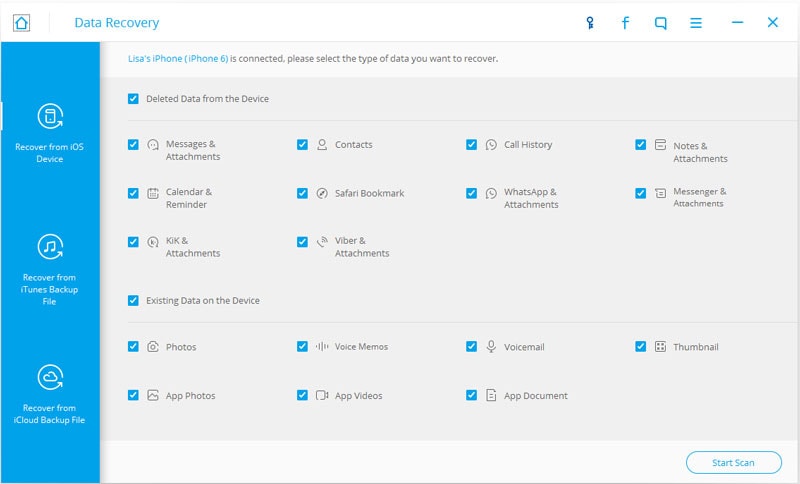
-
Step 2 Scan your device for lost data
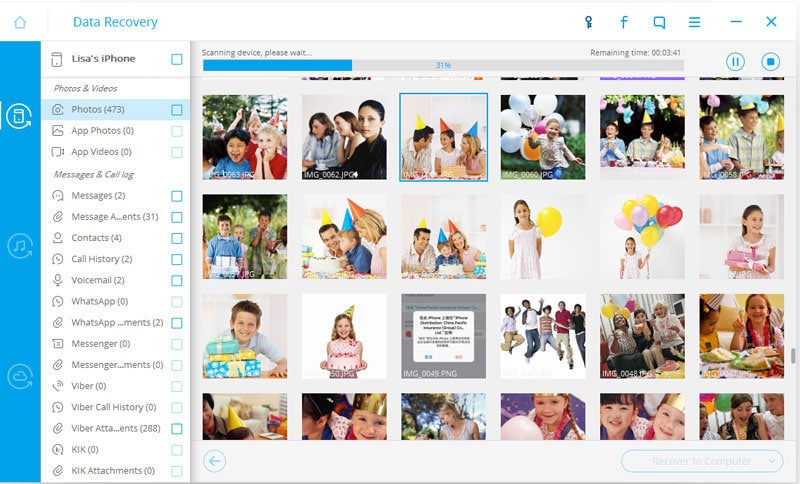
Select the file types you wish to retrieve and click Start Scan. The program will begin a deep analysis of your device's storage. The scanning process may take a few minutes depending on the total amount of data stored on your iPod Touch. If you see the specific files you are looking for, you can click on the Pause button to stop the process early.
-
Step 3 Preview and export the recovered data
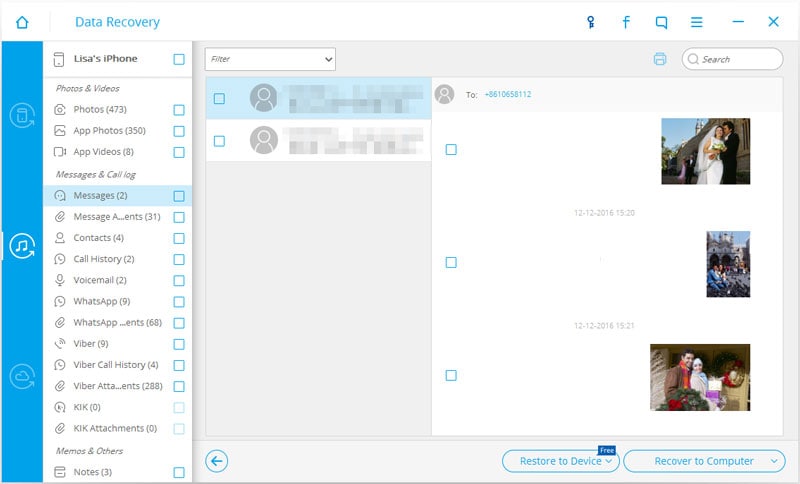
Once the scanning is completed, all found items such as photos, messages, app data, contacts, and call history will be categorized on the left sidebar, as the following interface shows. You can preview these items in detail. Select the data you would like to keep and then click on Recover to Computer or Recover to Device to safely save them.

Option 2: Recover from iTunes Backup File
If you suspect that your PC contains an old iTunes backup of your iPod Touch, you can extract files specifically from that backup without overwriting your current device.
-
Step 1 Select the iTunes recovery mode
Launch Dr.Fone on your computer and navigate to the Data Recovery module. This time, click on Recover from iTunes Backup File on the left panel. The program will automatically scan and detect all the iTunes backup files currently stored on your computer.
-
Step 2 Extract and save your preferred files
Review the list and choose a recent iTunes backup file, or the one that most likely contains the data you want to recover. Click Start Scan to unpack the backup. Once the scan is complete, preview and select the exact files you want to retrieve, then click Recover to Device or Recover to Computer.


Option 3: Recover from iCloud Backup File
If you had backed up to iCloud before getting locked out, you can also use Dr.Fone to selectively recover data from your iCloud backup files without having to erase the device first—something Apple's official method doesn't allow.
-
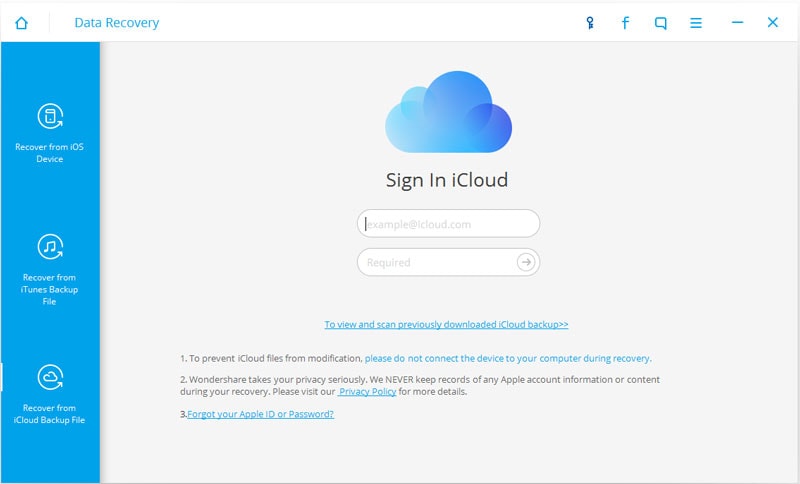
Step 1 Log into iCloud through Dr.Fone
Launch the data recovery program and select Recover from iCloud Sync File or Recover from iCloud Backup File. You will be prompted to safely sign in to your iCloud account.
-
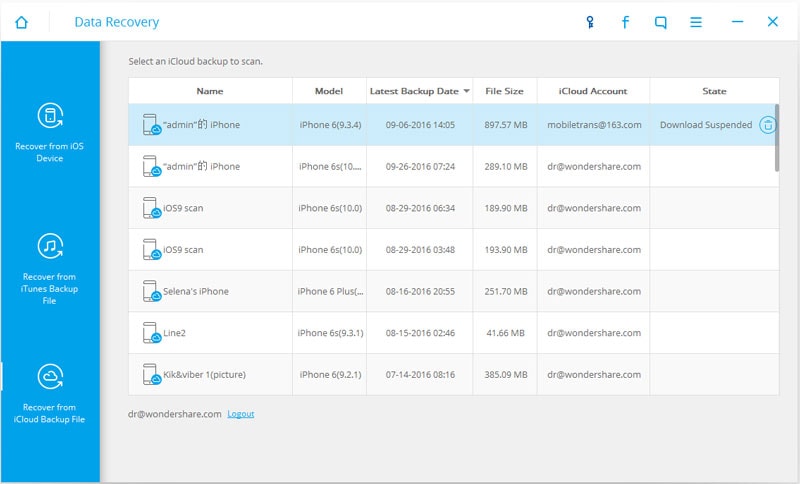
Step 2 Download the relevant iCloud backup
Browse through the list of available backups on your iCloud account. Select the backup archive containing the data you want to recover and then click on the Download button next to it.
-
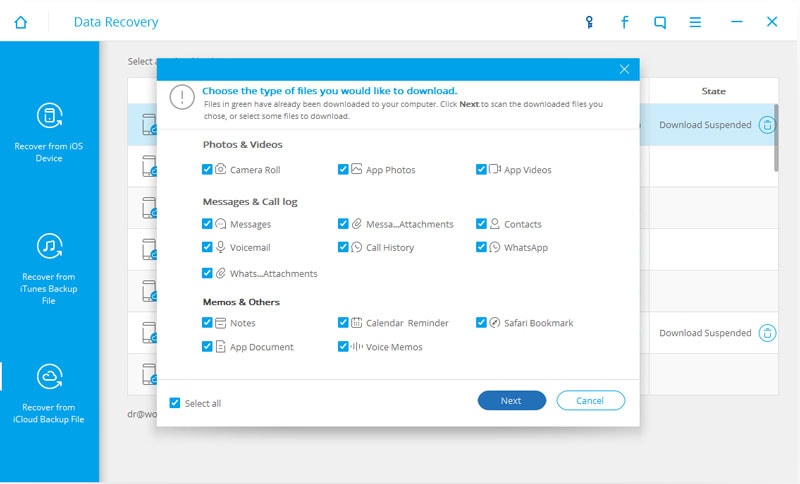
Step 3 Filter by file type
To speed up the download and extraction process, select the specific types of files you want to recover (such as Photos or Notes) and then click Next or Start Scan on the pop-up window.
-
Step 4 Finalize the iCloud data recovery
Once the download and scan are finished, preview the items. Finally, you can either choose Recover to Device or Recover to Computer to safely restore the data you need from the cloud.

The next time you get locked out of your iPod Touch, don't worry too much about permanent data loss. With the right tools and backup strategies, restoring your valuable memories is highly achievable.
Conclusion
Getting locked out of an iPod Touch does not automatically mean you must sacrifice all your precious photos, music, and documents. While resetting the device is necessary to remove the screen lock, you have reliable options to secure your data first. Whether you rely on a trusted iTunes sync, perform an iCloud restoration after erasing the device, or utilize powerful third-party software to bypass the usual limitations, the choice ultimately depends on your backup habits. For users who prefer a streamlined, flexible approach that minimizes the risk of overriding current data, utilizing a dedicated recovery tool remains the most efficient strategy to recover data before unlocking an iPod Touch.
FAQ
-
1. Will unlocking my iPod Touch erase all my current data?
Yes, if you have forgotten your passcode and need to unlock the iPod Touch by performing a reset, the process will wipe all data and settings on the device. That is why it is highly recommended to extract or back up your data using iTunes, iCloud, or a data recovery tool before initiating the factory reset. -
2. Can I recover data from a locked iPod Touch if I have never backed it up?
If you have never synced with iTunes or enabled iCloud backups, your options are severely limited once the device is locked. However, professional data recovery software may still be able to scan the device's internal storage and extract accessible fragments, although full recovery of encrypted data is not guaranteed without a prior backup. -
3. How do I put my iPod Touch in recovery mode to restore it?
To place an iPod Touch in recovery mode, connect it to a computer with iTunes or Finder open. For a 7th generation model, press and hold the Top button and Volume Down button simultaneously until the recovery mode screen appears. For 6th generation or older, hold the Top button and the Home button together until the screen shows the recovery mode prompt. -
4. Is it possible to bypass the iPod Touch lock screen without a computer?
If your iPod Touch is connected to Wi-Fi and has Find My enabled, you can erase and reset it remotely using another device by logging into iCloud.com or using the Find My app. However, to extract and save the data locally before erasing it, utilizing a computer with iTunes or data recovery software is typically required.
 Add Wondershare Dr.Fone as a preferred source on Google