Recover photos, messages, WhatsApp, and more — no backup
needed.
Recover photos, messages, WhatsApp, and more — no backup
needed.

 100% Security Verified | No Subscription Required | No Malware

 :
: 
 ChatGPT
 Perplexity
 Gemini
 Claude
 Grok
Grok
Accidents happen, and dropping your iPod Touch might leave you with a shattered screen, water damage, or a completely unresponsive system. If you are wondering how to recover data from a broken iPod Touch, you are certainly not alone. Whether your device suffered severe physical damage or a sudden system crash, losing access to your cherished photos, videos, contacts, and music can be incredibly frustrating.
Fortunately, as long as the internal storage remains intact or you have previously synced your device, retrieving your precious files is highly possible. In this updated 2026 guide, we will explore the most effective ways to extract and restore your data using professional tools like Dr.Fone - Data Recovery (iOS). This versatile software can also seamlessly recover data from broken iPhone models without any technical hassle. Let us look at how you can evaluate your situation and retrieve your data securely.
In this article
Part 1. How to Recover Data from a Broken iPod Touch
There are three primary ways to safely retrieve your files from a physically damaged or malfunctioning iPod Touch. The most direct method is scanning the device itself, which is a lifesaver if you have never created a backup. Alternatively, if your iPod is completely dead but was previously synced, you can extract your information from either an iTunes backup or an iCloud backup without interacting with the broken screen.
To execute any of these methods efficiently, utilizing specialized recovery software is highly recommended. Dr.Fone offers a unified solution that covers all three scenarios, allowing you to selectively preview specific files—like messages, photos, and contacts—before deciding what to restore.
 Recovers data after deletion, crashes, or device damage.
- Supports photos, messages, contacts, WhatsApp, and more.
- Supports all major iPhone, iPad, and iPod models.
- Preview and recover only what you need.

Part 2. Method 1: Retrieve Your Broken iPod Touch Data Directly
If you forgot to back up your device before the accident, do not panic. The direct scan method is designed for situations where your iPod Touch might have a broken screen or touch functionality but can still be successfully recognized by a computer. Keep in mind that certain fragmented media files like large videos might be slightly harder to recover directly, but text-based data and photos generally yield excellent success rates.
-
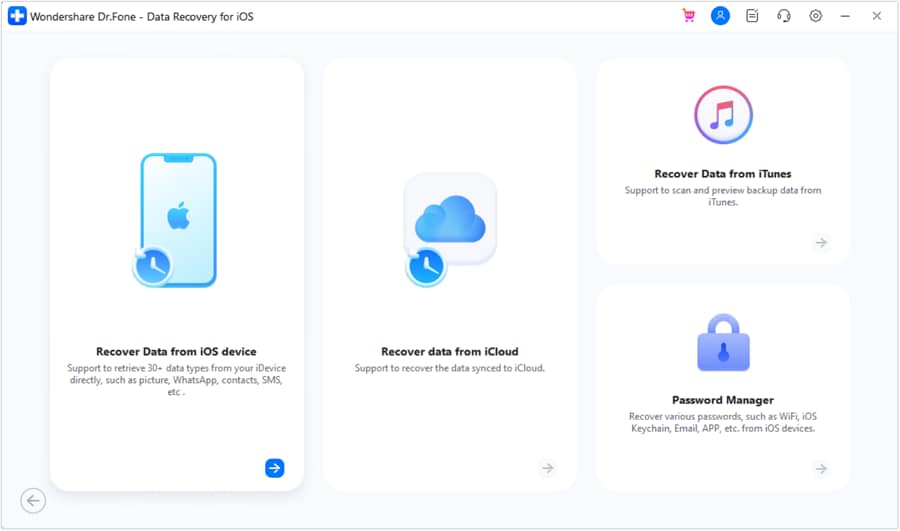
Step 1 Connect the Broken iPod and Select Recovery Mode
Begin by launching the recovery program on your computer. From the main interface, click on the Data Recovery option. Using a certified digital cable, connect your damaged iPod Touch to the computer. Once it is recognized, a new window will display; navigate to the Recover Data from iOS Device tab on the left panel.
-
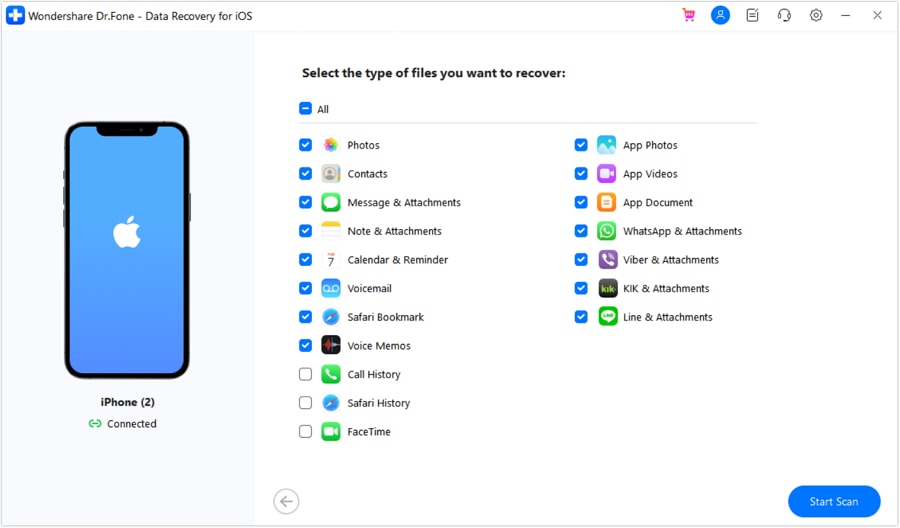
Step 2 Scan the iPod Touch for Lost Data
The software will immediately begin a deep scan of your iPod's internal storage. During this process, you will see a progress bar and a real-time preview of the files being discovered. Wait patiently until the scan finishes to ensure maximum data retrieval.
-
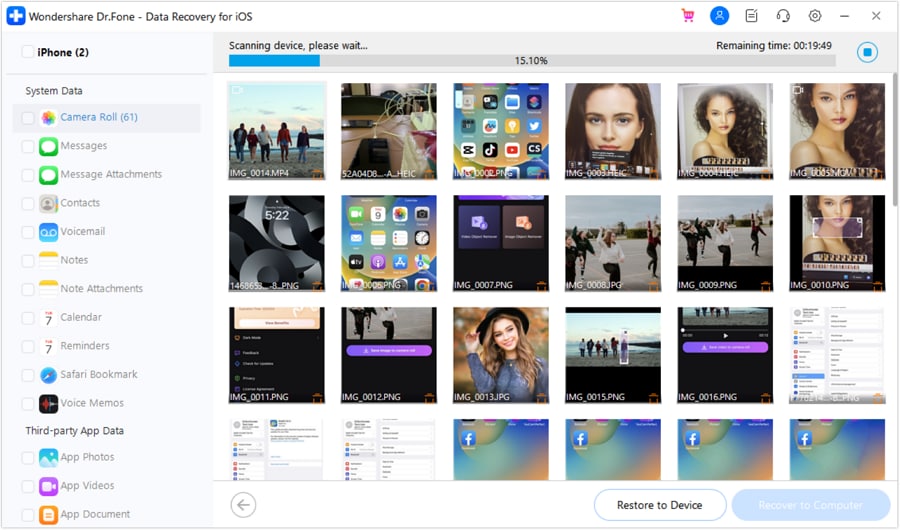
Step 3 Preview and Recover the Files
Once the scanning concludes, all found data will be neatly organized on the left sidebar into categories like photos, videos, contacts, messages, call history, and voice memos. You can check the quality of each file by previewing them individually. Select the checkboxes next to the crucial files you wish to keep, and click the Recover button to save them directly to your computer's hard drive in seconds.




Part 3. Method 2: Recover Broken iPod Touch Data from iTunes Backup
Sometimes, an iPod Touch is too severely damaged to be detected by a computer. If Dr.Fone cannot successfully establish a direct connection with your broken device, but you have regularly synced your data with iTunes in the past, you are in luck. You can effortlessly extract your files from an existing iTunes backup with just a few clicks.
-
Step 1 Choose the iTunes Backup Recovery Mode
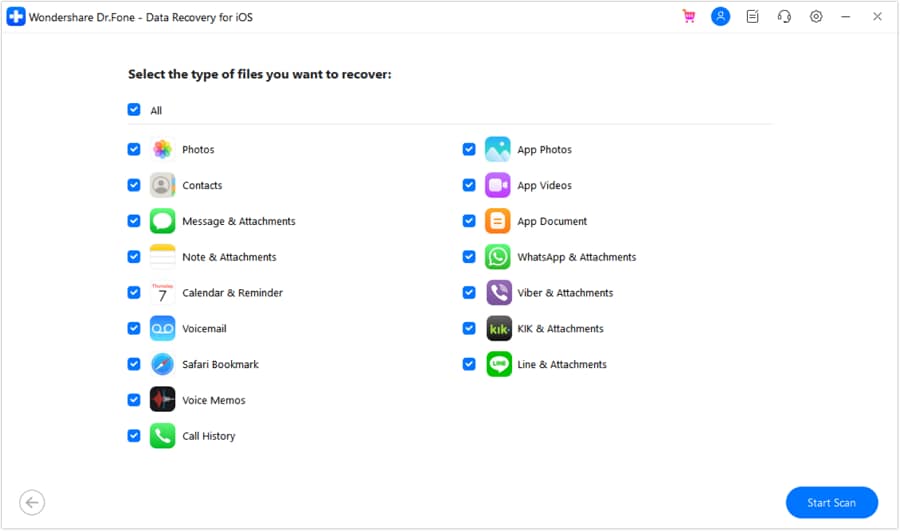
Launch the recovery tool and navigate to the Recover Data from iTunes option. Ensure that you do not connect your broken iPod to the computer during this step. The software will automatically read your local drive and display all the iTunes backup files currently stored on your system. Select the backup file belonging to your iPod Touch and click Start Scan.
-
Step 2 Wait for the Extraction Process
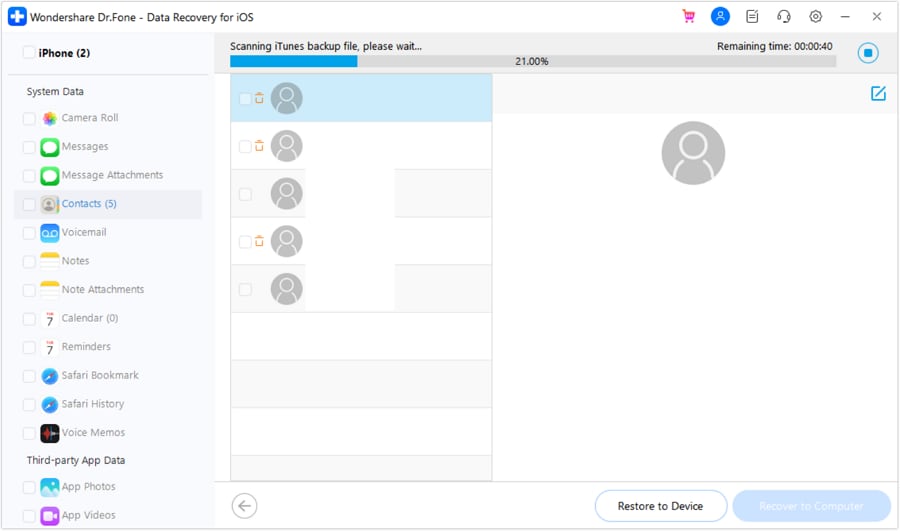
The program will now begin unpacking and extracting the contents hidden inside the unreadable iTunes backup file. Please be patient as it securely processes your stored information.
-
Step 3 Recover Backup Contents to Your Computer
After the scanning process is entirely completed, you will be able to read all the actual contents of your iPod. Browse through the organized tabs, select the files you want to retrieve, and then click Recover to Computer to safely export them to your local folders.
Part 4. Method 3: Extract Broken iPod Touch Data from iCloud Backup
If you primarily rely on wireless backups and have iCloud sync enabled, your files are securely stored on remote servers. Do not worry if your device is beyond repair; Dr.Fone can also assist you in extracting your broken iPod data directly from your iCloud account.
-
Step 1 Log in to Your iCloud Account
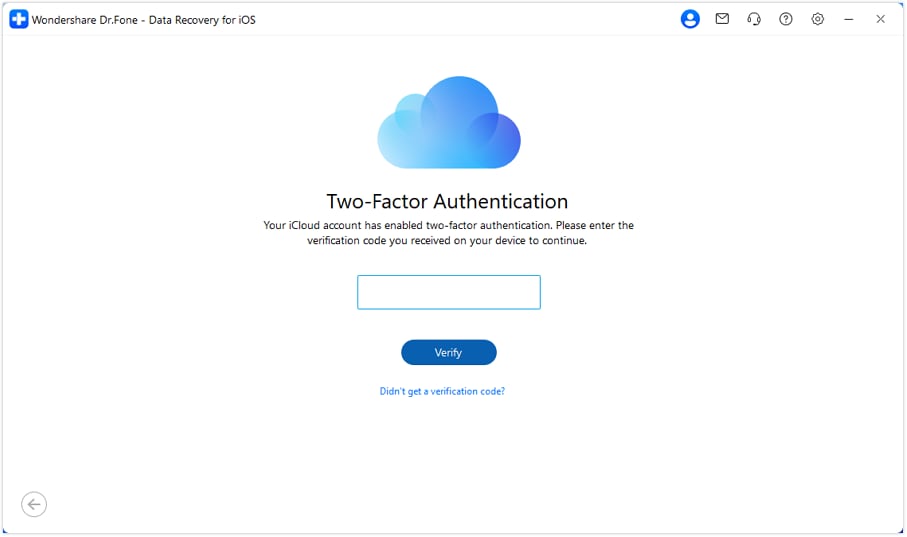
Open the program and select the Recover Data from iCloud option on the main dashboard. Keep your broken iPod disconnected from the computer. You will be prompted to enter your Apple ID credentials to log into your iCloud account safely.
-
Step 2 Download the Relevant iCloud Backup
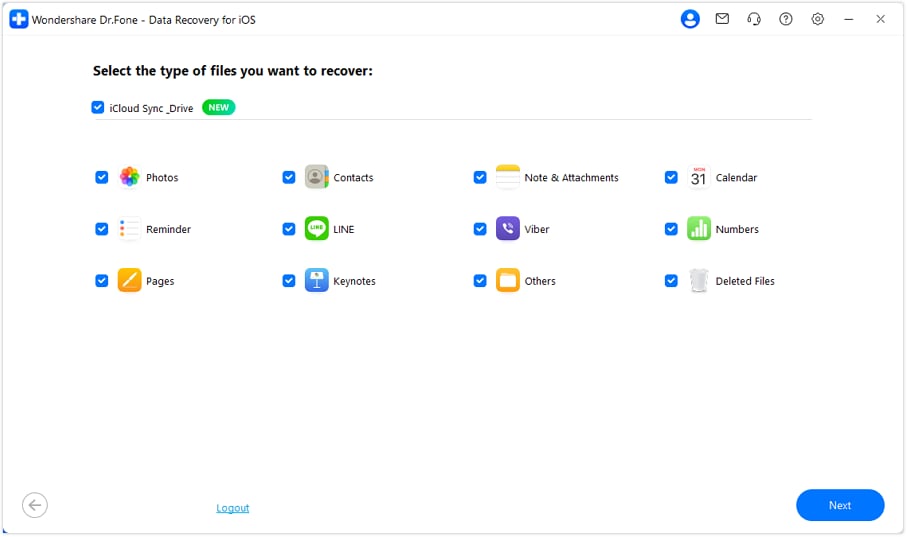
Once authenticated, a list of all available backup files linked to your iCloud account will appear. Identify the backup that corresponds to your damaged iPod Touch and click the Next button to begin downloading the backup file. This works identically to the iTunes method but pulls from the cloud.
-
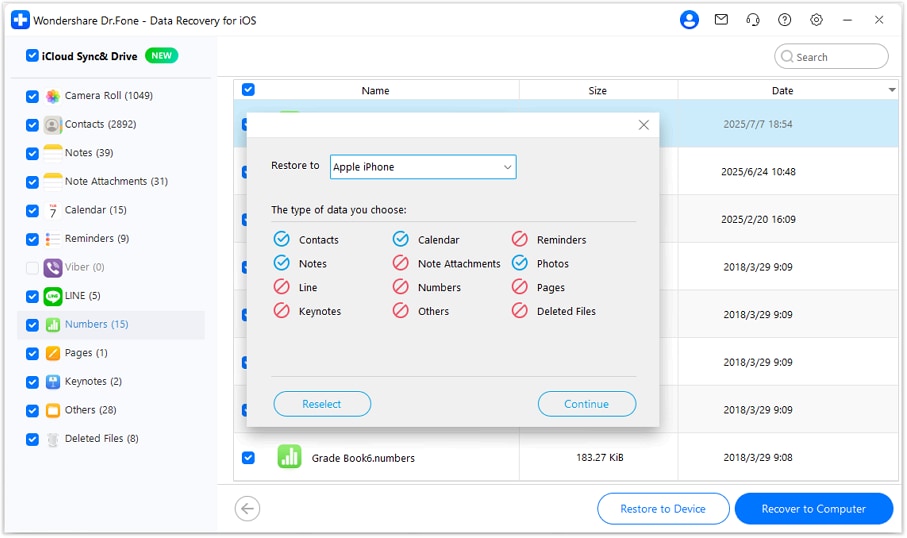
Step 3 Preview and Save Your Data
When the download is finished, the software will scan the data enclosed within your backup file. Once the scan is fully processed, review the sorted files, select the crucial contents you wish to retrieve, and confirm the recovery to securely restore them to your local PC.
Conclusion
Dealing with a shattered or malfunctioning iPod Touch and facing the fear of losing your precious digital memories can be incredibly stressful. However, utilizing powerful software drastically simplifies the retrieval process. Whether you need to directly scan the damaged hardware, extract information from a localized iTunes backup, or pull files seamlessly from iCloud, these methods provide a robust and reliable safety net. By taking immediate action and choosing the recovery option that best fits your situation, you can ensure that your important photos, contacts, and media remain entirely secure and accessible.
FAQ
-
1. Can I recover data if my iPod Touch screen is completely black and unresponsive?
Yes, you can still recover your data. If the internal motherboard is functional, you might be able to scan it directly using recovery software by connecting it to a computer. If the device cannot be recognized at all, your best alternative is to extract your data from an existing iTunes or iCloud backup. -
2. Does extracting data from an iTunes backup overwrite the current data on my other devices?
No, when using a specialized third-party data extractor tool, you are only reading and exporting the data from the backup file to your computer. It will not overwrite or affect the current data on your new iPhone or any other Apple device you might be using. -
3. How long does the direct scanning process take for a broken iPod Touch?
The time required for a direct scan depends entirely on the storage capacity of your iPod Touch and the amount of data stored on it. Typically, it can take anywhere from a few minutes to half an hour. Deep scanning for large media files like videos often takes slightly longer than scanning for text-based notes or contacts. -
4. Is it safe to enter my Apple ID credentials into third-party recovery software?
Reputable and certified recovery tools like Dr.Fone utilize robust encryption and strict privacy policies. They do not store your Apple ID, password, or iCloud data on their servers. The login process is strictly used to authenticate with Apple's servers and download your backup locally to your own computer.
 Add Wondershare Dr.Fone as a preferred source on Google