 Permanently erase all iOS & Android data—completely unrecoverable.

 100% Security Verified | No Subscription Required | No Malware

 :
: 
 ChatGPT
 Perplexity
 Gemini
 Claude
 Grok
Grok
Is your phone constantly warning you about low storage? Are you concerned that old, sensitive conversations are lingering in the cloud? These are common problems for heavy WhatsApp users, and the culprit is often years of accumulated backups filled with photos, videos, and chat logs.
Deleting your WhatsApp backup is an effective solution to reclaim valuable storage space and enhance your digital privacy. This guide will provide a comprehensive walkthrough on how to delete the WhatsApp backup from your devices and cloud services. Let's get your phone running smoothly and secure your personal data.
In this article
Part 1. Key Reasons to Delete Your WhatsApp Chat Backup
Before you proceed with deleting your WhatsApp chat history, it's beneficial to understand the advantages. Here are the primary reasons why clearing out old backups is a smart move for digital hygiene.
- Enhance Privacy: Backups can contain personal and sensitive conversations. If stored unencrypted in the cloud, they could become vulnerable to unauthorized access or data breaches. Erasing them helps safeguard your private chat history.
- Reclaim Storage Space: WhatsApp backups, especially those including videos and high-resolution images, can consume gigabytes of space on your cloud accounts (Google Drive/iCloud) and local device storage. Deleting them is a quick way to free up significant room.
- Boost Device Performance: A phone cluttered with old data can sometimes feel sluggish. Removing large backup files can contribute to a smoother and more responsive user experience.
- Eliminate Redundancy: If you've switched devices multiple times, you might have several outdated backups floating in your cloud storage. Deleting old ones prevents confusion and keeps your digital space organized.
- Create a Fresh Start: Sometimes, you simply want to move on from past conversations. Deleting old chats can provide a sense of a clean slate, especially after significant life changes.
However, before you delete anything, ensure you've saved any critical information or media elsewhere. Once a backup is deleted, it is typically gone for good.
Part 2. How to Erase WhatsApp Backups on Android and iOS
Clearing out your WhatsApp chat backup is a straightforward process, whether you use an Android or an iPhone. These backups can accumulate over time, consuming precious storage and holding onto conversations you no longer need. Here are five simple methods to delete WhatsApp backup files and manage your data more effectively.
Method 1: Deleting WhatsApp Backups from Google Drive (Android)
For Android users, WhatsApp backups are stored on Google Drive. If you want to clean up your cloud storage, this is the place to start. Follow these steps to learn how to delete a backup from WhatsApp on Google Drive.
-
Step 1 Access Google Drive
Open the Google Drive app on your Android phone. Tap the menu icon (three horizontal lines) in the top-left corner of the screen.
-
Step 2 Navigate to Backups
From the side menu that appears, select the "Backups" option to view all application backups stored in your drive.

-
Step 3 Locate WhatsApp Backup
You will see a list of your stored backups. Find the one for WhatsApp and tap the three-dot menu icon next to it.
-
Step 4 Delete the Backup
A menu will pop up. Select the "Delete backup" option from the list.

-
Step 5 Confirm the Deletion
A confirmation prompt will appear. Tap "Delete" again to permanently remove the WhatsApp backup from your Google Drive.

Method 2: Removing WhatsApp Backups from iCloud (iPhone)
If you're an iPhone user looking to free up space in your iCloud account, deleting old WhatsApp backup messages is an excellent strategy. This guide shows you how to delete backup of WhatsApp directly from your iCloud settings.
-
Step 1 Open iPhone Settings
Navigate to the "Settings" app on your iPhone. Tap on your Apple ID name, which is displayed at the very top of the screen.
-
Step 2 Access iCloud Settings
On the next page, select "iCloud" to manage your cloud storage and settings.

-
Step 3 Manage Account Storage
Within the iCloud menu, tap on "Manage Account Storage." This section shows you how much space each app is using.
-
Step 4 Find WhatsApp Messenger
Scroll through the list of apps and tap on "WhatsApp Messenger" to access its backup data stored in iCloud.

-
Step 5 Delete the Backup Data
Tap on "Delete Data" to initiate the removal of the WhatsApp backup from your iCloud account.
-
Step 6 Confirm Your Choice
A pop-up will appear asking you to confirm. Tap "Delete" again to finalize the action. Your WhatsApp backup on iCloud is now successfully deleted.

Method 3: Clearing Backups from Your Phone's Internal Storage (Android)
In addition to cloud backups, WhatsApp also stores local backup files on your Android device's internal storage. Clearing these can also free up space. Here’s how to delete backup in WhatsApp from your phone's file system.
-
Step 1 Open Your File Manager
Locate and open the file manager app on your Android phone. This might be called "Files," "My Files," or something similar.
-
Step 2 Navigate to the WhatsApp Folder
Browse to your device's internal storage (or SD card if that's where WhatsApp is installed). Find and open the "WhatsApp" folder.
-
Step 3 Open the Databases Folder
Inside the WhatsApp folder, you will see several subfolders. Tap on the one named "Databases." This folder contains all your local chat backups.

-
Step 4 Delete the Backup Files
You can long-press a single file to select it and then tap the delete icon. To delete all local backups, use the "Select All" option and then delete them. This will clear the local backups from your device.
Method 4: Removing Backups by Deleting the App (iPhone)
A more drastic approach for iPhone users is to delete the WhatsApp application itself. This action removes all app data, including chats, photos, and videos directly from your device. Note that this does not delete your iCloud backup unless you've also done so via Method 2.
-
Step 1 Go to iPhone Storage Settings
Open the "Settings" app, navigate to "General," and then tap on "iPhone Storage."

-
Step 2 Select and Delete WhatsApp
Scroll down the list of apps until you find "WhatsApp Messenger." Tap on it, and then select the "Delete App" option. Confirm the action to remove the app and all its associated data from your iPhone.

Part 3. The Ultimate Solution: Permanently Delete WhatsApp Backups with Dr.Fone
Are you looking for a method that ensures your WhatsApp data is gone for good and completely unrecoverable? Standard deletion methods often leave traces of data behind. For a truly permanent solution, especially when dealing with sensitive information, a specialized tool is required.
Dr.Fone - Data Eraser is a comprehensive software solution designed to securely manage, repair, and protect your mobile data. It is particularly effective for users who need to erase WhatsApp backup files permanently, ensuring they cannot be retrieved with any recovery software. It supports both iOS and Android devices and features a user-friendly interface that makes permanent data deletion accessible to everyone.
 Permanently erase all data on iOS & Android — completely unrecoverable.
- Military-grade wiping to fully protect your privacy.
- Generate verified erasure reports to boost device resale value.
- Selectively erase private data and remove junk & large files.
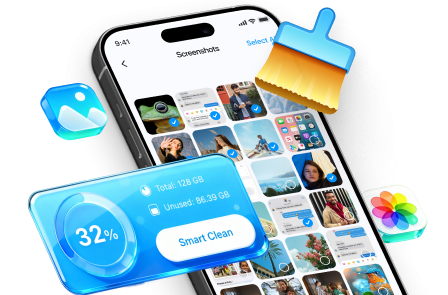
Follow these steps to learn how to delete WhatsApp Backup permanently using Dr.Fone Data Eraser.
-
Step 1 Launch Dr.Fone and Select Data Eraser
Download and install Dr.Fone on your computer. Open the software and choose the "Data Eraser" module from the main toolbox.

-
Step 2 Connect Your Phone
Connect your phone to the computer using a USB cable. Ensure that USB debugging is enabled on your Android device or that you trust the computer on your iPhone.
-
Step 3 Start the Erasing Process
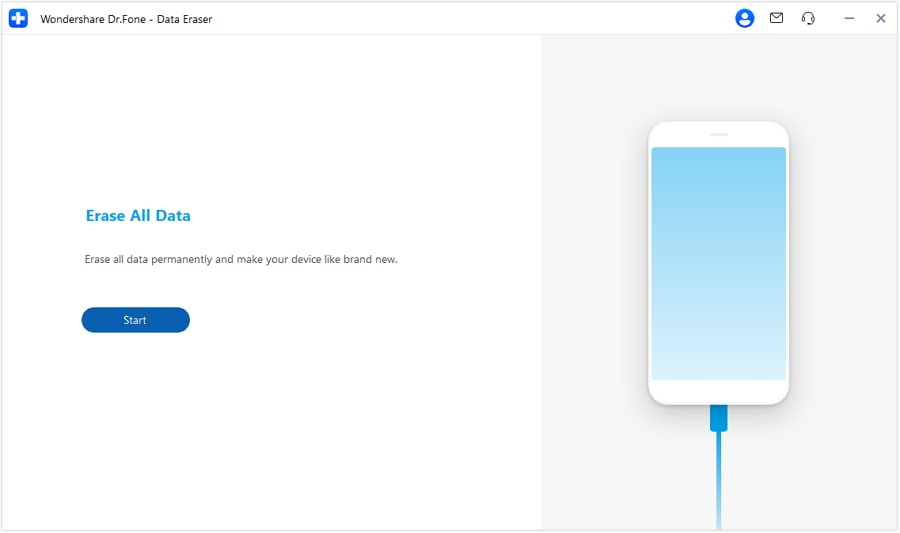
Once your device is successfully connected and recognized, click the "Start" button to begin the data erasure process.
-
Step 4 Confirm the Deletion
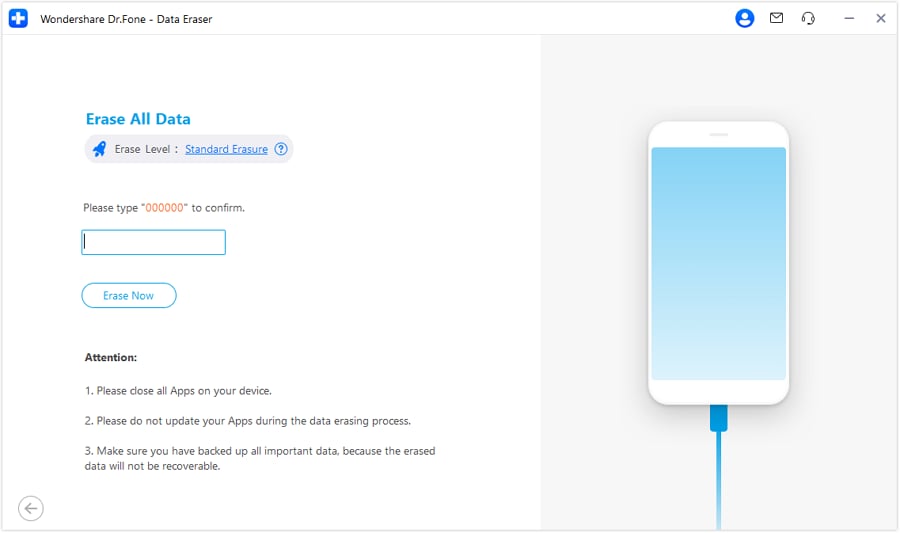
Dr.Fone will require you to confirm this irreversible action. Type "000000" into the confirmation box and click "Erase Now."
-
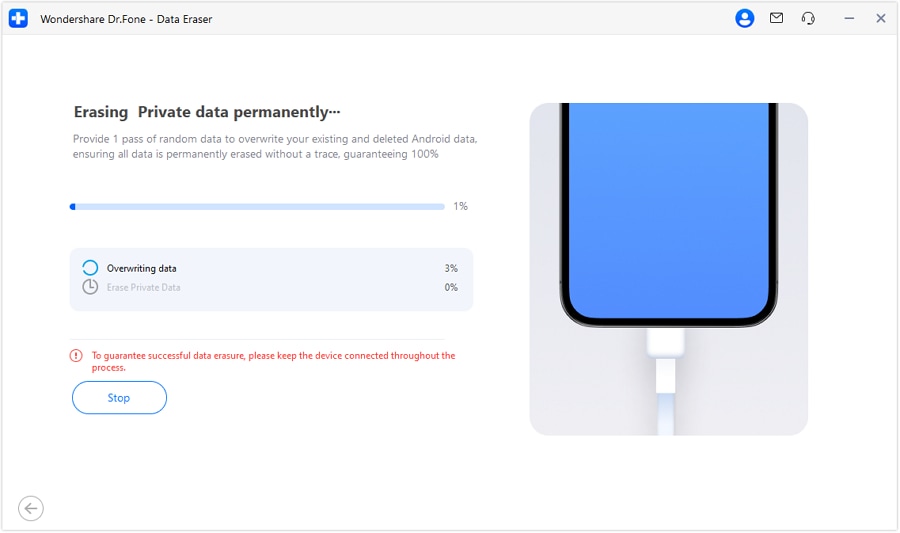
Step 5 Wait for the Process to Complete
Dr.Fone will now begin to securely erase all data on your device. It is crucial to keep your phone connected throughout this process.
-
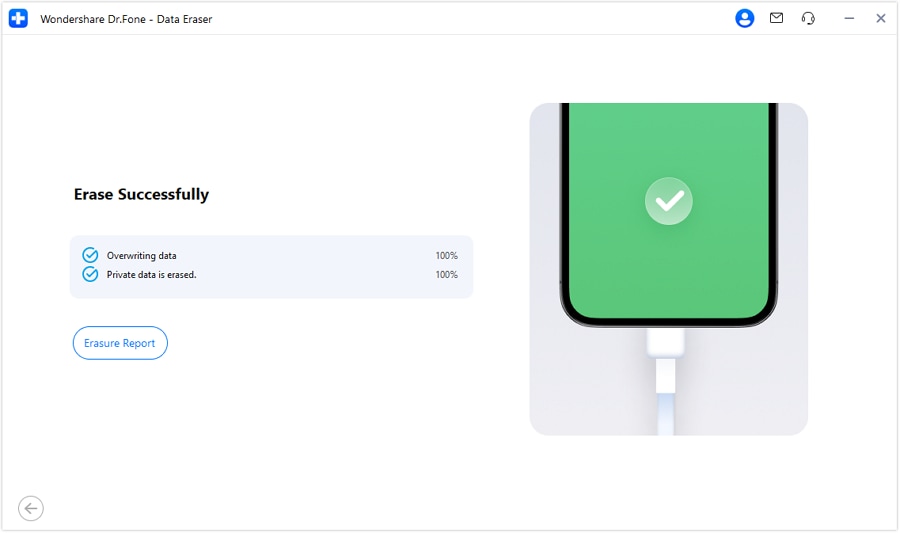
Step 6 Erasure Successful
Once the process is finished, Dr.Fone will display a confirmation message indicating that all data has been successfully and permanently erased from your device.
Conclusion
To conclude, regularly choosing to delete your WhatsApp backup is an excellent practice for maintaining your digital hygiene. It’s a simple yet powerful way to secure your private information, free up storage, and ensure your device runs optimally.
By following the steps outlined in this guide, you can easily manage and remove unwanted data from iCloud, Google Drive, or your phone's internal memory. For those who prioritize privacy and want to ensure their data is completely unrecoverable, using a professional tool like Dr.Fone - Data Eraser provides an added layer of security and peace of mind. Take control of your digital footprint today for a cleaner, faster, and more secure mobile experience.




FAQ
-
1. What happens if I delete my WhatsApp backup?
When you delete a WhatsApp backup from iCloud or Google Drive, you remove the saved copy of your chat history. Your current chats on your phone will not be affected. However, you will not be able to restore your chats from that backup if you switch to a new phone or reinstall WhatsApp. -
2. Does deleting the backup also delete my current WhatsApp chats?
No, deleting the cloud backup (on Google Drive or iCloud) or local backup files does not delete the messages currently on your phone. It only removes the saved copy that is used for restoration purposes. Your existing conversations will remain intact in the app. -
3. Can I recover a WhatsApp backup once I have deleted it?
Generally, no. Once a backup is deleted from Google Drive or iCloud, it is permanently removed from the cloud service and cannot be recovered through standard means. This is why it's important to be certain before deleting a backup. -
4. Why can't I see my WhatsApp backup on Google Drive?
WhatsApp backups are hidden from the main file view in Google Drive for security. To see them, you must go through the specific "Backups" section in the Google Drive menu. If it's still not visible, ensure you are logged into the same Google account that you used to create the backup.
 Add Wondershare Dr.Fone as a preferred source on Google




