
How to Factory Reset Android Phones and Tablets
Oct 24, 2025 • Filed to: Phone Repair Solutions • Proven solutions
Dr.Fone Basic:
Better Control for Your Phone
Manage, transfer, back up, restore, and mirror your device
Is your Android device plagued by slow performance and frustrating freezes? Discover the simple solution to restore your device to its former glory - a factory reset. This straightforward process can breathe new life into your Android phone, eliminating pesky glitches and reviving its peak performance, so you can enjoy a seamless mobile experience once again.
With the rise of substandard devices in the market, known for their limited memory and sluggishness, regular factory resets have become necessary to keep these devices running efficiently.
Part 1: When do we need to reset Android Phones and Tablets
Here are the five most common situations that would necessitate you to factory reset your Android device:
- Running low on Android device memory? A factory reset is the quick fix you need to free up space and start anew. Ditch the hassle of individually uninstalling problematic apps and save time with a straightforward reset.
- Tired of dealing with crashing apps and a sluggish Android device? If your home screen widgets and animations are malfunctioning, and you're constantly bombarded with 'force close' notifications and warnings about apps stopping unexpectedly, it's time to take drastic measures.
- Similarly, if the Android device takes longer than the normal time to launch applications, then it means that the apps might have some issues with their installations, and a factory reset would be a good way to correct the issues once and for all.
- Is your Android device's battery life draining faster than expected? While Android devices are known for their relatively short battery life, excessive battery drain can be a telltale sign that your device needs a reboot. A factory reset can be the solution to restore your device's normal performance and revive its battery life, ensuring your phone stays powered up and ready to go throughout the day.
- If you have decided to give your Android device to someone or to sell it, a factory reset is advisable so as to erase all the information synced from your mails and applications in your phone.
Part 2: Backup your Android data before resetting it
However, before factory resetting your Android phone, it is paramount that you back up all your important data. This may include all the media files such as the photos and music stored in your Android device’s internal storage, and also phone messages and your browser history. This is where having a tool like Dr.Fone Basic comes real handy.

Dr.Fone Basic
Backup & Restore Data Turns Flexible
- One-click to back up the whole iOS and Android device to your computer.
- Export what you want from the backup to your computer.
- Your device's data remains intact during the restore process.
- Fully compatible with the latest iOS and Android version.
Step 1. Initiate the Backup Process for Android Device to Computer
Launch Dr.Fone on your computer, connect your Android device, and follow the My Backup > Back Up Now path to initiate backup.

Step 2. Set Dr.Fone Link App As the Default SMS App
To save your Android text messages, use the Dr.Fone Link app as your default SMS application. Alternatively, explore your device's Settings for the same function. Confirm by clicking OK.
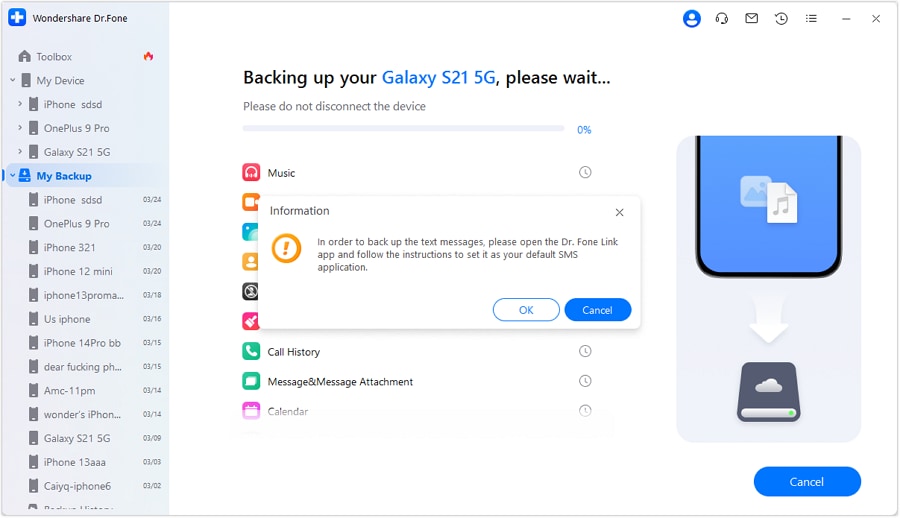
Step 3. Start to backup your device
The backup will initiate automatically and upon completion, its status will be visible in the user's window.
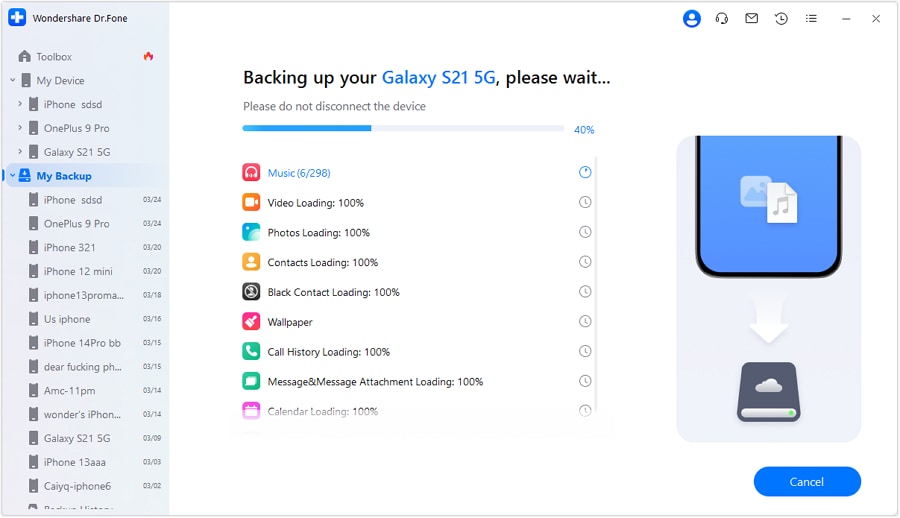
For a more detailed guide, embark on your visual learning journey here.
Part 3: How to reset Android Phones and Tablets using PC
Apart from the most common ways of resetting Android phones, using multiple buttons on the phone or tablet, you might as well hard reset your phone using your PC.
There are two methods of doing this. Firstly, you can use a PC reset tool for Android, or you can easily use the Android debug bridge commanding utility, to boot the recovery image on your phone.
Method 1 Factory Reset Android Using Universal Hard Reset Tool
In the first method, follow the below given steps.
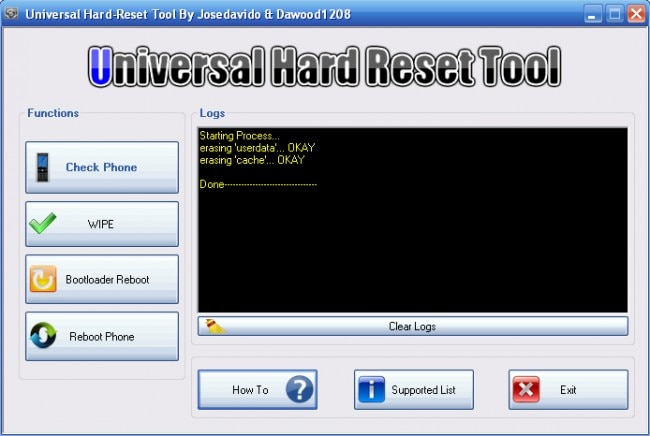
Step 1 - Download the latest version of a Universal hard reset tool.
Step 2 - Now navigate through the application and click on the option that you want to use. Preferably, click on 'wipe to reset the phone'.
Method 2 Factory Reset Android Using Android Development Kit
This method is a bit technical, although there’s nothing difficult in it.
Step 1 - Firstly, download the Android development kit from the Android developers’ website, and extract the folder. Now, rename the extracted folder; you can name it as ADT.
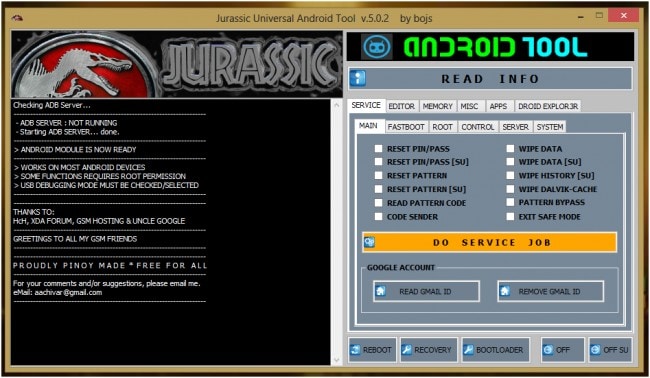
Step 2 - Afterwards, click computer in your file browser, choose properties and select advanced system settings, and from the window named system properties, click on environmental variables.
Step 3 - Open the path and click on edit in the system variables window, and move the cursor to the end of the selection.
Step 4 - Type "C:Program FilesAndroidADTsdkplatform-tools*" without quotes. Launch command prompt and connect your phone through a USB cable to your computer.
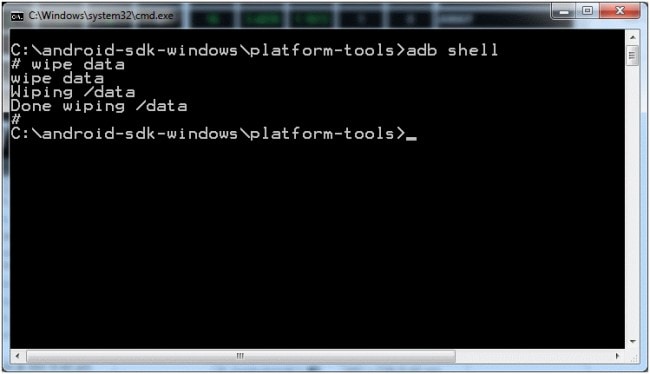
Step 5 - Make sure your tablet or phone is switched on. Type 'adb shell' and press enter. When ADB is fully configured in your device, type 'wipe data' and click enter. Your phone will restart in recovery mode and you will have restored your phone's factory settings.
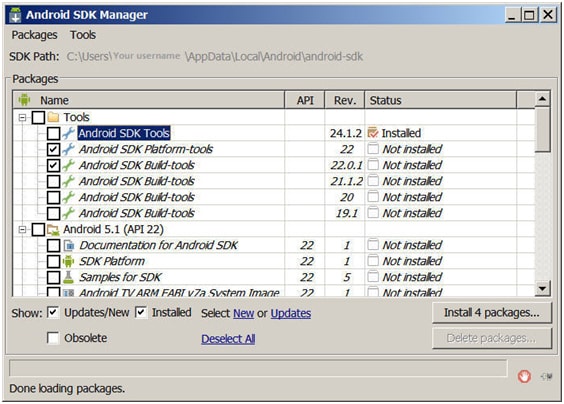
It is to be noted that these factory restoration processes require you to back up all your files before erasing everything.
Conclusion
Factory resets can significantly improve the performance of Android devices, particularly those with limited memory. Regular resets can help free up memory, resolve app crashes, enhance battery life, and ensure privacy before selling or giving away the device.
It's crucial to back up all important data before a reset using tools like Wondershare Dr.Fone Basic . The reset itself can be performed using methods such as Universal hard reset tool or the Android Development Kit. A factory reset offers not just a solution but a fresh start for your device.
Dr.Fone Basic:
Better Control for Your Phone
Manage, transfer, back up, restore, and mirror your device
Android Erase
- Android Diagnostics
- 1. Fix Android Microphone Issues
- 2. Test NFC on Android Device
- 3. Check Android Device in Minutes
- 4. Apps For Sensor Check Android
- 5. Apps for Testing Device's Hardware
- 6. Tools for Conducting Screen Tests
- 7. Ways to Check Phone's Vibrations
- 8. Check Mobile Signal Strength
- 9.Realme Touch Screen Test Codes
- 10.Android Codes To Test Touch Screen
- 11.Phone Processor Speed Tests
- Erase Android
- 1. Delete Browsing History on Android
- 2. Clear App Data and Cache on Android
- 3. Delete Photos from Android
- 4. Wipe Android When It's Lost
- 5. Wipe Cache Partition on Android
- 6. Delete Text Messages on Android
- 7. Delete WhatsApp Backup
- 8. Wipe Data or Factory Reset
- 9. Erase Android Data Before Selling
- 10. Delete Contacts on Android
- 11.Delete Multiple Contacts on Android
- 12.Wipe Android Phone before Selling
- 13.Delete Photos on Android
- 14.Remove Pre-installed Apps
- 15.Delete Apps on Android
- 16. Access Trash on Android
- Android Reset
- 1. Restart Phone without Power Button
- 2. Reset Phone without Volume Buttons
- 3. Factory Reset Android Phone
- 4. Hard Reset Android Phone Using PC
- 5. Hard Reset Locked Infinix Phone
- 6. Factory Reset Lenovo Phone
- 7. Factory Reset Android Tablets
- 8. Factory Reset Lenovo Tablets
- 9. Format Your Android Phone
- 10. Hard Reset Android Phones
- 11.Reset Android Without Home Button
- 12.Restart Your Android Phone
- 13.Soft Reset Android Devices
- 14.Reset Android without Losing Data
- 15.Ways to Hard Reset Tecno Spark
- 16.Updated Android Factory Reset Code
- Data Erase Apps
- 1. Speed Booster for Android
- 2. Android Cleaners to Boost Device
- 3. Data Erase Apps to Protect Privacy
- 4. Data Eraser Apps to Wipe Android
- 5. 15 Best Cleaning Apps for Android
- Sell Old Android


James Davis
staff Editor