Four Solutions to Factory Reset Android Phone and Tablet

Jun 30, 2026 • Filed to: Phone Repair Solutions • Proven solutions
 TL;DR:
You can factory reset an Android phone or tablet using the system settings for active units, Recovery Mode for unbootable devices, or Android Device Manager for remote wipes.
● Accessible devices are reset navigating to Settings > General > Backup & Restore, whereas unbootable devices require holding the Power, Home, and Volume-up buttons simultaneously to access the "Wipe data/factory reset" option in Recovery Mode.
● Locked or lost devices can be wiped remotely through Android Device Manager, which strictly requires logging in with the exact Google credentials currently linked to the target hardware.
● Standard factory resets may leave user data recoverable, so permanently wiping a device before resale requires a specialized tool like Dr.Fone - Data Eraser (Android) paired with an active USB Debugging connection.
Ask AI for a summary
 ChatGPT
 Perplexity
 Gemini
 Claude
 Grok
Grok
Dr.Fone Basic:
Better Control for Your Phone
Manage, transfer, back up, restore, and mirror your device
If you own an Android phone or tablet and wish to reset it, then you have come to the right place. We will teach you how to factory reset Android tablet and phones in four different ways. This might surprise you, but you can reset tablet and android phone without much trouble and give a brand new feel to your device. Read on and learn how to reset a tablet or android phone in this comprehensive tutorial.
Part 1: Precautions of Factory Reset Android Phone and Tablet
Before we provide different ways to reset Android tablet, it is essential to be aware of all the basic prerequisites. You might have already heard of common terms like soft reset, hard reset, factory reset, etc. Performing a soft reset is the easiest thing to do. In this, you simply break your device’s power cycle by just restarting it.
A hard reset is also known as a “hardware” reset as it wipes a device’s data entirely, leaving no scope to recover it afterward. Though most of the time, users don’t perform such an extensive step and simply factory reset their device to undo a wrong configuration. It restores the device’s setting to the factory version by erasing all the user data.
As you might already know, after performing a factory reset you end up losing your data. Therefore, it is highly recommended that you take a complete backup of your data before you reset tablet or phone. Take the assistance of Dr.Fone - Phone Backup (Android) to take a complete backup of your data before you learn how to reset a tablet. It is compatible with more than 8000 Android devices and provides a 100% secure way for you to take a backup of your device. Later, you can simply restore it as per your needs.
Dr.Fone - Phone Backup (Android)
Flexibly Backup and Restore Android Data
- Selectively backup Android data to the computer with one click.
- Preview and restore the backup to any Android devices.
- Supports 8000+ Android devices.
- There is no data lost during backup, export, or restore.

1. To take a backup of your device, simply install Dr.Fone - Phone Backup (Android) on your computer and launch it. Choose the option of “Phone Backup” and connect your phone to the computer. When it is recognized, click on the option of “Backup” to initiate the process.


2. Just select the type of data files that you wish to take a backup of and click on the “Backup” button when you are done. Wait for a while as the application will take a backup of your data.

3. After taking a backup of your device, the interface will let you know by displaying the following message. You can now view your backups as well.

Great! Now when you are familiar with all the essential prerequisites, let’s proceed and learn how to reset Android tablet and phone.
Part 2: Reset Android Phone and Tablet from Settings
This is the easiest way to reset any Android device. If your device is active and running in the usual way, then you can simply go to Settings and perform a factory reset. It will reset tablet and phone without any trouble. To do it, just follow these easy instructions.
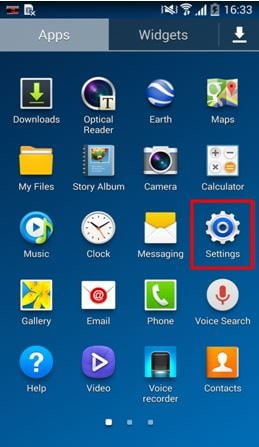
1. Simply unlock your device and go to its “Settings” option from your device’s home.
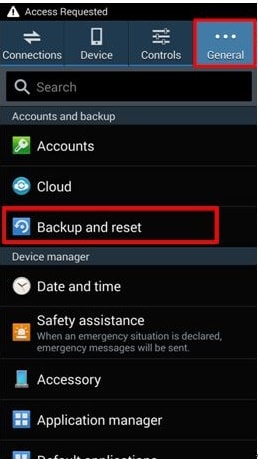
2. Here, you will be provided with different options. If you wish to reset Android tablet or phone, then go to General > Backup & Restore.
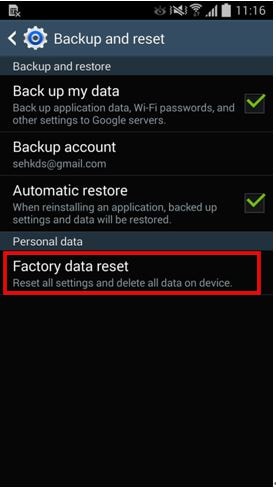
3. You can see different options related to your device’s backup and restore. Just tap on the option of “Factory Data Reset”.
4. Your device will display a prompt and let you know of all the repercussions of performing the factory reset operation. Tap on the “Reset Device” button to continue.
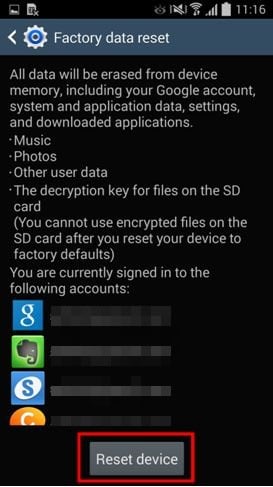
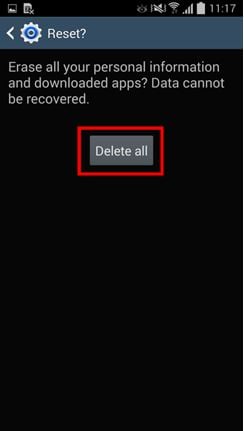
5. The device will let you know that the operation will delete all your data. Lastly, tap on the “Delete all” button to start the process.
Wait for a while as your device will perform all the needed steps to reset it.
Part 3: Reset Android Devices from Recovery Mode (when it can’t boot)
If your device is not operating in an ideal way, then you can’t visit the “Settings” menu in order to reset Android tablet. Don’t worry! You can factory reset it by entering your device’s recovery mode. This can be done by performing the following steps.
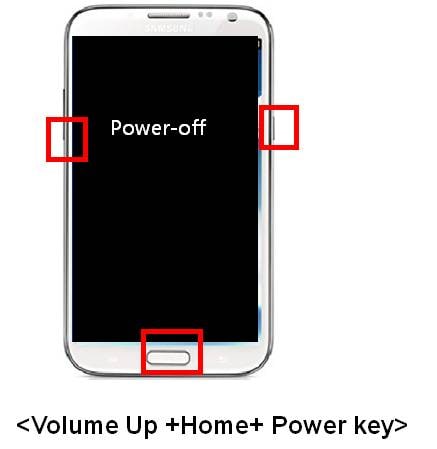
1. In order to start with, just switch off your phone and wait for a few seconds. Now, apply the correct key combination in order to enter its recovery mode. This can change from one device to another. In most devices, one can enter the recovery mode by pressing the Power, Home, and Volume-up buttons simultaneously.
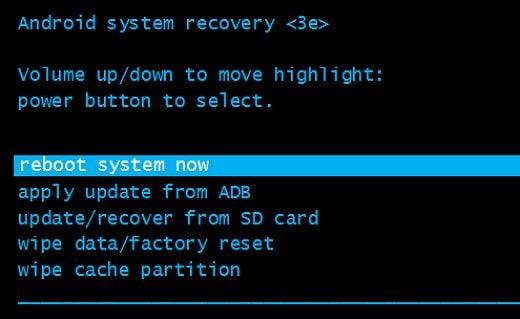
2. After entering the recovery mode, you have to navigate using the volume up and down buttons. In order to make a selection, you need to use the home or power button. Go to the “Wipe data/factory reset” option and select it. If you get a prompt regarding the deletion of user data, then simply agree to it.

3. This will initiate the factory reset operation. Give your device some time as it will perform all the needed steps. When it is done, select the option of “Reboot system now” to restart your phone.
That’s it! Your device will be brand new again. You are now able to learn how to reset a tablet by entering its recovery mode.
Part 4: Reset Android Devices from Android Device Manager
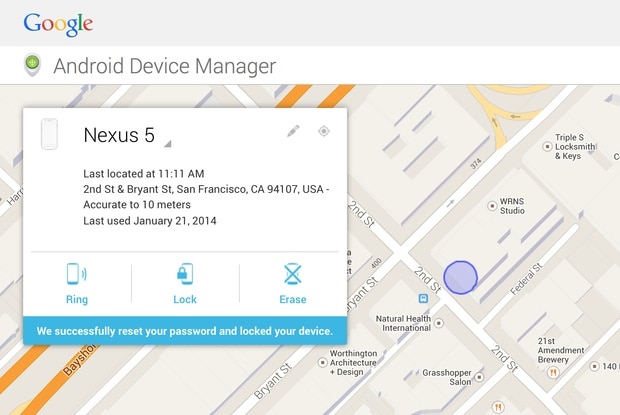
Android Device Manager provides a way to ring, lock, or erase your device remotely. This technique can also be implemented when you are not able to unlock your device or if it is lost. With a single click, you can learn how to reset Android tablet using its device manager. All you got to do is follow these steps.
1. Visit the Android Device Manager right here and log in to your account using the same Google credentials that are linked to your device.
2. As soon as you will enter its dashboard, you can see various operations that you can perform on your device remotely. You can easily identify its location, ring it, lock it, or even erase its data. Just select your phone and out of all the options, click on “Erase” to continue.
3. You will get a pop-up message providing all the basic information and repercussions of this step. Just click on the “Erase” button again in order to factory reset your device.
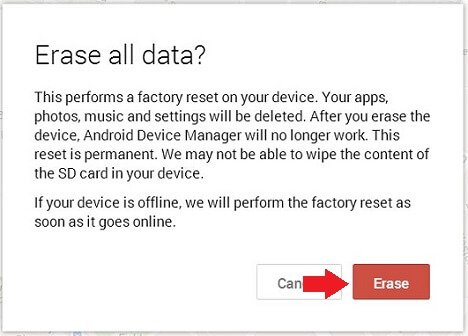
This will wipe all the data from your device. If it is offline, then the factory reset operation will be performed as soon as it would go online.
Part 5: Reset Android Devices before selling it
If you are selling your phone, then you might need to make an extra effort. There are times when even after performing the factory reset, your phone can retain some information. Therefore, if you are selling your device, then you should completely wipe its data beforehand. We recommend using Dr.Fone - Data Eraser (Android) in order to wipe your device before selling it. It is already compatible with almost every Android device and provides a safe way to permanently get rid of your data with a single click.
Dr.Fone - Data Eraser
Fully Erase Everything on Android and Protect Your Privacy!
- Simple, click-through process.
- Wipe your Android completely and permanently.
- Erase photos, contacts, messages, call logs, and all private data.
- Supports all Android devices available in the market.


Reset tablet using Android Data Eraser by following these steps.
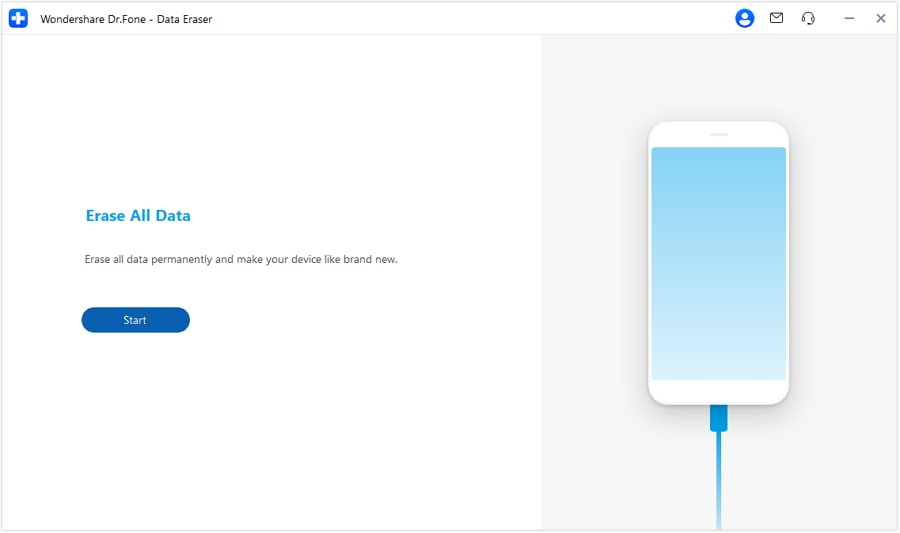
1. Start by downloading Android Data Eraser by clicking the "Start Download" button above. After installing it on your computer, launch it to get the following welcome screen. Choose the option of “Data Eraser” to start the operation.
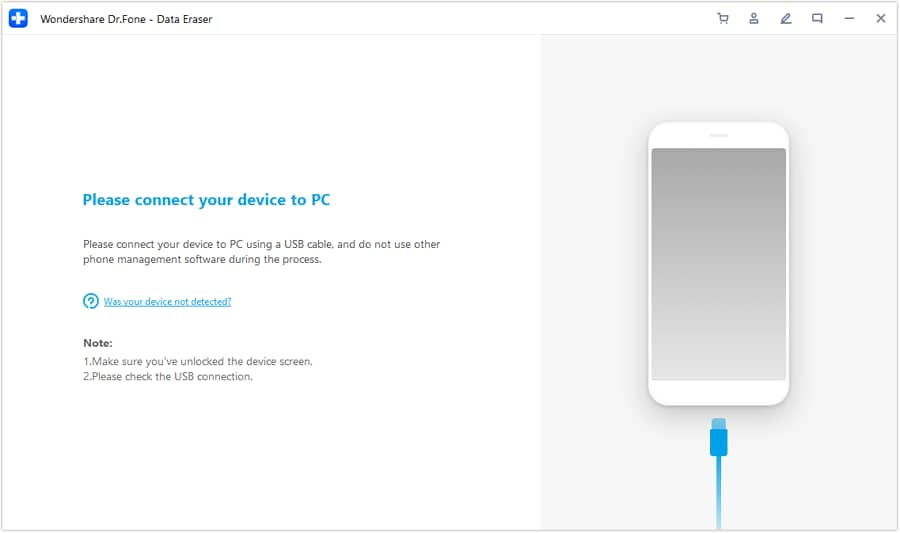
2. Now, using a USB cable, connect your Android device to the computer. Make sure that you have enabled the option of USB Debugging beforehand. As soon as you would connect your device, you might get a prompt regarding USB Debugging permission. Just tap on the “Ok” button to confirm it.
3. The application will automatically detect your device in no time. In order to start the process, click on the “Erase all data” button.
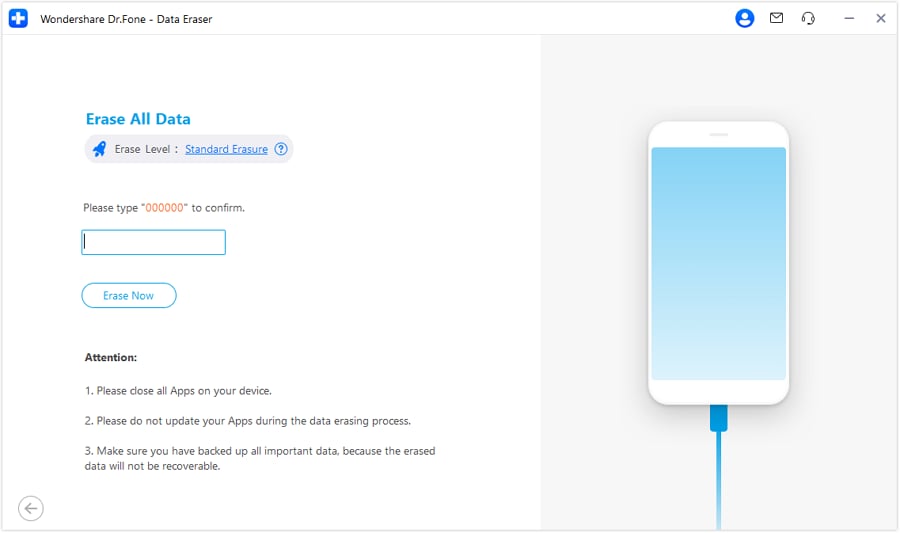
4. It is recommended to take a backup of your data beforehand, as after this operation, it can’t be retained. Type “000000” in the text box to confirm again and click on the “Erase Now” button.
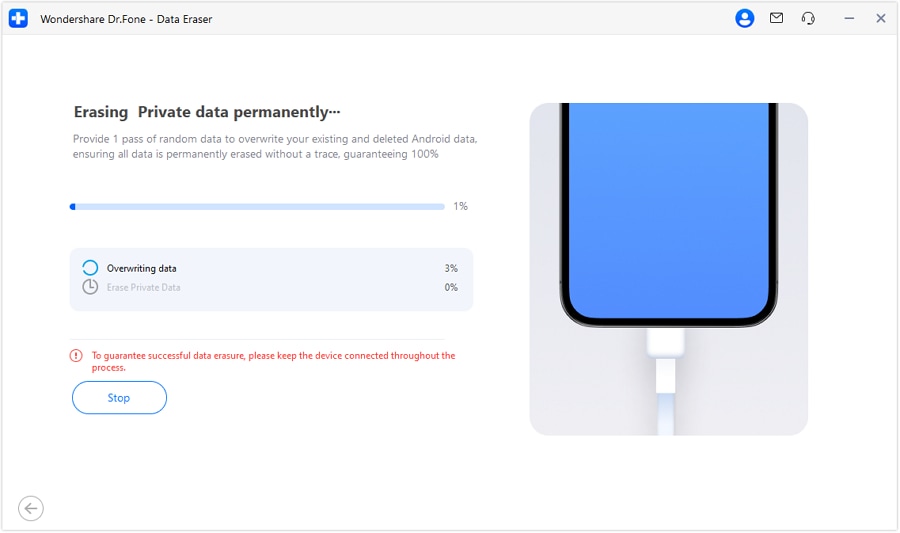
5. This will initiate the process. Make sure that you don’t disconnect your device during the entire operation or open any other phone management application.
6. Furthermore, you will be asked to tap on the “Factory Data Reset” or “Erase All Data” option on your phone. Simply perform the needed steps to wipe your data from your device.
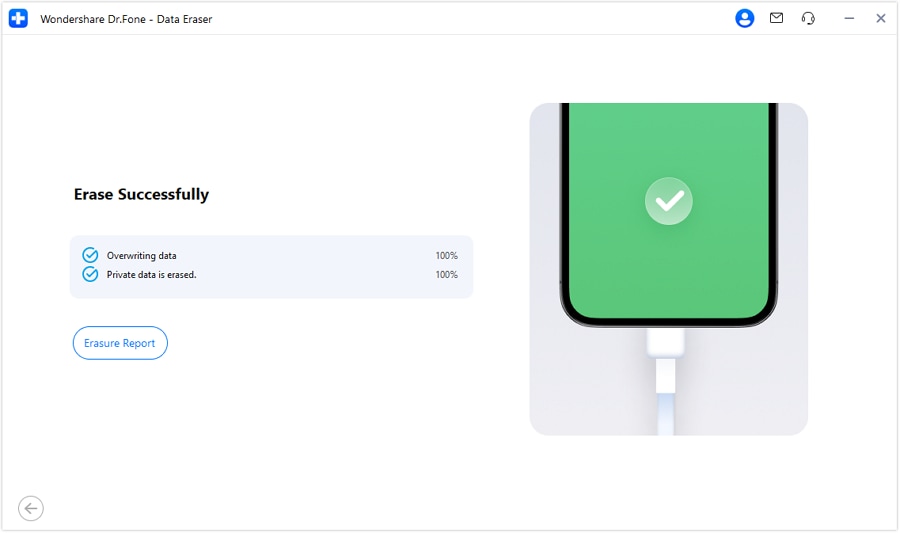
7. Wait for a while as your data will be removed permanently. As soon as it is completed successfully, you will be informed by the following screen.
Go ahead and give your preferred alternative a try in order to reset Android tablet or phone. We are sure you would be able to reset tablet or phone without much trouble after going through this tutorial. Additionally, if you are planning to sell your phone, then use Android Data Eraser to wipe your data completely.
Dr.Fone Basic:
Better Control for Your Phone
Manage, transfer, back up, restore, and mirror your device


Android Erase
- Android Diagnostics
- 1. Fix Android Microphone Issues
- 2. Test NFC on Android Device
- 3. Check Android Device in Minutes
- 4. Apps For Sensor Check Android
- 5. Apps for Testing Device's Hardware
- 6. Tools for Conducting Screen Tests
- 7. Ways to Check Phone's Vibrations
- 8. Check Mobile Signal Strength
- 9.Realme Touch Screen Test Codes
- 10.Android Codes To Test Touch Screen
- 11.Phone Processor Speed Tests
- Erase Android
- 1. Delete Browsing History on Android
- 2. Clear App Data and Cache on Android
- 3. Delete Photos from Android
- 4. Wipe Android When It's Lost
- 5. Wipe Cache Partition on Android
- 6. Delete Text Messages on Android
- 7. Delete WhatsApp Backup
- 8. Wipe Data or Factory Reset
- 9. Erase Android Data Before Selling
- 10. Delete Contacts on Android
- 11.Delete Multiple Contacts on Android
- 12.Wipe Android Phone before Selling
- 13.Delete Photos on Android
- 14.Remove Pre-installed Apps
- 15.Delete Apps on Android
- 16. Access Trash on Android
- Android Reset
- 1. Restart Phone without Power Button
- 2. Reset Phone without Volume Buttons
- 3. Factory Reset Android Phone
- 4. Hard Reset Android Phone Using PC
- 5. Hard Reset Locked Infinix Phone
- 6. Factory Reset Lenovo Phone
- 7. Factory Reset Android Tablets
- 8. Factory Reset Lenovo Tablets
- 9. Format Your Android Phone
- 10. Hard Reset Android Phones
- 11.Reset Android Without Home Button
- 12.Restart Your Android Phone
- 13.Soft Reset Android Devices
- 14.Reset Android without Losing Data
- 15.Ways to Hard Reset Tecno Spark
- 16.Updated Android Factory Reset Code
- Data Erase Apps
- 1. Speed Booster for Android
- 2. Android Cleaners to Boost Device
- 3. Data Erase Apps to Protect Privacy
- 4. Data Eraser Apps to Wipe Android
- 5. 15 Best Cleaning Apps for Android
- Sell Old Android
- ● Manage/transfer/recover data
- ● Unlock screen/activate/FRP lock
- ● Fix most iOS and Android issues
- Free Download Free Download Free Download


James Davis
staff Editor