Downgrade iPadOS With Ease in Different Ways: Downgrade iPadOS 17 Beta/16 to 16/15

Feb 11, 2026 • Filed to: Phone Repair Solutions • Proven solutions
OS updates are a frequent practice as they often bring new features and improvements. Sometimes, the latest version upgrade may not suit everyone's needs and preferences. This article explores the importance of downgrading iPadOS17. It will also provide insights into various scenarios where downgrading might be necessary.
Importance of Downgrading
- Newer iPadOS versions might not be compatible with older hardware or apps. It leads to performance issues or application crashes.
- Beta versions of iPadOS are prone to bugs and instability, affecting the user experience.
- In some cases, newer iPadOS versions might lead to increased battery consumption. This impacts the device's longevity between charges.
- Certain apps might not have been optimized for the latest iPadOS version. It causes functionality problems or reduced performance.
Different Scenarios Where Downgrading Might Be Necessary
- Participants of iPadOS beta programs might encounter significant issues. It prompts them to return to a stable version for everyday use.
- Older iPads might not have the capabilities to handle the demands of the latest iPadOS. This makes downgrading the only viable option.
- Critical apps may fail to function correctly on the latest iPadOS 17 beta Thus, users may choose to revert to a previous version to ensure app compatibility.
- The sluggish performance or frequent crashes on the latest iPadOS can be frustrating. It leads users to downgrade for a smoother experience.
- Some users may have jailbroken their devices. Here, downgrading could be necessary to maintain the jailbreak functionality.
Part 1. Understanding the iPadOS Downgrading Process and Risks
As exciting as it is to explore new iPadOS updates, there are instances when downgrading becomes necessary. It is usually done to revert the device back to a stable version. This section will discuss the essential steps involved in the downgrading process. It will also enlighten you about possible risks and important things to consider.
Explaining the Steps Involved in Downgrading iPadOS
Downgrading iPadOS involves reverting to a previous version of the OS. This can be a bit more challenging than upgrading the iPadOS. Here are the general steps involved in the downgrading process:
1. IPSW File
Before you start downgrading, you need to get the IPSW file of the specific iPadOS version. IPSW files are firmware packages. These contain the necessary files to install a particular iOS or iPadOS version.
2. USB Cable
You will need a compatible USB cable to connect your iPad to a computer for the downgrading process. Make sure it's in good condition and properly functioning.
3. Data Backup
Downgrading your iPadOS involves wiping your device clean. It means all your data will be erased in the process. Thus, it's essential to create a full backup of your iPad before starting the downgrade. You can back up your iPad using iTunes/Finder on your computer.
4. iTunes/Finder or a Third-Party Tool
To perform the downgrade, you can use either iTunes (on Windows or macOS versions up to macOS Catalina) or Finder (on macOS Catalina and later). Connect your iPad to the computer and open the appropriate tool. Alternatively, you can use third-party tools designed for downgrading iOS or iPadOS versions. These tools often simplify the process and offer extra features.
Highlighting the Potential Risks and Drawbacks
Downgrading iPadOS can be a viable solution for certain scenarios. Knowing the risks and drawbacks of the downgrading process is vital. Here are key issues to consider before downgrading your device from iPadOS17 beta.
1. Incompatibility Issues
Newer iPadOS versions bring new apps and features. However, it is possible that they may not function or appear in older versions. Incompatibility with the old OS might cause crashes and problems in certain apps.
2. Security Vulnerabilities
Previous operating systems may contain security vulnerabilities that were resolved in recent updates. Reverting to an older version might put your iPad at risk of potential security threats.
3. Unrecoverable Errors
During the downgrade, your iPad could become unusable or stuck in a boot loop if issues arise. This might require professional repairs in difficult situations.
4. Bricking the Device
During the downgrade process, an error or interruption can brick your iPad. It makes the device unusable. Here, seeking professional help might be necessary to restore the device to its original state.
5. Loss of Performance and Stability
Outdated OS lacks updates, optimizations, and bug fixes found in the latest versions. Consequently, they often exhibit reduced performance, sluggishness, and increased crashes or instability.
Part 2. New Features of iPadOS 17 Beta
Apple has introduced an array of innovative features in this latest beta version. From enhancing productivity to refining user experience, iPadOS 17 Beta has a lot to offer. Some of the new features set to revolutionize the way you interact with your iPad are given below:
1. Lock Screen
Personalize your iPad's Lock Screen with stunning wallpapers like Astronomy or Kaleidoscope. Explore various collections for inspiration. Experience an all-new dynamic motion effect for Live Photos on the Lock Screen. Stay updated with Live Activities such as food orders, flights, scores, and more. View weather, time, date, battery levels, and upcoming events on the Lock Screen with your favorite widgets.

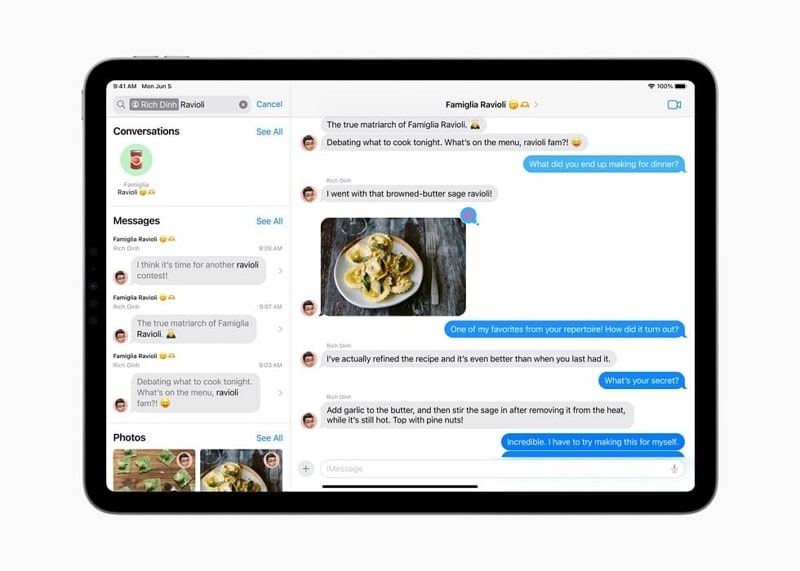
2. Messages
Discover the convenience of having all your iMessage apps in one place. All you need to do is tap the new plus button. This button allows you to access the things you frequently send, such as photos, audio messages, and your location.
Staying on top of conversations is easier with the catch-up arrow. It instantly takes you to the first unread message in a conversation. Additionally, replying swiftly is now possible by swiping right on any message.
3. Location Sharing
Sharing and viewing locations is more straightforward than ever. You can easily share your location or request a friend's location using the plus button. When someone shares their location with you, it appears directly within your conversation.
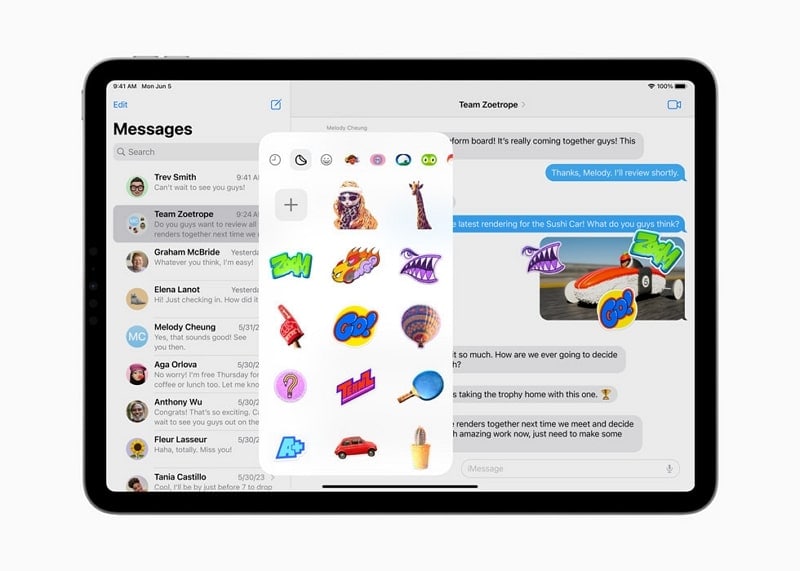
4. Stickers
For sticker lovers, the new stickers drawer is a game-changer. It consolidates all your Live Stickers, emoji, Memoji, and other sticker packs in one place. Moreover, your stickers automatically sync with iCloud. This ensures they're available on your iPhone, iPad, and Mac devices. Enjoy a seamless messaging experience with these exciting updates.
5. FaceTime
When someone misses your FaceTime call, you can record a video or audio message for them. Moreover, you can use your iPad as a camera to start a call directly from the FaceTime app on Apple TV. Alternatively, you can hand off the call from your iPad to your TV.
Want to add some fun to your calls? Express your emotions and feelings with reactions that fill the camera frame with entertaining and exciting 3D augmented reality effects such as confetti, hearts, fireworks, etc. In addition, you can also express your reaction with just a hand gesture.

6. Other New Features in iPadOS 17
- The Health app has been optimized for iPad's larger display. It offers rich details, trend reviews, and interactive charts. Track your menstrual cycle, log symptoms, and set medication reminders from your iPad.
- Enhanced AutoFill securely uses saved contact information. You can use it to fill out PDFs and scan documents faster. Share notes with real-time updates and see changes appear to live on collaborators' devices.
- Safari's different profiles keep browsing separately for Work and Personal topics. Switch between profiles to maintain separate histories, extensions, Tab Groups, cookies, and favorites.
- Private Browsing now locks private browsing windows when not in use. It blocks known trackers and removes tracking from URLs.
- iPadOS 17 allows you to blur sensitive photos and videos before viewing them. This helpful feature will be accessible in various places. You can use it on Messages, AirDrop, FaceTime messages, Contact Posters, and even third-party apps. Keep your content private and secure with this added functionality.
Part 3. Different Methods To Downgrade iPadOS 17 Beta to iPadOS 16/15
Now that you are ready to downgrade the iPadOS 17, it is time to look at the different available options. As mentioned before, there are three ways you can downgrade the iPad version. One is to use iTunes/Finder, the other is by using Recovery Mode, and the final one includes a third-party tool. Below we have described all three methods in detail:
Method 1: Downgrade via iTunes
The first method we will use to downgrade iPadOS 17 beta is the official iOS manager iTunes. The tool is freely available on the Microsoft Store for Windows users. If you are a Mac user, you can use Finder for this method.
Precautions To Take Before Starting the Process
- Backup Your Data
Before attempting any downgrade, create a complete backup of your iPad. For it, you can use iTunes or Finder on your computer. This backup will ensure that your data, settings, and apps can be restored after the process.
- Check IPSW Compatibility
Ensure you have downloaded the correct IPSW file for the iPadOS version you wish to downgrade to. Using an incompatible IPSW file could result in errors and prevent successful downgrading.
- Disable Find My iPad
To avoid potential complications during the downgrade, disable the "Find My iPad" feature on your device. Navigate to "Settings" and tap your Apple ID. Here go to "Find My" and toggle off "Find My iPad." You will need to provide the Apple ID password to complete this process.
- Charge Your iPad
Ensure that your iPad has sufficient battery charge before starting the downgrade process. A fully charged device will prevent unexpected interruptions during the downgrade.
Step-by-Step Guide to Downgrading From Beta Version
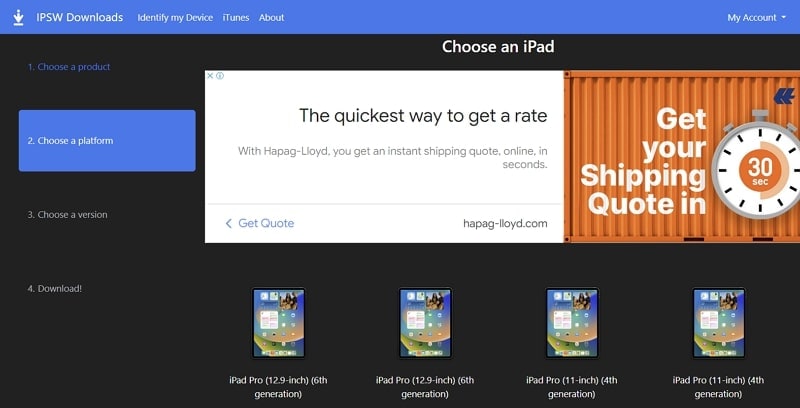
- Step 1: The first thing you need to do is download the required IPSW file. You can use the website "ipsw.me" to download the iPadOS 16 file. Ensure you download the signed IPSW file, as it is the only file to work.
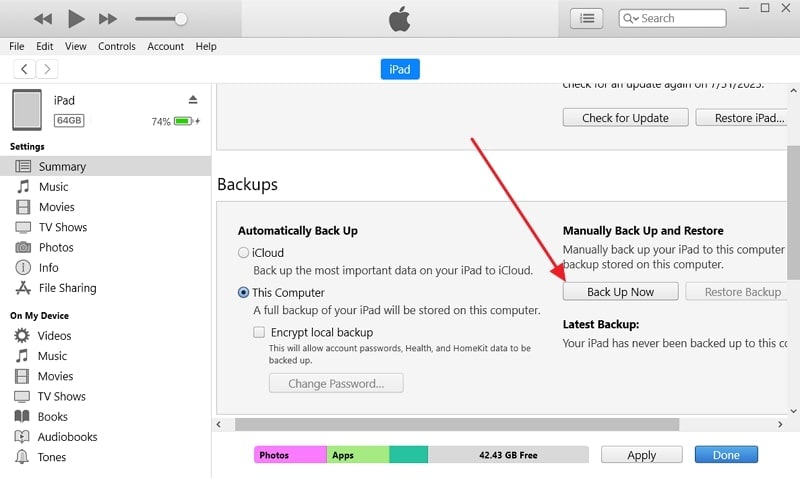
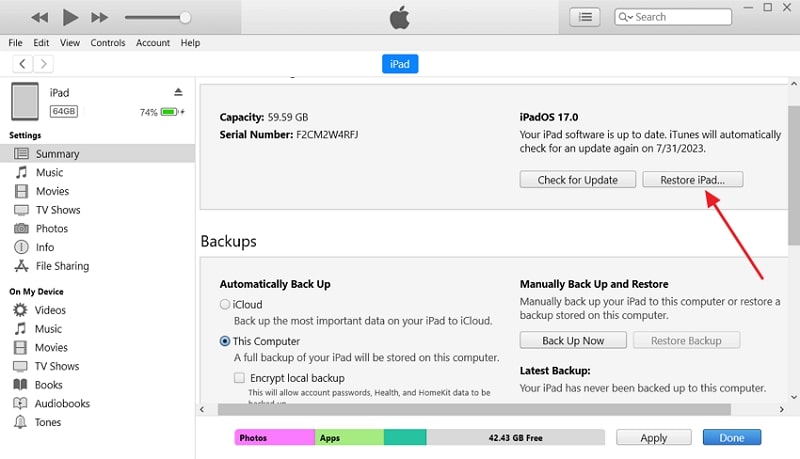
- Step 2: After turning off your iPad's "Find My" feature, connect it to the computer and launch iTunes/Finder. If you haven't backed up the device yet, create a backup using "Back Up Now" in the "Backups" section. Then, ensure that you have enabled the "This Computer" option as the backup file location.
- Step 3: Once done doing all the preparations for the downgrading process, click the "Restore iPad" button on iTunes while pressing the "Shift" key. The "Mac" users need to hold the "Option" key while pressing "Restore iPhone" in Finder. In the browsing window, choose the "IPSW" file you downloaded and click "Open."
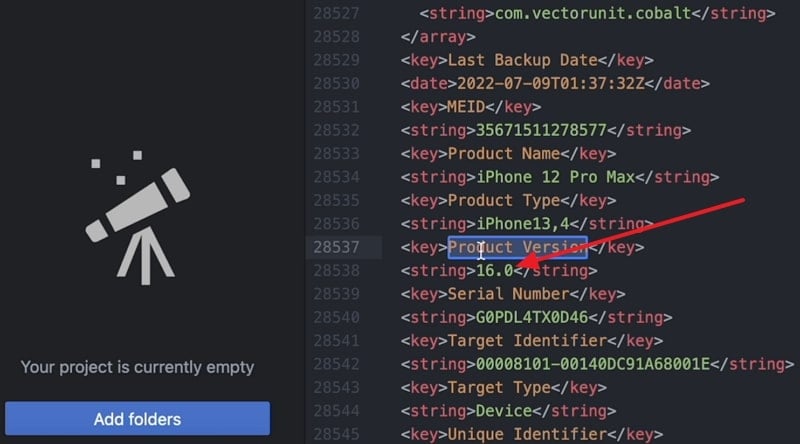
- Step 4: Once the downgrading process is complete, you need to restore the backup you created. However, the backup was done on iPadOS 17 and cannot be directly restored on iPadOS 16. Thus, you will need to change some values. Find the backup on your computer using iTunes/Finder Manage Backups and access the "info.plist" file in the folder.
- Step 5: Here in the file, search for "Product Version" using "CTRL + F" or "Command + F." After finding it, change its value from "17.0" to "16.0" below that line and save. Now unplug and reconnect your iPad to the computer. During the setup process, choose “Restore from iTunes Backup” and follow the on-screen instructions.
Method 2: Recovery Mode for Downgrading iPadOS
Another way to downgrade your iPad to the previous version is by using Recovery Mode. The Recovery Mode allows you to restore your iPad to the latest stable iPadOS version. To use this method, you will need the latest version of iTunes or the latest Mac version in the case of Finder. Here are the detailed steps to downgrade iPad via Recovery Mode:
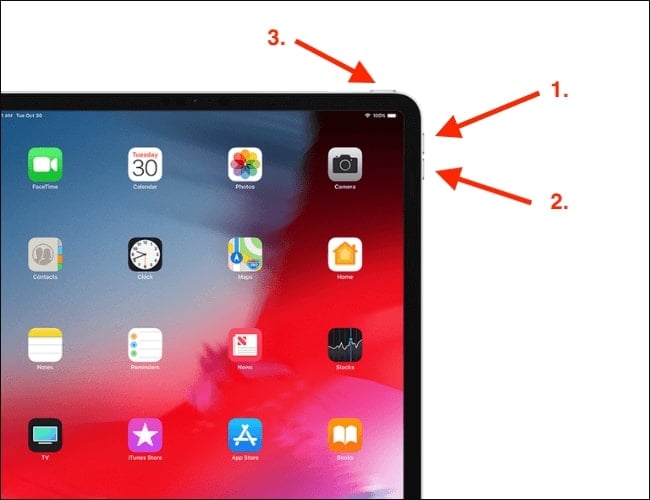
- Step 1: Once you have created a backup of your device, connect it to the computer. To activate Recovery Mode, you first need to press the "Volume Up" button, then the "Volume Down" button. After that, press and hold the "Side" button until iPad transitions into Recovery Mode.
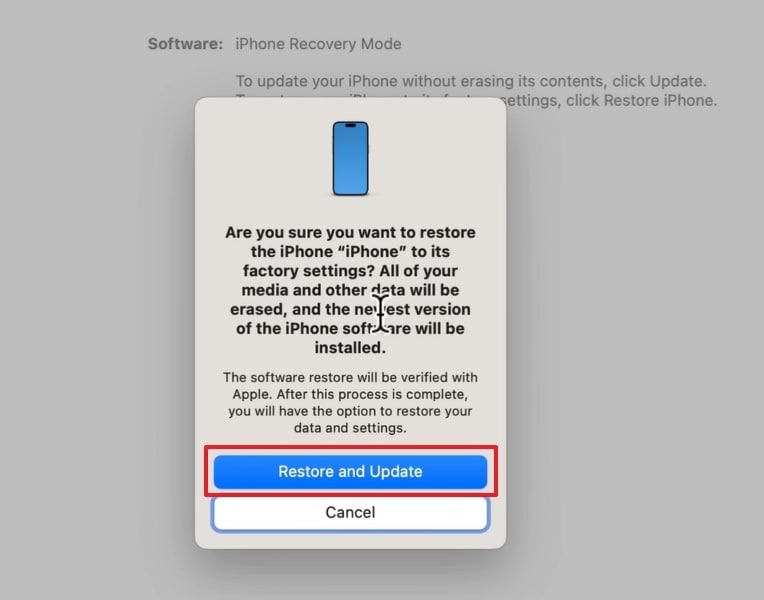
- Step 2: A window will appear informing you that iTunes has detected a device in Recovery Mode. Then, click the "Restore and Update" button and follow the on-screen step-by-step instructions to complete the process. Once your device is restored, you can unplug and set it up by recovering the backup using the instructions discussed in Method 1.
Method 3: Using Third-Party Software for Downgrading
Apart from using iTunes/Finder and Recovery Mode, there are many third-party tools you can use to downgrade your iPad. Dr.Fone by Wondershare is a reliable third-party software that allows downgrading iPadOS. It provides a seamless process for users who may find the manual downgrade methods intimidating. Moreover, it offers a more straightforward approach to downgrading iPadOS 17 beta.
It allows you to downgrade or upgrade without jailbreaking your iPad. Apart from that, it lets you repair over 150 iPadOS system issues without data loss. Wondershare Dr.Fone is compatible will all iPadOS versions, including the latest ones. Given below are the steps to downgrade iPadOS via Wondershare Dr.Fone:
- Step 1: Prepare Dr.Fone and Select iOS Upgrade/Downgrade Option
Begin by installing Wondershare Dr.Fone on your computer. After installation, launch the software and find the "Toolbox" section. From there, select "System Repair" to proceed. When prompted, choose "iOS" as your device type, and then click on the "iOS Upgrade/Downgrade" option.

- Step 2: Initiate Downgrading and Connect Your iOS Device
In this step, you'll initiate the iOS downgrade process. Click on "Downgrade iOS" and follow any on-screen prompts until you see the "Continue" button; click on it. Now, take your iPadOS device and connect it to your computer using an original or MFi-Certified cable. Wondershare Dr.Fone will automatically detect your device once it's connected.

- Step 3: Download and Install the Desired Firmware
With your iPadOS device successfully connected, you can now proceed to download the desired firmware version. Look for the available firmware options and choose the one you wish to install. Then, tap on the "Download" button to begin the iPadOS firmware download process. This might take some time, so be patient.

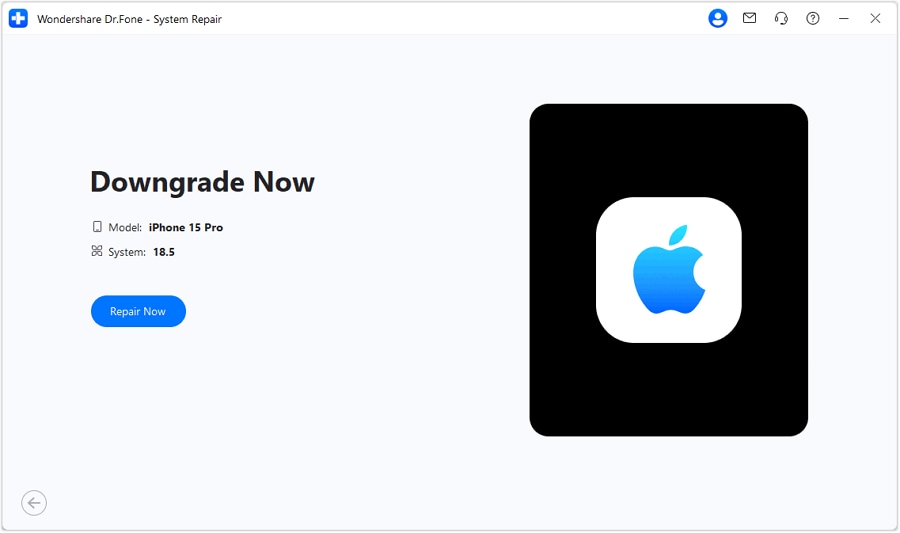
- Step 4: Kickstart the Firmware Installation Process
After downloading the firmware, click "Repair Now" to start the installation process. Wondershare Dr.Fone will now begin downgrading your iPadOS version using the selected firmware. Please note that this process may take a while, and it's essential not to disconnect your device during this time.
- Step 5: Finish the Downgrade and Confirm the Completion
Once the firmware installation process is completed, you'll receive a notification indicating the successful downgrade. At this point, tap "Done" to finish the process. Your iPadOS device should now be running the downgraded firmware version. Then, you can restore the backup to your iPad by following the instructions guided in Method 1.
Part 4. Troubleshooting and Common Error Fixes
As with any software modification, downgrading can sometimes present challenges and unexpected errors. This section will address common issues that one might encounter during the iPadOS downgrade process. It will provide practical solutions and workarounds to ensure a successful downgrade.
Addressing Common Issues Users Might Encounter During Downgrading
Downgrading iPadOS can sometimes be a complex process. So, users may encounter various issues along the way. Here are some common problems you might face during the iPadOS downgrade process and how to address them:
1. "The iPad could not be restored. An unknown error occurred (xxx)"
This error message often indicates a communication problem between iTunes/Finder and the iPad. Try using an Apple-certified USB cable, USB port, or Windows PC/MacBook. Restarting both the computer/MacBook and iPad can also help resolve this issue.
2. Stuck in Recovery Mode/DFU Mode
If your iPad gets stuck in Recovery Mode or DFU Mode during the downgrade, try the following:
- For Recovery Mode:Disconnect your iPad from the computer. Force restart it, and then try entering Recovery Mode again.
- For DFU Mode: Ensure you follow the correct steps for your iPad model, and try entering DFU Mode If the issue persists, you may need to use iTunes/Finder to exit DFU Mode.
3. Verification Failure of IPSW File
If iTunes/Finder fails to verify the downloaded IPSW file during the downgrade, it may be corrupted. Re-download the IPSW file from a reliable source and try again.
4. Battery Drain During Downgrade
The downgrade process can be battery-intensive. If your iPad's battery drains during the process, it may fail. Ensure your iPad has sufficient battery charge, or keep it connected to a power source.
5. App Compatibility Issues
After downgrading, some apps may not function correctly. It is due to compatibility with the earlier iPadOS version. Check for app updates in the App Store or contact app developers for information.
Providing Solutions and Workarounds for Successful Downgrade Process
1. Use Official IPSW Files
Always download IPSW files from official and reputable sources. This ensures that the files are legitimate and free from corruption.
2. Verify Device and IPSW Compatibility
Confirm that the IPSW file is compatible with your iPad model. Installing an incompatible IPSW file can lead to errors or render your device unusable.
3. Disable Firewall and Security Software
Firewalls or security software on your computer might interfere with the downgrading process. Temporarily disable them before starting the downgrade.
4. Check Apple's Signing Status
Apple signs certain iPadOS versions, allowing users to downgrade. Before attempting to downgrade, verify that Apple is still signing the version you want to install. You can check the signing status on various online platforms.
5. Restart the Computer and iPad
If you encounter errors during the downgrade, try restarting your computer and iPad. This can often resolve temporary glitches.
6. Be Patient and Cautious
The iPadOS downgrade process can take time, and errors might occur. Be patient and follow instructions carefully. Always back up your data before attempting any downgrades.
4,624,541 people have downloaded it
Conclusion
In conclusion, downgrading iPadOS 17 beta is a valuable option for users who encounter stability issues. It provides a way forward to stable iOS. We have explored different methods to downgrade, each offering unique advantages and considerations. Among these methods, Wondershare Dr.Fone stands out as a top-notch choice. It provides a user-friendly and efficient solution for downgrading iPadOS.
With Wondershare Dr.Fone, users can navigate the downgrade process with ease and confidence, even if they are less familiar with manual procedures or advanced technicalities. The software's straightforward interface, coupled with its reliable performance, makes it an ideal option.


iOS 17 Topics
- iOS 17 downgrade/upgrade
- 1. Downgrade ios 17 to 16
- 2.OTA Downgrader to downgrade device
- 3.Downgrade iPadOS 17 beta/16
- 4.Downgrade Apple WatchOS 10 beta
- 5.IPSW Beta Unsigned/Signed Version
- 6.Use SHSH Blobs to downgrade
- 7.Upgrade Devices with Firmware Files
- 8.iOS 17 Developer/Beta/Official
- iOS 17 New Features
- 1. Widget to Ios 17 Lock Screen
- 2.iOS 17 Wallpaper
- 3.iOS 17 Notification Center
- 4.iOS 17 Hidden Features
- 5.iOS 17 New Emoji
- 6.Live Activities iOS 17
- 7.Fix iOS 17 Keyboard Bug
- 8.iOS 17 Haptic Keyboard Issue
- 9.iOS 17 Tips and Tricks
- 10.New Car Play of iOS 17
- 11.Customize iOS 17 Standby Mode
- 12.iOS 17 Standby Mode Not Working
- 13.Create Live Stickers on iOS 17
- 14.New Feature of iOS 17 Facetime
- iOS 17 Problems
- 1. iOS 17 Bugs, Problems and Fixes
- 2.iOS 17 Update Won't Install Issue
- 3.Camera Black Screen iOS 17 Update
- 4.iOS 17 Apps Crashing
- 5.Charging Slow After iOS 17 Update
- 6.Stuck on Verifying Update to iOS 17
- 7.Overheating After iOS 17 Update
- 8.iPhone Freezing After iOS 17 Update
- 9.iOS 17 Battery Drain
- 10.iPhone Slow After iOS 17 Update
- 11.Stuck on Estimating Time Remaining
- 12.Recover Lost Data after Update


James Davis
staff Editor
Generally rated4.5(105participated)