How to Transfer Music from iPod shuffle to iTunes
Oct 24, 2025 • Filed to: Device Data Management • Proven solutions
Dr.Fone Basic:
Better Control for Your Phone
Manage, transfer, back up, restore, and mirror your device
Is there a way to transfer music on my iPod Shuffle Gen. 3 to iTunes on my computer? I'm afraid to try syncing because I think that is a reverse process where music in iTunes is transferred to the iPod. I don't want to erase music on the iPod. Thanks!
Want to transfer music from iPod shuffle to iTunes after losing your iTunes library? Intend to backup music on iPodc shuffle to iTunes? However, as a one-way program, iTunes only syncs music to your iPod shuffle. It can do nothing to transfer music on your iPod to it.
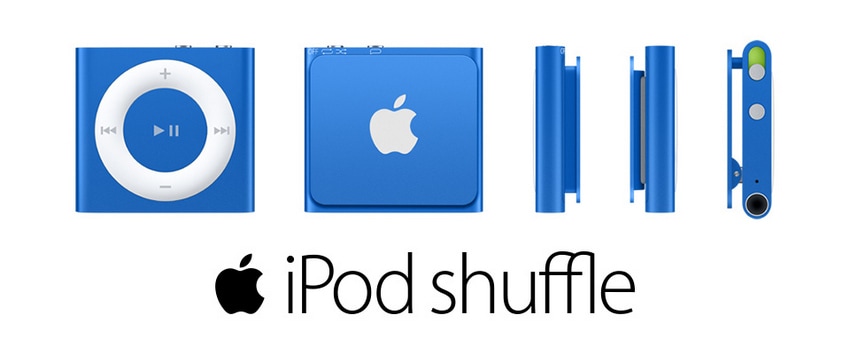
In this case, we highly recommend you to use an easy-to-use and powerful iPod to iTunes transfer tool - Wondershare Dr.Fone - Phone Manager (iOS). With which you're able to transfer all or selected songs from iPod shuffle, iPod Nano, iPod Classic, and iPod Touch to iTunes quickly and easily. Besides transferring music, you can also copy movies, playlists, podcast, TV show and music videos to your iTunes library as well. In addition, all the music added previously won't be removed during the iPod Shuffle music transfer.
- Part 1. Transfer Music from iPod shuffle to iTunes with Dr.Fone - Phone Manager (iOS)
- Part 2. Transfer Music from iPod shuffle to iTunes Manually
- Video Tutorial: How to Transfer Music from iPod shuffle to iTunes
Part 1. Transfer Music from iPod shuffle to iTunes with Dr.Fone - Phone Manager (iOS)

Dr.Fone - Phone Manager (iOS)
Transfer MP3 From iPhone/iPad/iPod to iTunes
- Transfer, manage, export/import your music, photos, videos, contacts, SMS, Apps etc.
- Backup your music, photos, videos, contacts, SMS, Apps etc. to computer and restore them easily.
- Transfer music, photos, videos, contacts, messages, etc from one smartphone to another.
- Transfer media files between iOS devices and iTunes.
- Support all iPhone, iPad, and iPod touch models with any iOS versions.
Note: Dr.Fone - Phone Manager (iOS) is fully compatible with iPod shuffle 4, iPod shuffle 3, iPod shuffle 2, and iPod shuffle 1.
Click the "Start Download" button to download Dr.Fone - Phone Manager (iOS) on your computer.
Easy steps to copy music from iPod shuffle to iTunes.
Below are the easy steps about the transferring music files and playlists from iPod shuffle to iTunes. Now, let's check out them.
Step 1. Run this program and connect iPod shuffle with PC
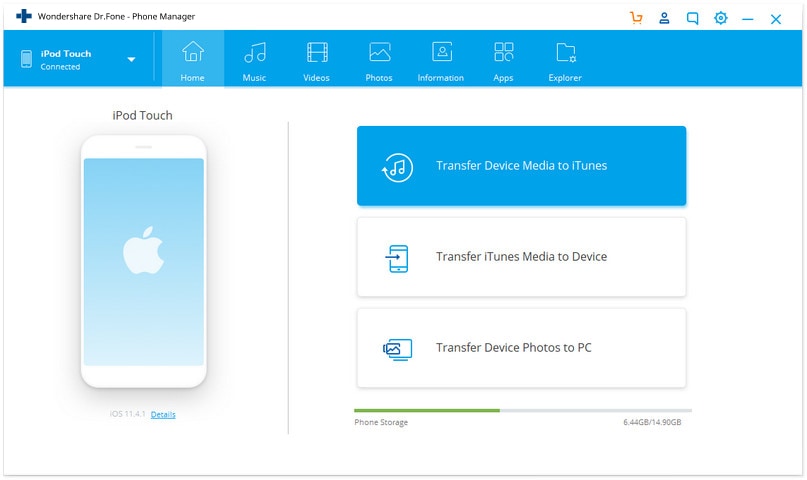
First of all, install and then run this iPod to iTunes transfer tool on your PC. If you haven't installed iTunes on your computer, this program will remind you of installing it. Thus, in this case, you should install iTunes on your computer.
Then, connect your iPod shuffle with your computer via a USB cable and choose the "Phone Manager" feature. This program will detect your iPod shuffle immediately. Then, the main interface will be shown on your PC screen.
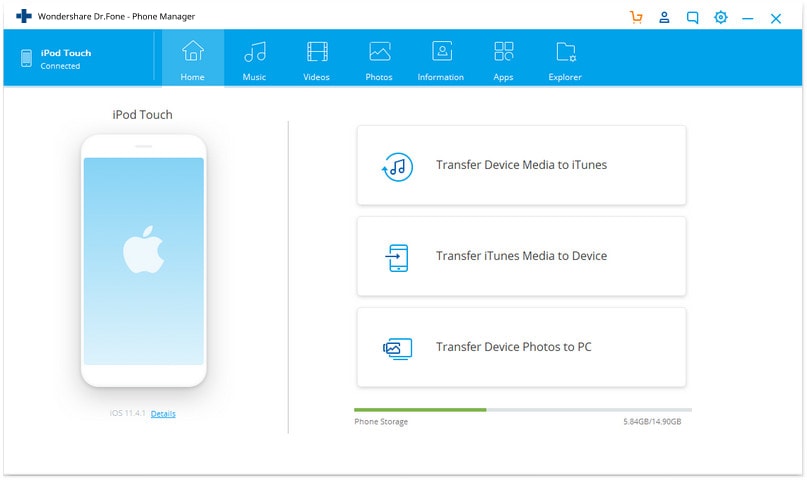
Step 2. Move music from iPod shuffle to iTunes
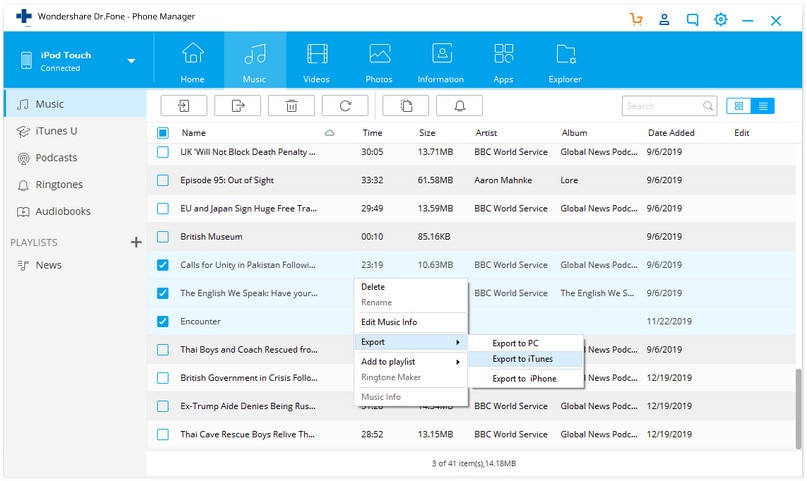
To sync music from iPod shuffle to iTunes, select the "Music" tab. Then select the music you would like to transfer from iPod shuffle to iTunes. Click "Export to iTunes". It will transfer songs from iPod to your iTunes library.
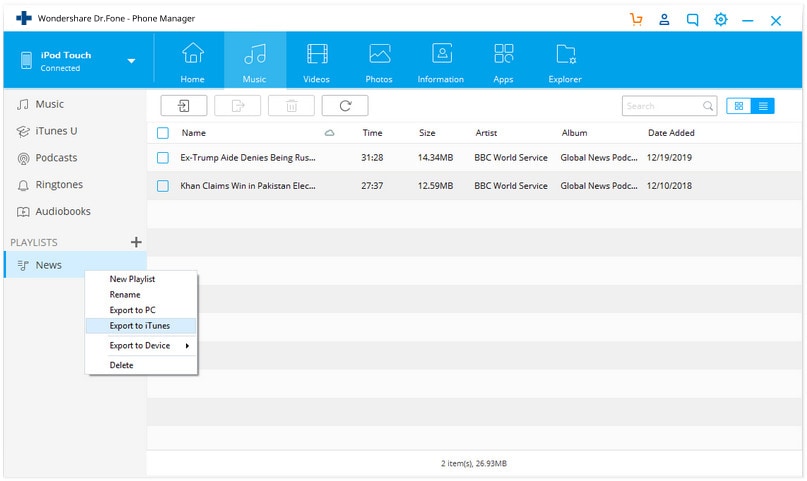
You can also move music playlist to your iTunes library in another way. On the left column, you should click "Playlist". Right click to select "Export to iTunes".
Dr.Fone - Phone Manager (iOS) is mainly to transfer music, photos, videos, playlists from your iPhone, iPad& iPod to iTunes Library& PC for backup, to manage music and photos freely with a relatively competitive price.
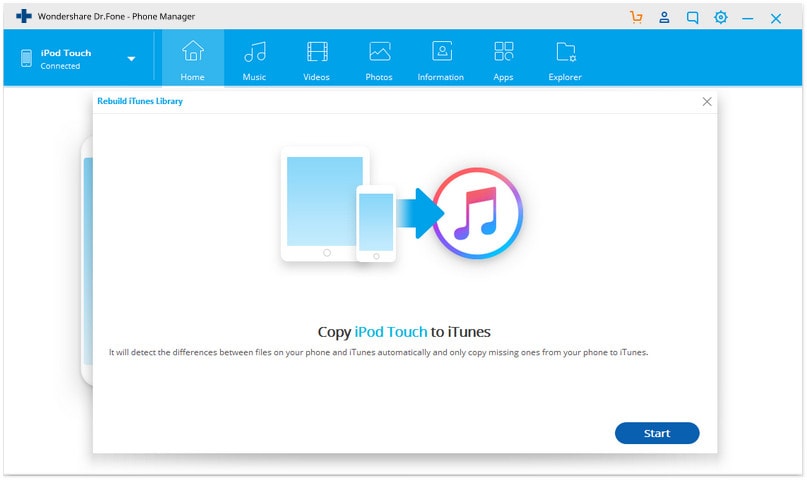
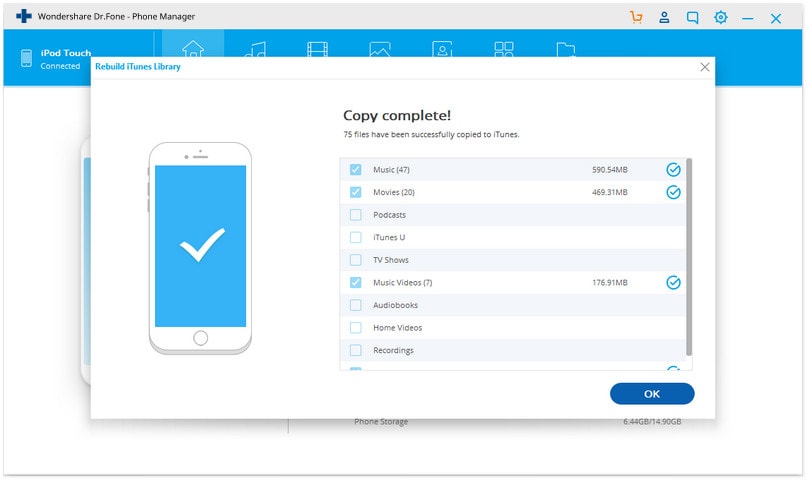
You can also transfer music from iPod shuffle to iTunes all with one click.
Part 2. Transfer Music from iPod to iTunes Manually
If you plan to transfer songs from your iPod manually to your iTunes music library on your computer, you will need a sync cable to connect your PC with your iPod.
Step 1 Plug in your iPod and launch iTunes. Check on ‘Enable Disk use’ and press OK.
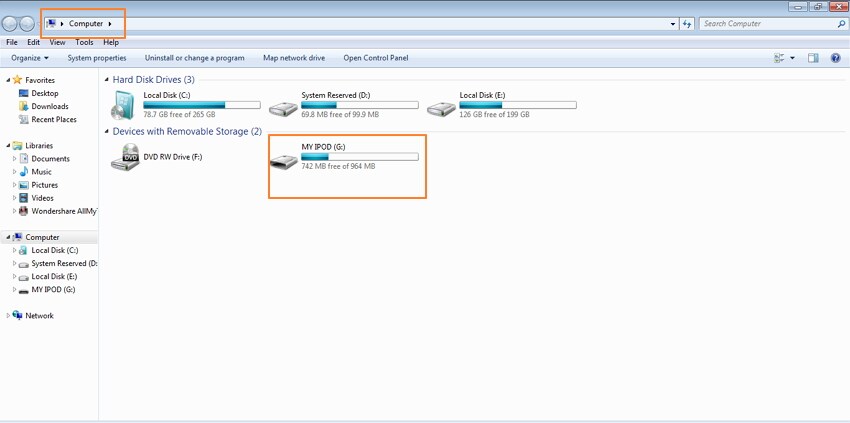
Step 2 Open iPod drive in My computer section because you will need to make hidden files become visible.
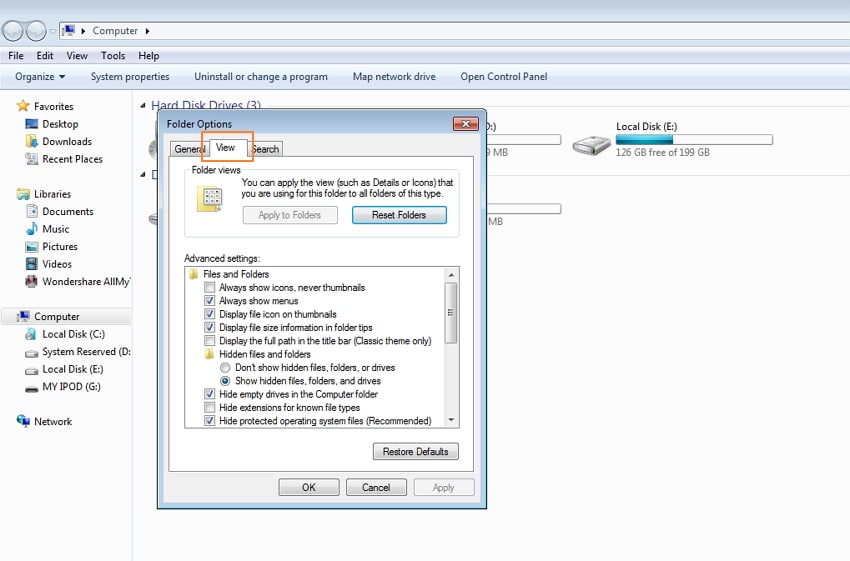
Step 3 Click Tools > Options >View and check ‘Hidden files and folders’.


Step 4 On iPod, go to Music and drag the chosen tracks to the folder on your computer.

Step 5In iTunes, click File menu and select "Add Folder to Library". Browse your computer for the music folder you’ve copied from your iPod and add files from it to your iTunes Library.

Your files have been successfully transferred. On the computer, your files will be unorganized but if you put back to your iTunes, they will become organized.
Dr.Fone Basic:
Better Control for Your Phone
Manage, transfer, back up, restore, and mirror your device
iPod Transfer
- Transfer from iPod
- 1. Transfer Your Photos from iPod
- 2. Transfer Music to Computer
- 3. Transfer Music to Computer or Mac
- 4. Transfer Music from iPod Classic
- 5. Transfer Music from iPod (Touch)
- 6. Transfer Music from Formatted iPod
- 7. Transfer Music from iPod to Mac
- 8. Sync iPod to New Computer
- 9. Transfer Music Without Losing Data
- 10. Transfer Pod to iTunes or Computer
- 11.Transfer Music to Hard Drive
- 12.Transfer iPod Music to MP3 Player
- 13.Transfer Music to USB Flash Drive
- 14.Transfer Music from Android to iPod
- 15.Upload iPod Music to Google Music
- 16.Transfer Music from iPod to iPad
- 17.Transfer Music to Samsung Galaxy
- Transfer to iPod
- 1. Transfer Music from iPod to iTunes
- 2. Transfer Music from iPod Classic
- 3. Transfer Music from iPod Nano
- 4. Transfer Music from iPod shuffle
- 5.Transfer Music from iTunes
- 6. Put music on iPod shuffle
- 7. Transfer Audiobooks to iPod
- 8. Transfer MP3 to iPod
- 9. Transfer Music From Window
- 10. Add Videos to iPod nano
- 11.Transfer Music from Hard Drive
- 12.Transfer Music from iMac
- 13.Transfer Music from Computer
- 14.Transfer Photos from Computer
- 15.Transfer Music from iPad
- 16.Transfer Music from iPod
- 17.Transfer Music from iPhone
- iPod Useful Tips
- ● Manage/transfer/recover data
- ● Unlock screen/activate/FRP lock
- ● Fix most iOS and Android issues
- Start Transfer Start Transfer Start Transfer


Daisy Raines
staff Editor