How to Transfer Audiobooks to iPod with or without iTunes
Oct 24, 2025 • Filed to: Device Data Management • Proven solutions
Dr.Fone Basic:
Better Control for Your Phone
Manage, transfer, back up, restore, and mirror your device
An audiobook is basically a recording of the text that can be read. If you have your favorite collection of books in form of audiobooks, then you can transfer them to iPod so that you can enjoy them even on the go. There are many websites with good collection of audiobooks and you can download your favorite titles from these sites, then transfer them to your iPod to enjoy them during your free time. Below given are the best ways on how to transfer audiobooks to iPod.
Part 1: Transfer Audiobooks to iPod Using iTunes
The first thing that comes to mind when we think about the file transfer to iOS devices is iTunes and the transfer of audiobooks is no exception. iTunes, being the official software of Apple, is the preferred choice of the users to transfer music, video, photos, audiobooks and other files. Below given are the steps to transfer audiobooks to iPod using iTunes.
Step 1 Launch iTunes and add audiobook to iTunes library
Install and launch iTunes on your PC. Now click File > Add File to Library.

Select the destination folder on PC where the audiobook is saved and click Open to add the audiobook. The selected audiobook will be transferred to iTunes library.

Step 2 Connect iPod with PC
Using a USB cable, connect your iPod to PC and the connected device will be detected by iTunes.

Step 3 Select the audiobook and transfer it to iPod
Under “My Music” on iTunes, click Music icon at the left-top corner that will show the list of all music files and audiobooks present in iTunes library. Select the audiobook on the right side, drag it to the left side and drop on iPod, thus the successful audiobook iPod transfer will be completed. Alternatively, you can also select any audiobook from iTunes store and transfer.

Pros and cons of the method:
Pros:
- It's free to use.
- No third party software is needed.
Cons:
- The process at times is complicated.
- iTunes can't recognize the non-purchased audiobooks, you need to find them in Music type.
Part 2: Transfer Audiobooks to iPod Using Dr.Fone - Phone Manager (iOS)
Wondershare Dr.Fone - Phone Manager (iOS) allows to transfer files between iOS devices, PC and iTunes without any restriction. Besides file transfer, the software allows to manage files, take backup, restore and perform other functions. Thus Dr.Fone - Phone Manager (iOS) can be considered as an apt choice to transfer audiobooks, music files, playlists, photos, TV Shows and other files to iPod and other devices.

Dr.Fone - Phone Manager (iOS)
Transfer Audiobooks From iPhone/iPad/iPod to PC without iTunes
- Transfer, manage, export/import your music, photos, videos, contacts, SMS, Apps etc.
- Backup your music, photos, videos, contacts, SMS, Apps etc. to computer and restore them easily.
- Transfer music, photos, videos, contacts, messages, etc from one smartphone to another.
- Transfer media files between iOS devices and iTunes.
- Support all iPhone, iPad, and iPod touch models with any iOS versions.
Steps to transfer audiobooks to iPod using Dr.Fone - Phone Manager (iOS)
Step 1 Launch Dr.Fone - Phone Manager (iOS)
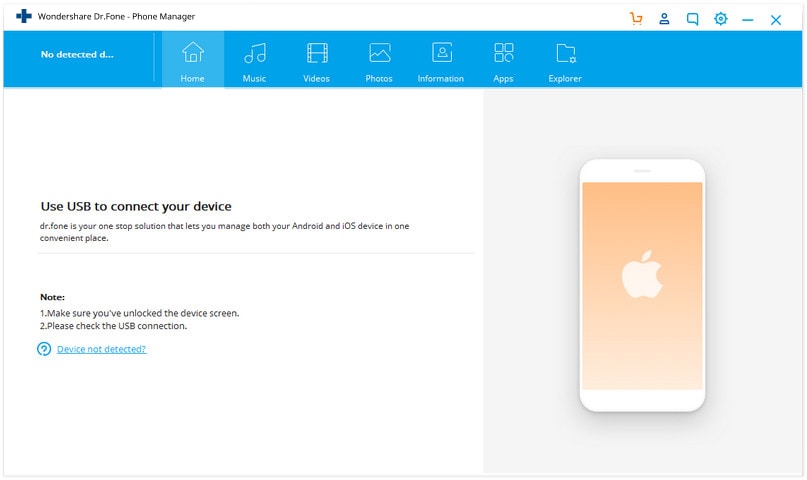
Download, install and launch Dr.Fone - Phone Manager (iOS) on your PC.

Step 2 Connect iPod with PC
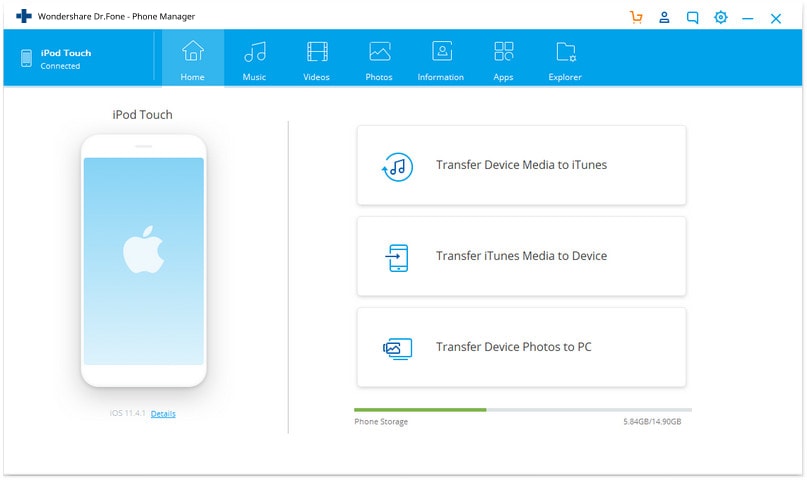
Connect iPod to PC using the USB cable and the connected device will be detected by Dr.Fone - Phone Manager (iOS).

Step 3 Add audiobooks to iPod
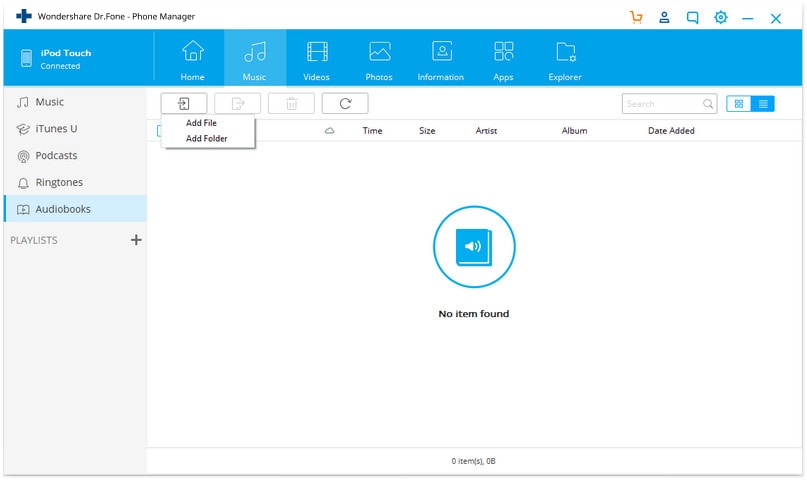
Select “Music” and you will see "Audiobooks" option on the left side, select Audiobooks. Click on the "+Add" button and then Add File.

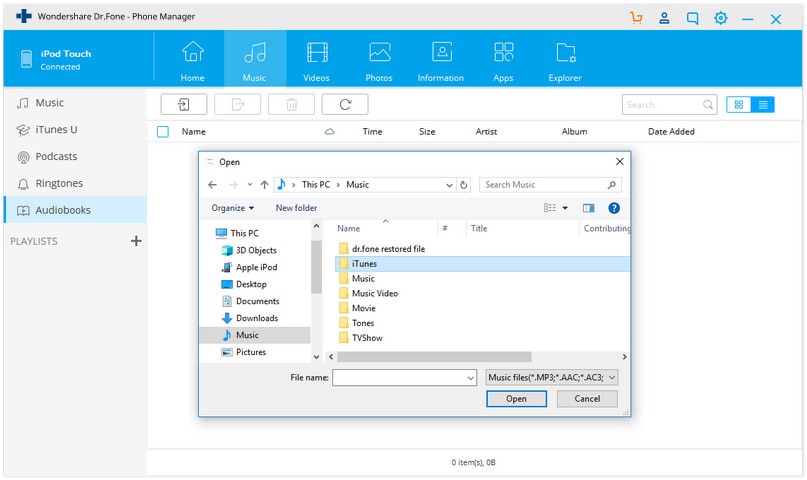
Select the destination folder on PC where the audiobook is saved and click on Open to load the audiobook to iPod, here you can select multiple audiobooks at one time if necessary. Thus you will have the selected audiobooks on iPod.

Pros and cons of the method:
Pros:
- The process of transfer is quick and simple.
- There is no restriction of iTunes.
Cons:
- Need installation of third party software.
Dr.Fone Basic:
Better Control for Your Phone
Manage, transfer, back up, restore, and mirror your device
iPod Transfer
- Transfer from iPod
- 1. Transfer Your Photos from iPod
- 2. Transfer Music to Computer
- 3. Transfer Music to Computer or Mac
- 4. Transfer Music from iPod Classic
- 5. Transfer Music from iPod (Touch)
- 6. Transfer Music from Formatted iPod
- 7. Transfer Music from iPod to Mac
- 8. Sync iPod to New Computer
- 9. Transfer Music Without Losing Data
- 10. Transfer Pod to iTunes or Computer
- 11.Transfer Music to Hard Drive
- 12.Transfer iPod Music to MP3 Player
- 13.Transfer Music to USB Flash Drive
- 14.Transfer Music from Android to iPod
- 15.Upload iPod Music to Google Music
- 16.Transfer Music from iPod to iPad
- 17.Transfer Music to Samsung Galaxy
- Transfer to iPod
- 1. Transfer Music from iPod to iTunes
- 2. Transfer Music from iPod Classic
- 3. Transfer Music from iPod Nano
- 4. Transfer Music from iPod shuffle
- 5.Transfer Music from iTunes
- 6. Put music on iPod shuffle
- 7. Transfer Audiobooks to iPod
- 8. Transfer MP3 to iPod
- 9. Transfer Music From Window
- 10. Add Videos to iPod nano
- 11.Transfer Music from Hard Drive
- 12.Transfer Music from iMac
- 13.Transfer Music from Computer
- 14.Transfer Photos from Computer
- 15.Transfer Music from iPad
- 16.Transfer Music from iPod
- 17.Transfer Music from iPhone
- iPod Useful Tips
- ● Manage/transfer/recover data
- ● Unlock screen/activate/FRP lock
- ● Fix most iOS and Android issues
- Start Transfer Start Transfer Start Transfer


Selena Lee
chief Editor