[SOLVED] How to Delete Snapchat Messages on Your Android
Aug 27, 2025 • Filed to: Data Wipe Solutions • Proven solutions

Have you ever sent a text message through Snapchat and instantly regretted typing it? Perhaps you meant to write it as an inside joke for just one friend or even as something that should never been said in the first place. Luckily, Snapchat can only delete these messages and entire conversations at once. Consequently, this manual will clearly show you how to delete Snapchat messages on your Android device and additional tips for handling your snaps. Read on to learn more.
- Part 1. Why Delete Snapchat Messages?
- Part 2. Deleting Individual Messages
- Part 3. Deleting Entire Conversations
- Part 4. Advanced Deletion Options
- Part 5. Manage Your Snapchat Messages with Wondershare Dr.Fone

Part 1. Why Delete Snapchat Messages?
If you need the deletion of some; or all Snapchat messages, there are many reasons why you can choose to do this. It could be issues regarding privacy or crowded chat history. It may also be about other people accessing your conversations. So, whatever the reason, the app lets you take charge of your messaging.
Part 2. Deleting Individual Messages
Let’s say you wish to disappear a specific message in a snapchat chat. It is pretty easy to delete individual Snapchat messages. Here is how:
Step 1: Open Snapchat
Start by opening the app on your Android phone.
Step 2: Go to Chats
Swipe right on Snapchat’s main screen to proceed to the chat list screen.
Step 3: Select the Chat
Tap on the thread where the message you want gone is at.

Step 4: Long Press the Message
Press and hold onto the message you want removed.
Step 5: Select "Delete"
Click “delete” from the appearing options.

Step 6: Confirm Deletion
Confirm that you want to delete the message by clicking “Okay.”

- Your friend will be alerted that you have deleted a message. Once seen, there is no way it can be completely wiped out.
- It is important to note what one sends on Snapchat because people can still take screenshots even before deleting a snap.

Part 3. Deleting Entire Conversations
You may sometimes want to delete a conversation instead of a single message - here’s how you can do it:
Delete Conversation on Chat List
Step 1: Open Snapchat
Launch the app and swipe right until you get to your chats.
Step 2: Press and hold the Conversation
Press and hold on to the conversation you want to delete until the additional options appear.

Step 3: Click the Delete Option
Tap “Chat and Notification Settings” > “Clear from Chat Feed” from the options on the screen.

Step 4:Confirm Deletion
Confirm the deletion by clicking “Clear” to remove the conversation from your chat list.

Removing Conversations under Settings
Step 1: Open Snapchat Settings
Click your profile icon on the top left and then the gear icon to access settings.

Step 2: Find Account Actions
Scroll down to locate “Clear Conversations.”

Step3: Choose the Conversation
Select the “X” beside the conversation you want to remove.

Step 4: Confirm Decision
Confirm this action by clicking “Clear” to delete the conversation.

Part 4. Advanced Deletion Options
Snapchat has a “Delete After Viewing” Feature that can help manage message deletions effectively. When viewed, all messages on Snapchat are automatically removed. However, users can set this feature as desired:
Step 1: Enter a Chat Room
Visit any chatroom or any conversation that requires management by its owner.
Step 2: Selecting Chat Icon
Click your friend’s profile image over a chatbox page display.

Step 3: Choose Delete Chats
Click the three dots “…” on the upper right corner of your screen, then “Chat and Notification Settings” > “Delete Chats…”

Step 4: Set the Timer for the Deletion of Messages after Viewing Them
Choose the timer you want to set for deletion; the options are After or 24 hours after viewing.

Part 5. Manage Your Snapchat Messages with Wondershare Dr.Fone
Snapchat allows for basic deletion options, but you may require something more advanced for data management. Wondershare Dr.Fone comes with stronger tools to manage your Snapchat messages and other data on your device.
Wondershare Dr.Fone - Data Erase
In this case, Dr.Fone has a feature that will help you completely erase all data from your device, ensuring that deleted messages and other sensitive information are permanently removed. This is how to use the tool called Dr.Fone – Data Erase:
Note: Using the Data Erase function means wiping out your data forever. Hence, we strongly advise using Dr.Fone Phone Backup before using Data Erase.

Dr.Fone - Data Eraser (Android)
Fully Erase Everything on Android and Protect Your Privacy
- Simple, click-through process.
- Wipe your Android completely and permanently.
- Erase photos, contacts, messages, call logs, and all private data.
- Supports all Android devices available in the market.
Step 1: Open Wondershare Dr.Fone software on your computer and connect a USB cable or wirelessly to get connected.
Step 2: If your connection is successful, proceed to the Toolbox section on the left side and click the Data Eraser option.
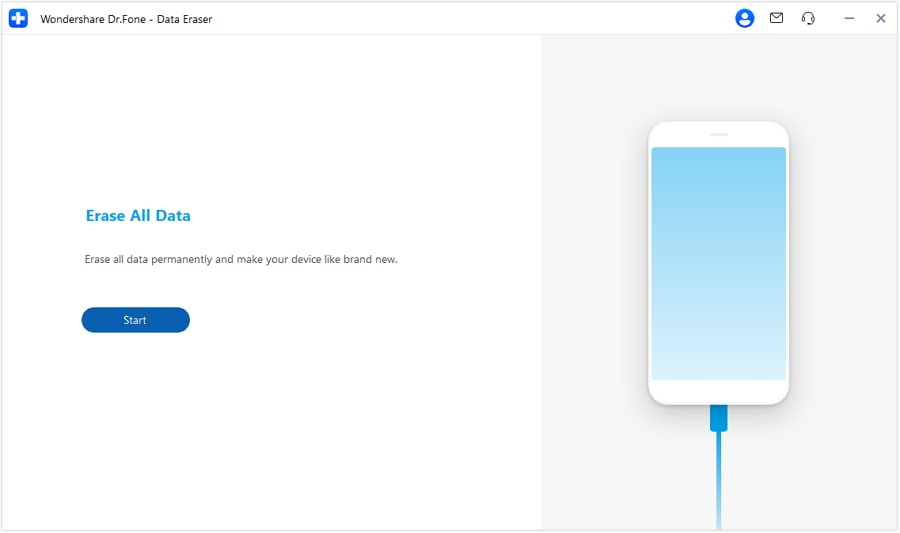
Step 3: A pop-up window with the Data Eraser tab will allow you to start the process by clicking “Start.”

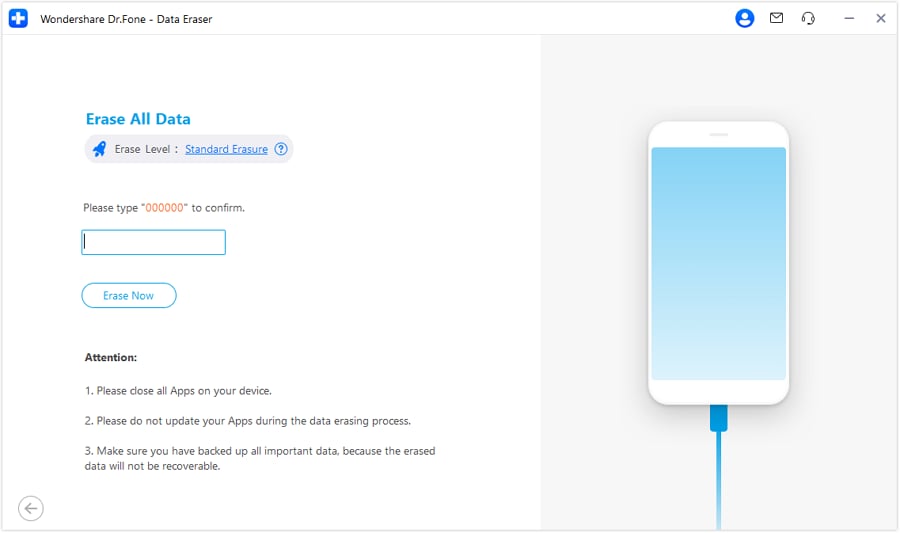
Step 4: After clicking “Start,” the next window will ask for the verification code flashed on the screen by providing “Erase Now” by Dr.Fone.

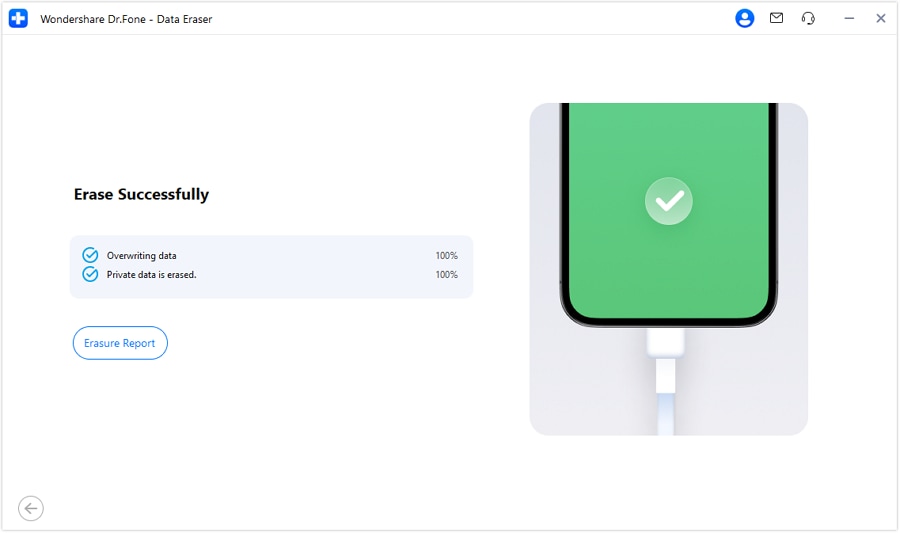
Step 5: The next screen will show you the progress of the process. If you wish to cancel, click Stop. After the process is complete, you will see the Erasure Report button. Click it to see what data types have been removed from your device.

Conclusion
Knowing how to delete Snapchat messages is important because it helps maintain your privacy and manage your Android device. Whatever you want to be removed from the chat- whether specific messages or the whole thing– Wondershare Dr.Fone Data Eraser has covered you. To effectively handle your Snapchat messages, these steps will be of great importance as they will keep your conversations confidential and maintain clean devices.
Android Erase
- Android Diagnostics
- 1. Fix Android Microphone Issues
- 2. Test NFC on Android Device
- 3. Check Android Device in Minutes
- 4. Apps For Sensor Check Android
- 5. Apps for Testing Device's Hardware
- 6. Tools for Conducting Screen Tests
- 7. Ways to Check Phone's Vibrations
- 8. Check Mobile Signal Strength
- 9.Realme Touch Screen Test Codes
- 10.Android Codes To Test Touch Screen
- 11.Phone Processor Speed Tests
- Erase Android
- 1. Delete Browsing History on Android
- 2. Clear App Data and Cache on Android
- 3. Delete Photos from Android
- 4. Wipe Android When It's Lost
- 5. Wipe Cache Partition on Android
- 6. Delete Text Messages on Android
- 7. Delete WhatsApp Backup
- 8. Wipe Data or Factory Reset
- 9. Erase Android Data Before Selling
- 10. Delete Contacts on Android
- 11.Delete Multiple Contacts on Android
- 12.Wipe Android Phone before Selling
- 13.Delete Photos on Android
- 14.Remove Pre-installed Apps
- 15.Delete Apps on Android
- 16. Access Trash on Android
- Android Reset
- 1. Restart Phone without Power Button
- 2. Reset Phone without Volume Buttons
- 3. Factory Reset Android Phone
- 4. Hard Reset Android Phone Using PC
- 5. Hard Reset Locked Infinix Phone
- 6. Factory Reset Lenovo Phone
- 7. Factory Reset Android Tablets
- 8. Factory Reset Lenovo Tablets
- 9. Format Your Android Phone
- 10. Hard Reset Android Phones
- 11.Reset Android Without Home Button
- 12.Restart Your Android Phone
- 13.Soft Reset Android Devices
- 14.Reset Android without Losing Data
- 15.Ways to Hard Reset Tecno Spark
- 16.Updated Android Factory Reset Code
- Data Erase Apps
- 1. Speed Booster for Android
- 2. Android Cleaners to Boost Device
- 3. Data Erase Apps to Protect Privacy
- 4. Data Eraser Apps to Wipe Android
- 5. 15 Best Cleaning Apps for Android
- Sell Old Android


James Davis
staff Editor