 Permanently erase all iOS & Android data—completely unrecoverable.

 100% Security Verified | No Subscription Required | No Malware

 :
: 
 ChatGPT
 Perplexity
 Gemini
 Claude
 Grok
Grok


Hey, I've been trying to figure out how to delete my old email account from my Android phone. Any ideas?
Android User
If you have ever wondered how to delete an email account on Android, you are certainly not alone. Many smartphone users eventually face the challenge of managing multiple email accounts, especially when they need to dispose of outdated, compromised, or simply unused inboxes. Whether you are decluttering your digital workspace, migrating to a more secure email service, or preparing your smartphone for a new owner, mastering the steps to remove email from Android is a vital digital hygiene practice.
In this comprehensive guide updated for 2026, we will walk you through exactly how to delete email account profiles on Android effectively. We will explore the primary reasons behind this necessity, provide straightforward manual steps to delete email on Android, and introduce a highly secure method for those who prioritize absolute data privacy. Let us dive in and streamline your Android email management!
In this article
Part 1. Why Remove Email From Android: Top Reasons
Before diving into the exact steps on how to delete emails on Android phone systems, it is essential to understand the common motivations driving users to clear out their accounts:
- Digital Decluttering: Juggling too many inboxes can lead to missed messages and notification fatigue. Removing unnecessary accounts helps you focus on priority communications.
- Enhancing Data Security: Dormant or forgotten accounts are prime targets for hackers. When you email account delete android connections, you minimize the risk of unauthorized access to your private data.
- Optimizing Device Performance: Email applications constantly sync in the background. Fewer active accounts mean reduced background data usage, smoother system performance, and longer battery life.
- Transitioning Services: If your workplace changes or you simply prefer a different provider, deleting the old profile is the first step to a clean slate.
- Device Resale Preparation: It is critical to wipe all personal accounts before selling or donating a smartphone to prevent identity theft.
- Troubleshooting Sync Errors: Sometimes, the easiest fix for a stubborn synchronization glitch is to remove the account entirely and re-add it fresh.
Part 2. How to Delete an Email Account on Android
When you decide it is time to part ways with a specific inbox on your smartphone, you generally have two distinct paths. You can either utilize a professional data wiping software for guaranteed security or use the built-in system settings for a quick removal.
2-1. Method 1: Use Wondershare Dr.Fone Data Eraser
 Permanently erase all data on iOS & Android — completely unrecoverable.
- Military-grade wiping to fully protect your privacy.
- Generate verified erasure reports to boost device resale value.
- Selectively erase private data and remove junk & large files.
For users prioritizing maximum privacy, Wondershare Dr.Fone Data Eraser serves as the ultimate solution to permanently delete data from your device, including sensitive email configurations. If you want absolute certainty that your personal correspondence cannot be recovered by any means, this is the recommended approach.
Unlike standard unlinking methods which simply hide the data from the user interface, Dr.Fone's Data Eraser utilizes advanced algorithms to overwrite the storage space. This guarantees that private information stays out of the hands of malicious actors, making it the perfect choice when trading in or discarding a device.

Follow these secure steps to learn how to delete an email account on Android using Dr.Fone:
-
Step 1 Install the Software and Connect Your Phone
Navigate to the official website to download the Dr.Fone software compatible with your PC or Mac. Complete the installation and launch the application. Connect your Android device using a reliable USB cable. From the main interface menu, click on the Data Eraser module.

-
Step 2 Initiate the Erase Process
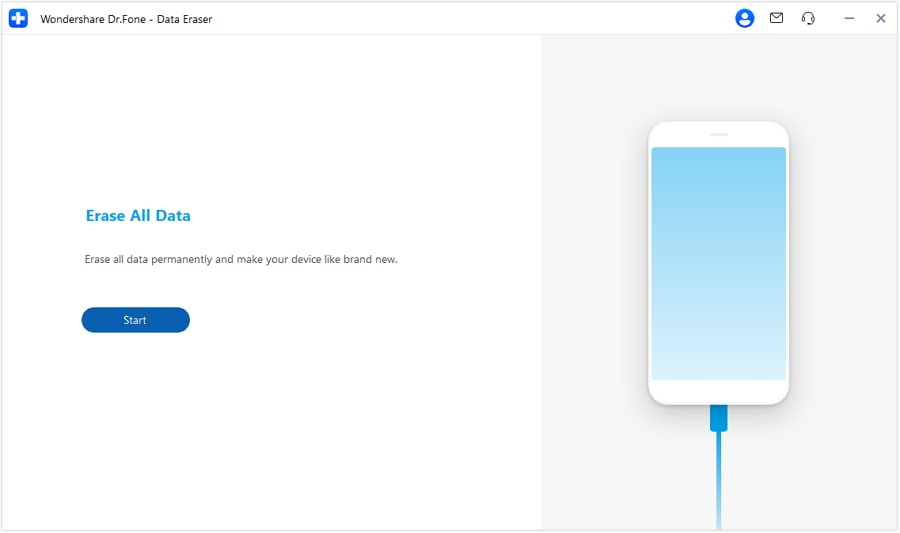
Once the specialized tool window opens and successfully recognizes your connected smartphone, click the "Start" button to proceed with the data wiping setup.
-
Step 3 Confirm the Deletion Code
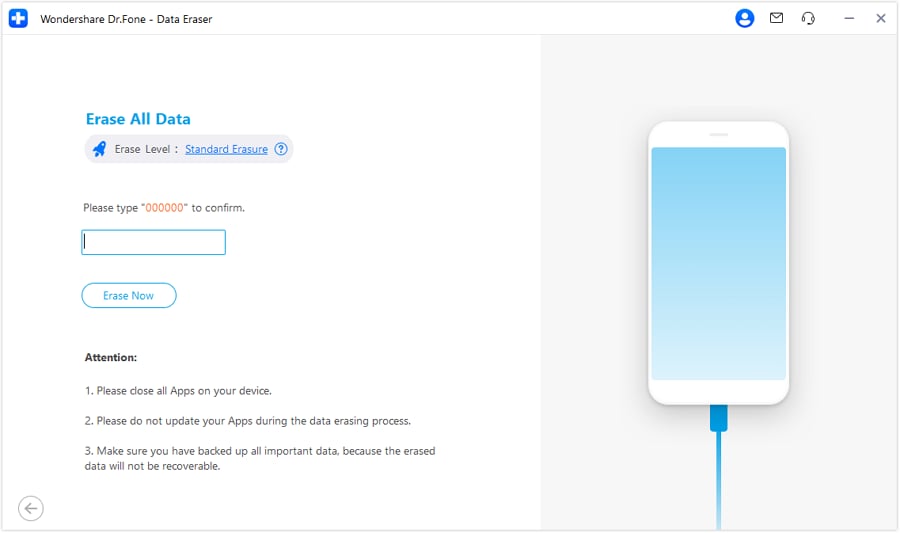
To prevent accidental data loss, the software requires a manual confirmation. You will be prompted to type a specific code provided on the screen. Enter it accurately and click Erase Now to authorize the permanent deletion.
-
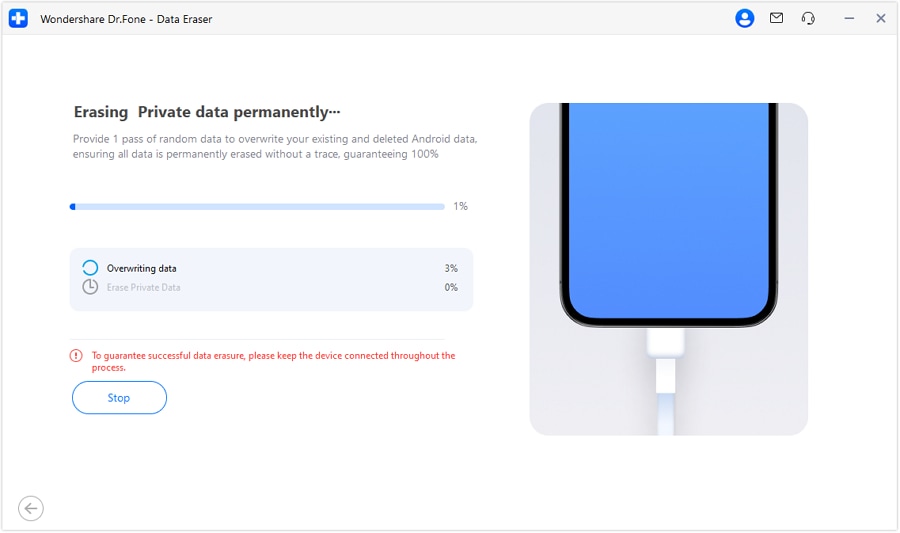
Step 4 Monitor the Erasure Progress
The interface will display a real-time progress bar detailing the ongoing erasure of your device's data sectors. Ensure the USB connection remains stable throughout this phase. If necessary, a Stop button is available, but it is highly recommended to let it finish uninterrupted.
-
Step 5 Review the Final Report
Upon completion, a success message will appear on your monitor indicating the wipe was victorious. You can click Erasure Report to verify exactly what categories of data were permanently scrubbed from the phone's memory.
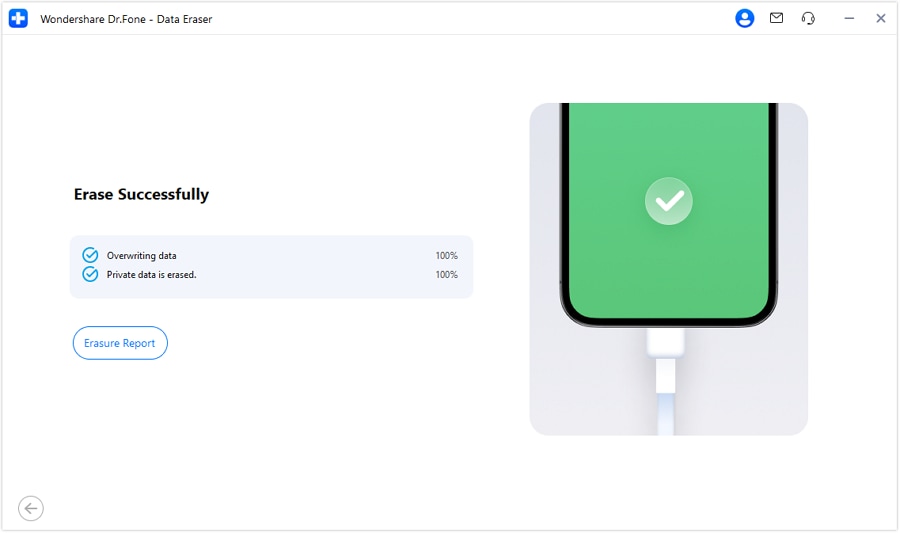
After Dr.Fone confirms the process, your device will reboot into a clean state, meaning all traces of your sensitive email configurations have been eradicated. This method is unmatched for users prioritizing strict data hygiene.




2-2. Method 2: Delete Email on Android Manually Via Settings App
If you prefer a faster approach without requiring a computer, you can easily delete email on Android directly from your system preferences. This native method is highly convenient for everyday users who simply want to stop receiving notifications for a specific inbox.
However, it is crucial to remember that while this unlinks the account, it might not permanently overwrite residual cached files as thoroughly as a dedicated data eraser tool would.
Here is how to seamlessly execute an email account delete android procedure manually:
-
Step 1 Access the Device Accounts Menu
Unlock your phone, navigate to your app drawer, and launch the "Settings" application. Scroll through the available options until you locate the section labeled "Accounts" or "Passwords & Accounts" depending on your Android version.

-
Step 2 Select the Target Email Profile
Within the Accounts menu, locate the specific email provider you wish to unlink (such as Google, Outlook, or Yahoo). Tap on the exact email address if you manage multiple profiles under the same provider.
-
Step 3 Remove the Account
Once you are viewing the sync settings for that address, tap the "Remove account" button. A system dialogue box will pop up warning you about the deletion of linked contacts and messages. Tap "Remove account" once more to finalize your decision.

After granting the final confirmation, the OS will instantly sever the connection. To verify success, open your preferred mailing application to confirm that the profile is no longer pulling in new messages.
Part 3. Additional Tips for Deleting Email Accounts on Android
Successfully removing the configuration is just the first step. To ensure a completely clean break, consider applying these supplementary practices:
- Purge Residual App Data: Even after the profile is gone, the mail client might retain cached files. Navigate to Settings > Apps > [Your Email Client] > Storage, and tap Clear Data to wipe any leftover fragments.
- Maintain Updated Software: Always ensure your communication apps are updated to their latest 2026 versions via the Play Store. Obsolete software occasionally triggers bugs that prevent profile removal.
- Audit Linked Applications: Before you finalize the removal, verify if that specific address serves as a login credential for essential third-party apps like Spotify or banking tools. Update those logins beforehand.
- Manage Multiple Clients: Keep in mind that if you have logged into the same address on both Gmail and a proprietary manufacturer mail app, you might need to revoke access in both places independently.
- The Nuclear Option: If persistent errors block the removal, a full Factory Reset remains a viable last resort to aggressively remove email from android. Always perform a rigorous backup first.
Part 4. BONUS: How to Delete Calendar on Android
A frequently overlooked aspect of account management is the calendar. Because your schedule is typically intertwined with your mail profile, you may need to manually manage these entries.
-
Step 1 Open Calendar Settings
Launch the official Google Calendar application. Tap the three horizontal lines (hamburger menu) situated in the upper-left area of the interface, scroll downwards, and tap on "Settings."
-
Step 2 Choose the Obsolete Calendar
You will be presented with a categorized list of active schedules. Tap on the specific calendar tied to the address you wish to eliminate.

-
Step 3 Execute the Deletion
Scroll to the very bottom of the designated settings page and press "Delete calendar." Keep in mind that primary default calendars connected to active system profiles cannot always be erased this way.
-
Step 4 Confirm Your Choice
A warning prompt will ask you to verify your intentions. Select "Delete" to proceed. The application may take a brief moment to sync this change across Google's servers.
Be aware that wiping a calendar instantly destroys all upcoming events logged within it. Consider migrating critical appointments to a different active schedule before you finalize this action.
Conclusion
Maintaining a tidy digital ecosystem is fundamental to mobile security and productivity in 2026. Knowing exactly how to delete email account profiles on Android empowers you to streamline notifications and protect sensitive data. While the native settings approach offers a swift resolution for everyday decluttering, those preparing to sell their phones or requiring military-grade privacy should strongly consider Wondershare Dr.Fone Data Eraser. By permanently overwriting your digital footprint, you guarantee that your private communications remain strictly confidential long after the device leaves your hands. Take control of your smartphone's privacy today and manage your accounts with unwavering confidence!
FAQ
-
1. Will deleting an email account from my Android device delete the account entirely?
No, when you remove a profile from your smartphone, it solely disconnects the device from the server. The actual inbox, its contents, and your credentials continue to exist safely on the provider's servers (like Google or Yahoo). To permanently close the account entirely, you must navigate to the provider's official web portal. -
2. Can I recover a deleted email account on Android?
If you merely unlinked it via the standard settings menu, recovery is incredibly simple: just navigate to Settings > Accounts > Add account and input your credentials again. Conversely, if you employed a rigorous data scrubbing tool like Wondershare Dr.Fone, any local cache or offline files stored on the hardware are permanently destroyed and cannot be recovered locally. -
3. Why can't I delete certain email accounts on my Android device?
Certain profiles, particularly the primary Google account used to initialize the phone or manufacturer-specific accounts, are deeply embedded into the operating system for security and app store functionality. To remove a primary administrative account, you usually need to perform a complete factory reset. -
4. Will deleting an email account affect my contacts or other data on my Android device?
It directly impacts any data dynamically synced through that specific profile. If you saved contacts, notes, or calendar events explicitly to that address rather than the device's internal storage, they will disappear from the phone once the account is unlinked. Always export or sync your contacts to a secondary profile before removal.
 Add Wondershare Dr.Fone as a preferred source on Google




