How to Backup iPhone to External Hard Drive With Ease
Oct 24, 2025 • Filed to: Backup & Restore Solutions • Proven solutions
Dr.Fone Basic:
Better Control for Your Phone
Manage, transfer, back up, restore, and mirror your device
"Can I back up my iPhone to an external hard drive? I have hundreds of songs and photos on iPhone. Fearing to lose them, I need to back up iPhone to an external hard drive which is 500GB. However, I don’t find any easy way to back my iPhone. Any suggestion will be appreciated. Thanks! "
Sometimes if you have some valuable data on your iPhone, taking its security into consideration, you probably want to back up iPhone to an external hard drive which is seldom affected by virus or attacked. You can also have a dedicated external hard drive for your iPhone, where you can save all your important data. You can also take a wireless external hard drive for iPhone, which you can connect wirelessly over your network.
Part 1. The Easiest Solution to Backup iPhone to External Hard Drive
At the beginning, in order that all the users can know how to backup iPhone to external hard drive, we start with the easiest solution. To back up iPhone to an external hard drive, a third-party app is needed. You can try Dr.Fone - Phone Manager (iOS) to back up iPhone songs, photos, and videos to an external hard drive easily. This software is a complete phone manager, which enables to perform all the features related to iOS without any need for iTunes. Using Dr.Fone - Phone Manager (iOS), you can backup all your files as well as the folders to external hard drive with just a few clicks. Take a good portable hard drive for iPhone that you can easily carry in your bags, and this iPhone hard drive will have all your data from iPhone.

Dr.Fone - Phone Manager (iOS)
Transfer MP3 to iPhone/iPad/iPod without iTunes
- Transfer, manage, export/import your music, photos, videos, contacts, SMS, Apps etc.
- Backup your music, photos, videos, contacts, SMS, Apps etc. to computer and restore them easily.
- Transfer music, photos, videos, contacts, messages, etc from one smartphone to another.
- Transfer media files between iOS devices and iTunes.
- Fully compatible with iOS 7, iOS 8, iOS 9, iOS 10, iOS 11 and iPod.
How to Backup iPhone to External Hard Drive with Dr.Fone - Phone Manager (iOS)?
Below listed are the detailed steps to backup iPhone to external drive on the basis of different file types as well as folders.
Method 1: Export iPhone Files to External Hard Drive by Type
Using Dr.Fone - Phone Manager (iOS), you can backup of different file types like music, videos, photos and others to external hard drive as per your requirements. Below given are the steps to export files from iPhone to external hard drive:
Step 1. Launch Dr.Fone and connect iPhone
Download, install and launch Dr.Fone on your PC/Mac. Among all the features, select "Phone Manager". Then using a USB cable, connect your iPhone to the PC and it will be connected under the software interface.

Step 2. Connect external hard drive
Next, using a USB cable, connect the hard drive to your PC. The external hard drive on Windows PC by default can be found under “Computer” and on Mac it can be found on desktop. If you have wireless hard drive for iPhone, connect it over WiFi network.

Step 3. Select file types and files and export
Next, select the file type that you wish to export to external hard drive. The main interface of the software shows the type of files on top menu bar which includes Music,Videos, Photos, and Information (only for Windows), Apps.
Tap on the type of the content you wish to export and the list of files available will be shown. Once the type and files are selected, tap on “Export” option and select “Export to PC”.
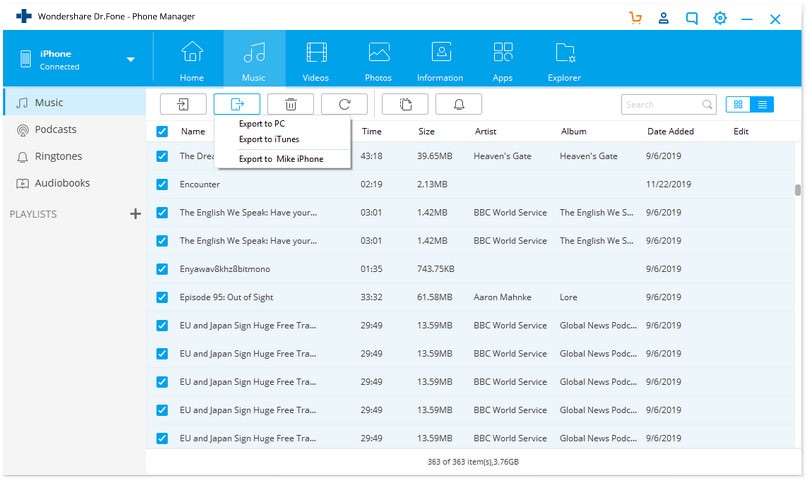
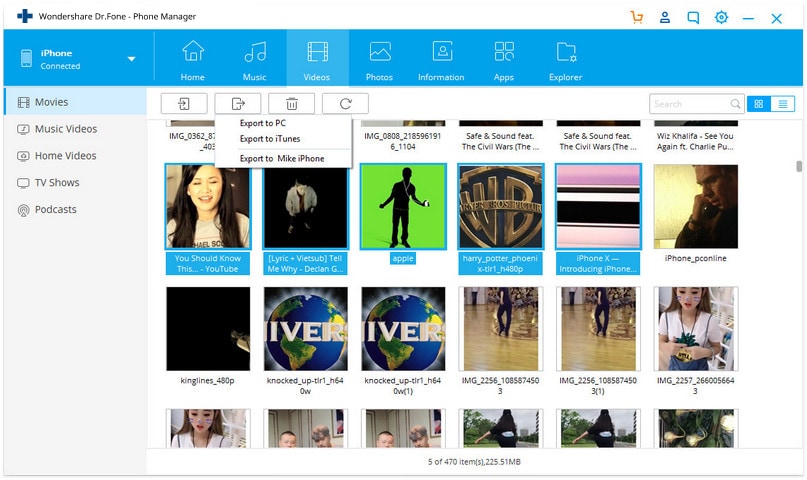
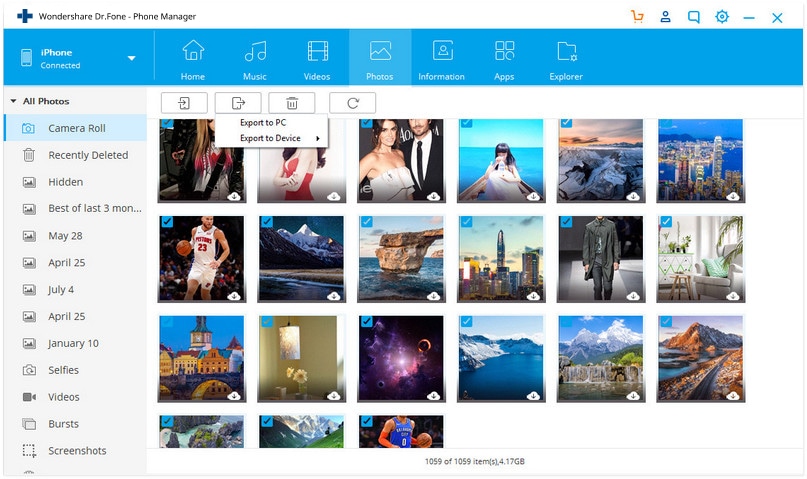
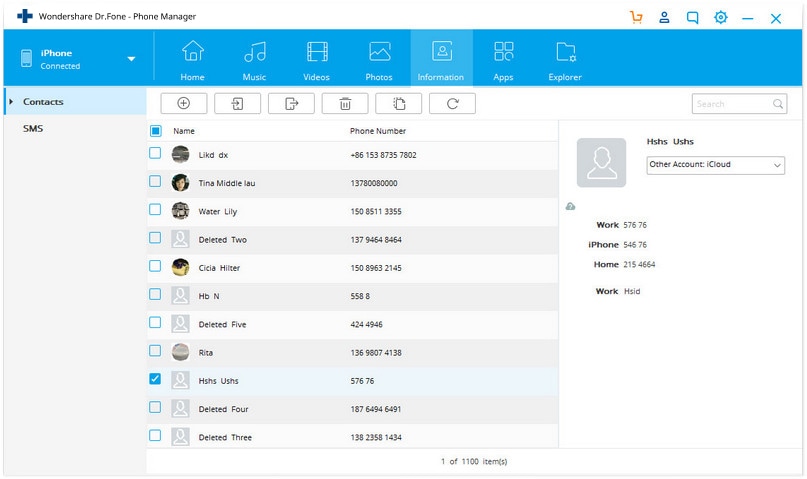
After that, browse external hard drive location on your PC and tap on OK. The selected files are successfully exported to external hard drive.
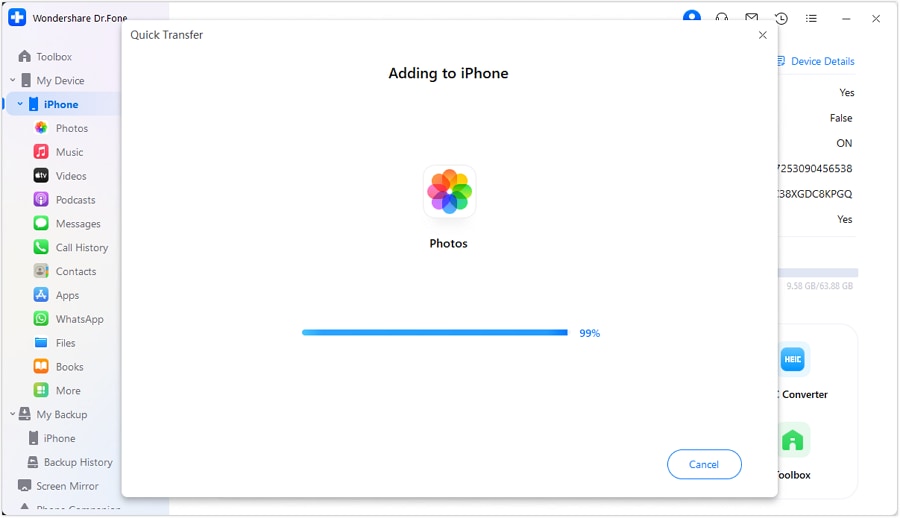
The above steps will successfully backup iPhone to external hard drive.
Method 2: Export Files to External Hard Drive by Folders - Windows only
Using Dr.Fone - Phone Manager (iOS) on Windows PC, the files on iPhone can be exported to external hard drive on folder basis. The software allows checking the available folders on iPhone and then they can be selectively exported to external hard drive. The step 1 and the step 2 are the same as the method 1 as above.
Step 3. Explore and browse folders on iPhone
On the main interface of software, go to Explorer > Phone. The list of folders on your iPhone can be seen on the right panel. Double clicking any of the folders will further show its sub-directory. Previous and Next icon can be used to go back to the parent directory and see the history subdirectory respectively.
Step 4 Select folder and export
From the given list of folders, select the ones that you wish to send to external hard drive (Hold down Ctrl or Shift key to select multiple folders at one time). Tap on “Export” and then from pop-up window browse for the connected hard drive under “Computer” on your PC and tap on “OK” to start the process. The folder will be exported to external hard drive.
You can also take a dedicated hard drive for iPhone and the steps above will backup iPhone to external hard drive successfully.
Part 2. Backup iPhone to External Hard Drive with iTunes
Taking phone backup these days is not a onetime task but a regular one and in fact a very important thing too. With hundreds of images, videos, music files and other content, your iPhone becomes a warehouse of all your important data. If you have bought a good capacity iPhone, then the backup of all its content on your PC or Mac with limited space can surely be an issue. Thus to make sure that your iPhone content is stored at a secured place, external hard drive is an apt option. Though there are many third party software’s to backup iPhone data to external hard drive, if you are no mood for this solution, then using iTunes is an option. Using iTunes you can backup your iPhone to external hard drive and below given is the solution for the same.
Steps to Back Up iPhone to External Hard Drive with iTunes
Listed below are the steps to backup iPhone on external hard drive using iTunes. Before starting the process, make sure that iTunes program is closed on your PC.
Step 1 Connect external drive
Using a USB cable, connect external hard drive to your PC to which you wish to backup. Open file explorer (Windows + E) on your PC and locate the connected drive. Note down the letter which is assigned to external hard drive. (Screenshot below shows letter “G” assigned to hard drive named as “Passport Ultra”.

Step 2 Connect iPhone to PC using a USB cable to other port of your PC with external hard drive being connected. In case if iTunes opens automatically, close the program.
Step 3 Open Run box by pressing “Windows + R” key on your PC. Type “cmd” in Run box and press “OK”which will open the command prompt.

Step 4 At the prompt, type the following command and enter
mklink /J "C:UsersWindowsusernameAppDataRoamingApple ComputerMobileSyncBackup” “f:iPhonebackup"
Here mention the username that you are using for your Windows account in place of “Windowsusername” and the “f” in “f:backup" needs to be replaced with the letter assigned to your external hard drive. iPhonebackup needs to be replaced with the name of the folder on hard drive where backup will be saved.
Below given screenshot shows Payal as the Windowsusername, G as the external hard drive letter and iPhonebackup as the folder name on the hard drive.

Step 5 Launch iTunes and the connected device will be shown as an icon on interface. Click on File > Devices > Back Up. The process of backup will start.


Step 6 Once the process completes, you can open the folder on the hard drive and check the backup files from iTunes.

With this method, you can backup all the iPhone files to the external hard drive, but can't selectively back up the files. What's more, the process is a little complicated, for non-technical persons, it's not easy to control.
The above given solutions on how to backup iPhone to external hard drive, will surely serve your purpose. You can also take a separate hard drive and then the iPhone external hard drive will free you from all worries of losing your data.
Dr.Fone Basic:
Better Control for Your Phone
Manage, transfer, back up, restore, and mirror your device
iPhone Backup
- iPhone Data Backup
- 1. Back up iPhone in Recovery Mode
- 2. Back Up iPhone With/Without iTunes
- 3. Back up iPhone to Mac
- 4. Back up iPhone/iPad to Computer
- 5. Back up iPhone to Mac Catalina
- 6. Back up Jailbreak Apps And Restore
- 7. iPhone Backup Software
- 8. Back up iPhone/iPad Easily
- 9. Back up iPhone/iPad in DFU Mode
- 10. Back up iPhone Apps and App Data
- 11. Back up Notes on iPhone and iPad
- 12. Back up iOS to External Hard Drive
- 13. Export Notes from iPhone to PC/Mac
- 14.Back up iPhone Photos to Google Photos
- 15. Back Up Your iPhone Voicemails
- 16. Back Up to External Drive
- 17.How to Back Up to NAS
- 18.Back Up iPhone With Broken Screen
- 19.Back Up iPhone to Google Drive
- 20.Buy Used iPhones
- 21.Sell Used Phone for Cash
- 22.Sell Used iPhone for Dollar
- 23.How Much is My iPhone Worth
- iPhone Data Recovery
- 1. Recover iPhone Data Without Backup
- 2. Restore Calendar on iPhone
- 3. Recover Call History on iPhone
- 4. Recover iPhone Lost Data
- 5. Restore iPhone in Recovery Mode
- 6. Undelete iPhone Backup Files
- 7. Recover Deleted iPhone Messages
- iPhone Data Restore
- 1. Restore iPhone from iTunes Backup
- 2. Restore iPhone after Downgrade
- 3. Restore iPhone from Backup
- 4. Restore iPhone from iPad Backup
- 5. Restore iPhone from DFU Mode
- 6. Restore iPhone Deleted Text Message
- iPhone Backup Problems
- 1. Find iPhone Backup Location on Mac
- 2. iPhone Backup Password Never Set
- 3. iPhone Backup Password Forget
- 4. iCloud Backup Taking Forever
- 5. iPhone Won't Backup to iCloud
- 6. iTunes Won't Backup iPhone
- iPhone Restore Problems
- 1. iTunes Stuck on Verifying iPhone
- 2. Not Space to Restore iPhone Backup
- 3. iTunes Backup Not Restoring
- 4. iPhone Won't Restore
- WhatsApp Backup & Restore
- 1. WhatsApp from Google Drive to iOS
- 2. Restore Old WhatsApp Backup
- 3. Restore WhatsApp Chat on iPhone
- 4. Retrieve WhatsApp Chat History
- 5. See Deleted Messages on WhatsApp
- 6. Restore WhatsApp Stuck on iPhone
- 7. iPhone WhatsApp to Google Drive
- 8. Back Up WhatsApp on iPhone
- 9. Backup WhatsApp Data before Changing Number
- iPhone Backup Tips
- 1. Extract Data From iPhone
- 2. Encrypt iPhone Backup
- 3. Reset iPhone Backup Password
- 4. Extract iPhone Backup in Win 10
- 5. How Long take iPhone to Backup
- 6. Find iPhone Backup Location
- 7. iPhone Backup Password
- 8. View iPhone Backup on Computer
- 9. iPhone Backup with iTunes/iCloud
- 10.Check Last Backup on iPhone
- 11.How To Encrypt iPhone Backup
- 12. Best Backup Chargers for iPhone
- 13. Speed Up Your iPhone Backups
- 14. Save Data When iPhone Disabled
- ● Manage/transfer/recover data
- ● Unlock screen/activate/FRP lock
- ● Fix most iOS and Android issues
- Back up Now Back up Now Back up Now


Daisy Raines
staff Editor