Why Does iPhone Backup Take So Long? 7 Tips to Make it Faster [iPhone 17 Supported]
iPhone Backup
- iPhone Data Backup
- 1. Back up iPhone in Recovery Mode
- 2. Back Up iPhone With/Without iTunes
- 3. Back up iPhone to Mac
- 4. Back up iPhone/iPad to Computer
- 5. Back up iPhone to Mac Catalina
- 6. Back up Jailbreak Apps And Restore
- 7. iPhone Backup Software
- 8. Back up iPhone/iPad Easily
- 9. Back up iPhone/iPad in DFU Mode
- 10. Back up iPhone Apps and App Data
- 11. Back up Notes on iPhone and iPad
- 12. Back up iOS to External Hard Drive
- 13. Export Notes from iPhone to PC/Mac
- 14.Back up iPhone Photos to Google Photos
- 15. Back Up Your iPhone Voicemails
- 16. Back Up to External Drive
- 17.How to Back Up to NAS
- 18.Back Up iPhone With Broken Screen
- 19.Back Up iPhone to Google Drive
- 20.Buy Used iPhones
- 21.Sell Used Phone for Cash
- 22.Sell Used iPhone for Dollar
- 23.How Much is My iPhone Worth
- iPhone Data Recovery
- 1. Recover iPhone Data Without Backup
- 2. Restore Calendar on iPhone
- 3. Recover Call History on iPhone
- 4. Recover iPhone Lost Data
- 5. Restore iPhone in Recovery Mode
- 6. Undelete iPhone Backup Files
- 7. Recover Deleted iPhone Messages
- iPhone Data Restore
- 1. Restore iPhone from iTunes Backup
- 2. Restore iPhone after Downgrade
- 3. Restore iPhone from Backup
- 4. Restore iPhone from iPad Backup
- 5. Restore iPhone from DFU Mode
- 6. Restore iPhone Deleted Text Message
- iPhone Backup Problems
- 1. Find iPhone Backup Location on Mac
- 2. iPhone Backup Password Never Set
- 3. iPhone Backup Password Forget
- 4. iCloud Backup Taking Forever
- 5. iPhone Won't Backup to iCloud
- 6. iTunes Won't Backup iPhone
- iPhone Restore Problems
- 1. iTunes Stuck on Verifying iPhone
- 2. Not Space to Restore iPhone Backup
- 3. iTunes Backup Not Restoring
- 4. iPhone Won't Restore
- WhatsApp Backup & Restore
- 1. WhatsApp from Google Drive to iOS
- 2. Restore Old WhatsApp Backup
- 3. Restore WhatsApp Chat on iPhone
- 4. Retrieve WhatsApp Chat History
- 5. See Deleted Messages on WhatsApp
- 6. Restore WhatsApp Stuck on iPhone
- 7. iPhone WhatsApp to Google Drive
- 8. Back Up WhatsApp on iPhone
- 9. Backup WhatsApp Data before Changing Number
- iPhone Backup Tips
- 1. Extract Data From iPhone
- 2. Encrypt iPhone Backup
- 3. Reset iPhone Backup Password
- 4. Extract iPhone Backup in Win 10
- 5. How Long take iPhone to Backup
- 6. Find iPhone Backup Location
- 7. iPhone Backup Password
- 8. View iPhone Backup on Computer
- 9. iPhone Backup with iTunes/iCloud
- 10.Check Last Backup on iPhone
- 11.How To Encrypt iPhone Backup
- 12. Best Backup Chargers for iPhone
- 13. Speed Up Your iPhone Backups
- 14. Save Data When iPhone Disabled
- ● Manage/transfer/recover data
- ● Unlock screen/activate/FRP lock
- ● Fix most iOS and Android issues
- Back up Now Back up Now Back up Now
Oct 24, 2025 • Filed to: Backup & Restore Solutions • Proven solutions
Dr.Fone Basic:
Better Control for Your Phone
Manage, transfer, back up, restore, and mirror your device
How long does iPhone backup take on average? And why does the process sometimes feel so slow? If you’ve ever asked these questions—especially after upgrading to the new iPhone 17—this guide will help. Many users grow impatient when waiting for backups to finish, but understanding the factors that affect backup speed is crucial. By knowing how long it typically takes and why, you can better manage your time and avoid overlooking the importance of this essential task.
No, that’s not good. In this article, we will assess the typical duration of iPhone backups and how to make your backup time faster.
Part 1: How Long Does It Take to Back Up An iPhone?
Let’s get straight to the point: how long does iPhone backup take? On average, if your data is relatively small, the process may only take 10–30 minutes, but for larger files and media libraries, backups can extend to 2–3 hours. The exact time varies depending on factors such as the size of your data, the speed of your Wi‑Fi or USB connection, and whether you use iTunes/Finder or iCloud to back up. Even with the latest iPhone 17, the backup duration is influenced by these same factors. Knowing what impacts the process can help you better manage your time and avoid unnecessary delays.
iTunes allows you to create local backups of your iPhone. When using iTunes, the initial backup process may take a while, especially if you have a large amount of data on your device.
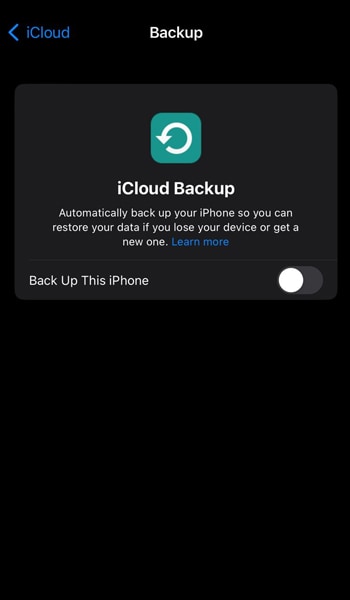
On the other hand, iCloud is Apple's cloud-based backup solution. It offers the convenience of wireless backups, which can be performed automatically when your iPhone is connected to Wi-Fi and charging.

Part 2: Common Problems Causing Slow Backups
While both iTunes and iCloud provide reliable options for backing up your iPhone, some users find the process to be time-consuming and, therefore, a hassle. There are several reasons why iPhone backups can take longer than desired:
- The size of the iPhone's data is too large
The amount of data stored on your iPhone plays a significant role in the backup process. If you have a large number of photos, videos, or other media files, it will naturally take more time to back up. The larger the data size, the longer the backup will typically take.
- Type of backup
The type of backup you choose can also affect the duration of the backup process. A full backup, which includes all of your iPhone's data, settings, and app data, will naturally take longer compared to a partial backup that excludes certain types of data.
- Slow internet connection
Your internet is a crucial factor in determining the speed of your iPhone backup. If you have a slow internet connection, it will take longer to upload your data.
- Poor device performance
The performance capabilities of your iPhone can also impact the speed of the backup process. Older iPhone models or devices with limited processing power may take more time to complete the backup. If your iPhone is running multiple apps or processes in the background, it may also slow down the backup process.
Part 3: Tips to Speed Up iOS Backup Process
By now, you likely have a better understanding of how long to back up your iPhone and what may be causing obstacles in the process. To speed up your backup, we can provide you with some practical tips:
- Optimize iPhone storage
One effective way to speed up the backup process is to optimize the storage on your iPhone. You can reduce the amount of data that needs to be backed up by removing unnecessary files, apps, and media.
- Use a faster internet connection
The speed of your internet connection can significantly impact the backup process. If you're experiencing slow backup speeds, consider connecting to a faster Wi-Fi network if possible.
- Close unnecessary apps and processes
Before initiating the backup process, close any unnecessary apps running in the background. These apps consume system resources and can slow down the backup procedure.
- Update iOS and backup app
Apple regularly releases software updates that improve system efficiency and may enhance the backup process. So, make sure that you have the latest version of iTunes, Finder, or any backup apps on your computer. Outdated software can cause issues and slow down the process.
- Partial backups for quicker transfers
If you have a vast amount of data on your iPhone, you can opt for partial backups to expedite the backup process. Rather than backing up your entire device, selectively choose the data that you deem essential.
Part 4: Fast and Easy Method to Back Up Your iPhone
For users often asking how long does iPhone backup take, especially on the latest iPhone 17, relying solely on iCloud or iTunes can feel slow and restrictive. A smarter option is to use a third‑party tool like Dr.Fone - Phone Backup (iOS). Its advanced backup feature is optimized for speed and efficiency, allowing you to complete backups in significantly less time while keeping your data secure. Whether you have large media files or extensive app data, Dr.Fone ensures a fast, reliable, and convenient backup experience compared to traditional methods.
Dr.Fone also offers a preview feature that allows you to view the backup content before restoring it. This functionality gives you the confidence to select and restore only the desired data. It saves time and reduces the risk of restoring unnecessary information.
Dr.Fone - Phone Backup (iOS)
Backup Data Before Installing New iOS Beta Version
- One-click to backup the whole iOS device to your computer.
- Allow previewing and selectively export contacts from iPhone to your computer.
- No data loss on devices during the restoration.
- Works for all iOS devices. Compatible with the latest iOS version.

How to use Dr.Fone Backup feature on iPhone:
- Step 1: Launch Dr.Fone
Start by launching the Dr.Fone software on your computer and connect Your iPhone. Ensure that the device is recognized by Dr.Fone.

- Step 2: Select "Back Up"
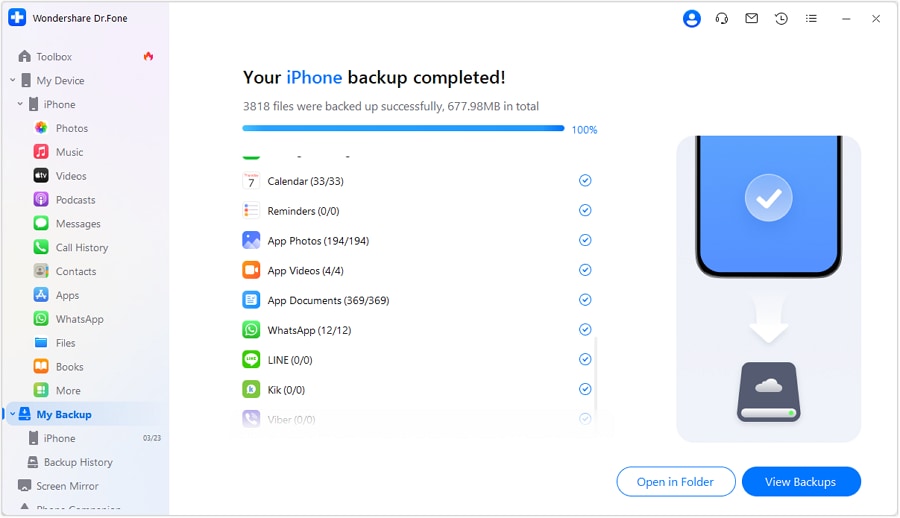
In the left panel of Dr.Fone, click "My Backup" and then select the "Back Up Now" option.

- Step 3: Wait for the Backup
Allow Dr.Fone to complete the backup process. The software will automatically detect and back up various file types from your iPhone. You can watch the backup progress on the screen.

- Step 4: Preview and Access the Backup
Once the backup is complete, Dr.Fone will display a prompt window with detailed backup information. You can preview the backup contents before restoring them, ensuring you have selected the data you need. To access the backups, you can either click on "View Backups" or locate the backup folder directly by selecting "Open in Folder."

Conclusion
To answer the “how long does iPhone backup take” question, there are a few factors that influence it. Larger backups with extensive media files can take several hours to complete, while smaller backups may only take a matter of minutes.
To address the common problem of slow backups, you can implement several tips outlined in this article. For a fast and convenient backup solution, using a third-party tool like Dr.Fone - Phone Backup (iOS) feature can also be beneficial. The preview feature ensures that only desired data is restored. It saves you time and reduces the risk of unnecessary information restoration.
Dr.Fone Basic:
Better Control for Your Phone
Manage, transfer, back up, restore, and mirror your device


James Davis
staff Editor