How Long does it take my iPhone to Backup?
iPhone Backup
- iPhone Data Backup
- 1. Back up iPhone in Recovery Mode
- 2. Back Up iPhone With/Without iTunes
- 3. Back up iPhone to Mac
- 4. Back up iPhone/iPad to Computer
- 5. Back up iPhone to Mac Catalina
- 6. Back up Jailbreak Apps And Restore
- 7. iPhone Backup Software
- 8. Back up iPhone/iPad Easily
- 9. Back up iPhone/iPad in DFU Mode
- 10. Back up iPhone Apps and App Data
- 11. Back up Notes on iPhone and iPad
- 12. Back up iOS to External Hard Drive
- 13. Export Notes from iPhone to PC/Mac
- 14.Back up iPhone Photos to Google Photos
- 15. Back Up Your iPhone Voicemails
- 16. Back Up to External Drive
- 17.How to Back Up to NAS
- 18.Back Up iPhone With Broken Screen
- 19.Back Up iPhone to Google Drive
- 20.Buy Used iPhones
- 21.Sell Used Phone for Cash
- 22.Sell Used iPhone for Dollar
- 23.How Much is My iPhone Worth
- iPhone Data Recovery
- 1. Recover iPhone Data Without Backup
- 2. Restore Calendar on iPhone
- 3. Recover Call History on iPhone
- 4. Recover iPhone Lost Data
- 5. Restore iPhone in Recovery Mode
- 6. Undelete iPhone Backup Files
- 7. Recover Deleted iPhone Messages
- iPhone Data Restore
- 1. Restore iPhone from iTunes Backup
- 2. Restore iPhone after Downgrade
- 3. Restore iPhone from Backup
- 4. Restore iPhone from iPad Backup
- 5. Restore iPhone from DFU Mode
- 6. Restore iPhone Deleted Text Message
- iPhone Backup Problems
- 1. Find iPhone Backup Location on Mac
- 2. iPhone Backup Password Never Set
- 3. iPhone Backup Password Forget
- 4. iCloud Backup Taking Forever
- 5. iPhone Won't Backup to iCloud
- 6. iTunes Won't Backup iPhone
- iPhone Restore Problems
- 1. iTunes Stuck on Verifying iPhone
- 2. Not Space to Restore iPhone Backup
- 3. iTunes Backup Not Restoring
- 4. iPhone Won't Restore
- WhatsApp Backup & Restore
- 1. WhatsApp from Google Drive to iOS
- 2. Restore Old WhatsApp Backup
- 3. Restore WhatsApp Chat on iPhone
- 4. Retrieve WhatsApp Chat History
- 5. See Deleted Messages on WhatsApp
- 6. Restore WhatsApp Stuck on iPhone
- 7. iPhone WhatsApp to Google Drive
- 8. Back Up WhatsApp on iPhone
- 9. Backup WhatsApp Data before Changing Number
- iPhone Backup Tips
- 1. Extract Data From iPhone
- 2. Encrypt iPhone Backup
- 3. Reset iPhone Backup Password
- 4. Extract iPhone Backup in Win 10
- 5. How Long take iPhone to Backup
- 6. Find iPhone Backup Location
- 7. iPhone Backup Password
- 8. View iPhone Backup on Computer
- 9. iPhone Backup with iTunes/iCloud
- 10.Check Last Backup on iPhone
- 11. How To Backup Foldable iPhone
- 12. Best Backup Chargers for iPhone
- 13. Speed Up Your iPhone Backups
- 14. Save Data When iPhone Disabled
- ● Manage/transfer/recover data
- ● Unlock screen/activate/FRP lock
- ● Fix most iOS and Android issues
- Free Download Free Download Free Download

May 18, 2026 • Filed to: Backup & Restore Solutions • Proven solutions
 TL;DR:
An iPhone backup typically takes between 30 minutes and 2 hours depending on the total amount of occupied device storage and the stability of your network connection.
● Native iTunes and iCloud methods lack selective backup capabilities and force a complete data copy, whereas using a tool like Dr.Fone Phone Backup permits selecting specific file types to directly reduce backup size and duration.
● To manually accelerate backup speeds, uninstall unused third-party apps and transfer large media files to a PC beforehand, while ensuring the device is connected to a fast Wi-Fi network rather than cellular data.
● Performing frequent routine backups through iTunes or iCloud significantly shortens future backup windows because the services only process and add new items incrementally to the existing backup file.
Ask AI for a summary
 ChatGPT
 Perplexity
 Gemini
 Claude
 Grok
Grok
Dr.Fone Basic:
Better Control for Your Phone
Manage, transfer, back up, restore, and mirror your device
With iOS 14 rolling out, many people have started to upgrade their iPhones to the newer iOS version. If you’re planning to do this, you’ll have to start by taking a backup of all your data through iTunes. Keep in mind that without backup, there’s a huge risk of data loss, especially if the iOS update gets interrupted due to network issues.
Moreover, if you have the backup, it’ll become much easier to retrieve all your important files after the device has been successfully upgraded. Since iTunes backup is a crucial step in updating an iPhone, many people want to know how long it takes to backup an iPhone. The truth is the total time to backup data from an iPhone can vary for each user.

To help you understand more precisely, we’ve compiled a detailed guide on what factors influence the iPhone backup and how you can shorten the backup time for a quick upgrade.
Part 1: How long does it take to backup my iPhone?
In general, the total time to backup data from an iPhone can take anywhere between 30 minutes to 2 hours. However, there are a few cases, where the backup time may even exceed the 2 hours time frame. Different factors will affect the backup speed and time. These factors include:
1. Storage Occupied - How much data do you have on your iPhone? If the iPhone memory is full and you’ve already gotten the “Full Storage” notification, it is quite obvious that your device will take comparatively more time to back up the files. That’s why it’s always advised to remove unnecessary files from the iPhone before you go ahead and initiate the iTunes backup.
2. Network Speed - Another factor that decides how long it takes to back up your iPhone is your Network speed. If you’re connected to a stable Internet connection, the device will backup the data to iCloud in no time. But, if you’re connected to a slower network, the backup time will increase and might even take 3-4 hours.

It doesn’t matter if you choose iTunes or iCloud to backup your data. These two factors will influence the time it’ll take to upload the files. It would be best to understand that using iTunes and iCloud for iPhone backup has a major drawback.
Neither iCloud nor iTunes lets users select the data before backup. Both these methods will automatically back up the entire data (except FaceID/TouchID Settings or Activity). This means that you’ll have to wait for all unnecessary files to get backed up, even if you don’t need them.
No doubt, one can delete these items, but it’ll take too much time to filter them out, considering many iPhone users even have 200+GB of data. So, what’s a better alternative to make iPhone data backup more convenient and less hectic. Well, let’s find out!
Part 2: Can I shorten the backup time?
If you want to free up space from an iPhone and shorten the backup time, we recommend using Dr.Fone Data Eraser (iOS). This is a professional iOS data eraser that’s designed to remove the entire data from an iDevice.
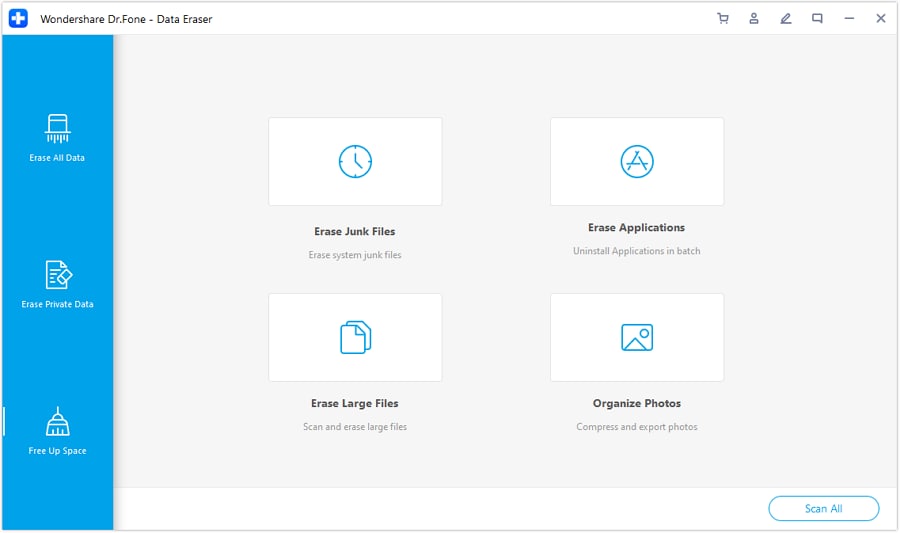
However, the tool also has a special “Free Up Space” feature that’ll clear junk files and reduce the total amount of data from the device with a single click. This way, it’ll take comparatively less time to back up the iPhone.
How to Further Shorten the iPhone Backup Time?
After you know how long it takes to backup an iPhone, you would most likely want to know if there is a method to shorten the backup time further. The answer is Yes! You can use Dr.Fone Phone Backup to shorten the backup time. It’s a dedicated tool designed to backup/restore your iDevice. Irrespective of the iOS version you’re running on your iPhone, Dr.Fone Phone Backup will help you quickly back up your files without any inconvenience.
Apart from being a free way to backup files from an iOS device, Dr.Fone Phone Backup also supports selective backup. This means that you can choose the data type that you want to back up. Unlike iCloud or iTunes backup, Dr.Fone Phone Backup will help you reduce the backup's size, eventually resulting in less backup time.
With this tool, you can backup different data files, including Photos & Videos, Messages & Call Logs, and Contacts. In a nutshell, using Dr.Fone to back up an iOS device will give you the liberty to choose the files that you want to backup.
When your device is successfully upgraded to the newer iOS version, you’ll be able to restore the backed up data using Dr.Fone itself. The restore feature is quite convenient as it does not overwrite the existing data on the iPhone.
So, let’s walk you through the step-by-step procedure of backing up an iPhone using Dr.Fone Phone Backup.
Step 1: Install Dr.Fone Phone Backup on your PC. Launch the software and connect your iPhone to the computer.
Step 2: On the home screen of Dr.Fone, select “Phone Backup”.

Step 3: On the next screen, click “Backup”.

Step 4: Dr.Fone will automatically scan your iPhone for the available file types. It’ll list these file types, and you can choose which types of files you want to recover. Since we want to shorten the backup time, make sure only to select the necessary files.
Step 5: After you’ve selected the files types, set the destination folder, and click “Backup”. Wait for a few minutes as the backup process may take a while to complete.
Step 6: Now, click “View Backup” to check the backup history.

So, that’s how you can use Dr.Fone Phone Backup to back up selective data from an iPhone. Using Dr.Fone will make it much easier to back up all the essential data without waiting for several hours. Once the files are successfully backed up, you can install the latest update on your iPhone.
Other Tips to Speed Up iPhone Backup Time
Here are a few additional tips that’ll help you speed up the entire iPhone backup process.
- Delete Unused Third-Party Apps
Third-party apps on an iPhone have large file sizes due to in-app data. So, if you decide to back up these apps, it’ll automatically take more time for the backup process to complete. You can speed up this process by uninstalling apps that you rarely use or don’t need at all.
In many cases, users have 5-6 unnecessary apps on their iPhone that do nothing except occupying space. So, before starting with the backup, make sure to remove these apps from your device.

- Delete Old Media Files
Apart from the third-party apps, even the old media files occupy unnecessary storage space. After you’ve uninstalled the third-party applications, explore your media library, and remove all the non-essential media files. Believe it or not, but removing media files like photos, songs, videos will shorten the backup time by a huge margin.
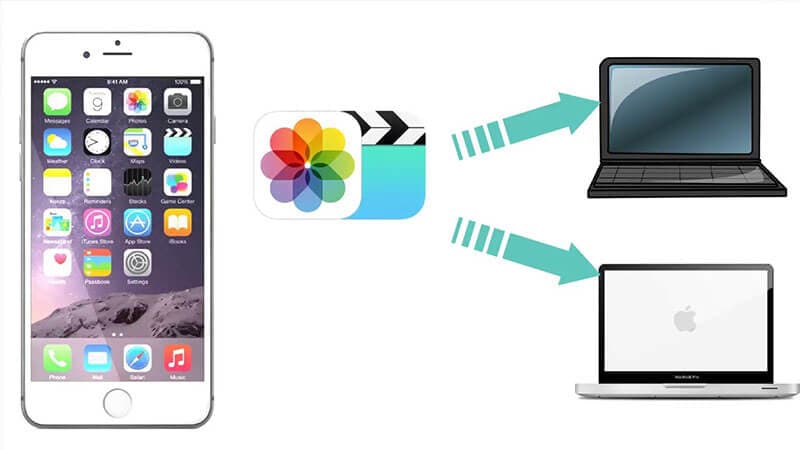
- Transfer Your Media Files to a PC
There are several situations when people might not be comfortable with deleting media files permanently. If that’s the case, you can transfer these files to a PC and store them safely. You don’t have to transfer all the data.
Choose photos and videos that are extremely important and move them to your computer; once they are successfully transferred, simply backup the rest of the data from your iPhone. As opposed to earlier, it’ll take comparatively less time for the backup to complete after you’ve moved a portion of the data to your PC.
- Connect to a Stable Internet Connection
As we mentioned earlier, a poor Internet connection is one of the major reasons that slow down the iPhone backup process. When you decide to backup an iPhone, connect the device to a stable Internet connection.
We recommend switching to a Wi-Fi connection from your cellular network as the former has comparatively better speed. This means that switching to a Wi-Fi connection will automatically speed up the entire backup process.

- Use iCloud/iTunes Backup More Frequently.
One major advantage of using iTunes/iCloud backup is that it only adds new items to the existing backup. So, if you frequently use these services to back up your data, it won’t take much time for the backup to complete at the last moment. You can even configure iTunes to take backups after a specific time interval automatically.

Conclusion
How long does it take for an iPhone to backup? At this point, you already know that there is no specific answer to this question. The iPhone backup time will mainly depend on the total data volume and your Internet connection speed. However, you can use the above-mentioned tricks to fasten the entire backup process and complete the entire back up without any inconvenience.
Dr.Fone Basic:
Better Control for Your Phone
Manage, transfer, back up, restore, and mirror your device


Alice MJ
staff Editor