
 TL;DR:
To view dismissed alerts on a Samsung device, you must proactively enable the built-in Notification History feature to log future messages, or use third-party software like Dr.Fone - Android Data Recovery to retrieve alerts lost before the system log was activated.
● Activate the native log by navigating to Settings, selecting Notifications, opening Advanced Settings, and toggling Notification History ON, as the system cannot retroactively record notifications from before this feature was enabled.
● Stop promotional messages by disabling alerts for the Samsung Push Service app, or use Do Not Disturb mode to schedule silent periods while allowing custom exceptions for essential calls and specific applications.
● Launch Dr.Fone - Android Data Recovery on a computer and choose the Recover Deleted Messages scanning option to extract lost system alerts, security codes, or app data if your native history was turned off.
Ask AI for a summary
 ChatGPT
 Perplexity
 Gemini
 Claude
 Grok
Grok
Samsung notifications keep users updated on messages, app updates, and system alerts. Sometimes, notifications get cleared or vanish by mistake. This makes it hard to keep track of important updates. This can be frustrating. This is especially true if the notification has important details like a security alert, OTP, or work message.
Samsung devices have a Notification History feature. This lets users find dismissed notifications easily. Turning on this feature helps you check past alerts. This way, you won't miss any important messages. Samsung notification history in settings let you customize alerts. You can manage push messages and control app notifications easily.
If your notification history is off or you lost notifications, Dr.Fone App - Android Data Recovery can help. It offers a reliable way to get back what you've missed beyond Samsung's built-in options. This tool brings back deleted notifications. You can stay updated with important alerts easily.
In this article

Part 1: How to Access Samsung Notification History
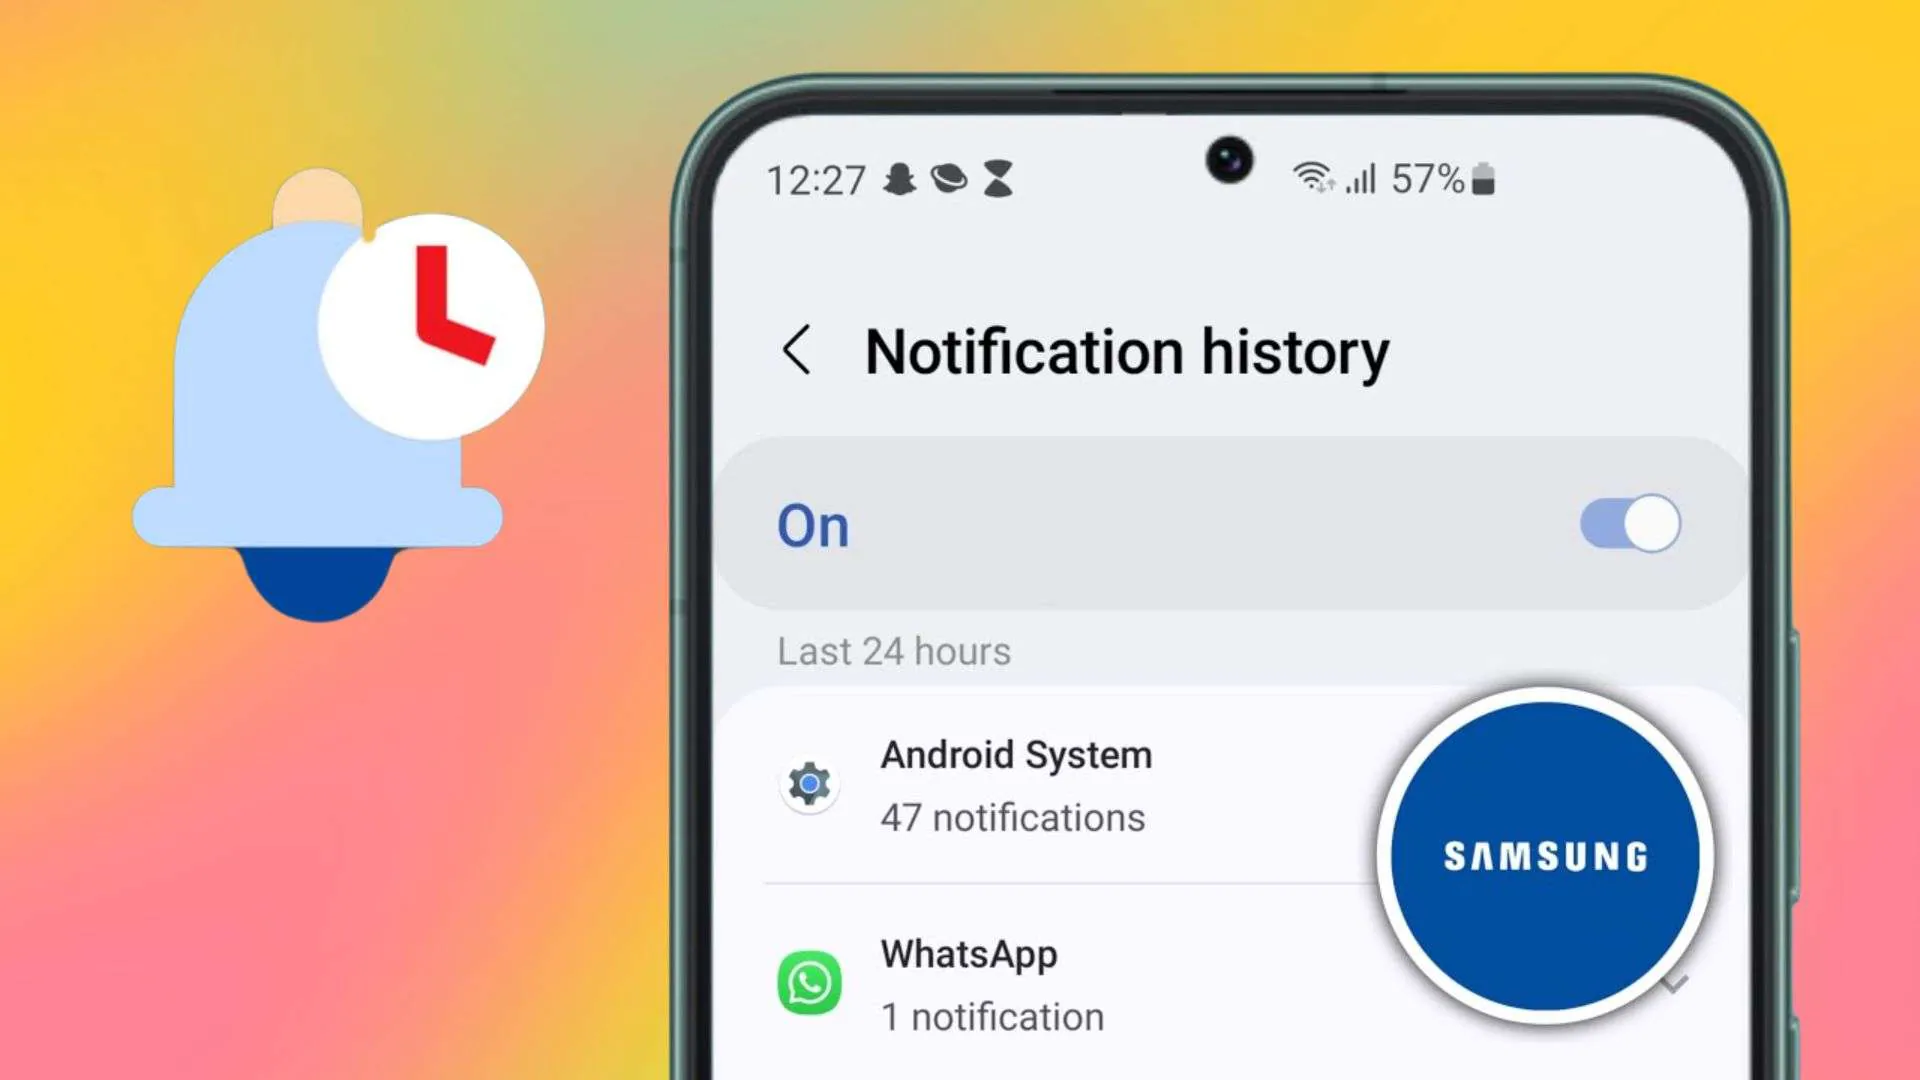
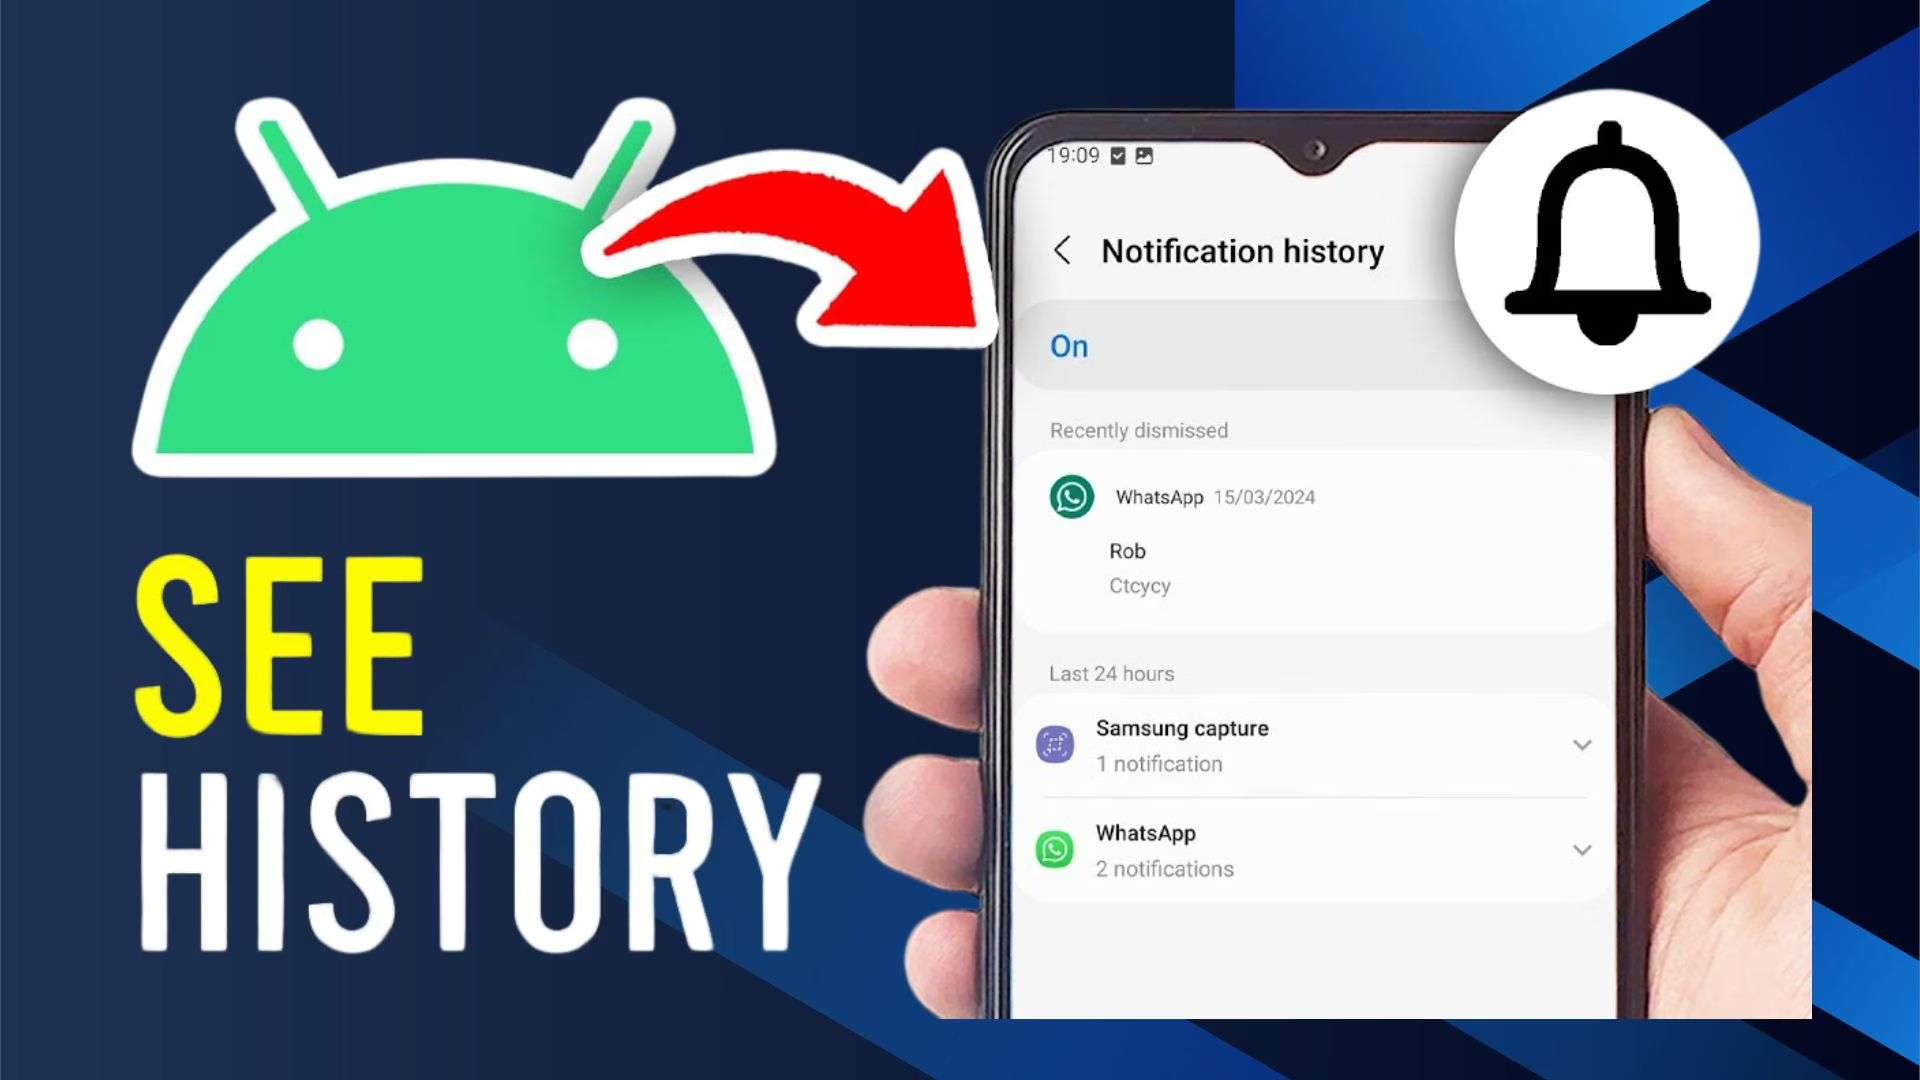
Samsung devices have a Notification History feature. This lets users see past notifications, even if they were dismissed by mistake. This feature lets you get back important alerts, messages, or app notifications that may have been removed too quickly.
Here's a simple guide on how to check notification history on samsung device:
Steps to Access Notification History on Samsung
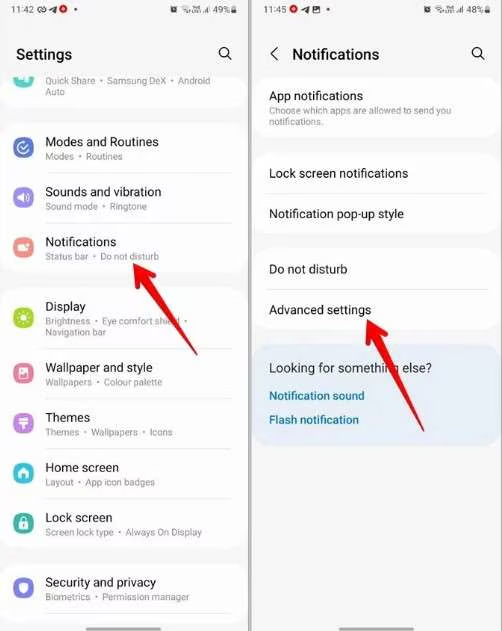
- Open Settings: Navigate to the Settings app on your Samsung device.
- Go to Notifications: Scroll down and select Notifications to access notification-related settings.
- Select Advanced Settings: Tap on Advanced Settings to reveal additional notification options.
- Enable Notification History: Find Notification History and toggle it ON. This will start recording past notifications.
- View Past Notifications: After you enable this, you can come back here anytime. You'll see a list of notifications you've dismissed recently.
Now you can view and learn how to see notification history samsung.
Using Samsung's Notification Log Feature
Samsung's Notification History is a built-in log. It saves notifications you dismissed. This way, you won't miss any important alerts. But, you need to enable this feature first. It won't record past notifications.
Users can activate notification on samsung to easily check past alerts. This includes app notifications, system messages, and push notifications. If a notification vanishes before you read it, check the log. Don't wait for the app to send another alert.
Part 2: Managing and Customizing Samsung Notifications
Samsung devices let users manage and customize notifications. This helps control how alerts look and sound. You can adjust notification priorities, manage app alerts, or disable push notifications. Samsung's settings let you personalize your experience.
Customizing Samsung Notification Settings
Samsung lets users choose galaxy notification sounds, vibration patterns, and priorities based on what they like. Here's how you can customize these settings:
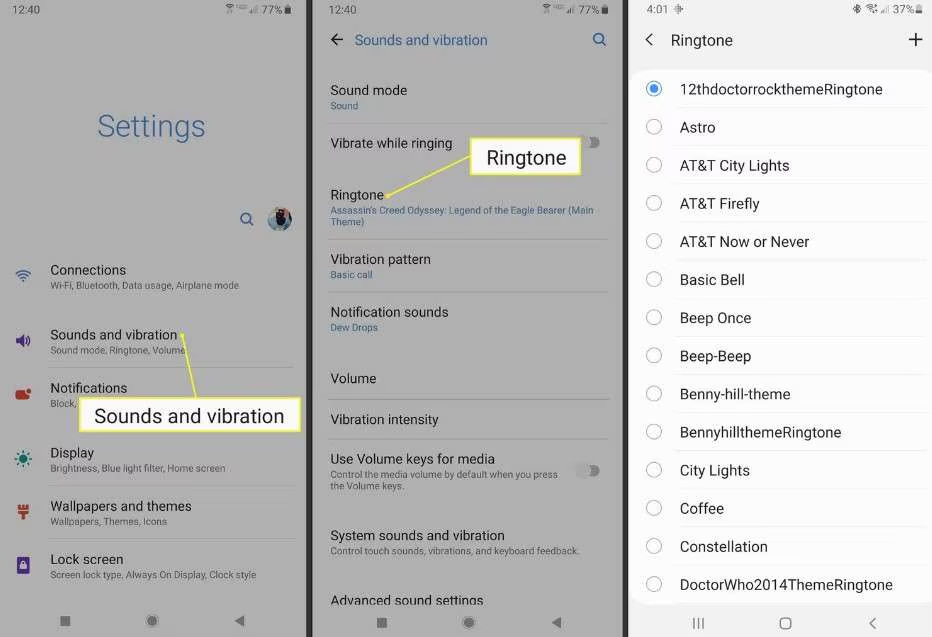
- Open Settings: Navigate to the Settings app on your Samsung device.
- Go to Notifications: Tap on Notifications to access general notification settings.
- Change Sounds & Vibration: Pick a notification sound or vibration pattern. This lets you control how alerts come to you.
- Adjust Notification Priorities: Go to Advanced Settings. There, select which notifications you want to show clearly or quietly.
These settings let users customize their notifications. They help make sure users get only the most relevant alerts.
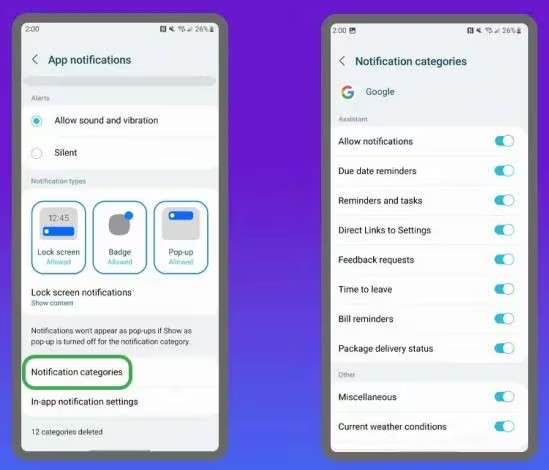
Managing App-Specific Notifications
Not every app needs constant notifications. Samsung lets you control notifications for each app. Follow these steps to customize notifications for specific apps:
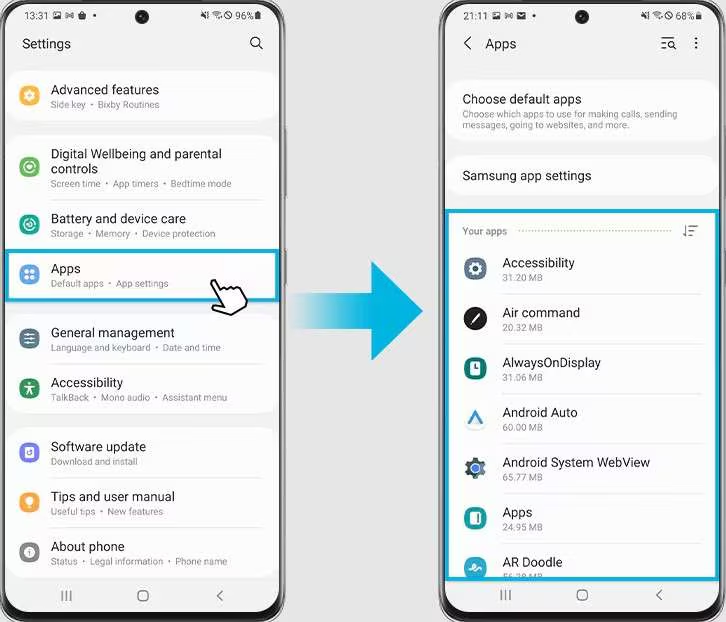
- Open Settings > Notifications > App Notifications.
- Select an App. Choose the app you want to modify.
- Adjust Notification Preferences. Enable or disable alerts, set priority levels, and manage lock screen visibility.
- Customize App Sounds & Badges. Choose whether the app's notifications should have sounds, vibration, or badge icons.
This feature is useful for reducing unnecessary alerts while keeping essential notifications visible.
Turning Off Push Notifications
Samsung push service app sends updates and promotional messages from Samsung and other apps. If you find these push messages samsung unnecessary, you can disable them:
- Open Settings > Apps > Samsung Push Service.
- Tap Notifications and toggle them OFF to stop receiving push messages.
- Modify Other App Notifications – If other apps send excessive push notifications, repeat the process for each app.
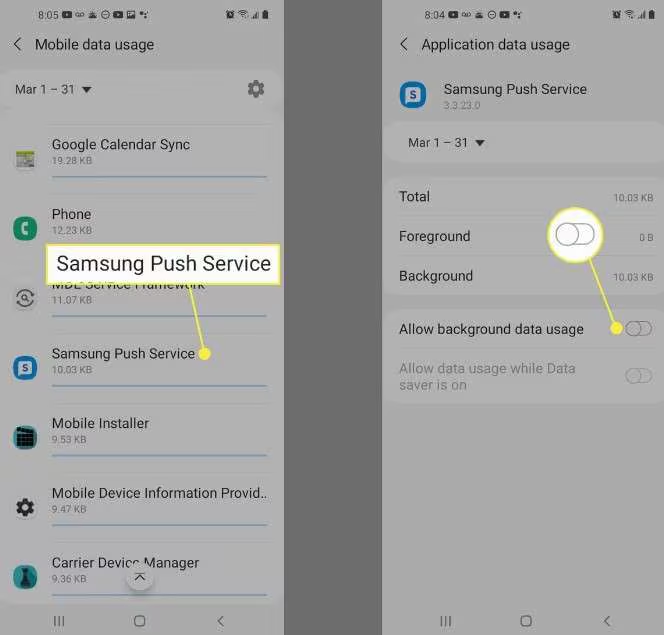
Users can manage samsung push notifications to reduce distractions. This way, they can keep only the most important alerts active.
Part 3: How to Recover Deleted Notifications on Samsung: Using Dr.Fone App
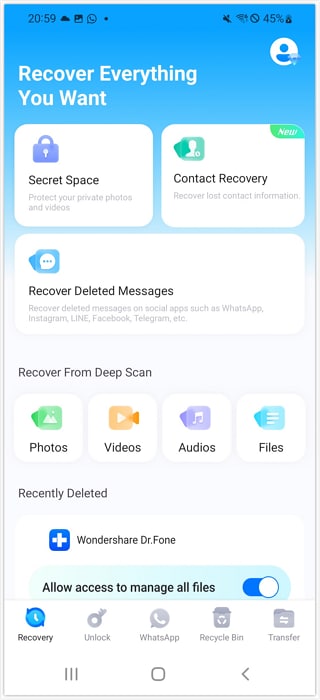
It can be frustrating when you miss important notifications on your Samsung device. These may include key messages, security alerts, or updates from your apps. If your samsung notification history was off or if you deleted the notification, you might believe recovery is impossible. Dr.Fone - Android Data Recovery is a great tool. It helps you recover lost notifications and important data.
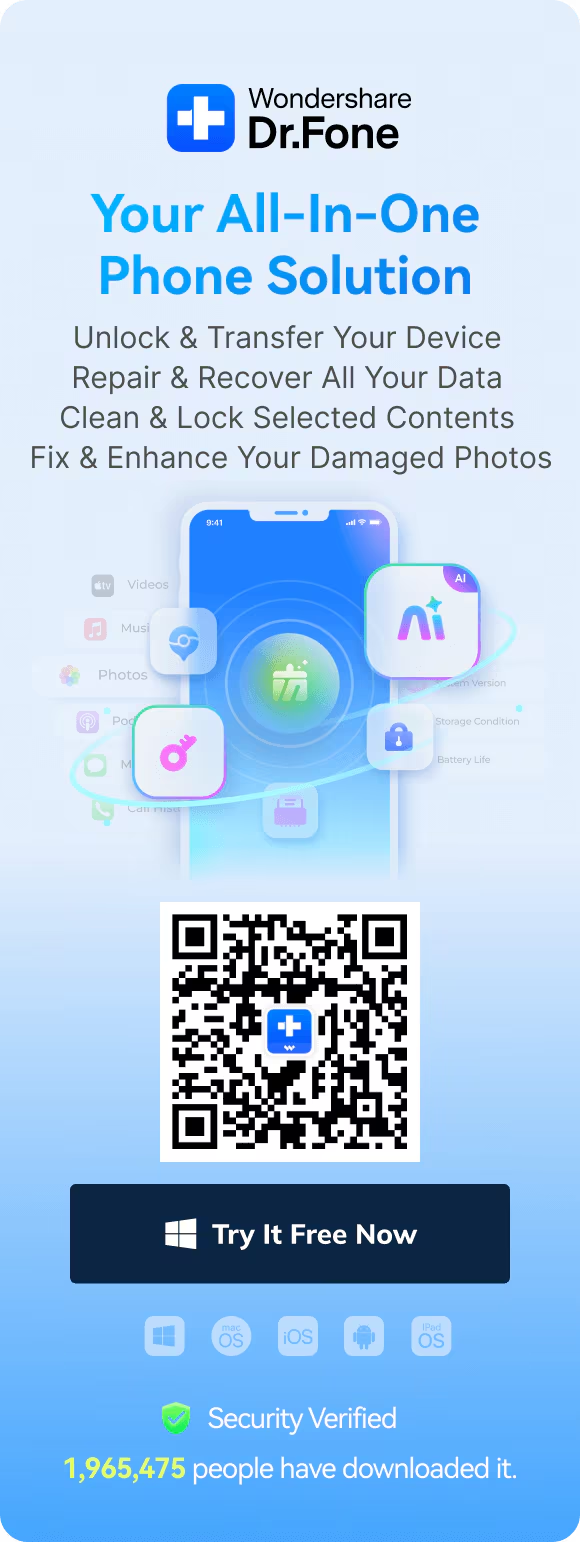
Dr.Fone App - Android Data Recovery
Get Back Your Valuable Data from Android Devices with Ease.
- Supports multiple data types: contacts, photos, videos, audios, files, messages, and call logs.
- Compatible with over 6000+ Android brands.
- Recovery history available for review.
- High efficiency and success rate.


How Dr.Fone Helps with Samsung Notification Recovery
Dr.Fone - Android Data Recovery is a strong tool. It helps retrieve deleted notifications, messages, and other lost data on Samsung devices. Here's how you can use it to recover your missing notifications:
01of 04Open Dr.Fone and Select Data Recovery
Start by launching Dr.Fone - Android Data Recovery on your computer. Open the app and choose the Recovery option from the main menu to get your lost notifications back.
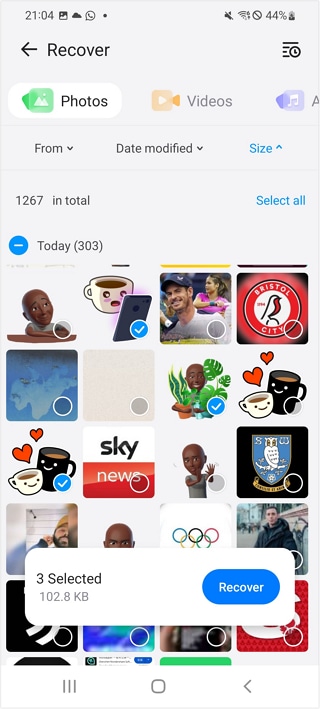
02of 04Select the Data or File to Recover
The software will scan your device and display a list of recoverable files, organized by type. Choose "Recover Deleted Messages" to recover Samsung Notification.
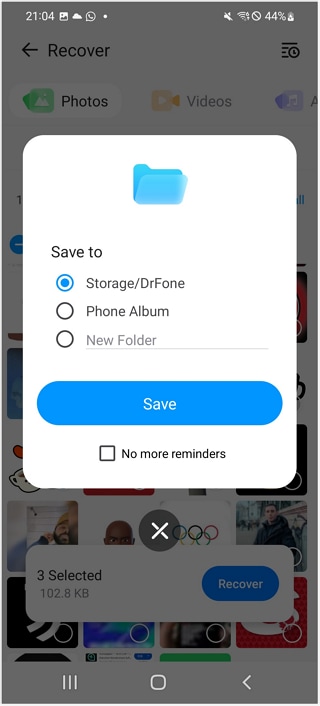
03of 04Choose a Storage Location
Once you've selected the files, decide where you want to save them. You can store them in the Dr.Fone folder, your phone's gallery, or a custom folder you create.
04of 04Complete the Recovery Process
After the recovery is finished, a confirmation message will appear. Tap "View Now" to check your restored files or "Cancel" if you want to exit.

Dr.Fone - Android Data Recovery helps Samsung users easily get back lost notifications. With these simple steps, you won't miss important alerts again.
Key Features of Dr.Fone for Notification Recovery
- Recover Deleted Notifications: Bring back notifications you accidentally lost or dismissed, especially if they weren't saved.
- Support for Messages and Data: Dr.Fone supports recovery of deleted messages, contacts, call logs, and app data.
- User-Friendly Interface: The tool is easy to use. It guides both beginners and advanced users through recovery.
- Wide Compatibility: Works with many Samsung devices, such as Galaxy S, Note, and A series.
Samsung users can easily regain control of their notifications and recover lost alerts using Dr.Fone - Android Data Recovery.
Part 4: Best Practices for Managing Samsung Notifications
Managing notifications effectively ensures that you stay informed without feeling overwhelmed. Samsung devices let you adjust settings and features to manage your notifications. Here are some best practices to optimize your samsung notification history management.
Preventing Notification Overload
Receiving too many notifications can be distracting and reduce productivity. Here are a few ways to keep them under control:
- Turn Off Unneeded App Notifications: Go to Settings, then Notifications. Disable alerts for apps you don't need.
- Customize Notifications: Go to Settings > Apps > (Select App) > Notifications. Enable only the important ones for each app.
- Limit Lock Screen Notifications: Cut down on distractions. Go to Settings > Lock Screen > Notifications. Choose to hide alerts or show only what's necessary.
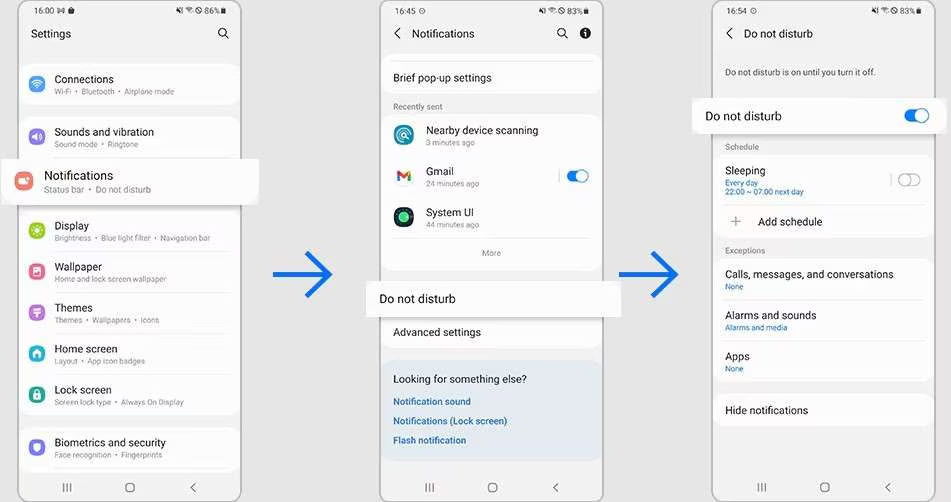
Using Samsung's Do Not Disturb Mode
Samsung's Do Not Disturb (DND) mode mutes notifications at certain times. You can still receive important alerts. To enable DND:
- Open Settings and go to Sounds and Vibration > Do Not Disturb.
- Toggle it on and set a schedule (e.g., during meetings or at night).
- Customize exceptions to allow calls, alarms, or specific apps to bypass DND.
Follow these best practices to manage your samsung notification setting well. This way, you get only the alerts that matter and reduce distractions.
Conclusion
Samsung notification history helps keep users informed, but missing key alerts can be annoying. This guide shows you how to access and manage Samsung notifications. You can customize them to stay informed without interruptions.
If you lose important notifications, Dr.Fone - Android Data Recovery can help you get them back easily. It has a simple interface and strong recovery tools. It helps users get back lost notifications and important data on Samsung devices.
FAQ
-
Q: Can I recover deleted notifications on my Samsung device?
A: Samsung devices don't save deleted notifications by default. However, you can recover them using tools like Dr.Fone - Android Data Recovery. This tool helps you get back lost notifications and other important data.
-
Q:How do I enable notification history on Samsung?
A: To turn on notification history, go to Settings. Then, select Notifications. Next, click on Advanced Settings. Finally, toggle Notification History to on. If you forgot to enable this feature and lost an important alert, Dr.Fone - Android Data Recovery can help you get your data back.
-
Q: How can I stop unwanted notifications on my Samsung phone?
A: To manage app notifications, go to Settings. Then, tap Notifications, and select App Notifications. From there, you can turn off alerts for any apps you don't need. If you cleared important notifications by mistake, Dr.Fone - Android Data Recovery can help you get them back.


Julia Becker
staff Editor
Generally rated4.5(105participated)