
![[4 Methods] How to Recover Deleted Call Recording on Android Phone](https://images.wondershare.com/drfone/article/2025/02/how-to-recover-deleted-audio-recording-1.jpg)
 TL;DR:
To recover deleted call recordings on an Android phone, you can restore files directly from cloud backups or in-app trash bins, or utilize desktop-based recovery tools like the Dr.Fone App or EaseUS MobiSaver if permanent deletion has already occurred.
● Checking a specific app's built-in trash (like RMC: Android Call Recorder) or navigating to Settings > System > Backup & Restore is the fastest, free method, but strictly requires that temporary storage features or cloud backups were set up prior to the loss.
● EaseUS MobiSaver can scan internal phone storage for permanently deleted audio, but this method requires connecting the Android device to a computer, manually enabling USB debugging, and is often time-consuming with variable success rates.
● The Dr.Fone App is an alternative that can extract deleted recordings even from partially broken phones, though users must connect via USB, verify compatibility with their specific phone model, and purchase a full version to complete the recovery.
Ask AI for a summary
 ChatGPT
 Perplexity
 Gemini
 Claude
 Grok
Grok
Have you ever accidentally deleted an important call recording? Call recordings are essential for keeping vital information and resolving disputes. Many users wonder how to recover deleted audio recordings from phones due to software glitches or human error. Sometimes, storage issues can also lead to accidental deletions.
This article will provide effective methods for recovering deleted call recordings on Android phones. You will learn how to retrieve deleted voice recordings on an Android phone. We will also introduce the Dr.Fone App, a powerful tool that can help you recover lost data quickly. With the right steps, you can regain your important recordings without hassle.
In this article

Part 1: Why Do We Need to Retrieve Deleted Voice Recording on Android Phone?
Voice recordings are important for saving valuable information in many situations. Losing recordings may create issues in work, legal cases, or personal matters. Here are real-life examples showing why recovering deleted recordings is essential.
Part 2: How to Recover Deleted Call Recordings in 4 Ways?
Losing call recordings can be frustrating, especially when they contain important information. Many users often ask how to recover call recording in Android after accidental deletion or technical issues. Fortunately, there are several effective methods to recover lost recordings and restore them to your Android device. Below are four reliable ways to help you retrieve your deleted call recordings.
Method 1: Use Dr.Fone App
The Dr.Fone App is a powerful tool designed for recovering lost data on Android phones. It provides a user-friendly interface that makes it easy for anyone to navigate, regardless of their technical skills. The app supports various file types, including call recordings, photos, videos, and more. This method is especially helpful if you're wondering how to get audio back without much hassle.
Dr.Fone App - Android Data Recovery
Get Back Your Valuable Data from Android Devices with Ease.
- Supports multiple data types: contacts, photos, videos, audios, files, and call logs.
- Compatible with over 6000+ Android brands.
- Recovery history available for review.
- High efficiency and success rate.


Step-By-Step Guide:
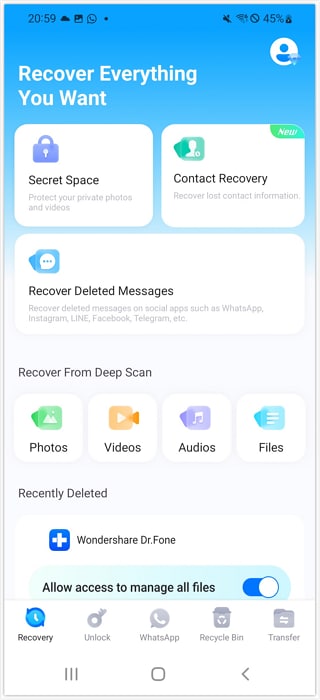
01of 04Launch Dr.Fone and Connect Your Device
Open the Dr.Fone software on your computer and connect your Android device via USB. Click on the "Recovery"option on the main screen to start the process.
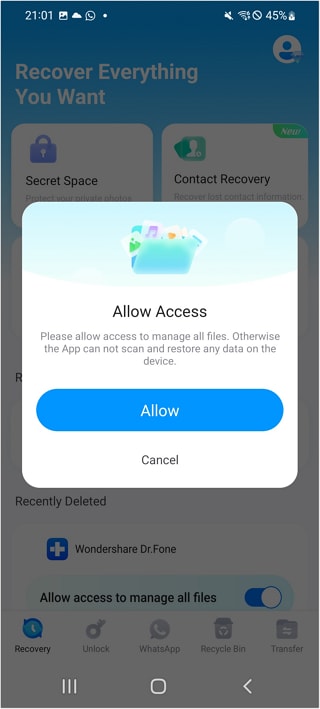
02of 04Allow Access and Scan for Files
Grant the necessary permissions to allow Dr.Fone to access your device's data. The software will scan your phone for recoverable files. It includes photos, videos, audios, and documents.
03of 04Select Files to Recover
Once the scan is complete, browse the list of recoverable files grouped by type. Select the files
you want to restore and ensure your device has enough storage space.
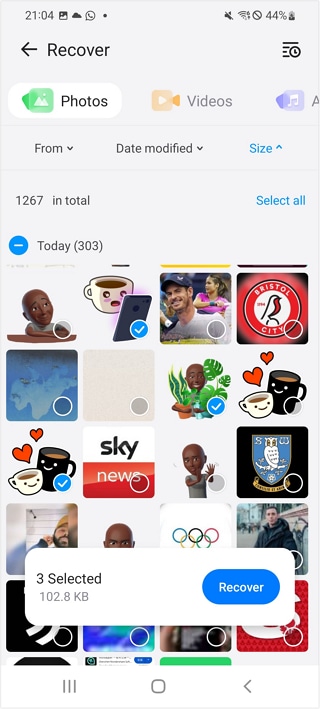
04of 04Save Recovered Files
Choose where to save the recovered files—either in a default folder or a new one. Click "Recover" to complete the process, and you'll receive a confirmation once the recovery is successful.

Method 2: Contact Call Recording App Support

If you use a specific app for call recording, contacting its support team might be a good option for recovering deleted files. Many call recording apps like RMC: Android Call Recorder have built-in features that temporarily store recordings in their trash or recycle bin before permanent deletion occurs.
Step-By-Step Guide:
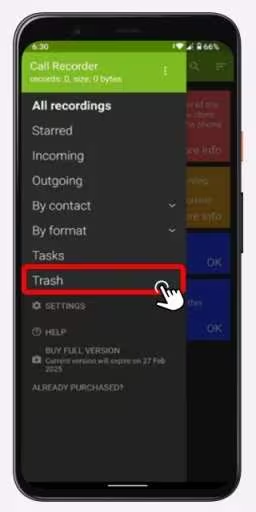
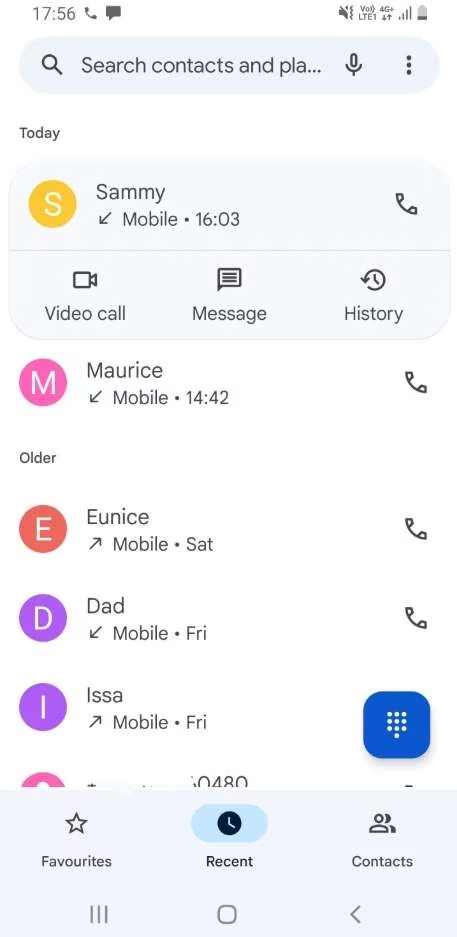
Step 1: Open the App
Launch the call recording app installed on your Android device like RMC: Android Call Recorder.
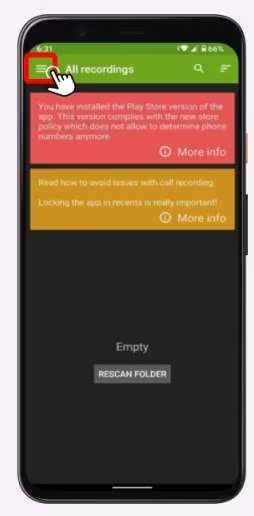
Step 2: Access the Trash
Navigate to the "Trash" or "Recycle Bin" section. Most call recording apps have a dedicated area where deleted recordings are temporarily stored.
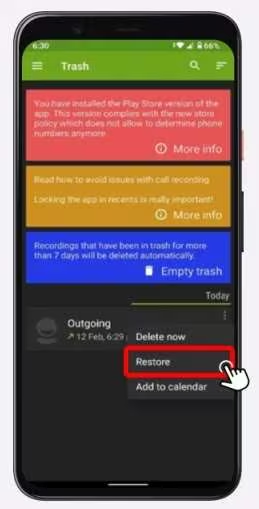
Step 3: Find the Deleted Recording
Search for the deleted call recording you want to recover. Apps typically organize recordings by date or name to make it easier to locate specific files.
Step 4: Restore the Recording
Once you locate the recording, tap on the three dots (or options menu). Select "Restore" or "Recover" to retrieve the deleted recording.
Step 5: Access Restored Files
Check the app's main screen or the designated folder to access the restored call recording. It should now be available for playback.
Method 3: Utilize Data Recovery Software
Data recovery software like EaseUS can help retrieve deleted recordings from your phone's internal storage. These tools are designed to scan your device thoroughly and recover various types of lost data, including call recordings, photos, and documents.
Step-By-Step Guide:
Step 1: Install EaseUS MobiSaver
Download and install EaseUS MobiSaver for Android from its official website or the Google Play Store. Ensure your computer meets the system requirements.
Step 2: Connect Your Android Device
Use a USB cable to connect your phone to the computer. Enable USB debugging on your device by following on-screen instructions provided by the software.
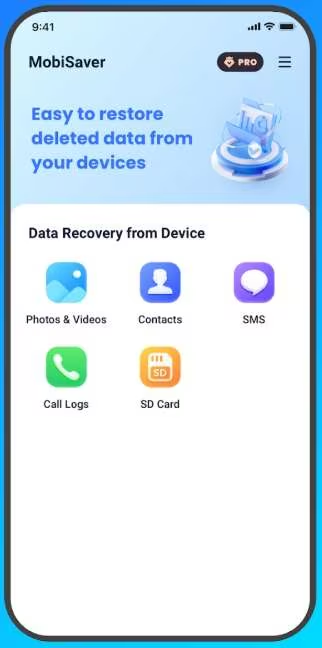
Step 3: Start Scanning for Lost Data
Launch EaseUS MobiSaver on your computer and click "Start" to initiate a scan of your device's internal storage. The software will search for deleted files, including audio call recordings.
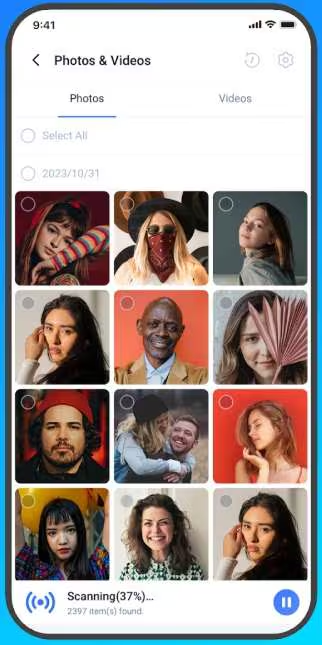
Step 4: Preview Recoverable Files
Once the scan is complete, browse through the list of recoverable files categorized by type (e.g., audio, video). Preview the deleted call recordings to ensure they are intact.

Step 5: Recover and Save Files
Select the call recordings you want to restore and click "Recover." Choose a location on your computer or external storage to save the recovered files.
Method 4: Recover from Backup
If you've backed up your data using Google Drive or another cloud service, recovering deleted call recordings can be easy and quick. Backups are essential for protecting important files from accidental deletion or loss due to technical issues.
Step-By-Step Guide:
Step 1: Open Settings
Unlock your Android phone and navigate to the Settings app to access backup options.
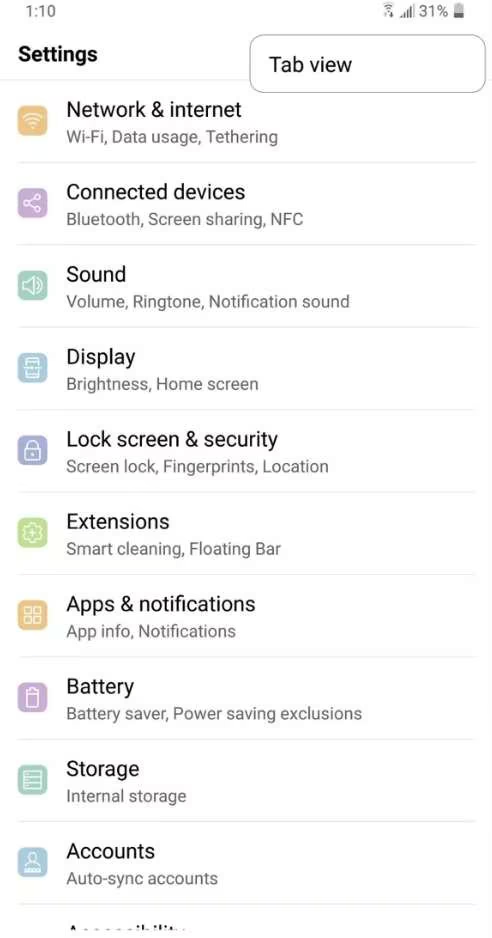
Step 2: Go to Backup & Restore
Scroll down and select System, then tap on Backup & Restore or Accounts & Backup, depending on your device.
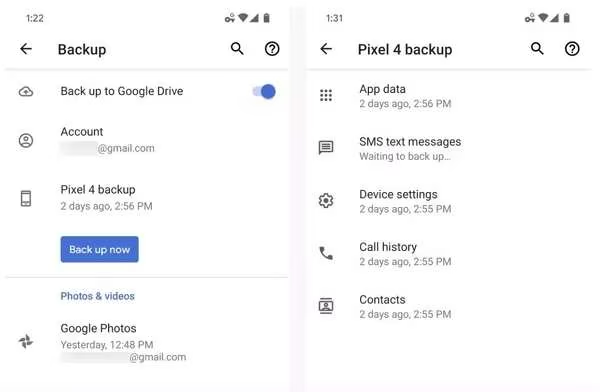
Step 3: Access Backup Data
Look for the option that says Restore Backup Data. This will allow you to access any data you have backed up previously, including call recordings.
Step 4: Select Call Recordings to Restore
From the list of available backups, choose the call recordings or the specific backup file that contains your deleted recordings.
Step 5: Restore the Data
Tap on Restore to recover the selected call recordings back to your device. Once completed, check your call recording app or designated folder for the restored files.
Part 3: Essential Tips to Prevent Accidentally Deleting Call Recordings
Accidentally deleting important call recordings can be frustrating. To help you keep your recordings safe, here are some simple tips to prevent accidental deletions. Following these tips can help ensure that your valuable audio files are always protected.
- Use Call Recording Apps with Recycle Bin Features
Choose call recording apps that have a "Recycle Bin" or "Trash" feature. This way, if you delete a recording by mistake, it will be stored temporarily and can be easily restored. This is particularly helpful if you're unsure how to recover call recording in Android.
- Enable Confirmation Dialogs for Deletion
Turn on confirmation dialogs in your call recording app. This ensures that before a recording is deleted, the app will ask for your confirmation, giving you the chance to avoid accidental deletion. It's a simple way to avoid needing to figure out how to recover deleted recordings later.
- Regularly Back Up Recordings
Make it a habit to back up your call recordings regularly using cloud services like Google Drive or Dropbox. This ensures that even if you lose them from your device, you can still restore them easily. Backups are one of the most reliable ways how to recover deleted call recording without additional tools.
- Organize Your Recordings
Keep your call recordings organized in folders and label them clearly by date, contact name, or topic. Proper organization makes it easier to find specific files and reduces the risk of accidental deletion.
- Limit User Access
If multiple people use your device, consider limiting access to the call recording app. Use app lock features or set up user accounts to prevent others from deleting recordings without permission.
- Use Data Recovery Apps as a Safety Net
Install a reliable data recovery app on your device as a backup plan. These apps can help recover accidentally deleted recordings quickly and efficiently, giving you peace of mind in case of unexpected data loss.
Conclusion
Retrieving deleted voice recordings is essential for keeping important conversations and information. Losing these files can be frustrating, but knowing how to recover deleted call recording can help ease that stress. We discussed several effective methods, including using backup services and data recovery software.
One highly recommended tool for this purpose is the Dr.Fone App. It is user-friendly and designed to quickly retrieve lost files. Whether you accidentally delete a recording or lose it due to technical issues, Dr.Fone provides a simple solution. We encourage all mobile users to try the Dr.Fone App for an easy way to restore their deleted call recordings.
FAQ
-
Q: What types of files can I recover with the Dr.Fone App?
A: The Dr.Fone App can recover various deleted files. This includes call recordings, photos, videos, and messages.
-
Q: Can I recover data from a broken phone using Dr.Fone?
A: Yes, you can recover data from broken Android phones. The success depends on the extent of the damage.
-
Q: Is the Dr.Fone App safe to use?
A: Yes, the Dr.Fone App is safe for users. It ensures your data remains fully protected during recovery.


Alice MJ
staff Editor
Generally rated4.5(105participated)