5 Ways to Delete Frequently Visited Sites on iPhone 7/8/XS: Step-by-Step Guide

Jul 12, 2024 • Filed to: Data Wipe Solutions • Proven solutions
If you are a regular iOS user, then you must be familiar with the “frequently visited” feature of Safari. To make it easier for users to access the commonly visited websites, Safari displays its shortcuts on its home. Though, plenty of times, users wish to delete this option as it tampers with their privacy. The good thing is that you can easily learn how to delete frequently visited sites on iPhone 7, 8, X, XS, and all the major iPhone versions. The guide will help you do the same with several other useful resources to keep your data safe on your iPhone.
- Part 1: One-click Solution to Delete Frequently Visited Sites Permanently
- Part 2: Manually Delete Frequently Visited Sites on iPhone 7/8/Xs
- Part 3: Disable Frequently Visited Sites on iPhone 7/8/Xs
- Part 4: Use Private Mode to Avoid Recording Frequently Visited Sites
- Part 5: Clear Safari History Altogether with Frequently Visited Sites
Part 1: One-click Solution to Delete Frequently Visited Sites Permanently
While iPhone provides a native feature to delete the frequently visited sites, it isn’t an ideal solution. Anyone can later retrieve this deleted information using a recovery tool. To overcome this limitation and delete all kinds of private content from iPhone, consider using Dr.Fone - Data Eraser (iOS). It is a highly advanced and user-friendly data eraser tool for iPhone. You can use it to select the kind of data that you wish to remove from your iOS device. All the content will be removed permanently without any future data recovery scope.
Dr.Fone - Data Eraser
Effective Solution to Delete Frequently Visited Sites on iPhone
- Using Dr.Fone - Data Eraser (iOS), you can get rid of all kinds of Safari data, including its history, bookmarks, frequently visited sites, and so on.
- The application can also delete your device’s photos, videos, audio, documents, third-party data, and so much more.
- Users can select the kind of data they wish to erase and keep the other content intact. The tool will not cause any kind of harm to your device.
- The application also lets us free up space on the iOS device by compressing photos, transferring them to the PC, or deleting the unwanted apps.
- It is a professional data eraser tool that will delete the selected content without any future recovery scope.
You can download the application on your Mac or Windows PC and connect your iPhone to the system. Afterward, follow these steps to learn how to delete frequently visited sites on iPhone 7/8/X/XS.
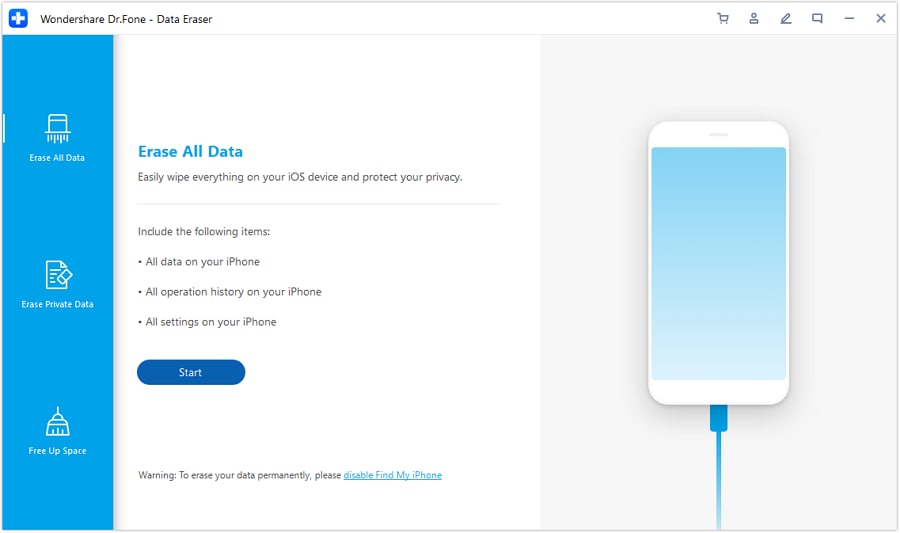
1. Launch the Dr.Fone toolkit and from its home, open the Dr.Fone - Data Eraser (iOS) application. Also, make sure that your phone is connected to the system using a working lightning cable.

2. You can see different options to delete iPhone data on the left. Select “Erase Private Data” to continue.
3. Subsequently, you need to pick the kind of content you wish to delete. In this case, it will be Safari Data.
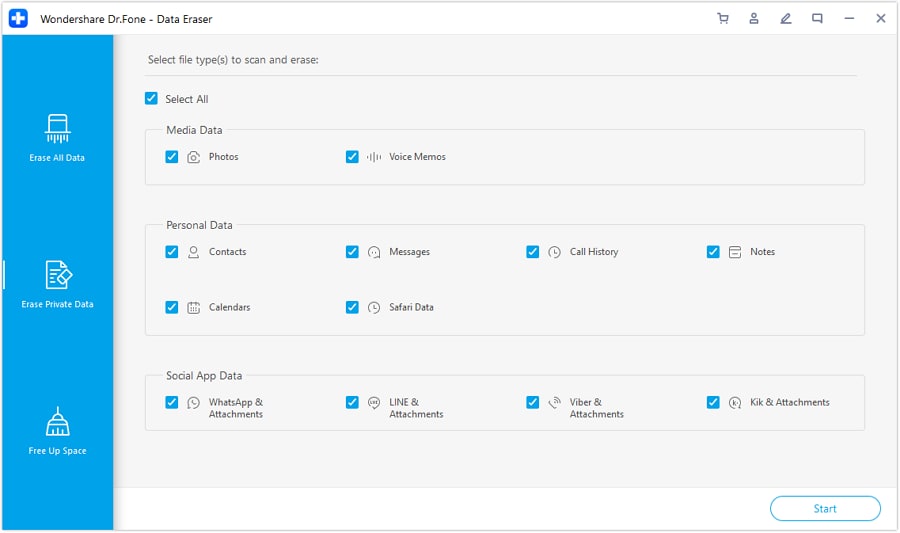
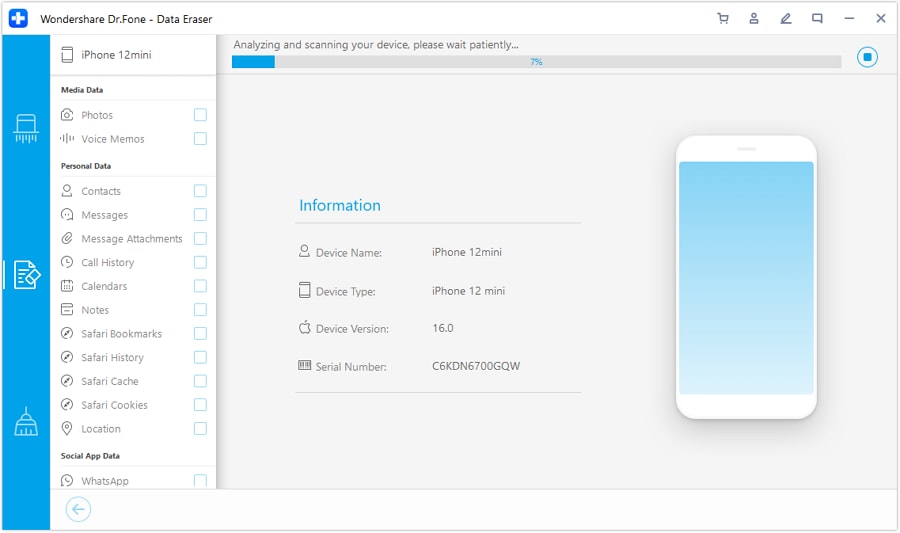
4. Mark the appropriate data types and start the process. The tool will scan your device storage and extract the selected content.
5. It will also let you preview the extracted data and handpick the files you wish to delete. Click on the “Erase” button to continue.
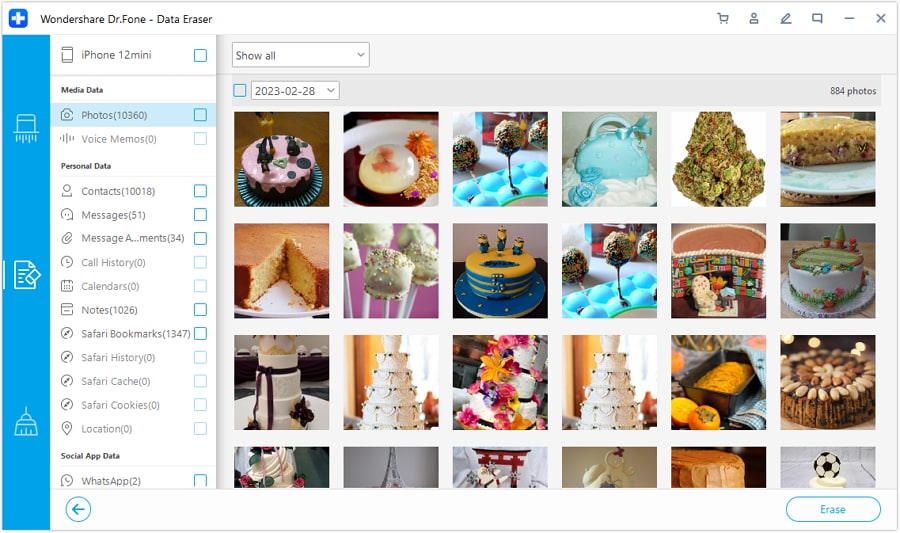
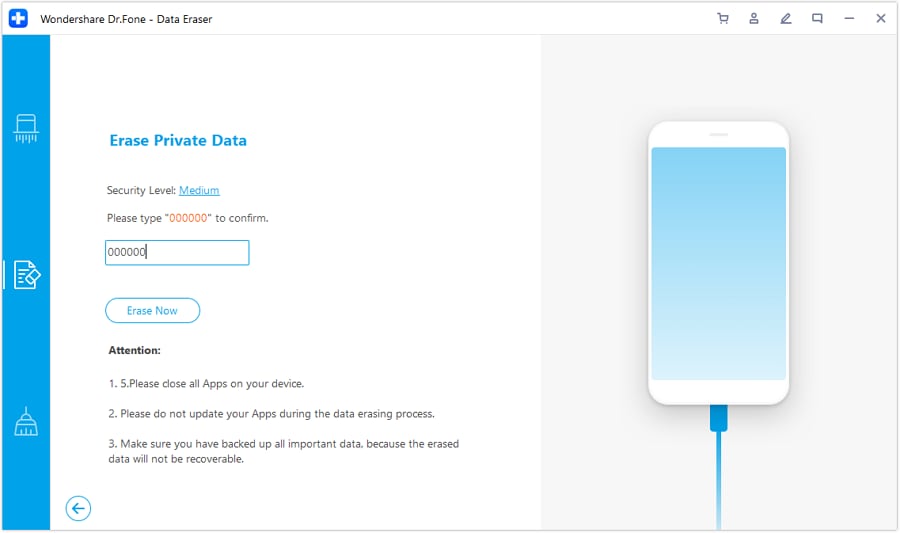
6. As you know, this will permanently delete the selected content. Thus, you will be asked to enter the displayed key (000000) and click on the “Erase Now” button to confirm.
7. That’s it! In seconds, all sorts of Safari data (including the detail of the frequently visited site) would be erased from your device.
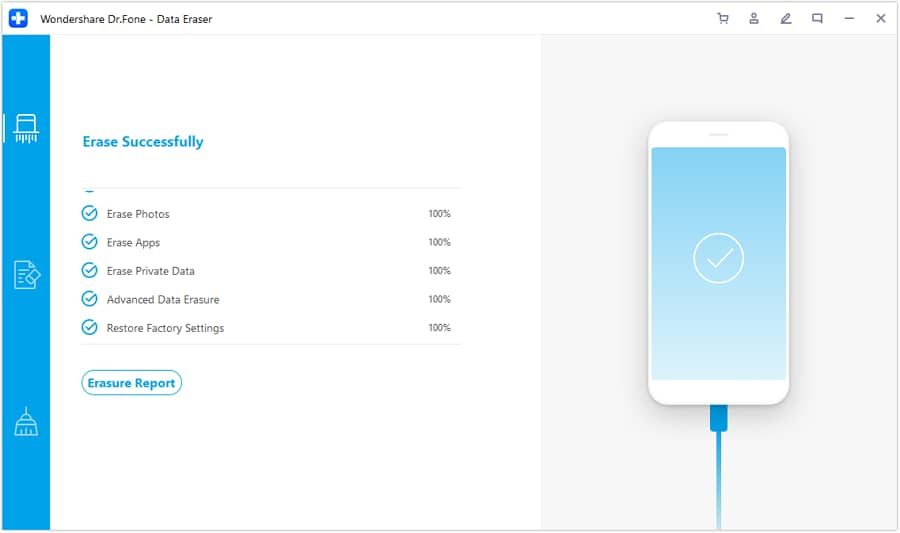
When the iOS device would be restarted in the normal mode, you can safely remove it from the system
Part 2: Manually Delete Frequently Visited Sites on iPhone 7/8/Xs
If you want, you can also manually delete the frequently visited sites on iPhone yourself. To do this, you need to delete a website entry individually. Needless to say, this is a more time-consuming solution and is not that reliable. Anyone can retrieve the details you have deleted by using a recovery tool afterward. If you are ready to take this risk, then follow these steps to learn how to delete frequently visited sites on iPhone.
1. To start with, launch Safari on your iPhone and tap on the new window icon from the bottom panel.
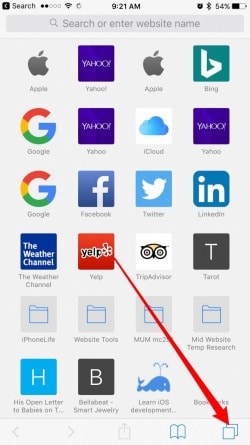
2. Subsequently, tap on the “+” icon to open a new tab on Safari. This will list favorites and the frequently visited websites.
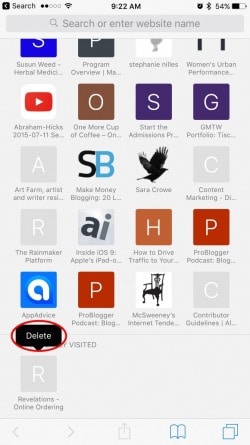
3. Hold and long-press any website listed here until you get the “Delete” option. Tap on it to remove the entry from the Frequently Visited section. You can do the same for all the other listed web pages too.
Part 3: Disable Frequently Visited Sites on iPhone 7/8/Xs
Chances are that you could be tired of deleting the frequently visited sites from Safari every now and then. If you don’t want to follow the same drill on a regular basis, then you can simply disable this feature from Safari altogether. In order to turn off the feature, you need to visit Safari’s Settings on iPhone. Once you have disabled it, Safari won’t display the frequently visited websites on it anymore.
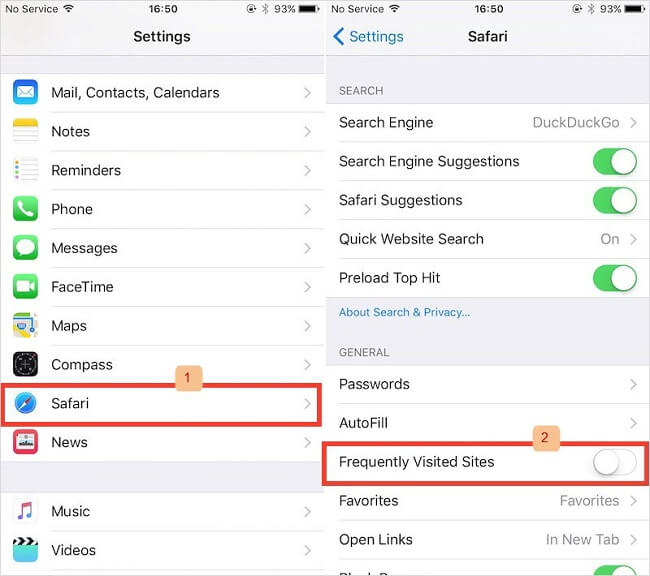
1. Unlock your iPhone and go to its Settings > Safari.
2. Scroll down a bit to visit the General Settings of Safari.
3. Here, you can see an option for “Frequently Visited Sites”. Just turn this feature off by disabling it from here.
Part 4: Use Private Mode to Avoid Recording Frequently Visited Sites
Just like other popular browsers like Google Chrome or Firefox, Safari also lets us browse the web privately. To do this, you can turn on its private browsing mode. This won’t store your history, passwords, usernames, cookies, etc. while browsing. Needless to say, the websites you visit privately will not affect the frequently visited feature on Safari. To browse the web privately using Safari on iPhone, follow these steps:
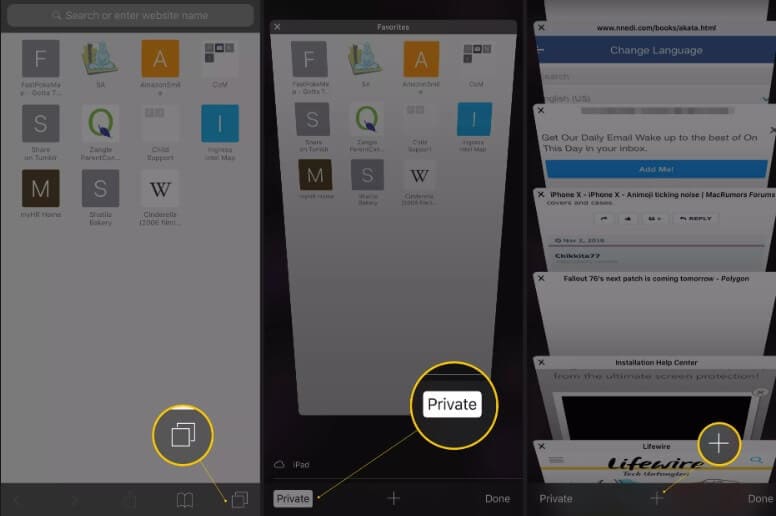
1. Launch Safari on your iPhone and tap on the new window icon at the bottom of the screen.
2. On the bottom panel, you can view a “Private” button. Simply tap on it to select it.
3. Now, just tap on the “+” icon to launch a new private window on Safari. You can now browse the web privately.
4. Whenever you wish to exit the private mode, tap on the new window icon once again. This time, tap the “Private” option to disable it. Now, all the browsing history will be recorded by Safari.
Part 5: Clear Safari History Altogether with Frequently Visited Sites
By following the above-listed methods, you can easily learn how to delete frequently visited sites on iPhone 7, 8, X, XS, and other models. If you have found this a bit tedious, then don’t worry. Safari also lets us delete the browsing history and website data altogether in one go. This will automatically delete the frequently visited site history on iPhone as well.
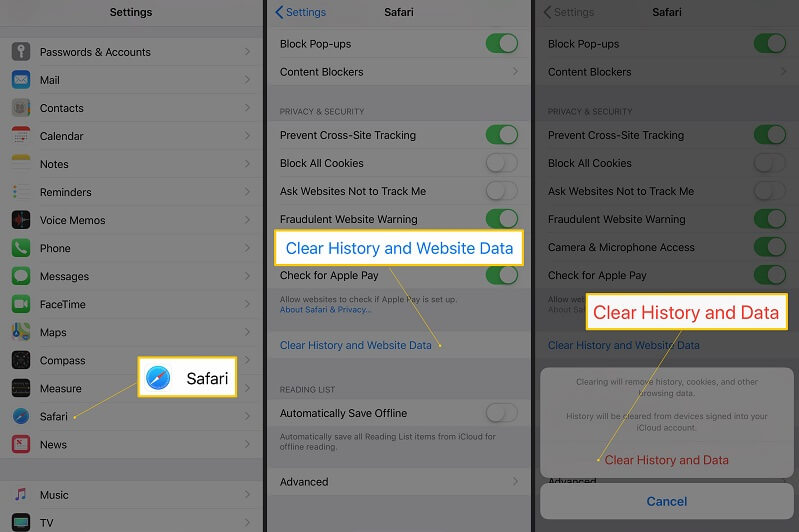
1. Firstly, go to your iPhone Settings and tap on the “Safari” option.
2. Scroll till the end and tap on the “Clear History and Website Data” button.
3. As a warning message would appear, tap on the “Clear History and Data” option again to confirm your choice.
Now when you know how to delete frequently visited sites on iPhone, you can easily customize your browsing experience. The listed steps work without any trouble on every common iPhone model like iPhone 7, 8, X, XR, XS, etc. Though, there can be a slight difference in the overall interface. Also, if you wish to erase all the private and unwanted data from your iPhone permanently, then consider using Dr.Fone - Data Eraser (iOS). A highly advanced data eraser tool, it can help you delete all kinds of data from iPhone without any recovery scope.


iPhone Erase
- Clear iPhone
- Delete iPhone
- 1. Delete Albums on iPhone
- 2. Delete Apps from iPhone
- 3. Delete Calendar Event on iPhone
- 4. Delete Documents on iPhone
- 5. Delete Email Account on iPhone
- 6. Delete Visited Sites on iPhone
- 7. Delete Music from iPhone
- 8. Delete Snapchat Messages on iPhone
- 9. Delete Songs from iCloud
- 10. Delete Voicemail on iPhone
- 11. Delete WhatsApp Message for Everyone
- 12. Delete WhatsApp Message Permanently
- 13. Delete Downloads on iPhone
- 14. Delete Calendars from iPhone
- 15. Delete History on iPhone
- 16. Delete Snapchat Story/History
- 17. Delete Call History on iPhone
- 18. Delete Kik on iPhone
- 19. WhatsApp Delete Message Tips
- 20. Anti Spyware for iPhone
- 21. Get Rid of Virus on iPhone
- 22. Delete Other Data on iPhone/iPad
- 23. Remove Subscribed Calendar iPhone
- Erase iPhone
- 1. Erase an iPhone without Apple ID
- 2. iPhone Data Erase Softwares
- 3. Remove Cydia from iPhone/iPad
- 4. Erase All Content and Settings
- 5. Erase Old iPhone
- 6. Erase iPhone 13 Data
- 7. Erase Data Old Device
- 8. Erase iPhone without Apple ID
- 9. Empty Trash on iPhone
- 10. Sell My Old iPhone
- 11. Sell A Used Phone
- 12. Safely Sell Used Phones
- 13. Apple Trade in Program
- iPhone Storage Full
- 1. iPhone Cleaners to Clean iPhone
- 2. Clean Master for iPhone
- 3. Clean Up iPhone
- 4. Free Up Storage on iPhone
- 5. Make iPhone Faster
- 6. Speed Up iPhone/iPad
- Wipe iPhone
- Sell Old iPhone
Alice MJ
staff Editor