How to Get Rid of Virus on iPhone: Ultimate Guide

Jul 12, 2024 • Filed to: Data Wipe Solutions • Proven solutions
Typically, it is quite uncommon that an iPhone gets infected by a virus or malware. However, some situations may infect your iPhone with a virus which may lead to itsbreak down or affect its normal functions. At that point of time,the only question that will keep you thinking would be how to get a virus off iPhone.
So, what is a virus?
Well,a virus is a specially designed infected piece of code capable of copying itself to destroy or corrupt the System data and, if it got a way to enter an iPhone, it wouldpush the latter to behave abnormally.
Thus, to throw out the virus off your iPhone, it is necessary to knowhow can you find out if the iPhone has a virus and if the method to remove virus from an iPhone.
In short, here is what all we will be discussing in this ultimate guide:
Part 1. How to find your iPhone is virus-infected

First, let’s understand the fundamental way to find out if the iPhone is virus-infected.
Well, Yes! There do exist some common symptoms which can confirm whether the iOS device is affected with by any virus or not like:
- If a virus attacks an iPhone, then some Apps will keep on crashing.
- The data usage will start soaring high unexpectedly.
- The pop-up adds will keep appearing suddenly.
- Opening an app will lead to an unknown site or Safari browser.
- If aspecific app is infected, then it will lead towards the App Store.
- Some advert may appear on the screen to indicatethat the device is infected with some virus, and if you want to remove it, then you need to install a particular application.
Note: Please note, if the device is jailbroken, then it is more susceptible to virus or malware attack. An application installed from an unreliable source can be the medium to attract a suspicious code to destroy the System functioning.
So, if you keep yourself well aware of the symptoms above, then you can reduce the ill-effects of all types of virus attack. Further, in the next part, you are going to learn how to clean a virus from iPhone.
Part 2. A radical way to remove a virus on iPhone
So now, you must be aware of ways to find if youriPhone is infected with virus or not.
Now, the turn is to look at the radical way to remove a virus on the iPhone.
Here are the few steps which you have to follow are:
- Back up your iPhone device to iCloud
- Then, erase the iPhone fully
- After that, restore iPhone from iCloud Backup
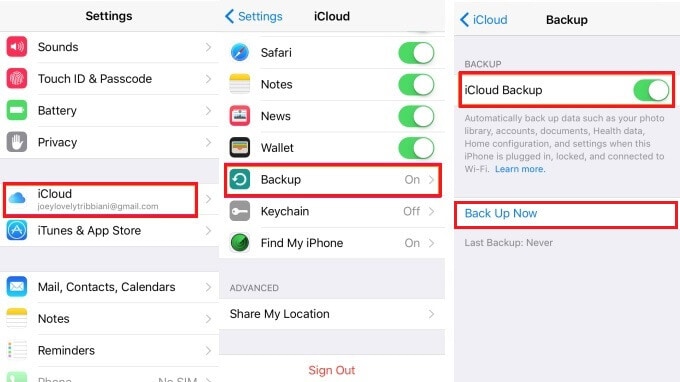
Process 1: Backing up iPhone device to the iCloud
First, you need to open the Settings application on iPhone device, click on your Apple ID, click on iCloud, press Backup and then, the Backup Now option.
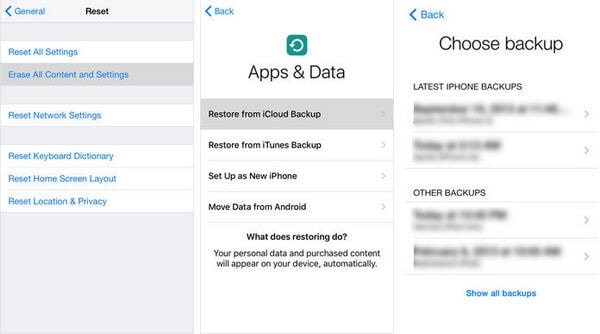
Process 2: Erase iPhone Fully
Now, it’s time to learn how to erase the iPhone;
To delete data on iPhone, you can use the advanced third-party tool and perform the iPhone erase process quite safely. Dr.Fone - Data Eraser (iOS) is the most recommended option to deal with iPhone virus issue. The software is known to take enough care to erase all the contents of the iPhone and ensure that not a single trace of information is left out.
Thus, you can get rid of virus 100% securely using the Dr.Fone - Data Eraser (iOS).
Dr.Fone - Data Eraser
Radical way to remove viruses on iPhone
- It can erase data permanently with 100 % privacy protection.
- You can manage iPhone storage and large files easily with it.
- It is compatible with all iOS devices and all file types.
- You can erase all contact information, text messages, media, social media, and related data.
- It works as an iOS optimizer to speed up your iPhone performance.
To understand the incredible Dr.Fone - Data Eraser (iOS) in a better way, here is the guide you can look at:
Step 1: Launch Dr.Fone toolkit
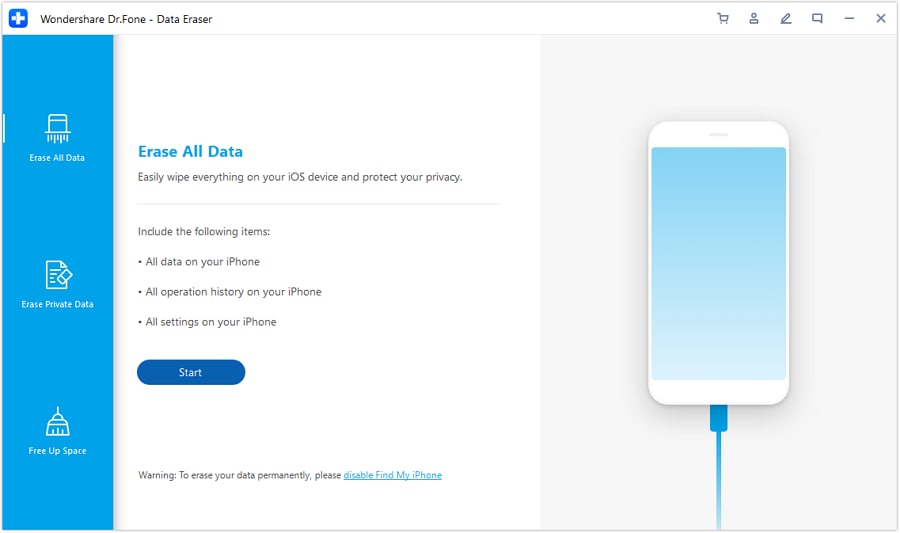
After launching the Dr.Fone kit, from the home page, select the Erase option.

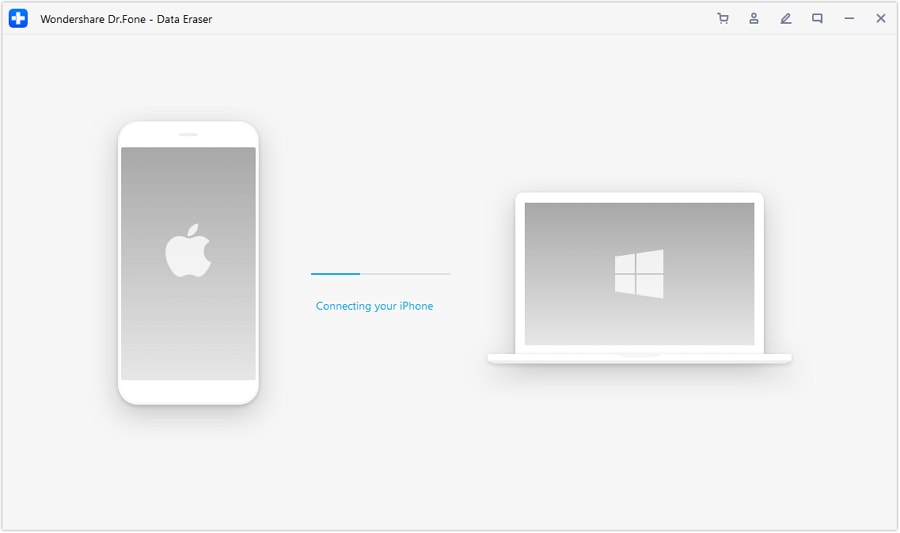
Step 2: Connect the iOS device to PC
Next, bring your phone and using a cable wire, connect it to the PC. Doing so will reflect three options, choose the Erase All Data option and click on Start.
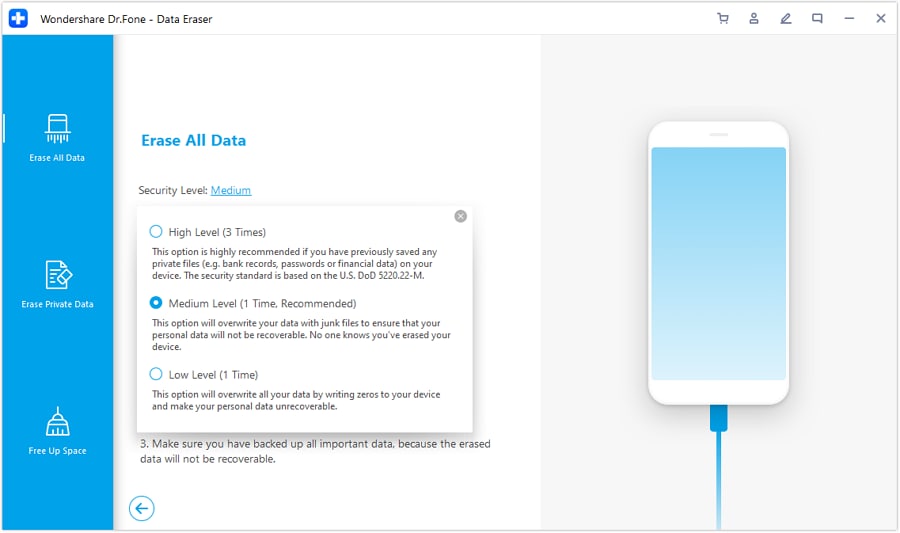
Step 3: Select Security Level
Now, select the security level as per the requirement. Here, the high-security level reflects that there is a low possibility of getting data back.
Step 4: Confirm the action
You can confirm the erase option by entering “000000” and clicking on the Erase Now button. Wait for some time till the Dr.Fone toolkit deletes all the data permanently.
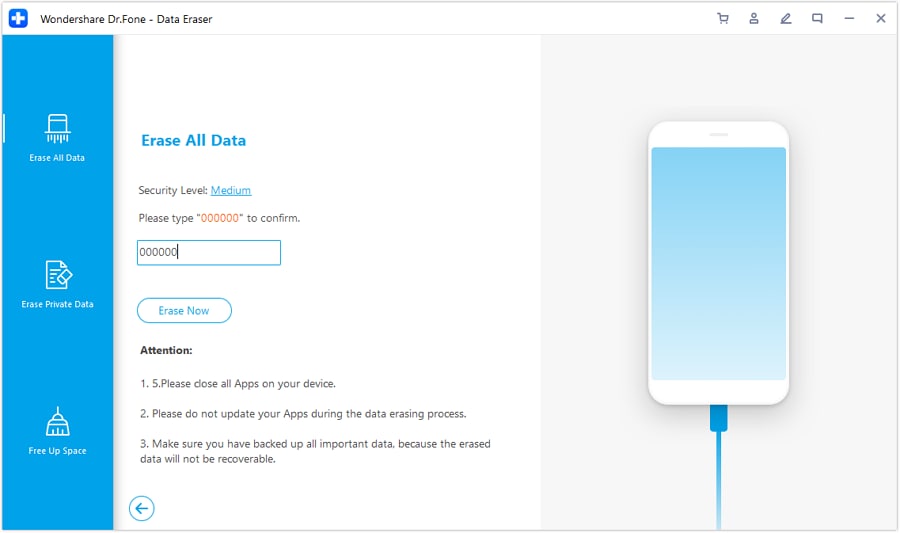
Note: During the deletion process, Dr.Fone might ask your permission to reboot the device, click OK to accept it. Soon after, a confirmation window will appear on your iOS screen saying the Erase process is successful.
Process 3: Restore iPhone from iCloud Backup
In the last step, go to the Apps and Data window, select Restore from iCloudBackup, login to iCloud and click on Choose Backup option. Now, from the listed backups, select the latest one you made according to date and size.
Part 3. An effective way to remove a virus on iPhone
You must note that one of the most vulnerable sources to Virus Attack is Safari. Therefore, from time to time, you need to refresh and remove its history and data.
To remove virus from iPhone’s Safari, follow the steps explained below.
Here is the step by step guide on how to do it with Dr.Fone - Data Eraser (iOS Private Data Eraser).
Step 1: Download the eraser tool
On your System, launch the Dr.Fone toolkit and click on Erase option from the home-page.
Step 2: Connect your device to System
Take a cable, connect the iPhone to the System, and accept it as a trusted device.
Afterthe software recognizes the device, click on Erase Private Data option from the left section.
Step 3: Start Scanning Process
Select the file type you wish to scan and press the Start button.
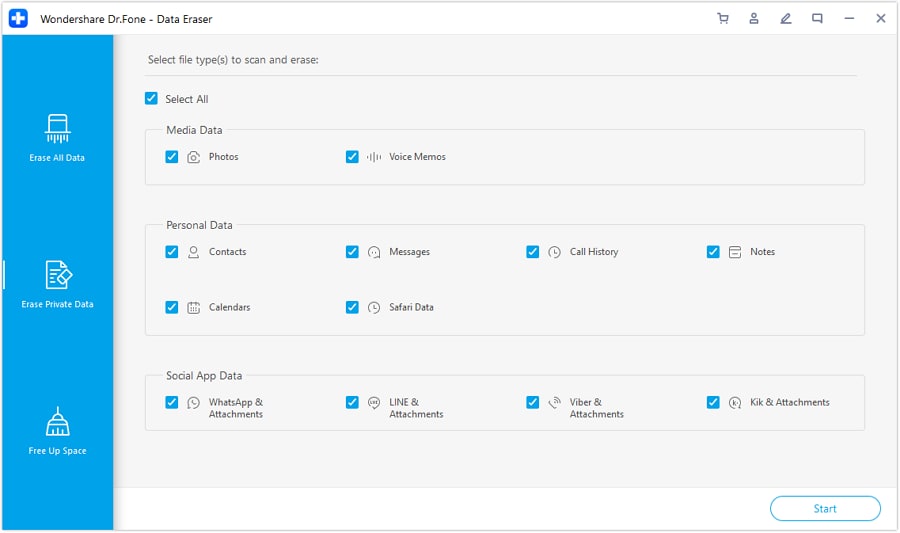
Step 4: Select Safari history or other details to erase
After the scanning is over, look at the left section, tick mark under Safari history, bookmarks, cookies, cache, etc., and press Erase.

Note: You need to confirm the erase action by typing “000000”, and pressing on “Erase Now” option. That’s it, the Safari history will delete, and you can safeguard your iPhone from virus through Safari Browser.
Part 4. 3 Tips to prevent virus on iPhone
Well, this section, although the final one of this article, is the most beneficial for all iPhone users.The suggestions below will be a great help to you if you are want to know how to get rid of a virus on your iPhone.
If you takespecific preventive actions,it will not only help youkeep your iPhone free from virus, besides it will also keep your device protected from other malware problems.
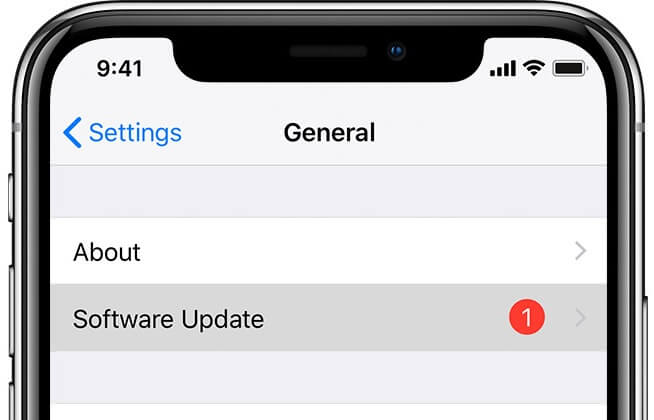
1: Update to the latest iOS regularly
One of the necessary actions to maintain the health of your iOS device intact is to update to the newest iOS version frequently. Doing so will equip the machine with advanced technology that is capable of fighting against any virus attack or other issues.
You can update to the latest iOS by:
Going to Settings> General> Software update option
2: Avoid suspicious link clicks
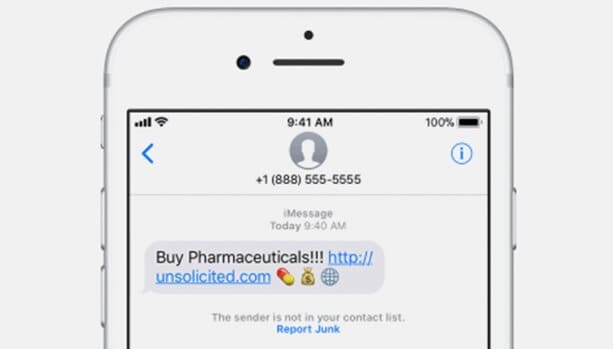
It is always advisable to avoid any suspicious link clicks, as it may give direct access to mischievous sources and infect your iPhone with some coded virus. Such links can come from any source, such as text messages, emails, message on social media account, website surfing, watching a video, or the applications on your device.
3: Stay away from tricky pop-up
For iOS device users, it is common to receive various System generated pop-ups. But, not all pop-up messages are from legitimate sources. It can be a phishing attempt.
Thus, if you ever receive any pop-up then to check its reliability press the Home button. If the pop-up disappears, then it is a phishing attempt, but if it continues to show later, it is System generated.

Conclusion
Nothing can be more relieving than getting rid of a virus on your iPhone. Hopefully, you now are well aware of all the methods mentioned in the article on how to remove virus from iPhone. Also, it is imperative for you to understand what precautions you must take to avoid a virus attack on your iPhone. After all, as rightly stated, prevention is better than cure.
However, if still, your iOS device is under attack from malware, then make use of the Dr.Fone toolkit, which not only deals with the virus effectively but also keeps your data 100% secure.
Lastly, we request you to share the article on how to check if my iPhone has a virus and how to get rid of it, with your friends and well-wishers today.


iPhone Erase
- Clear iPhone
- Delete iPhone
- 1. Delete Albums on iPhone
- 2. Delete Apps from iPhone
- 3. Delete Calendar Event on iPhone
- 4. Delete Documents on iPhone
- 5. Delete Email Account on iPhone
- 6. Delete Visited Sites on iPhone
- 7. Delete Music from iPhone
- 8. Delete Snapchat Messages on iPhone
- 9. Delete Songs from iCloud
- 10. Delete Voicemail on iPhone
- 11. Delete WhatsApp Message for Everyone
- 12. Delete WhatsApp Message Permanently
- 13. Delete Downloads on iPhone
- 14. Delete Calendars from iPhone
- 15. Delete History on iPhone
- 16. Delete Snapchat Story/History
- 17. Delete Call History on iPhone
- 18. Delete Kik on iPhone
- 19. WhatsApp Delete Message Tips
- 20. Anti Spyware for iPhone
- 21. Get Rid of Virus on iPhone
- 22. Delete Other Data on iPhone/iPad
- 23. Remove Subscribed Calendar iPhone
- Erase iPhone
- 1. Erase an iPhone without Apple ID
- 2. iPhone Data Erase Softwares
- 3. Remove Cydia from iPhone/iPad
- 4. Erase All Content and Settings
- 5. Erase Old iPhone
- 6. Erase iPhone 13 Data
- 7. Erase Data Old Device
- 8. Erase iPhone without Apple ID
- 9. Empty Trash on iPhone
- 10. Sell My Old iPhone
- 11. Sell A Used Phone
- 12. Safely Sell Used Phones
- 13. Apple Trade in Program
- iPhone Storage Full
- 1. iPhone Cleaners to Clean iPhone
- 2. Clean Master for iPhone
- 3. Clean Up iPhone
- 4. Free Up Storage on iPhone
- 5. Make iPhone Faster
- 6. Speed Up iPhone/iPad
- Wipe iPhone
- Sell Old iPhone
James Davis
staff Editor