How to Transfer Music from Mac to iPhone?

May 18, 2026 • Filed to: Device Data Management • Proven solutions
 TL;DR:
Transferring music from a Mac to an iPhone can be done offline using Dr.Fone or iTunes, or wirelessly via iCloud Drive and Dropbox, though Dr.Fone is the recommended alternative for bypassing iTunes entirely.
● Dr.Fone - Phone Manager (iOS) supports devices running iOS 7 through iOS 13 and includes a built-in prompt to automatically convert incompatible song formats before copying them to your phone.
● iTunes offers local USB or Wi-Fi syncing that functions automatically for Apple Music subscribers, but it requires significant disk space and lacks the ability to transfer entire folders in a single click.
● iCloud Drive and Dropbox enable cloud-based file access across devices logged into the same account, but both methods strictly require an active internet connection and come with limitations like complex interfaces or costly premium pricing tiers.
Ask AI for a summary
 ChatGPT
 Perplexity
 Gemini
 Claude
 Grok
Grok
Dr.Fone Basic:
Better Control for Your Phone
Manage, transfer, back up, restore, and mirror your device
In today’s fast-paced life, music is an incredible way to declutter our minds from daily life stresses and worries. Come home after a tiring day at the office, plug-in some music, and feel better.
Music is always with us during our ups and downs; we turn to music when we have a party mood; similarly, music helps us to get out of our sadness. Each individual has his or her unique taste of music that reflects their personality.

Some are fans of Bryan Adams soothing music, while others are pumped up from the popular songs AC DC. This is the reason we maintain a personal list that will play in continuous mode.
Do you too have a vivid song list, but it is there on your Mac PC, right? Yeah, in this post, we’ve curated a mini-tutorial on how to transfer music from Mac to iPhone, so without wasting any time, get on with it.
Part 1: Transfer Music from Mac to iPhone without iTunes
iTunes is a media player, media library, Internet radio telecaster, cell phone the board utility, and the customer application for the iTunes Store, created by Apple Inc.
Do you know how to transfer music from Mac to iPhone without iTunes? Yes, it is possible, here, we put forth a reliable and robust software Dr.Fone that lets you quickly transfer the song list on your Mac PC to your iPhone.
It is Free software that works with both Windows and PC. Developed by Wondershare, the software is safe to use. It features a user-friendly that makes the transfer of music easy-peasy. This software is compatible with the latest iOS 13, and iPod. Using this software, you can transfer not only videos, photos, contacts, and music.
Dr.Fone - Phone Manager (iOS)
Transfer MP3 to iPhone/iPad/iPod without iTunes
- Transfer, manage, export/import your music, photos, videos, contacts, SMS, Apps, etc.
- Backup your music, photos, videos, contacts, SMS, Apps, etc. to computer and restore them easily.
- Transfer music, photos, videos, contacts, messages, etc from one smartphone to another.
- Transfer media files between iOS devices and iTunes.
- Fully compatible with iOS 7, iOS 8, iOS 9, iOS 10, iOS 11, iOS 12, iOS 13 and iPod.


Here is the step-by-step guide syncing music from mac to iPhone with iTunes
Step 1: Download the Dr.Fone software on your Mac. Double click the downloaded exe.file and install it like any other software. The best part about this software is that you don’t require iTunes software to transfer music from Mac from iPhone.

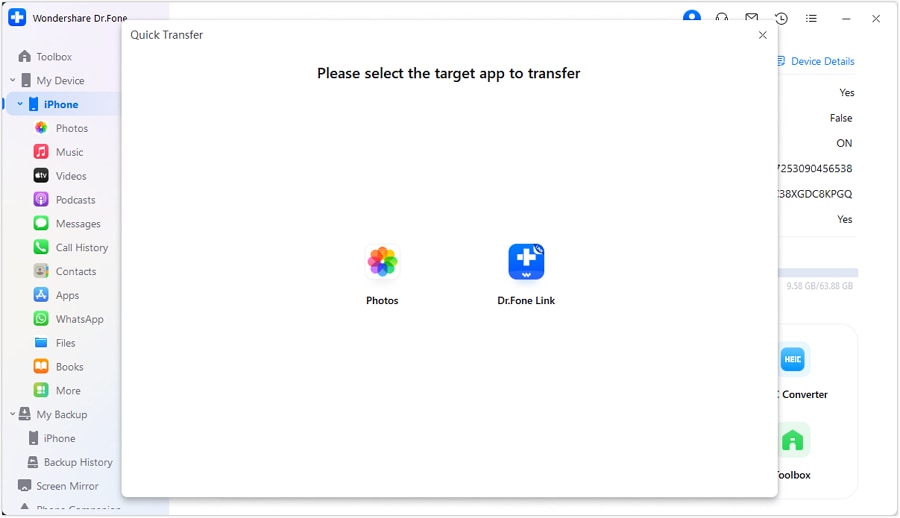
Step 2: The second step is connecting your iPhone to the Mac PC; this will be done via the USB cable. In a few seconds, you’ll see your iPhone appearing on the Dr.Fone phone manager as illustrated above.
Step 3: Since the Dr.Fone software has automatically detected your iPhone, it will itself put the iPhone on the main window.

Step 4: the next step is clicking the music tab, which is there on the top of the main window, and then you’ll be entering the music window by default. In case, this doesn’t happen; then you’ll have to click the music tab there on the left sidebar.
Step 5: Then, click Add to discover all your songs stored on your Mac. You’ll need to open it to transfer each one to your iPhone or iPod. In case, the song isn’t in the right format; then a pop-up window will come up that will be asking you to allow the necessary conversation.
Step 6: Don’t think much, click convert, and after that the song will be successfully copied to your iPhone.
Part 2: Sync Music From Mac to iPhone with iTunes
You can easily sync music from Mac to iPhone from your Mac PC to your iPod, iPod touch, or iPhone using iTunes.
If you have already subscribed to Apple Music, then the syncing is done automatically, you don’t have to make any efforts for the same. In case, you haven’t, then follow the below quick guide syncing music from Mac to iPhone using Mac.
Step 1: Connect your iPhone or iPod to your Mac PC. The device can easily be connected via the USB C cable, USB or wifi connectivity - you need to turn on the wifi syncing.
Step 2: In the Finder sidebar, locate the device which has been connected.

Step 3: In the bottom bar, you need to select the music to be synced from Mac to iPhone.

Step 4: In this step, you have to select the "Syncing Onto {name of the device}" tickbox to sync the music from Mac to iPhone. Syncing is the process of transfer of all your songs from one gasket to another with a single click.

Step 5: Hit "Selected playlist, artists, albums, and genres," if you want to transfer selected music.
Step 6: Here, you'll have to individually tick box items you want to transfer from the music list on your Mac PC to your iPhone or iPod. Deselect the tick boxes for the items you don't want to transfer.
Step 7: Here, you'll have to tick box certain syncing options:
"Include videos" - in the case; you want to transfer the music from your Mac PC to iPhone with videos.
"Include voice memos" - If you want a voice memo along with your music being synced.
"Automatically fill free space with songs" - If you want the free space on your device to be filled with songs from Mac.
Step 8: When you are all ready to sync, click apply, and the transfer will take its course to get done.
Finally, before you disconnect your iPhone or iPod after the transfer of music, you must click the eject in the finder sidebar.
Part 3: Copy Music from Mac to iPhone Via Dropbox

Dropbox allows anybody to transfer and move documents to the cloud and share them with anybody. Back up photographs, recordings, docs, and different documents to distributed storage, and access records matched up with any of your PCs or cell phones—from anyplace.
Furthermore, with cutting edge-sharing highlights, it's anything but difficult to send documents—huge or little—to companions, family, and colleagues.
Dropbox is another alternative that lets you transfer music from Mac to iPhone without iTunes.
Step 1: Download dropbox and install Dropbox both on your iPhone or iPod and Mac PC. After logging onto your Dropbox account using the same credentials on both the devices. If you don't have an account, then create one using the same valid email ID.
Step 2: To access the songs on both your iPhone, while you are in any part of the cloud, you have to upload music files on the dropbox from your Mac PC and vice versa. It is super easy, with no hassle involved.
Step 3: Now open the dropbox app on your target device to see the newly uploaded song files. So, now you are ready to listen to your favorite music.

Part 4: Sync Music from Mac to iPhone via iCloud
The iCloud drive allows users to store their stuff on the cloud and access it anytime anywhere from various devices, right from iPod, iPhone, Mac PCs.
You can even upload the entire songs folder with a simple click. You can access iCloud drive from all iOS and Mac gadgets using the same Apple ID. Let’s put a quick tutorial on how do I transfer music from my mac to iPhone:-
Step 1: The first thing you need to do for transferring music from Macbook to iPhone is to turn on iCloud on both your Mac PC and target device.
For the iPhone: "Settings" > [your name] > "iCloud" and move down to turn on "iCloud Drive".
For the Mac: Apple menu > "System Preferences" > "iCloud" and then select "iCloud Drive".
Step 2: Upload the files you want to transfer Mac to the iPhone onto iCloud from the source device.

Step 3: In the destination device, you have to download the song files from the iCloud drive.
Part 5: Comparison Table of These Four Methods
| Dr.Fone | iTunes | iCloud | Dropbox |
|---|---|---|---|
|
Pros-
|
Pros-
|
Pros-
|
Pros-
|
|
Cons-
|
Cons-
|
Cons-
|
Cons-
|
Conclusion
After reading the entire post, you’ll probably know how to transfer music from Mac to iPhone, what are the best methods for the same. In this post, we illustrate each method in detail with easy-to-implement steps.
We also discussed the pros and cons of each way of transferring music from Macbook to iPhone. From the above, we can easily deduce that Dr.Fone software is the preferred choice, firstly because it is free to use, it has an easy, user-friendly interface - even the technically challenged can follow the steps to transfer the music from Mac to iPhone.
So, why think or rethink, download the Dr.Fone software from here-drfone.wondershare.com
Dr.Fone Basic:
Better Control for Your Phone
Manage, transfer, back up, restore, and mirror your device


iPhone Music
- Download Music to iOS
- 1. Download Music to iPhone
- 2. Download Songs on iPhone/iPad/iPod
- 3. Download Free Music on iPhone
- 4. Download on iPhone without iTunes
- Make iPhone Ringtones
- 1. Set Voice Memo a Ringtone on iPhone
- 2. Ringtone Apps to Download Ringtones
- 3. Add Custom Ringtones to iPhone
- 4. iPhone Ringtone Apps
- 5. Ringtone Maker Apps for iPhone
- 6. Change iPhone Alarm Volume
- 7. Set A Ringtone on iPhone
- 8. Set MP3 As Ringtone iPhone
- 9. Set Ringtone iPhone
- 10. Make Custom Text Tones for iPhone
- 11. Websites for Free iPhone Ringtones
- 12. Move Ringtone from iPhone to Android
- 13. Popular iPhone Ringtone Remix
- Transfer Audio Media to iPhone
- 1. Send Ringtone from iPhone to iPhone
- 2. Transfer MP3 to iPhone
- 3. Transfer Audiobook from PC to iPhone
- 4. Transfer Songs from CD to iPhone
- 5. Put Ringtones on iPhone
- Transfer Music from iPhone
- 1. Transfer Music from iPhone to computer
- 2. Transfer Music from iPhone to iCloud
- 3. Transfer Music from iPhone to Android
- 4. Transfer Music from iPhone to iPod
- 5. Put Music on iPhone from Computer
- 6. Add Music to iPhone from Computer
- 7. Sync Apple Music Library
- Transfer Music from iTunes
- 1. Transfer Music from iTunes to iPhone
- 2. Transfer Music from Mac to iPhone
- 3. Transfer Music from Laptop to iPhone
- Transfer Music to iPhone
- 1. Transfer Music from Computer to iPhone
- 2. Transfer Music from Mac to iPhone
- 3. Transfer Music from Mac to iPhone
- 4. Music from PC to iPhone
- 5. Music from PC to iPhone without iTunes
- 6. Transfer Music from Android to iPhone
- 7. Transfer Music from iPad to iPhone
- 8. Transfer Music from iPod/iPhone
- 9. Transfer Music from iPhone to iPhone
- 10. Transfer Music from External Hard Drive
- 11. Transfer to iPhone without iTunes
- 12. Transfer Music to Jailbroken iPhone
- 13. Transfer Music to iPhone
- Transfer Music to iTunes/PC
- 1. Transfer Music from iPhone to iTunes
- 2. Transfer Music from iPhone to PC
- 3. Transfer Music from iPhone to Mac
- 4. Transfer Music between PC and iPhone
- 5. Transfer Music from to PC without iTunes
- iPhone Music Problems
- 1. Song Missing After iOS Update
- 2. Music Won't Play on iPhone
- 3. iPhone Plays Music by Itself
- 4. Apple Music Song Is Not Available
- 5.Fix Apple Music Library Not Syncing
- iPhone Music Tips
- ● Manage/transfer/recover data
- ● Unlock screen/activate/FRP lock
- ● Fix most iOS and Android issues
- Free Download Free Download Free Download


Alice MJ
staff Editor