 Effortlessly manage data through preview, delete, export, etc.

 100% Security Verified | No Subscription Required | No Malware

 :
: 
 ChatGPT
 Perplexity
 Gemini
 Claude
 Grok
Grok

How can I transfer music from iPhone to computer? I want to listen to my favorite songs on my PC, but can't find a reliable way to get my music library off my phone.
iPhone User
A while back, a friend of mine came up to me with this exact question, desperate to figure out how to transfer music from iPhone to the computer without losing their curated playlists. At first glance, Apple's stringent file system can make it seem incredibly difficult to transfer music from iPhone to PC, from iPhone to laptop, or vice versa. The strict synchronization rules of iOS often confuse users trying to back up their offline audio.
Fortunately, you don't need to be a technical expert to break these barriers. By taking the assistance of the right tools, you can easily manage, export, and transfer songs from iPhone to computer without any hassle. In this comprehensive 2026 guide, we will teach you how to securely copy your favorite tracks to your desktop in three distinct ways.
In this article
Part 1. How to Transfer Music From iPhone to Computer Using iTunes
Since iTunes is officially developed by Apple, a vast majority of users rely on its native assistance to manage their media libraries. Because it is freely available, it remains the standard method to transfer music from iPhone to computer free of charge. However, there is a significant catch: iTunes will only allow you to transfer purchased songs from your iPhone to the computer due to strict Digital Rights Management (DRM) restrictions. Custom MP3s cannot be exported this way.
If your entire music library consists of official Apple purchases, you can learn how to transfer music from iPhone to PC by following these straightforward steps:
-
Step 1 Connect Your Device to iTunes
To get started, use an authentic lightning or USB-C cable to connect your iPhone to the computer. Launch the newest version of iTunes to ensure optimal device detection and compatibility.
-
Step 2 Allow Automatic Transfer Prompt
Most of the time, iTunes automatically recognizes the presence of new purchased content on the connected iOS device. Chances are that you might get a prompt asking if you want to transfer music from iPhone to PC. Simply click on the "Transfer" button to copy the newly purchased items immediately.

-
Step 3 Manually Transfer Purchases
If you don't receive the automatic prompt, simply wait for your device icon to appear in iTunes. Afterward, navigate to the top menu bar, click on "File", hover over "Devices", and click on the option to "Transfer Purchases from [Your iPhone's Name]".

-
Step 4 Authorize Your Computer
Since the purchased files are heavily encrypted with Apple's DRM, iTunes might ask you to authorize your computer to play and store them. To do this, go to Account > Authorizations and select "Authorize This Computer".
By executing this solution, you will securely transfer songs from iPhone to a computer that were officially downloaded via the Apple Music ecosystem.
Part 2. Transfer Music From iPhone to PC Without iTunes (Dr.Fone)
As you can see, iTunes comes with a myriad of limitations—most notably its inability to export non-purchased music files. It is not an ideal way to seamlessly copy music from iPhone to a computer if you rely on third-party tracks, ripped CDs, or voice memos. To have a hassle-free experience and freely transfer all forms of audio data between platforms, simply use Dr.Fone - Phone Manager (iOS).
As a core component of the Dr.Fone toolkit, it offers a secure, two-way transfer solution. Not only does it transfer music from iPhone to the computer effortlessly, but it can also be used to move other essential files like photos, HD videos, audiobooks, contacts, and text messages.
 Effortlessly manage data through preview, delete, export, etc.
- Transfer all data between devices.
- Robust backup solutions for reliable data protection.
- Mirror screens to PC for meetings, teaching, and control.

This intuitive device management software lets you completely bypass annoying iTunes synchronization restrictions. We will explore two primary workflows: directly exporting your music library, and automatically rebuilding a lost iTunes library structure.
2-1. Transfer music from iPhone to computer directly
To learn how to transfer music from iPhone to computer selectively without syncing over your existing files, just follow these instructions:
-
Step 1 Launch Phone Manager Feature
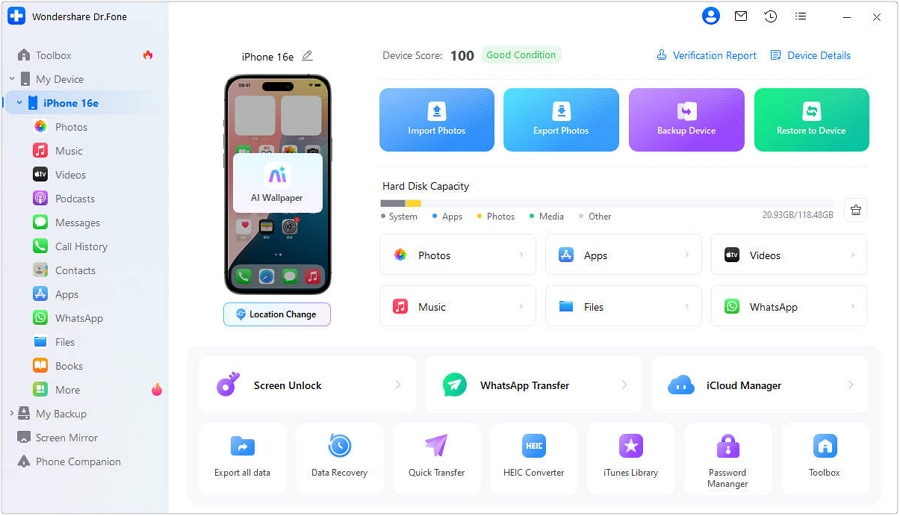
To begin with, download Dr.Fone from its official website to your Windows PC or Mac. After running the main toolkit interface, select the "Phone Manager" module from the home screen.

-
Step 2 Connect Your iOS Device
Connect your iOS device to the system using a reliable USB cable. The software will detect it automatically in seconds. Once detected, you can view its detailed storage snapshot on the main interface.
-
Step 3 Navigate to the Music Tab
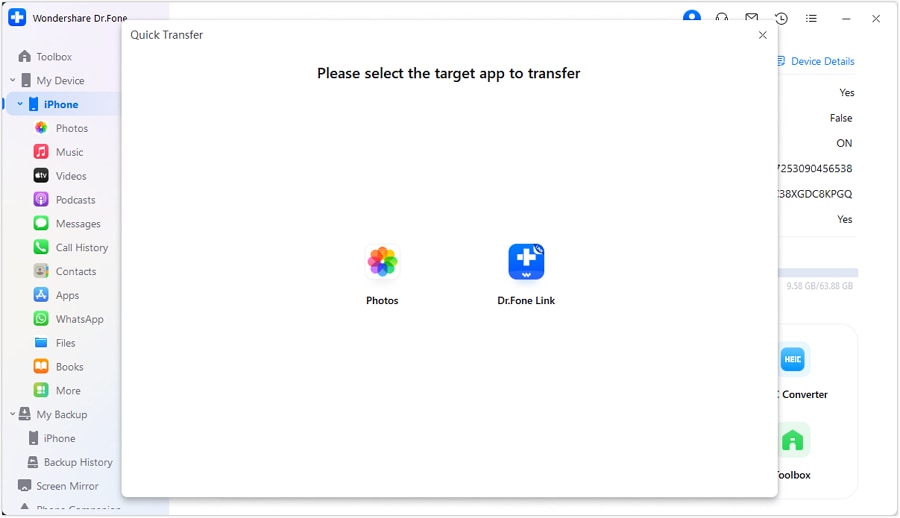
To view your audio library and copy music from iPhone to the computer, switch to the "Music" tab located at the top navigation bar.
-
Step 4 Select and Export to PC
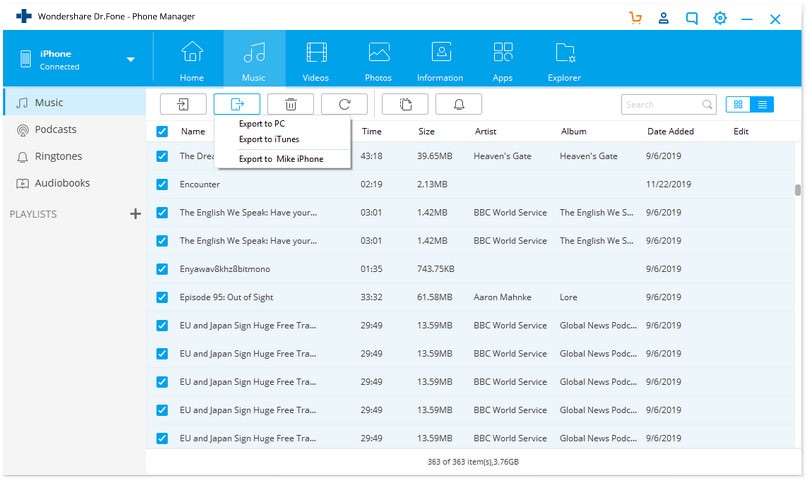
Here, you can browse all the music files stored locally on your iOS device. The data is intuitively classified into different categories (Podcasts, Audiobooks, Playlists) on the left panel. Check the boxes next to the tracks you wish to transfer, click on the "Export" icon, and select "Export to PC". This will automatically start the transfer process to your chosen folder.
2-2. Rebuild your iTunes Library automatically
If your computer crashed or you recently upgraded to a new PC, you might have lost your entire iTunes library. Besides directly exporting tracks, Dr.Fone allows you to rebuild the iTunes library from your iPhone in one click.
-
Step 1 Select Media Transfer Option
Connect your iPhone to the computer and launch the app. Under its "Phone Manager" module, click on the quick action labeled "Transfer Device Media to iTunes" directly on the main dashboard.
-
Step 2 Scan and Select Files
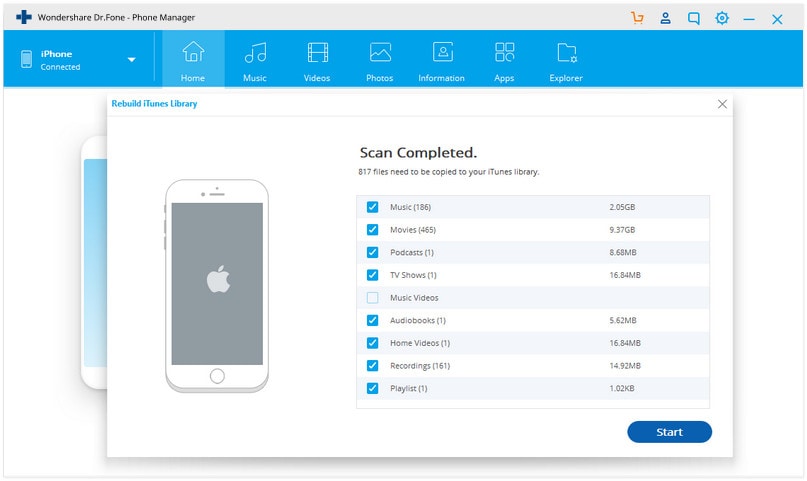
This will automatically scan your device and present a window showing the exact types of media data that can be synced (Music, Playlists, Podcasts). Simply keep your preferred options selected and click on the "Start" button.
-
Step 3 Finalize Library Sync
The software will effortlessly filter out duplicates and ensure all selected files are copied from your iPhone directly into the native iTunes library in no time.
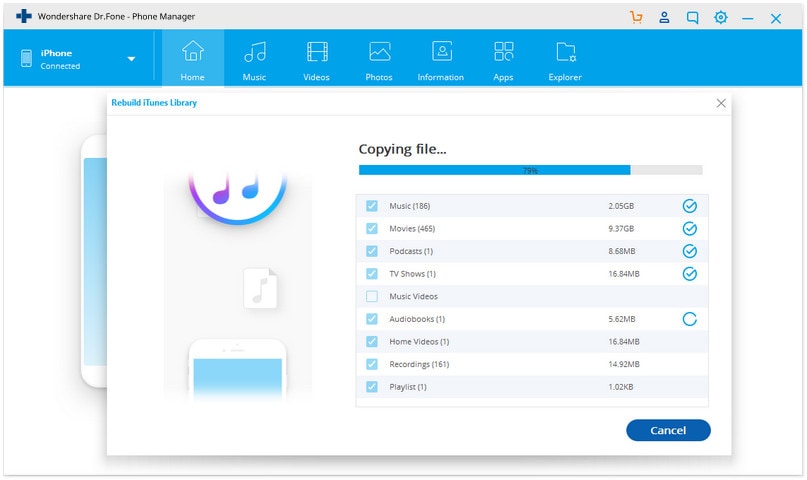
In this way, you can reliably transfer music from iPhone to computer free of syncing errors, without having to repurchase them multiple times on different platforms.




Part 3. How to Transfer Music From iPhone to Computer by Streaming
If you don't necessarily need the raw audio files saved on your local hard drive, streaming offers a brilliant workaround. This is considered an unconventional way to "transfer" songs from iPhone to the computer, as it focuses entirely on real-time playback.
There are tons of third-party applications out there that can help you broadcast audio from your phone to a PC. One popular solution is Apowersoft Phone Manager, a tool that can help you transfer music from iPhone to the computer via wireless streaming.
-
Step 1 Install Streaming Receiver
To implement this method, firstly download and launch the Apowersoft tool on your Windows PC. It will act as a broadcasting receiver.
-
Step 2 Connect to Wi-Fi
Ensure that both your computer and your iPhone are actively connected to the exact same Wi-Fi network.
-
Step 3 Enable iOS AirPlay
Swipe down from the top right of your iPhone screen to access the Control Center, and tap the Screen Mirroring or AirPlay icon.
-
Step 4 Select the Target PC
Select your computer from the list of available devices and turn on the mirroring option to cast your device's audio output to your desktop.

-
Step 5 Play Your Tracks
After that, simply open Apple Music or your local player and play any song on your iPhone. The high-quality audio will automatically be pushed and played out loud on your computer as well.

Conclusion
Now that you have explored three proven and entirely different ways to transfer music from iPhone to PC, you can easily choose a method that meets your specific requirements. While iTunes remains a viable option for syncing official Apple purchases, it consistently falls short when dealing with diverse formats and unpurchased tracks.
As you can see from our breakdown, Dr.Fone - Phone Manager (iOS) provides the most comprehensive solution to transfer songs from iPhone to computer. It functions as an all-in-one desktop toolkit designed to help you organize, backup, and copy your device data securely without relying on Apple's restrictive sync rules. Give it a try today and take back full control of your smartphone's media.
FAQ
-
1. How can I transfer non-purchased music from my iPhone to my PC?
Because iTunes heavily restricts exporting custom or unpurchased tracks due to DRM policies, you will need a third-party management tool. Applications like Dr.Fone - Phone Manager allow you to preview and select any audio file—including custom MP3s, ripped CDs, and audio memos—and export them directly to a folder on your computer. -
2. Is it possible to transfer music from iPhone to computer for free?
Yes. If your music was officially purchased directly from the Apple ecosystem, you can connect your iPhone, open iTunes, and select "Transfer Purchases" entirely for free. Additionally, some transfer software offers free trial thresholds, while streaming features like AirPlay cost nothing to use over local Wi-Fi. -
3. Will syncing my iPhone with a new computer erase my existing music?
If you use the native iTunes "Sync" function on a brand-new computer, it will warn you that your iPhone is synced with another library and ask to erase and replace your current iPhone data. To avoid data loss, use third-party transfer software that exports files bidirectionally without deleting anything. -
4. Can I transfer my music using a standard USB cable?
Yes, transferring music via a standard USB-C or Lightning cable is the fastest and most secure method available. Both iTunes and Dr.Fone utilize a direct physical cable connection to achieve high-speed transfers without depending on network stability, ensuring your files are copied swiftly without degradation.
 Add Wondershare Dr.Fone as a preferred source on Google



