Move contacts, messages, photos, videos, app data, and more between iOS and Android.

 100% Security Verified | No Subscription Required | No Malware

 :
: 
 ChatGPT
 Perplexity
 Gemini
 Claude
 Grok
Grok
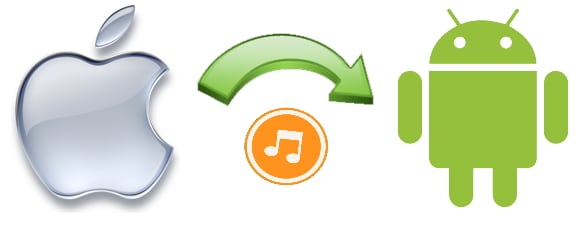
Apple has consistently prioritized a closed ecosystem, which makes finding out how to move custom ringtones from iPhone to Android a frustrating task for many users. While iOS relies strictly on the proprietary .m4r file extension for all call alerts, Android systems natively utilize .m4a or standard .mp3 formats. Because of this distinct architectural gap, attempting to transfer iPhone ringtones for Android directly through native methods like Bluetooth or iCloud is virtually impossible without manual file management.
Fortunately, you do not need to struggle with complex technical workarounds or risk losing your favorite audio data. Whether you are switching ecosystems entirely or just want to share a specific audio clip with a secondary device, leveraging dedicated desktop tools allows you to bridge this gap effortlessly. In this comprehensive 2026 guide, we will break down the exact steps to seamlessly migrate your audio alerts across platforms and explore exactly how to custom ringtones for iPhone from scratch.
In this article
Part 1. How to move custom ringtones from iPhone to Android?
The primary hurdle when transferring media between these two dominant operating systems is the file format discrepancy. The official iOS file extension for an audio alert is .m4r, whereas an Android device typically relies on reading files formatted as .m4a or .mp3 to be assigned as the system ringtone. This fundamental difference is the absolute main reason you must adapt or properly export your media files when attempting to push iPhone ringtones for Android platforms.

While there are numerous versatile apps related to iTunes and mobile management available online, using a trusted third-party phone manager is the safest and most efficient route. A reliable desktop application lets you oversee all your contacts, media, and system files without the restrictive limitations that iTunes typically enforces. For this exact purpose, we highly recommend Dr.Fone - Phone Manager (iOS). This robust software acts as a one-stop solution, allowing you to manually explore your device's directories and export individual media files directly to a completely new device or your local computer.
Relying on unverified online conversion tools can expose your smart devices to spyware or result in severe audio quality loss. Utilizing a professional desktop management tool ensures your data remains completely secure and the audio quality stays pristine throughout the transfer process.
1-1. Transfer iPhone Ringtones for Android with a Trustful App
 Effortlessly manage data through preview, delete, export, etc.
- Transfer all data between devices.
- Robust backup solutions for reliable data protection.
- Mirror screens to PC for meetings, teaching, and control.

-
Connect Your Devices
Start by downloading and installing Dr.Fone on your personal computer. Launch the application main interface and connect both your iOS device (source) and your Android device (destination) to the PC using their respective USB cables.
-
Select the Source Device
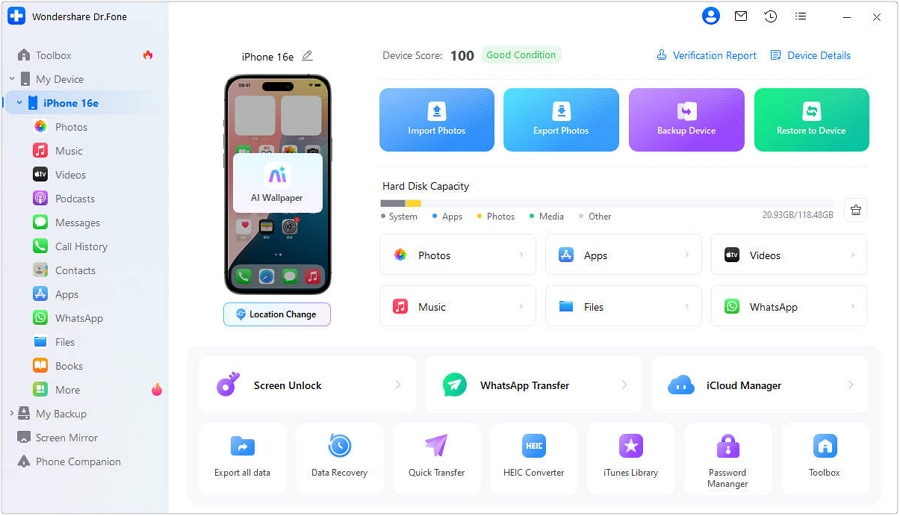
Once both mobile devices are actively recognized by the system, use the top-left dropdown menu on the software dashboard to ensure your iPhone is selected as the primary source device for the transfer.
-
Export Ringtones to Android
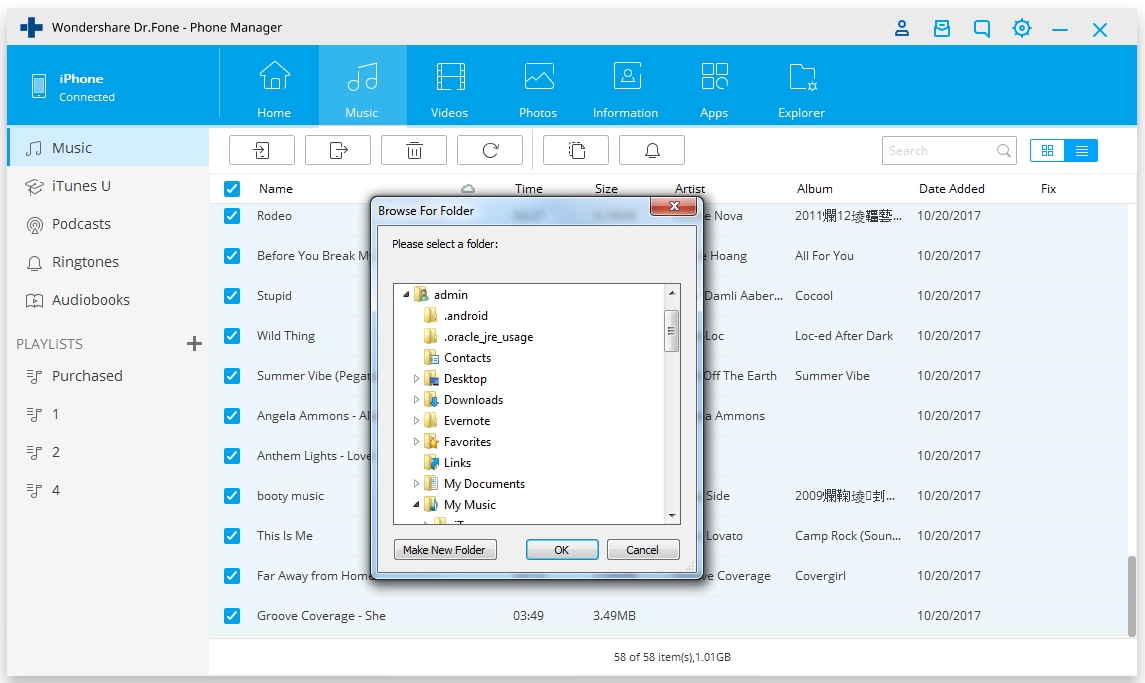
Navigate to the 'Music' tab on the main navigation bar, then click on the 'Ringtones' option in the left sidebar to view all active alerts on your iPhone. Select the specific custom ringtones you wish to transfer, click on the 'Export' icon, and choose the 'Export to Device' option (selecting your connected Samsung or other Android smartphone from the list). The software will flawlessly handle the file transfer and ensure compatibility seamlessly.




Part 2. How to custom ringtones for iPhone?
If you don't merely want to transfer existing files but actually want to learn exactly how to custom ringtones for iPhone using your favorite personal songs, the Ringtone Maker feature built directly into the software makes the process incredibly straightforward. You can trim, cut, and customize local music files or audio currently stored on your connected device with precision.
-
Access the Music Tab
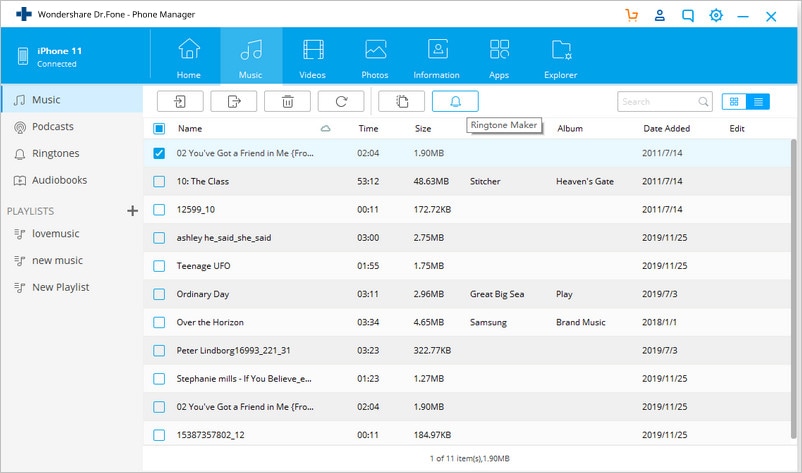
Run the phone management application and connect your iPhone securely to the computer. Navigate to the 'Music' tab on the top horizontal menu bar to instantly load your device's entire audio library.
-
Open the Ringtone Maker
Click on the 'Ringtone Maker' icon located in the top toolbar menu. Alternatively, you can directly right-click on any individual music file already listed in your active library and select 'Ringtone Maker' from the context popup menu.
-
Import Your Audio File
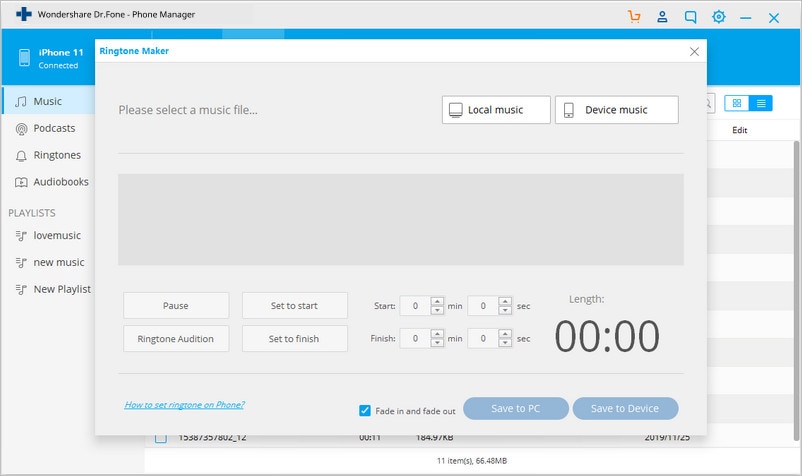
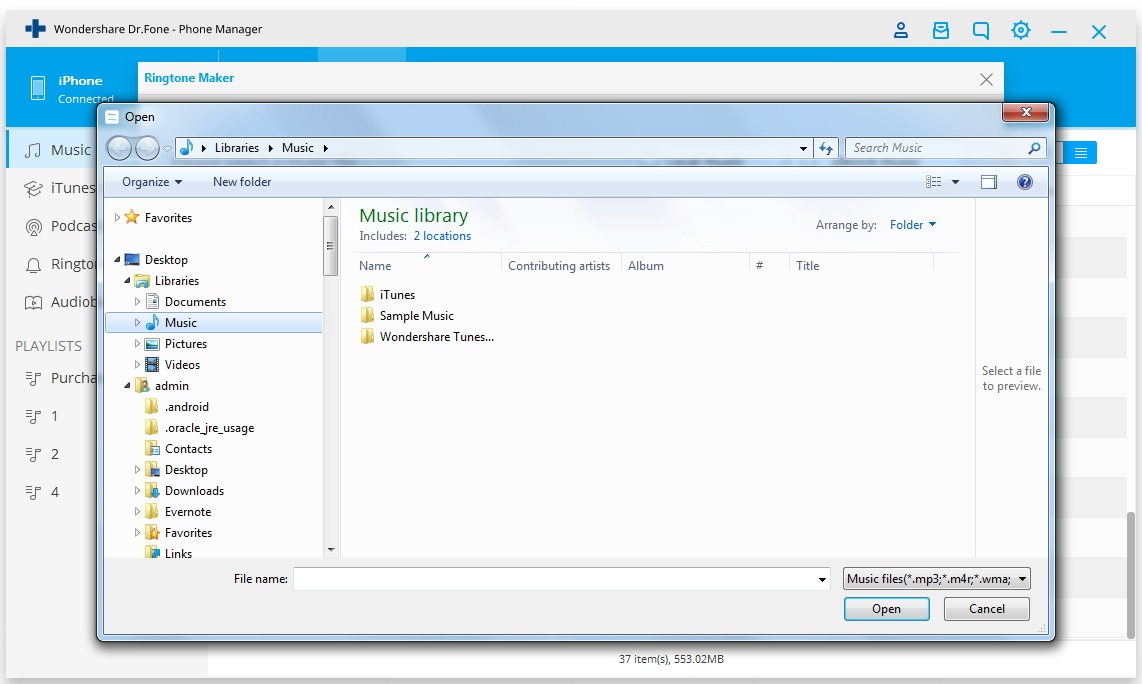
A dedicated Ringtone Maker window will immediately pop up on your screen. From here, click on 'Local Music' to browse and import an audio file saved directly on your PC's hard drive. If you prefer to use a song already residing on your phone, click the 'Device Music' button.
-
Trim and Save the Custom Ringtone
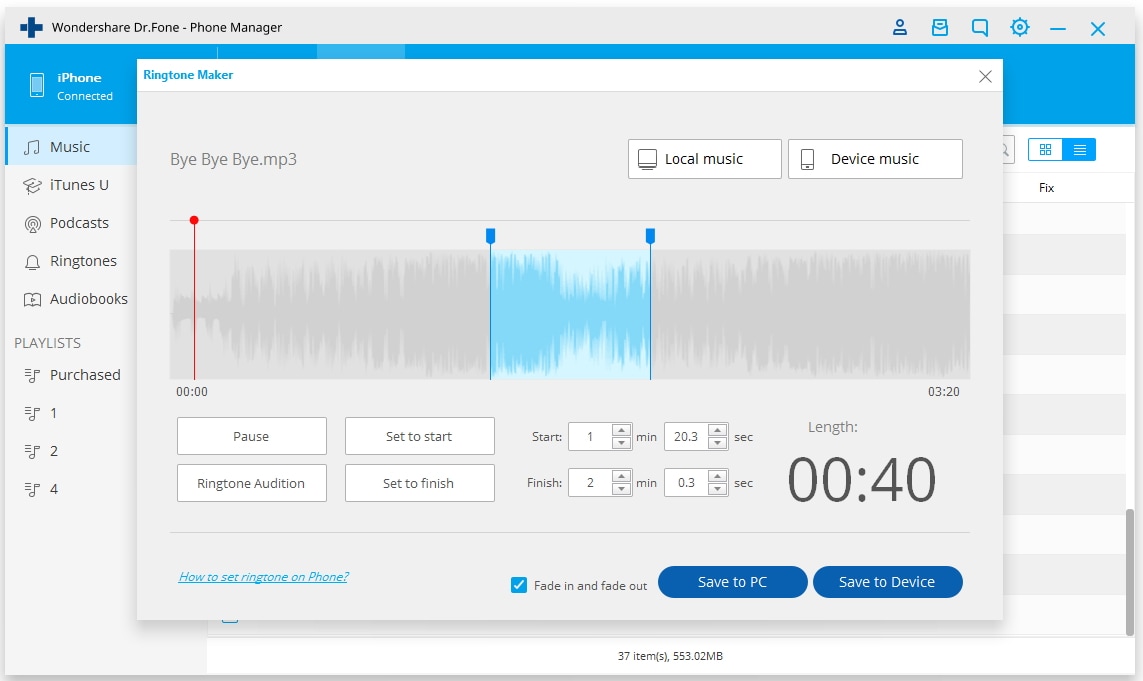
Use the timeline sliders to meticulously set the precise start and finish times for your desired audio snippet (iOS ringtones are typically capped at 40 seconds). Click 'Ringtone Audition' to accurately preview your creation. Once satisfied with the cut, click 'Save to PC' to store it locally, or 'Save to Device' to push it directly into your iPhone's active ringtone directory.
Conclusion
With an overwhelming number of applications currently on the market offering basic iTunes alternatives, it can be extremely tedious to test each one just to figure out how to move custom ringtones from iPhone to Android effectively. Placing a tremendous value on user experience and ultimate convenience, Dr.Fone - Phone Manager (iOS) proves to be a remarkably lightweight and efficient software tool. It completely simplifies the complex iOS ecosystem, ensuring you can manage cross-platform transfers, perform safe data backups, and make custom audio alerts without ever bogging down your computer's memory resources. By adopting this highly streamlined approach, you can easily bypass Apple's stringent file format restrictions in 2026 and enjoy absolute freedom over all your mobile device's media files.
FAQ
-
1. Why can't I transfer Apple Music directly to Android as a ringtone?
Any music track downloaded directly from Apple Music's streaming library is strictly protected by Apple's FairPlay DRM (Digital Rights Management). Because these files are tightly encrypted to prevent piracy, third-party software cannot extract or convert them into custom ringtones for Android or iOS. You must always utilize DRM-free local audio files instead. -
2. Does transferring iPhone ringtones for Android reduce audio quality?
No, transferring the files through a professional desktop tool does not degrade your audio quality. The software simply handles the file container (extracting or adapting the .m4r into an Android-readable format like .m4a or .mp3) while flawlessly maintaining the original bitrate of the audio clip. -
3. Can I Bluetooth a custom ringtone from my iPhone to Android?
No. Apple's iOS strictly prohibits the direct transfer of media files, including custom ringtones, via standard Bluetooth protocols to non-Apple devices. To move the files successfully, you must use an intermediary solution like a PC equipped with dedicated data management software or a reliable cloud storage service. -
4. Where are custom ringtones saved on an Android device?
Once safely transferred, Android devices typically store these audio files in the designated 'Ringtones' folder located within the internal storage directory. You can easily access this folder using your Android's native File Manager application or simply select the audio directly from the 'Sound & Vibration' menu in the core device settings.
 Add Wondershare Dr.Fone as a preferred source on Google