 Effortlessly manage data through preview, delete, export, etc.

 100% Security Verified | No Subscription Required | No Malware

 :
: 
 ChatGPT
 Perplexity
 Gemini
 Claude
 Grok
Grok
iPhone owners often accumulate massive libraries of music, and while having thousands of tracks in your pocket is incredible, managing that vast media collection can become incredibly challenging. Whether you are constantly creating customized playlists, adding new music, cleaning out outdated songs, or trying to organize diverse genres, handling such large volumes of audio data is tough even for powerful iOS-backed devices. Furthermore, extensive media management consumes precious time, and the native functions can often feel repetitive and restrictive.
Most importantly, if you are not able to manage your files properly, the inevitable lack of storage memory on your iPhone will quickly become a major bottleneck. However, armed with the right third-party tools and a solid understanding of platforms like iTunes, it is entirely possible to organize large music playlists with maximum efficiency. In this comprehensive 2026 guide, we will explore exactly how to master your audio library. We will detail actionable methods on how to take music off iPhone onto a computer, rebuild your iTunes library, and significantly improve your daily workflow.
In this article
Part 1. How to Get Music Off iPhone Onto Computer
There are countless situations where you simply have to get music off your iPhone to free up space or back up your precious collection. Unfortunately, the default iOS transfer process is notoriously monotonous and consumes unnecessary amounts of time. For modern iPhone users, you quickly realize that it's just not easy to transfer music from iPhone to PC by simply cutting and pasting the file through a basic folder explorer.
Apple's ecosystem does not function the same as open-source Android devices, especially when you are desperately trying to shift a massive, customized playlist from your iOS device directly to a PC. If you are serious about figuring out how to get music off iPhone onto computer efficiently, you will absolutely need the right software toolkit. While there are a few rudimentary methods to move content (such as Email, Bluetooth, and standard USB connections), these often fail when faced with gigabytes of high-quality audio files.
While Email or Bluetooth might suffice for a single voice memo, the absolute best and most professional method is utilizing Dr.Fone - Phone Manager (iOS). This dedicated tool is specially engineered to safely transfer files from iOS device to PC without quality loss. Dr.Fone makes the extraction of huge music libraries a completely seamless process, often finishing in just a matter of seconds. You can rely on this interface to transfer music from your iPhone to your PC, external drives, iTunes, or even entirely different smartphones without the heavy lifting.
 Effortlessly manage data through preview, delete, export, etc.
- Transfer all data between devices.
- Robust backup solutions for reliable data protection.
- Mirror screens to PC for meetings, teaching, and control.

If you want a transfer tool that is not only highly accessible but guarantees file safety without risking accidental sync deletions, Dr.Fone is unmatched. Let us examine step-by-step how to flawlessly execute this procedure and export your favorite tracks.
-
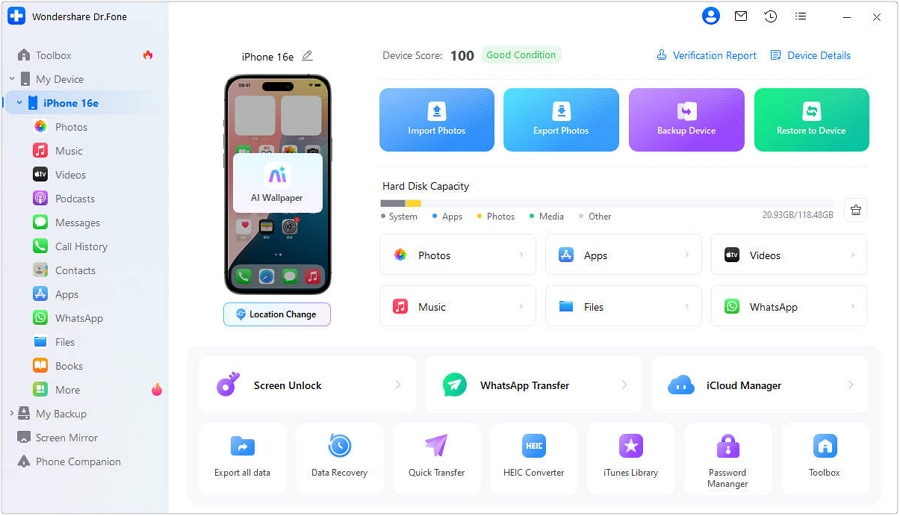
Step 1 Install the Program and Connect Your iPhone
To start taking music off your iPhone, first download and install Dr.Fone - Phone Manager (iOS) using the secure links provided above. Open the software on your desktop. Once ready, ensure that your iPhone is firmly plugged into the computer via a reliable USB lightning cable.
-
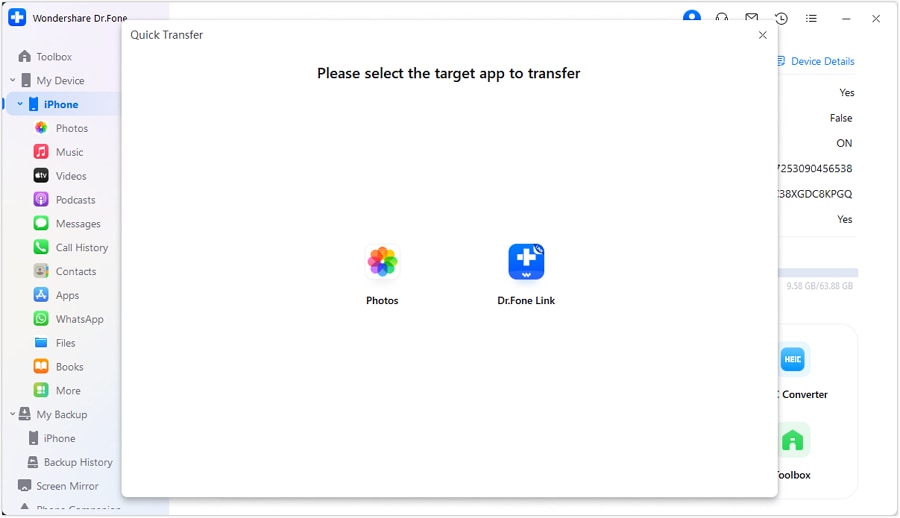
Step 2 Navigate to the Music Management Tab
Visit the top 'Music' section on the dashboard. Under this tab, you will immediately see a comprehensive list of all the music files currently saved on the iOS device. Here, you can easily filter and select the content you wish to switch from your iPhone. You can check individual boxes or select all depending on your storage requirement.
-
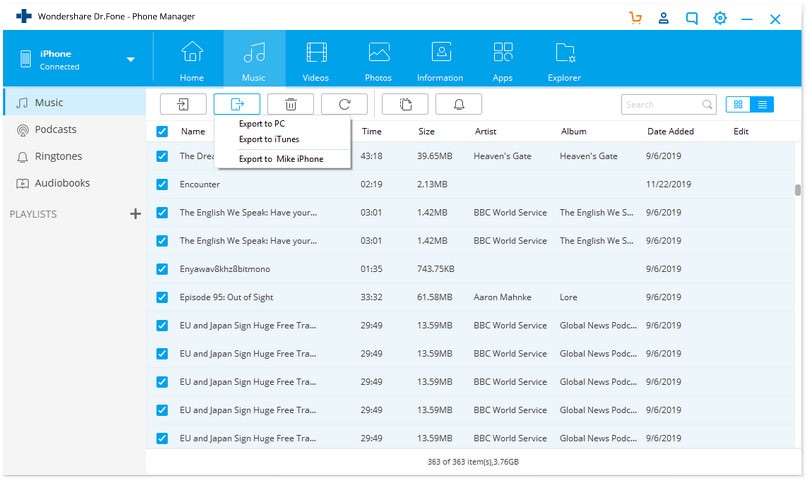
Step 3 Initiate the Export Process
Once you have carefully highlighted your desired songs or playlists, select the designated icon for exporting content located on the top toolbar. From the dropdown menu, choose the 'Export to PC' option to begin routing the files safely to your hard drive.
-
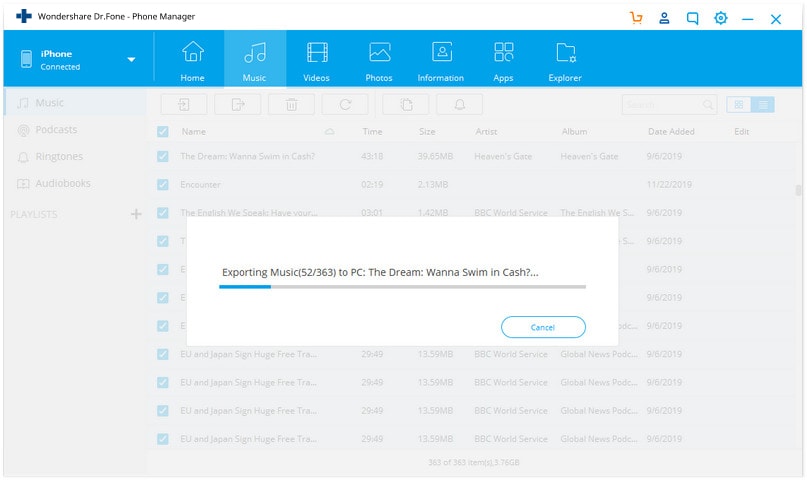
Step 4 Choose Destination and Complete Transfer
A secondary window will prompt you to select a specific destination folder on your desktop. Find your preferred location and click 'Ok'. Simply wait patiently until all the selected media files have been successfully exported without any iTunes interference.
Part 2. How to Take Music Off iPhone and Move It to iTunes
For many traditional iPhone owners, iTunes remains the primary platform for storing, buying, and cataloging music. Unfortunately, the built-in iTunes or Apple Music mobile app does not provide the same level of granular accessibility and power as its desktop counterpart.
To make meaningful structural changes to your main playlist, metadata edits, or mass deletions, you often need to utilize iTunes on a Mac or PC, rather than struggling on the mobile version's touch screen. Because of these distinct functional differences, it makes complete sense that at some point, you will urgently want to transfer new offline music directly to iTunes on your desktop computer to merge libraries.
Fortunately, there is a simple, highly efficient way to bypass Apple's rigid one-way sync rules. Dr.Fone - Phone Manager (iOS) acts as the absolute best tool to seamlessly facilitate two-way transfers from your iOS device directly back to iTunes. This intelligent software fundamentally helps you save valuable hours, especially when you are dealing with a large, unorganized music playlist. With this manager, you will essentially take full control over your media ecosystem.
We will clearly illustrate below exactly how to get music off iPhone and firmly onto your local iTunes library with Dr.Fone. Just follow these streamlined steps.
-
Step 1 Launch Dr.Fone and Connect
Connect the target iOS device, and launch the Dr.Fone - Phone Manager toolkit. You will instantly be taken to the primary menu screen showcasing your device details.
-
Step 2 Select Rebuild iTunes Library
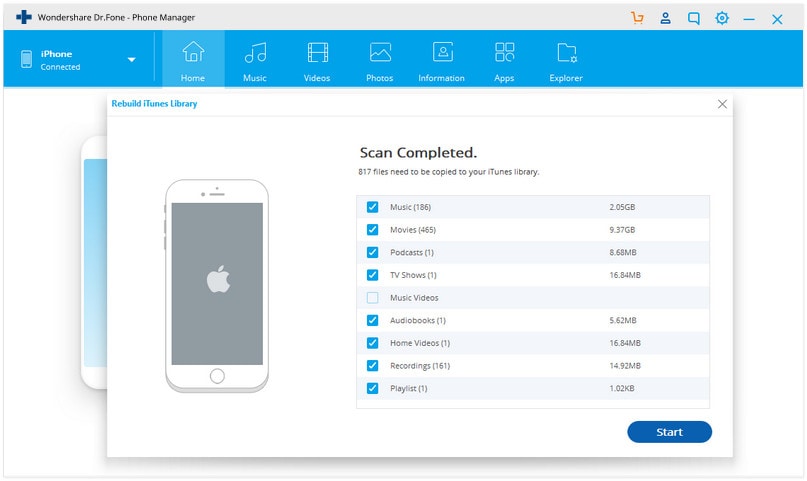
On the main interface, locate and click the 'Transfer Device Media to iTunes' option. Dr.Fone will automatically begin a deep scan of both your local iTunes application and your connected iOS device to accurately detect the differences in file types and prevent unwanted duplicates.
-
Step 3 Select the Audio Files
Once the scan completes, thoroughly review and select the specific files or entire playlists you want to transfer. Simply click on the 'Start' button to confidently move onto the next step in the extraction process.
-
Step 4 Allow the Transfer to Complete
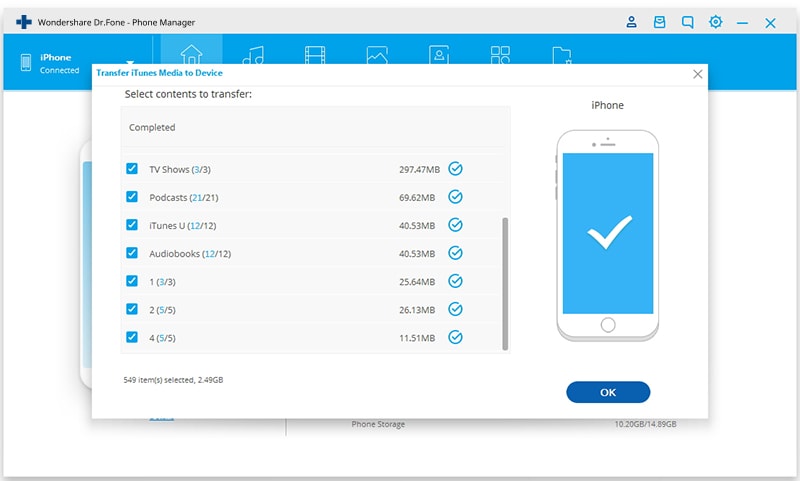
Dr.Fone will take a few short minutes to systematically transfer all the chosen music files safely into your iTunes library folder architecture.
-
Step 5 Review the Completion Notice
You will receive a success notice on your screen informing you exactly when the digital transaction is complete, ensuring no data was lost during the bridge.
Part 3. Pro Tips for Managing Music on iPhone in 2026
As we've seen, managing large audio collections can easily become a major pain point for dedicated owners of the iPhone. This persistent issue exists because the standard Apple Music/iTunes app designed for iOS devices simply is not as comprehensive feature-wise when directly compared to its desktop counterpart. For dedicated audiophiles and music lovers, curated playlists can grow to be extremely large, and managing that vast volume of content is obviously challenging on a 6-inch screen. Hence, we offer some professional-grade tips to immediately help you manage your media and make the absolute most of iTunes.
1. Optimize Music Storage on iOS Devices
If you are struggling with low space, the single best native way to manage a large volume of music is to automatically optimize storage directly on your iOS device. Your iPhone OS system smartly allows you to optimize local storage in a series of incredibly simple steps. Navigate to Settings > Music > Optimize Storage. Once activated, the Optimize Storage toggle will automatically delete background tracks that you haven't played in a while to save space. You can carefully set exactly how much local space is strictly dedicated to downloaded music. For example, if you deliberately choose to dedicate 4GB for downloaded music intended for offline listening, you will have roughly 800 standard-quality tracks permanently available.

2. Sync iTunes Folder Without Duplications
It's important to remember that most people get their music not exclusively from the iTunes store, but often from tertiary sources like ripped CDs, high-res audio sites, and other online sources. To seamlessly add or properly take music off iPhone, you often have to manually import the music into iTunes first. Sadly, this default process frequently duplicates songs within iTunes media folders, which unnecessarily takes up massive amounts of space on your main computer hard disk. You can radically improve this workflow by configuring iTunes to sync music without duplicating backend files. This optimization is effectively done by intelligently adding music to a designated ‘Watch Folder’. This specific folder structurally prevents raw file duplication when uploading new media onto the iTunes registry.
3. Automating Playlist Creation
Many individuals love listening to tailored music when they are actively working, studying, or relaxing on the weekend. Creating the exact right playlist for these specific moments can take an exhausting amount of time because compiling the right tracks based on BPM or mood requires effort. However, by leveraging iTunes algorithms, you can make the entire curation process far easier by automating it. Take advantage of the native ‘iTunes Genius’ feature, which automatically scans and compiles unique playlists based entirely on how specific songs mathematically sound together, or whether they share the identical underlying genre metadata.
- Safely bypasses restrictive iTunes sync limitations
- Transfers audio directly from iOS to local PC folders
- Extracts files without triggering data overwrites
- Maintains high-quality metadata and album art
- A rigid one-way syncing process deletes conflicting data
- Notorious for creating hidden duplicate files
- Extremely cumbersome for managing large playlists
- Requires manual sorting of externally sourced media
Conclusion
Creating and thoroughly editing vast music playlists on your modern iPhone is an absolute breeze provided you are utilizing the proper management tools. Ultimately, we highly recommended leveraging the advanced capabilities of Dr.Fone - Phone Manager (iOS). This versatile toolkit lets you rapidly transport multimedia content seamlessly from one iOS smartphone directly to another, or to external storage platforms. Using this manager, you can easily obtain new music or safely get music off iPhone onto the computer without risking your hard-earned library. Proper organizational management of playlists inherently improves your iPhone’s performance, frees up critical storage caches, and saves you tremendous amounts of time when dealing with a large volume of digital music. If you are deeply interested in simplifying your media workflow, utilizing a dedicated iOS transfer tool is undeniably the smartest route available in 2026.




FAQ
-
1. Can I get music off my iPhone without using iTunes at all?
Yes, absolutely. By using third-party management tools like Dr.Fone, you completely bypass the iTunes infrastructure. These programs interact directly with your device's internal file system, allowing you to selectively extract songs straight into a standard desktop folder. -
2. Does taking music off my iPhone permanently delete it from the device?
No, exporting or transferring your music simply copies the exact file to the new destination. The original audio tracks remain perfectly intact on your iPhone unless you manually instruct the software to delete them post-transfer to save local storage space. -
3. Why is Bluetooth or Email not recommended for transferring my playlists?
While feasible for a singular low-res track, Email heavily restricts file size attachments, and Bluetooth protocols on iOS are historically restricted for mass media transfers. When moving gigabytes of high-fidelity music, these older methods are incredibly slow, prone to timeouts, and ultimately inefficient. -
4. Will I lose album artwork and song metadata when transferring to a PC?
If you employ a professional iOS transfer software, all embedded ID3 tags, including high-resolution album artwork, artist details, genre, and play counts, are entirely preserved during the extraction phase to your computer or iTunes library.
 Add Wondershare Dr.Fone as a preferred source on Google



