How To Download Photos From Google Drive To iPhone?

Jul 12, 2024 • Filed to: Manage Device Data • Proven solutions
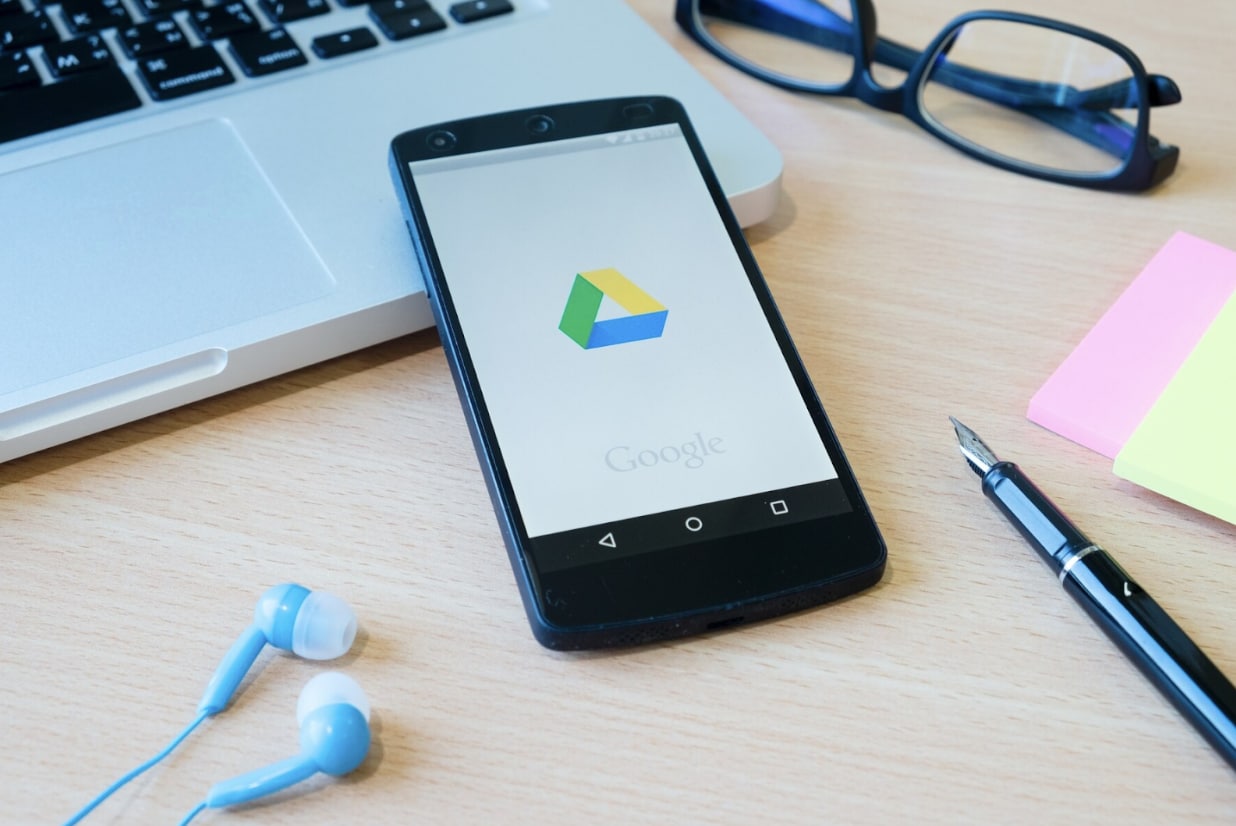
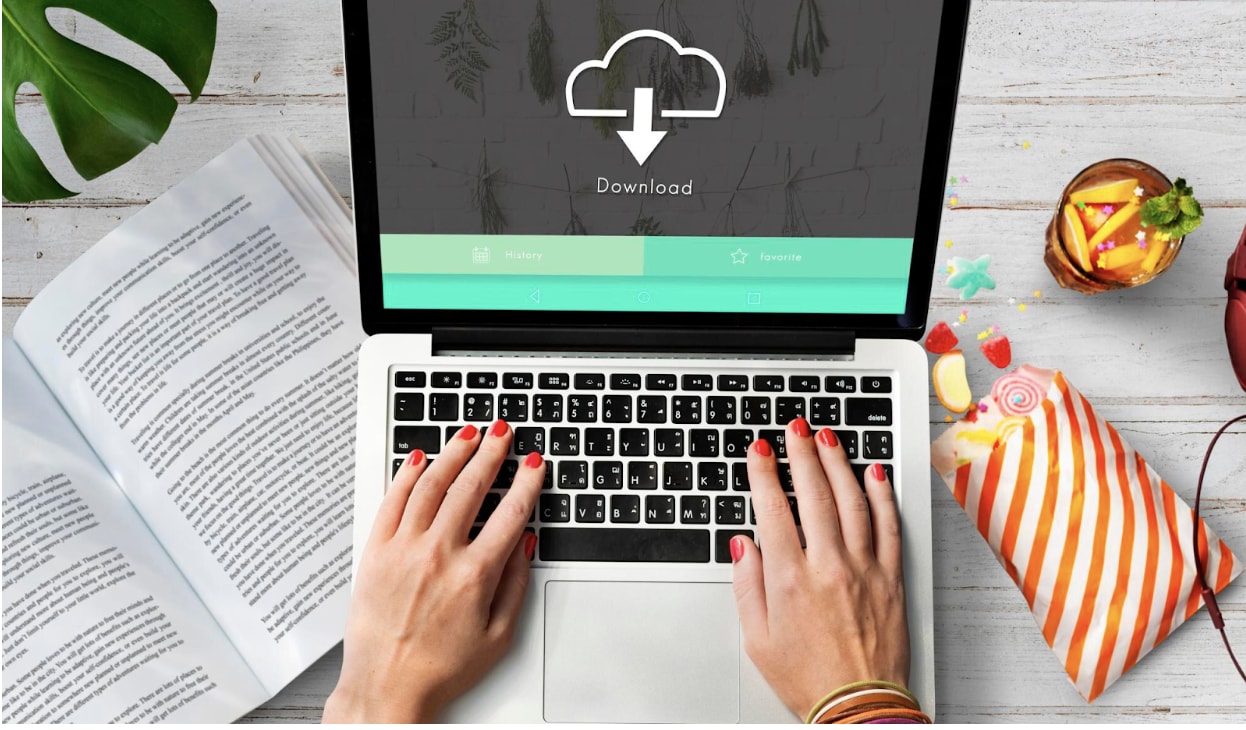
With Google Drive and Google Photos, it's easy to store all your photos and videos in the cloud. But what happens when you want to access those photos on your iPhone when you don't have an internet connection? Or when you need to free up storage space on Google Drive? There are several scenarios when downloading photos from Google Drive to your iPhone comes in handy.
Going on a trip without reliable internet access? Download your Google Photos to your iPhone beforehand so you can continue to view and share them offline. Heading somewhere without cell service like a remote hiking trail or camping in the woods? Bring your photos along by saving them directly to your Camera Roll. Want to show friends photos over AirDrop or text them photos when you don't have a connection? You'll need them downloaded on your device first.
Freeing up storage on Google Drive by saving photos to your iPhone can also help you avoid running into storage limits. And sometimes you may just want to have local backups of your favorite photos safely on your iPhone where you can easily access them in the Photos app.
- Part 1: How to Download Photos from Google Drive to iPhone Using Google Drive App?
- Part 2: How to Download Photos from Google Drive to iPhone Using Google Drive Web?
- Part 3: How to Download Photos from Google Drive to iPhone Via Files App?
- Part 4: How to Download Photos from Google Drive to iPhone Using iTunes?

- Part 4: Bonus tips: Download Photos from Google Drive to iPhone Using Dr.Fone?
- Final Thoughts
Part 1: How to Download Photos from Google Drive to iPhone Using Google Drive App?

Step 1: Install the Google Drive App
- Launch the app on your iPhone from the app store.
- Search for "Google Drive".
- Go to google drive, click on “get” and download the application for free.
Step 2: Log Into Your Google Account
- Launch the Google Drive app in your phone.
- You will need to sign into your google account which holds the pictures that you want to download.
Step 3: Locate the Photos
- Open the photo(s) under google drive.
- Click on to zoom.
Step 4: Download the Photo
- Tap the three dot menu icon in the upper right corner.
- Select "Save Image" to download the photo to your iPhone's Photos app.
- Alternatively, choose "Open In" then "Save to Files" to save the photo to the Files app instead.
Step 5: Find the Downloaded Photo
- Open the Photos app to view photos saved there.
- Or open the Files app and go to "On My iPhone" to see photos saved there.
The downloaded photo is now on your iPhone and accessible in the Photos or Files app for offline viewing and sharing!
Part 2: How to Download Photos from Google Drive to iPhone Using Google Drive Web?
You can actually use the Google Drive website directly on your iPhone's browser to download them without needing to install the app. Let's walk through the simple steps:
Step 1: Open Google Drive
- First, open up the Safari web browser on your iPhone.
- Type in drive.google.com in the address bar at the top and press Go.
- This will take you to the Google Drive site.
Step 2: Log Into Your Account
- Once the site loads, log into the Google account that contains the photos you want to transfer to your phone.
- Type in your username and password and tap Log In.
Step 3: Locate and Open the Photos
- Now you can browse through your Google Drive files and folders.
- Locate the specific photo or photos you want to download to your iPhone.
- Tap on a photo to open it.
Step 4: Download the Photo
- In the top right corner, you'll see a downward arrow icon - tap this to download the photo.
- Don't worry, this won't delete it from your Drive storage.
Step 5: Save the Photo
- A popup will appear asking if you want to open the file or save it.
- Choose "Save Image" so that the photo is saved to your iPhone's photo library rather than just opening temporarily.
Step 6: Confirm Download
- Briefly, you'll see a "Download Complete" banner appear.
- Make sure to tap on this banner to confirm the download is fully finished.
Step 7: Find the Downloaded Photo
- The image will now be saved in your Photos library for offline access when you don't have internet.
- You've successfully downloaded a photo from Google Drive to your iPhone through the web!
Using the Google Drive website allows you to easily download photos to your iPhone without needing the app. Just log in, tap to download the photo, confirm saving it, and you'll find it in your Photos offline. A quick way to get Google Drive photos on your iPhone through the mobile web.
Part 3: How to Download Photos from Google Drive to iPhone Via Files App?

The Files app on your iPhone provides a handy way to copy over photos stored in your Google Drive account. Here is a simple walkthrough to do this:
Step 1: Open the Files App
- First, find and open up the Files app on your iPhone - it has a blue folder icon.
- This app allows you to access various cloud storage services, including Google Drive.
Step 2: Access Google Drive
- Once in the Files app, tap on the three dots in the top-right corner to open the menu.
- Select "Edit" and make sure the switch next to "Google Drive" is turned on.
- This connects the Files app to your Google Drive storage.
Step 3: Navigate to Photos
- You should now see your Google Drive folders and files show up within the Files app.
- Browse and navigate to the specific photos you want to transfer from Google Drive to your iPhone.
Step 4: Save the Photos
- When you find a photo you want to download, lightly press and hold your finger on it until you see a menu pop up.
- On this menu, tap "Save" and then "Save Image" to download that photo file onto your iPhone.
Step 5: Confirm Download
- The Files app will briefly display a banner saying "Download Complete" once it finishes.
- Make sure to tap on this banner to confirm the download is fully finished.
Step 6: View Photos
- The last step is to open up your Photos app and you should see the images you downloaded from Google Drive now saved there.
- The Files app has copied them over for offline access!
The Files app provides a simple way to browse your Google Drive content and selectively download photos to save them right on your iPhone. A handy built-in option for quick transfers!
Part 4: How to Download Photos from Google Drive to iPhone Using iTunes?

iTunes can be used to transfer photos from Google Drive to your iPhone, but it's a bit tricky for beginners. Here's a simplified walkthrough:
Step 1: Connect Your iPhone to Your Computer
- First, plug your iPhone into your computer using the USB charging cable that came with your phone. This allows the two devices to communicate.
- When a "Trust This Computer?" prompt pops up on your iPhone, tap "Trust" to allow access. This is important!
Step 2: Open iTunes and Select Your iPhone
- Now launch the iTunes app on your computer.
- In iTunes, click on the little phone icon at the top right to go to your iPhone's sync page.
Step 3: Select Google Drive Photos to Transfer
- In the left menu, click "Photos."
- Then click "Sync Photos" and select the Google Drive folders or albums containing the photos you want to transfer.
Step 4: Start the Transfer
- Finally, click the "Apply" button at the bottom right corner. This will start copying the photos to your iPhone.
- Just wait for the transfer to fully complete!
The photos from your Google Drive should now be saved on your iPhone. You can disconnect it and view the photos in your Photos app.
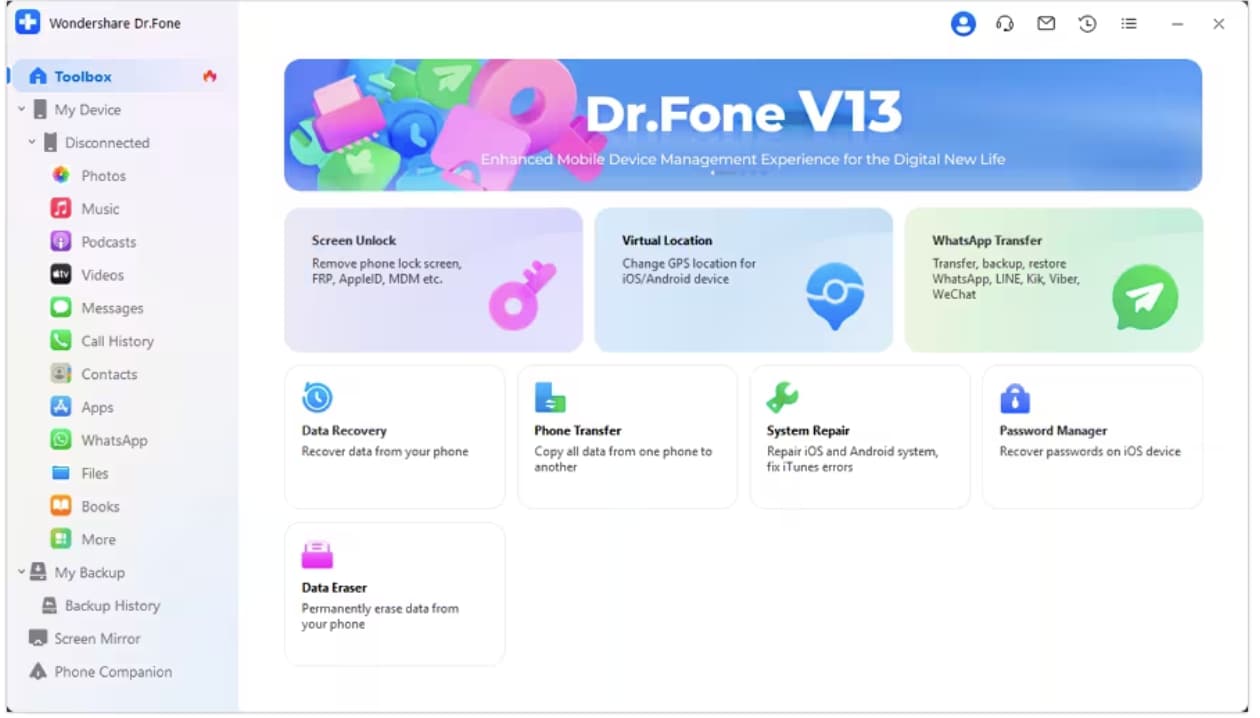
Part 5: Bonus tips: Download Photos from Google Drive to iPhone Using Dr.Fone
If you find the above methods too complex, consider using the Dr.Fone Phone Manager to quickly transfer photos from Google Drive to your iPhone.
Dr.Fone Basic
Backup & Restore iOS Data Turns Flexible.
- One-click to back up the whole iOS device to your computer.
- Preview and selectively restore files to any device with simplicity.
- Export what you want from the backup to your computer.
- Your device's data remains intact during the restore process.
- Supports iPhone, iPad, iPod touch, and the latest iOS version.


Step 1: Open Phone Transfer Tool-Dr.Fone
Launch Wondershare Dr.Fone on your computer to proceed into the Toolbox > Phone Transfer tool.
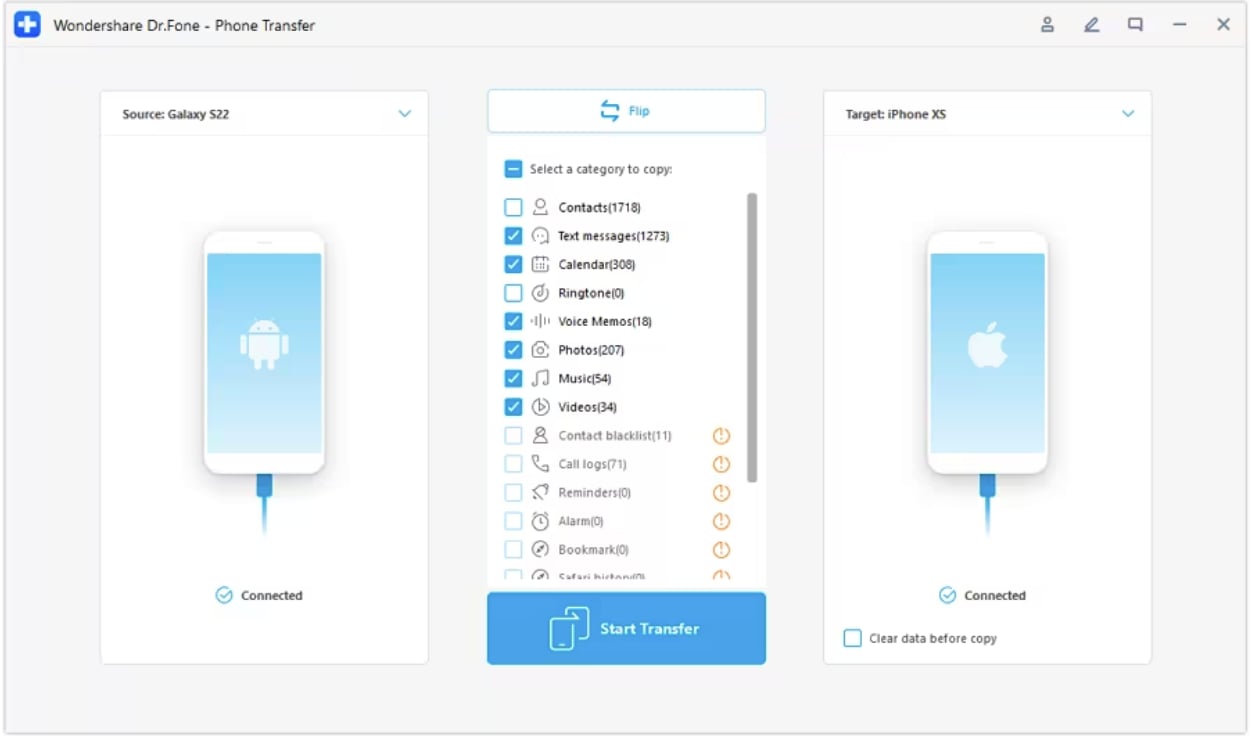
Step 2: Set Source and Destination for Data Transfer
As it opens on a new window, set the Source and Destination devices for the phone transfer. While setting up the devices, their data is also loaded on the platform. You can use the Flip button to change the transfer direction between devices.
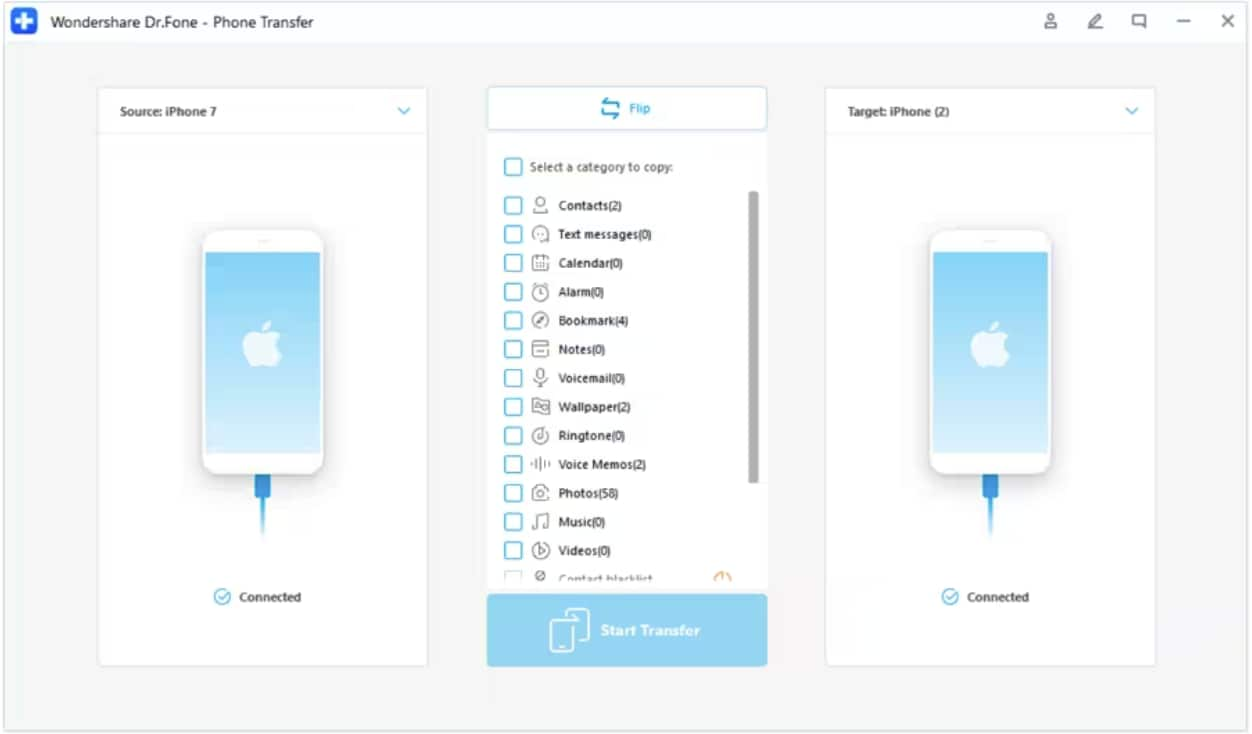
Step 3: Initiate Transfer of Data
Once the transfer direction is set from Android device to iOS, continue to select the data types that you wish to transfer. Checkmark them and click the Start Transfer button to pursue the particular function.
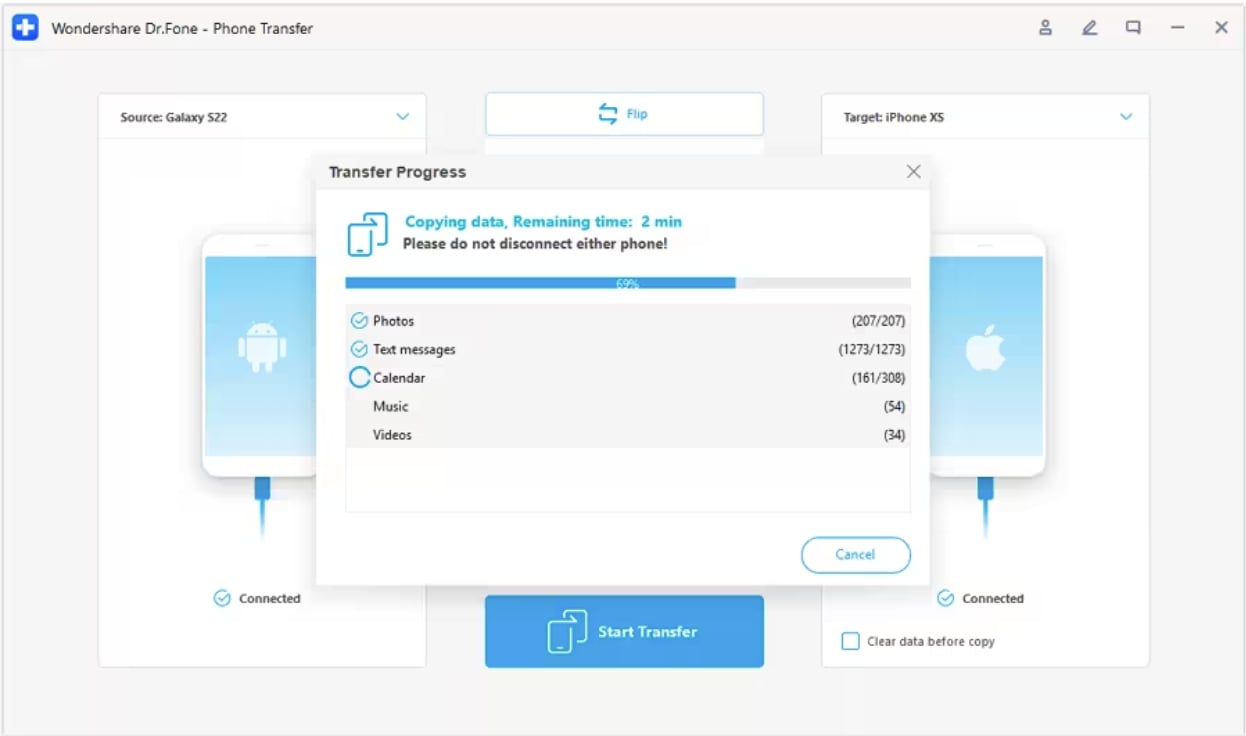
Step 4: Observe Transfer Progress
The window opens, showing the progress of the data transfer. Click Cancel if you wish to close down the operations.
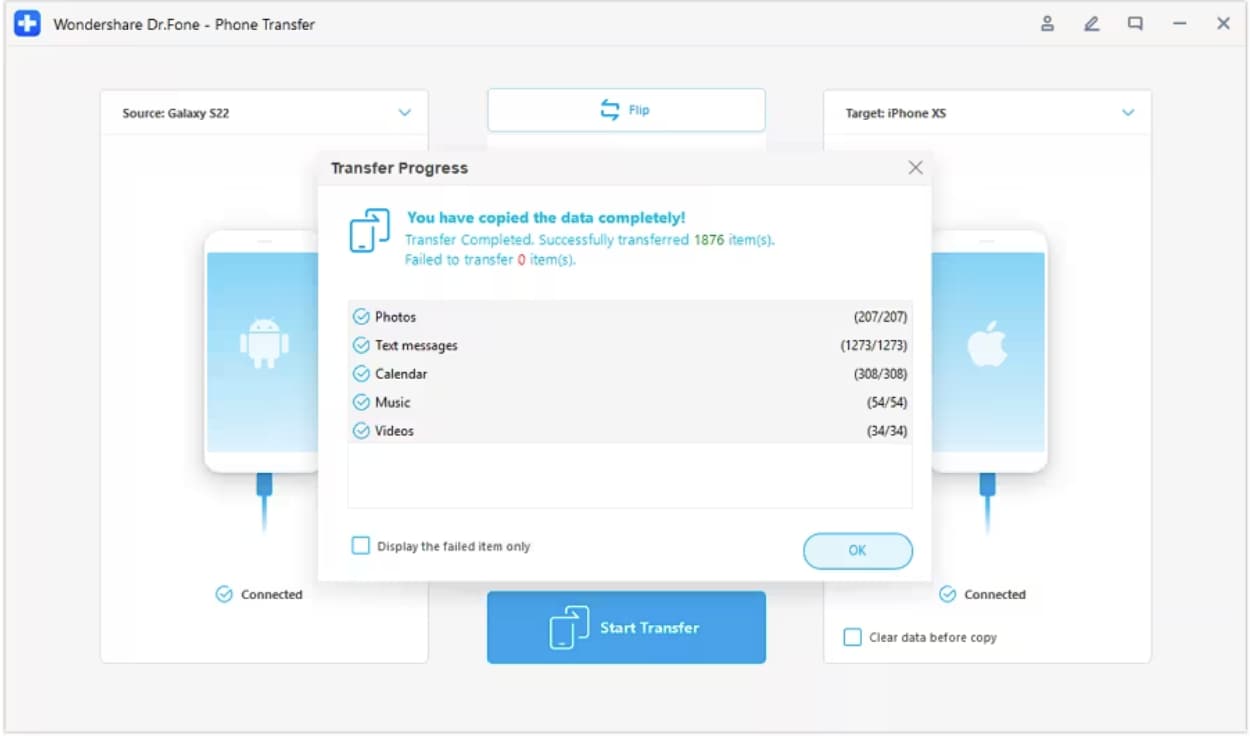
Step 5: Conclude Android to iOS Data Transfer
Once done, the window on the front shows the successful execution of the process. Tap OK to close it down.
Final Thoughts
Transferring photos from Google Drive to your iPhone is easy once you know the various methods available. The Google Drive app offers a straightforward way to download individual photos. The Google Drive website gives you similar functionality through the browser. For bulk transfers, the Files app lets you access Drive files and save them locally. iTunes can sync entire folders of Drive photos to your iPhone, but requires connecting to a computer.
The bonus tip is to use a specialized tool like Dr.Fone Phone Manager. It streamlines Google Drive media transfers with an intuitive interface, wireless connectivity, and useful features like batch downloading and automatic backups.
Overall, while the native apps get the job done, third party solutions like Dr.Fone make it much simpler to get photos from Google Drive over to your iPhone. With the right method, you can securely preserve your collection of Drive photos on your iPhone for offline access and sharing.


iPhone Photos
- Convert HEIC to JPG
- 1. Convert HEIC to JPG on Linux
- 2. Convert HEIC to JPG Windows
- 3. Best HEIC Converter Online
- 4. Convert HEIC to JPG High Quality
- Export iPhone Photos
- 1. Upload iPhone Photos to Google Drive
- 2. Transfer Photo from iPhone to PC
- 3. Transfer Photo from iPhone to iPhone
- 4. Transfer from iPhone to iPhone
- 5. Transfer from iPhone to iPad
- 6. Move iPhone Photo to External Drive
- 7. Transfer from iPhone to Flash Drive
- 8. Extract Photos from iPhone
- 9. Download Photo from iPhone
- Import Photos to iPhone
- 1. Transfer from Laptop to iPhone
- 2. Transfer Photo from Camera to iPhone
- 3. Transfer Photo from Mac to iPhone
- 4. Transfer Photos from PC to iPhone
- 5. Transfer from iPhone to PC
- 6. Transfer from Android to iPhone
- 7. Transfer from Samsung to iPhone
- Manage iPhone Photos
- 1. Back up iPhone Photos
- 2. Get Photos off iPhone
- 3. Send Large Size Photos from iPhone
- 4. Photo/Video Compressor Apps
- 5. Delete Photos from iPhone/iPad
- 6. iPhone Photos Disappeared Suddenly
- 7. iPhone Photoshop Alternatives
- Recover iPhone Photos
- 1. Restore Deleted Photos from iPhone
- 2. Recover Photos from iPod Touch
- 3. Recover Deleted Picture from iPhone
- Transfer iPhone Photos to Mac
- Transfer iPhone Photos to PC
- 1. Transfer Data from iPhone to PC
- 2. Transfer Photo to Computer
- 3. Transfer Photo to PC without iTunes
- 4. Transfer Library to Computer
- 5. Send Photo from iPhone to Computer
- 6. Import Photo from iPhone to Windows
- 7. Transfer Photo to Windows
- Transfer Photos from Google Drive
- 1. Download from Google Drive to iPhone
- 2. Transfer from Google Photo to iPhone
- 3. Download from iCloud to iPhone
- Transfer Photos to Google Drive
- Image Convert Tips
- ● Manage/transfer/recover data
- ● Unlock screen/activate/FRP lock
- ● Fix most iOS and Android issues
- Learn More Learn More
Alice MJ
staff Editor