The Ultimate Guide to Send Photos from iPhone to Computer

Jul 12, 2024 • Filed to: Manage Device Data • Proven solutions
It used to be difficult to transfer images from an iPhone to a computer since the two devices were incompatible. If you want to save a copy of your iPhone photos on your computer, alter the images, or give a copy to a friend, there are several ways you can do so. You'll learn how to send photos from iPhone to pc quickly and easily in this post.
Pro Tip: One-stop Solution to Send Photos from iPhone to Windows/Mac
Here is a pro tip for you all. If you want hassle-free and quick to transfer photos from iPhone to PC and vice-versa, we suggest Dr.Fone – Phone Manager (iOS). The tool is widely trusted and used. You cannot just transfer photos but other data types like SMS, music, and videos. The best part is it supports iOS 15 and the latest iPhone too. So compatibility will not be an issue. Hence, try this tool and get the best experience of transferring. The best part is that it offers Windows and Mac versions to use no matter what PC you have. Here are the steps you need to follow if you want to send photos from iPhone to Mac or Windows:
Step 1: Go to the official website of Dr.Fone – Phone Manager and download it. On the main page, click on “Phone Manager” option. Install and launch it afterward.

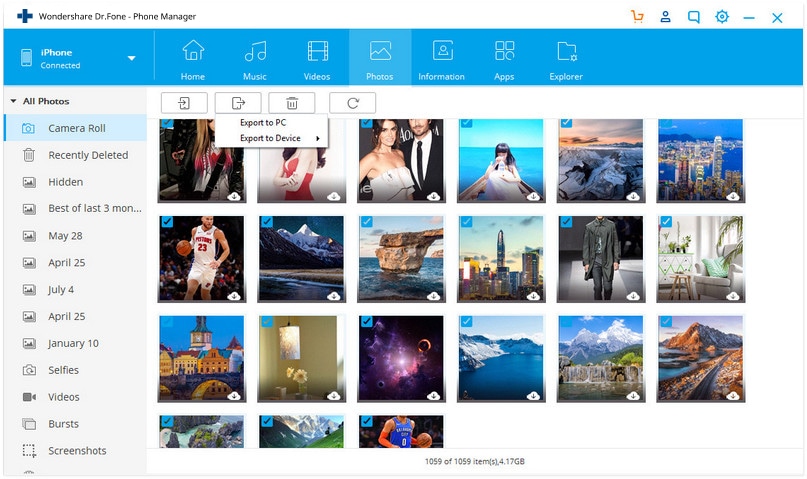
Step 2: Connect your iPhone to the PC and wait until it gets connected. Once done, you need to choose the “Transfer Device Photos to PC” option.

Step 3: A dialog box will appear where you need to choose your images folder. After choosing, click “OK” on the dialog box.
Step 4: Your images will export and the transfer will get completed within a blink. Tap “Open Folder” now and you can access your photos on your PC.
How to Send Pictures from iPhone to Computer – Mac
1. Transfer Photos from iPhone to Mac Using a USB
You can send photos from iPhone to Mac using a USB. This method is a good choice if you don't have access to the internet or if your internet speed is too slow.
How to send photos from iPhone to Mac using Photos App:
Step 1: Use a USB cord to connect your iPhone to Mac.
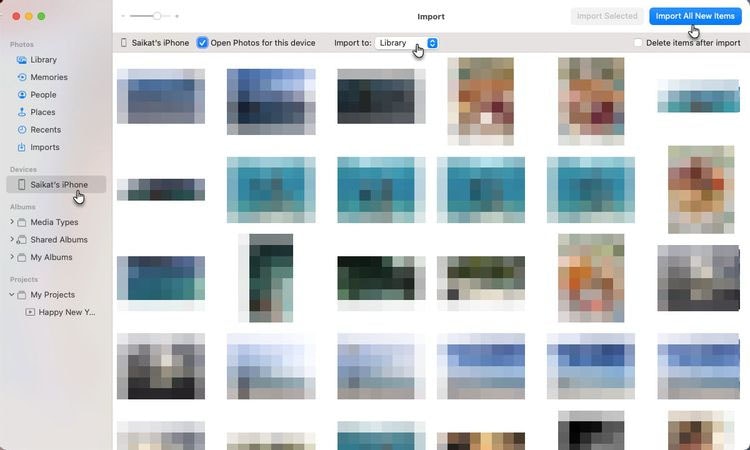
Step 2: On your Mac, open the Photos app.
Step 3: In the Photos app's upper menu, select “Import”.
Step 4: Now, either select the photographs you want to import and click “Import Selected” or click “Import All New Items”.
Step 5: Once the transfer is complete, you will be notified through Email.
2. Send Photos from iPhone to Mac Using iCloud Photo Stream
Your Apple devices are synchronized with the most recent 1000 photos using the Photo Stream feature. Wi-Fi automatically uploads all media files, except for movies and Live Photos, when you exit the Camera app.
To activate the iPhone's My Photo Stream:
Step 1: To access your iCloud photos, go to “Settings” > “iCloud” > “Photos”.
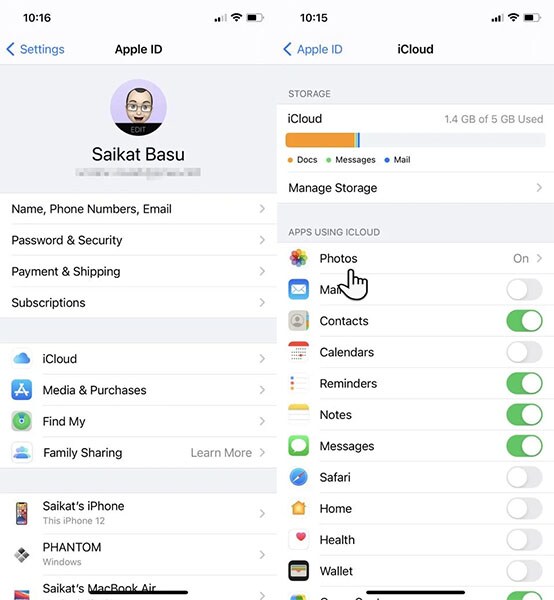
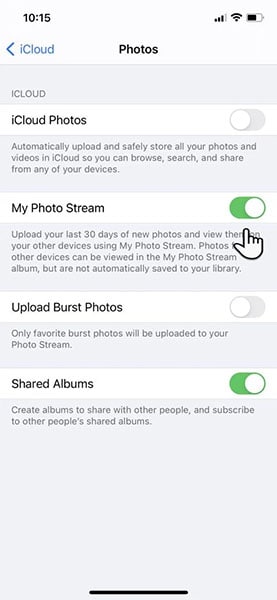
Step 2: Next to the “My Photo Stream” option, toggle the switch on.
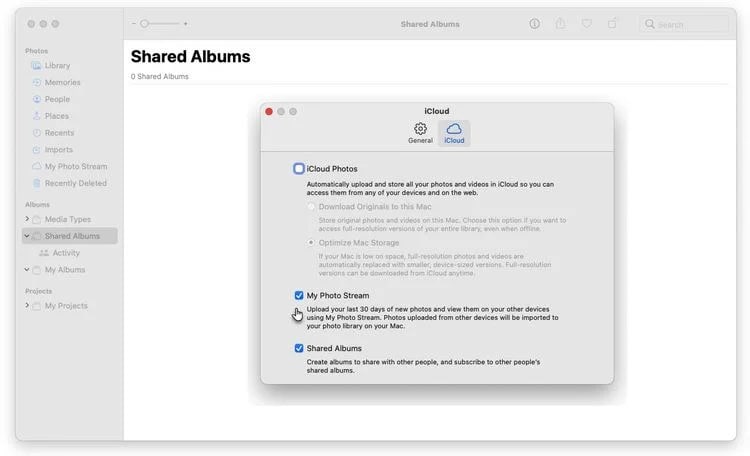
Step 3: Head to the Mac and launch “Photos”. Select “Photos” > “Preferences” > “iCloud”
Step 4: On the pop-up, click the check box next to “My Photo Stream”. Your photos will get synced automatically and this is how you can send photos from iPhone to Mac using Photo Stream.
3. Transfer Photos from iPhone to Mac Computer with AirDrop
Another way to transfer photos from iPhone to Mac computer is via AirDrop. You need to keep the Mac and iPhone connected on the same Wi-Fi connection. Also, they should be within Bluetooth range.
To send photos with AirDrop, follow these instructions:
Step 1: Firstly, go to your phone's Photos app and choose the images you want to share.
Step 2: Tap the “Share” icon and a menu will display. Select “AirDrop” from the menu.

Step 3: Now, you will notice all Apple users within a short distance of the app's search radius.
Step 4: Select the device you want to send the picture to and press the “Done” button on the device's screen.

On Mac, the transferred files are saved in the "Downloads" folder.
How to Send Pictures from iPhone to Computer - Windows
1. Send Photos from iPhone to Computer in Windows 10 (Windows Photos App)
Using the built-in Windows 10 Images app, you can import all of your iPhone or iPad's photos in one go. Here's how to send photos from iPhone to computer.
Step 1: To begin, connect your iPhone or iPad to your computer using a USB cord.
Step 2: Open the “Photos” app from the Start menu.
Step 3: Look for the “Import” option at the screen's upper-right corner.

Step 4: All new photos will be selected for Import by default, so if you don't want to import any photos, you can do so by clicking on them.
Step 5: Finally, click "Continue." Do not disconnect your iPhone or iPad from the wall socket during this procedure! Importing will begin in the Photos app.
2. Send Pictures from iPhone to Computer in Windows 10 (Alternative Method)
Another way to send pictures from iPhone to computer is File Explorer. However, to use it, you'll need first to install iTunes on your computer. After installing, you can follow the steps mentioned below.
Step 1: Get your iPhone connected to the PC and launch Windows Explorer.
Step 2: Now, on the left panel, click the arrow located with “This PC” option.
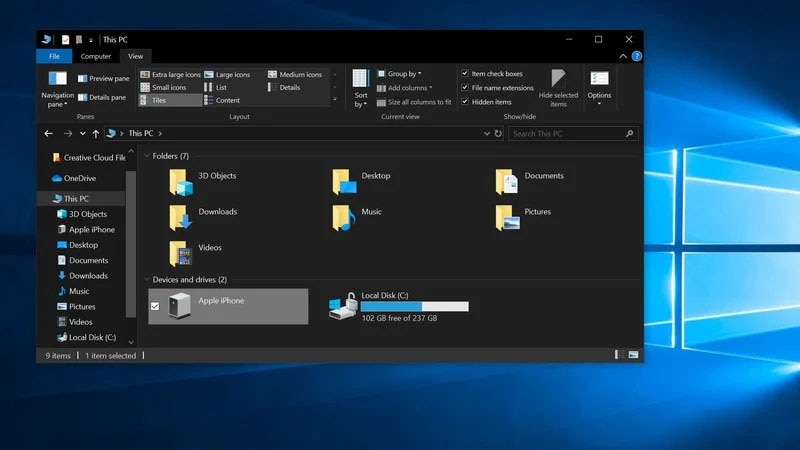
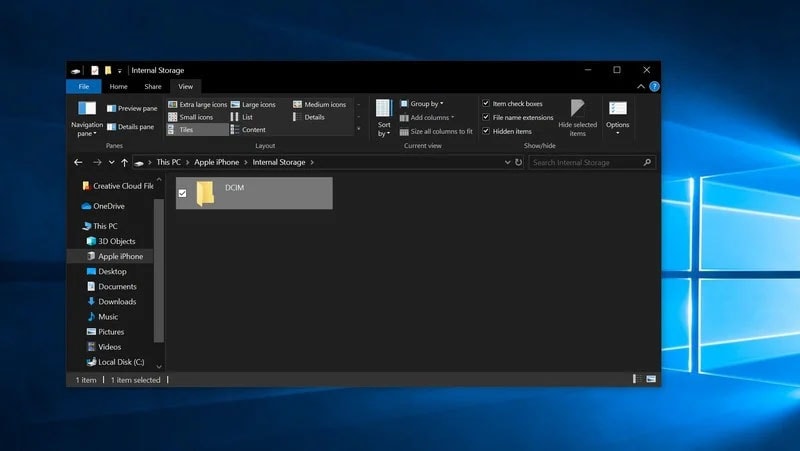
Step 3: Select your iPhone and choose “Internal Storage”. You will see a “DCIM” folder. Double click on it now.
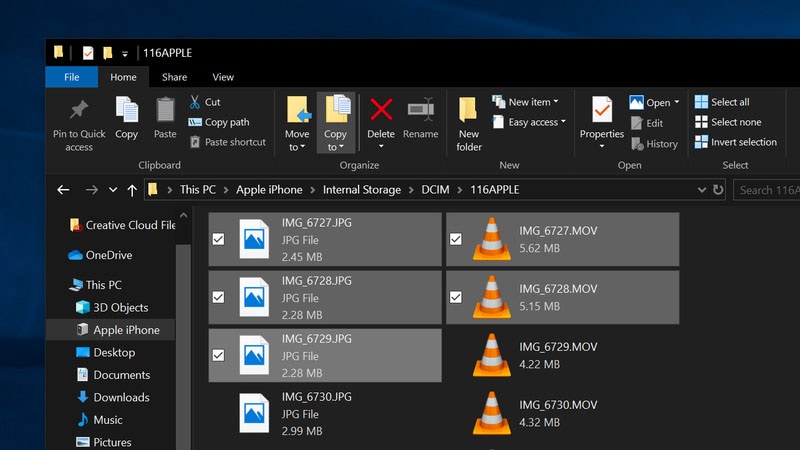
Step 4: It will open images. You can select the images you want to transfer or press “Ctrl+A” to select all the photos.
Step 5: After that, hit on “Copy to” drop down and select “Choose location”. Now select a destination here you would like to save the images.
Step 6: Hit “Copy” in the end and sit back and relax.
3. Transfer iPhone Photos to PC Using iCloud for Windows
If you've backed up your images from your iPhone or iPad to iCloud, Windows 10 can sync them wirelessly. Let’s know how to send pictures from iPhone to computer using this method.
Step 1: Microsoft Store can be accessed by launching it from the Windows Start menu, taskbar, or desktop.
Step 2: Go to the Microsoft Store and look for “iCloud”.
Step 3: Click the “Get” button and download iCloud to your computer.
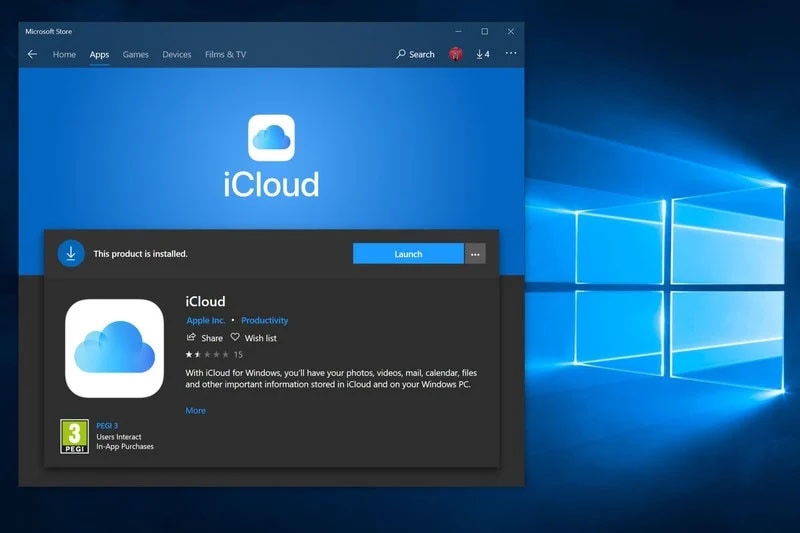
Step 4: Press the “Launch” button once the download is complete.
Step 5: Enter your Apple ID here and then enter your password.
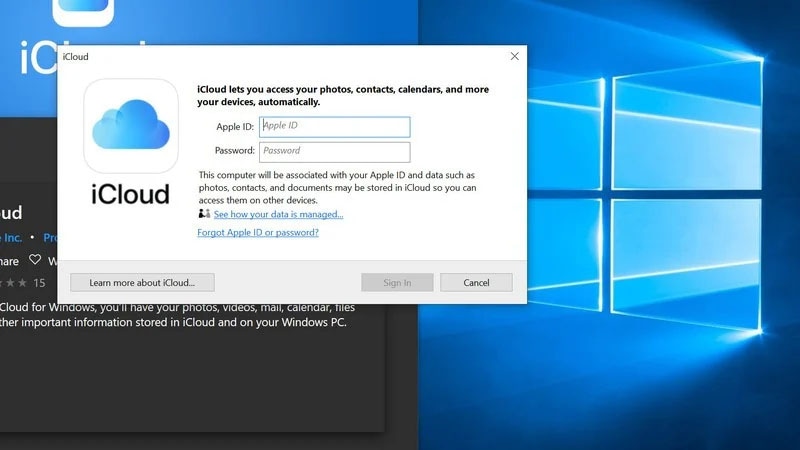
Step 6: To sign in, click the “Sign In” button.
Step 7: In the Photos section, click the “Options” icon to reveal more options.
Step 8: Make sure “iCloud Photos” are checked by clicking the checkbox next to it.
Step 9: Now, please uncheck the box that says “Upload New Photos from my PC”
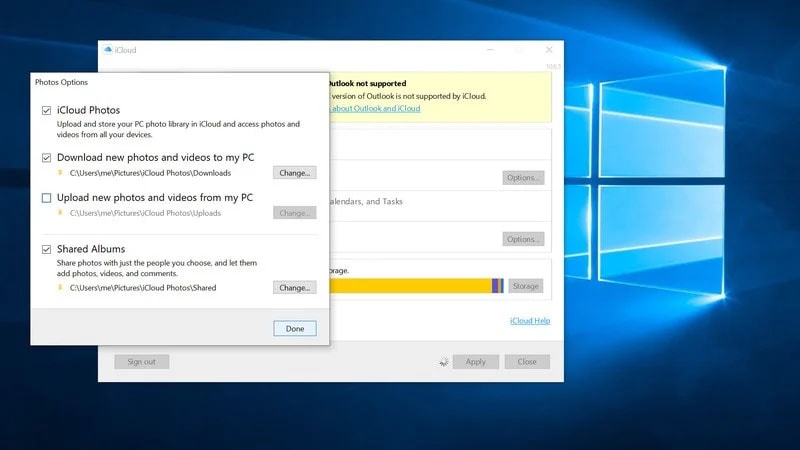
Step 10: When you're finished, click the “Done” button followed by “Apply”.
Final Words
That’s a wrap-up on today’s topic. Moving information and photos from an iPhone to a computer is no longer a difficulty to be faced. When it comes to transferring files from one platform to another, things are getting easier and easier to do. We hope this article helped you send pictures from iPhone to computer using various techniques. Thanks for reading this folks!


iPhone Photos
- Convert HEIC to JPG
- 1. Convert HEIC to JPG on Linux
- 2. Convert HEIC to JPG Windows
- 3. Best HEIC Converter Online
- 4. Convert HEIC to JPG High Quality
- Export iPhone Photos
- 1. Upload iPhone Photos to Google Drive
- 2. Transfer Photo from iPhone to PC
- 3. Transfer Photo from iPhone to iPhone
- 4. Transfer from iPhone to iPhone
- 5. Transfer from iPhone to iPad
- 6. Move iPhone Photo to External Drive
- 7. Transfer from iPhone to Flash Drive
- 8. Extract Photos from iPhone
- 9. Download Photo from iPhone
- Import Photos to iPhone
- 1. Transfer from Laptop to iPhone
- 2. Transfer Photo from Camera to iPhone
- 3. Transfer Photo from Mac to iPhone
- 4. Transfer Photos from PC to iPhone
- 5. Transfer from iPhone to PC
- 6. Transfer from Android to iPhone
- 7. Transfer from Samsung to iPhone
- Manage iPhone Photos
- 1. Back up iPhone Photos
- 2. Get Photos off iPhone
- 3. Send Large Size Photos from iPhone
- 4. Photo/Video Compressor Apps
- 5. Delete Photos from iPhone/iPad
- 6. iPhone Photos Disappeared Suddenly
- 7. iPhone Photoshop Alternatives
- Recover iPhone Photos
- 1. Restore Deleted Photos from iPhone
- 2. Recover Photos from iPod Touch
- 3. Recover Deleted Picture from iPhone
- Transfer iPhone Photos to Mac
- Transfer iPhone Photos to PC
- 1. Transfer Data from iPhone to PC
- 2. Transfer Photo to Computer
- 3. Transfer Photo to PC without iTunes
- 4. Transfer Library to Computer
- 5. Send Photo from iPhone to Computer
- 6. Import Photo from iPhone to Windows
- 7. Transfer Photo to Windows
- Transfer Photos from Google Drive
- 1. Download from Google Drive to iPhone
- 2. Transfer from Google Photo to iPhone
- 3. Download from iCloud to iPhone
- Transfer Photos to Google Drive
- Image Convert Tips
- ● Manage/transfer/recover data
- ● Unlock screen/activate/FRP lock
- ● Fix most iOS and Android issues
- Learn More Learn More
Selena Lee
chief Editor