3 Ways to Transfer Photos from Laptop to iPhone Including iPhone 12 Quickly
Jul 12, 2024 • Filed to: Manage Device Data • Proven solutions
Nowadays, our iPhones are by our side no matter what we’re doing or where we are. Whether we’re making calls, contacting loved ones around the world, playing games, or reminiscing and looking through photos of some of the best times of our lives with friends and family.
However, for us to fully enjoy our devices, we need to be able to transfer said photos to and from our devices, so we can have them all in one convenient place.
But what happens if you’ve taken your camera abroad and you now want those pictures on your iPhone? What about all the photos that are years old and just sitting on your computer?
Thankfully, learning how to transfer pictures from laptop to iPhone including iPhone 12 isn’t as overwhelming as it may first seem. Here to help you out are three methods you can use when learning how to transfer photos from laptop to iPhone, and you’ll never have to worry about your media files again!
- Method #1 - How to Transfer Photos from Laptop to iPhone including iPhone 12/12 Pro(Max)/12 Mini with iTunes
- Method #2 - Transfer Pictures from Laptop to iPhone including iPhone 12/12 Pro(Max)/12 Mini without iTunes
- Method #3 - How To Transfer Pictures From Laptop to iPhone including iPhone 12/12 Pro(Max)/12 Mini with Dropbox
Method #1 - How to Transfer Photos from Laptop to iPhone including iPhone 12/12 Pro(Max)/12 Mini with iTunes
Of course, the most common method you would use when learning how to copy photos from laptop to iPhone would be using the dedicated iTunes software. Here’s a step-by-step guide on how to transfer photos from laptop to iPad.
Step 1 - Setting Up Your Laptop
Open up your laptop and open the iTunes software. If you haven’t already got iTunes downloaded and installed on your computer, you can head to the iTunes website first.
Once you’ve downloaded the software for either Mac or Windows, follow the on-screen instructions during the installation process. Your computer may restart during this time.

Step 2 - Connect Your iPhone
Connect your iPhone device to your laptop using the dedicated USB cable. When connected, you’ll see a notification come up on the laptop and on iTunes itself. If you haven’t connected your iPhone to your laptop before, you may need to wait a moment while your laptop installs the right drivers. This is an automated process.
When the device is fully connected, you’ll see it appear on in the menu on the left-hand side of the screen.
Step 3- How to Transfer Photos from Laptop to iPad or iPhone
Using the left-hand navigation menu, select your iPad or iPhone device, and click the ‘Photos’ option. At the top of the screen, click ‘Sync’ and then choose the folder in which your photos are stored. Use the tick boxes to select every photo you want to transfer and click ‘Sync’ when you’re ready.
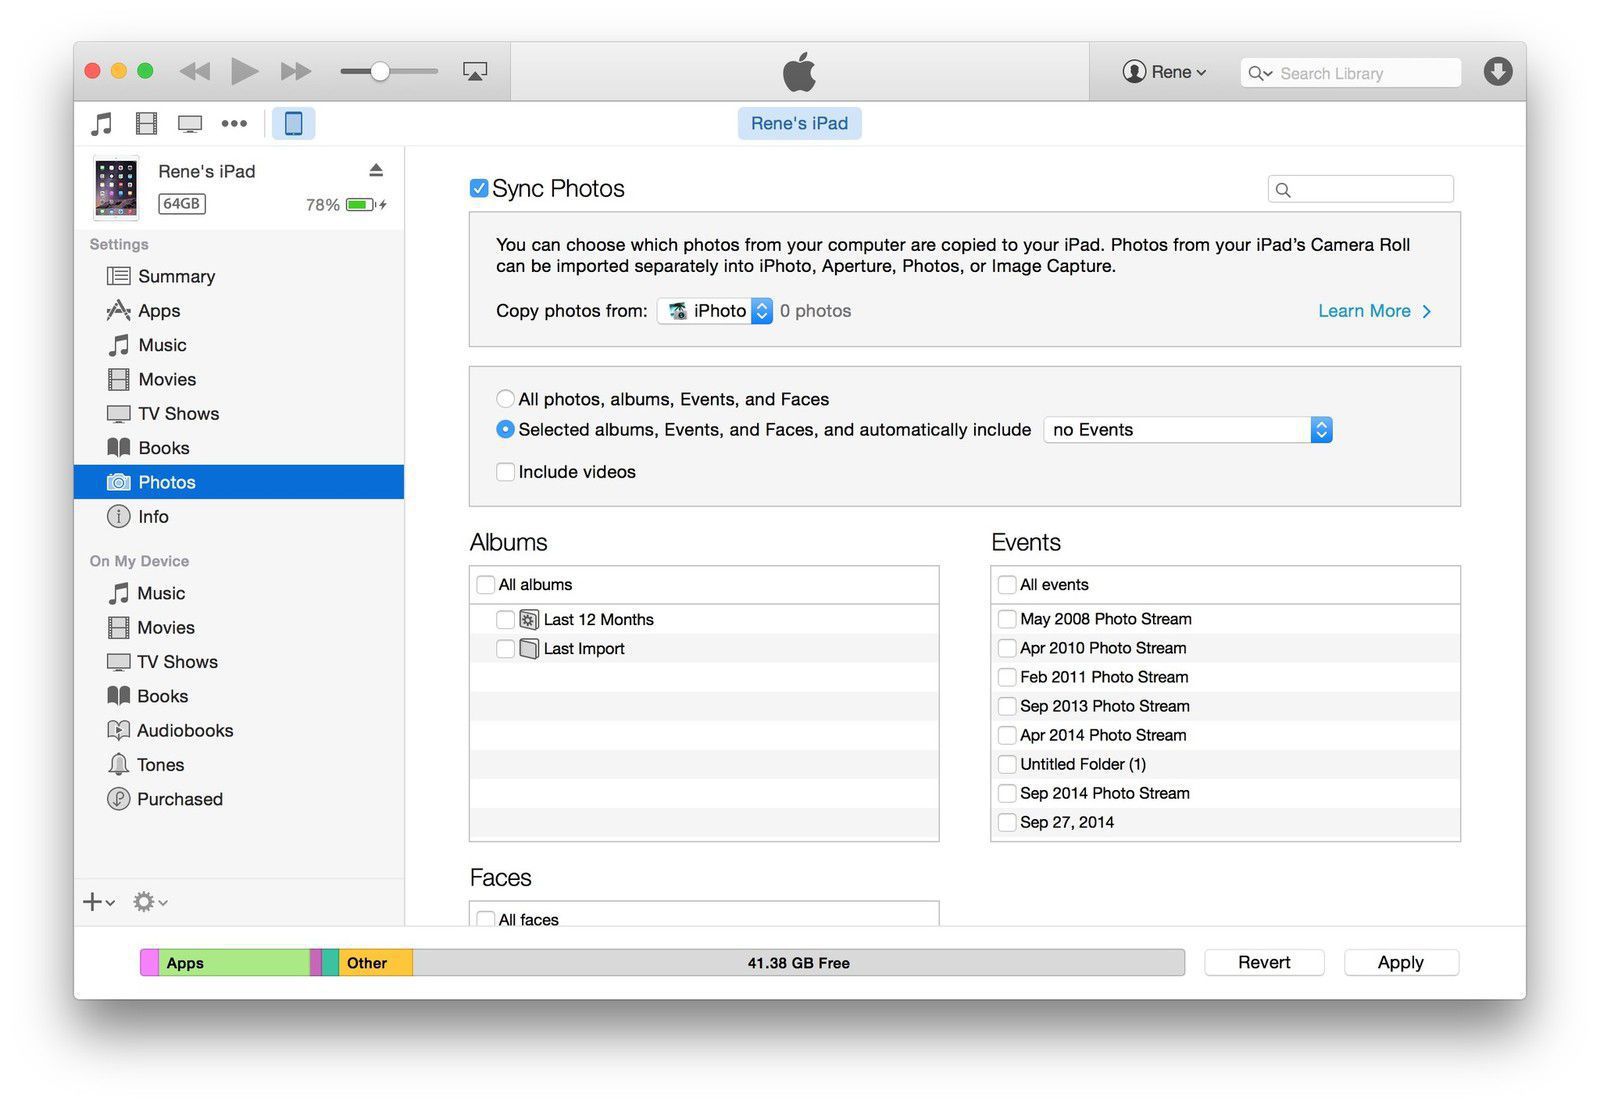
The progress bar will show you how long the process will take. Make sure you do not disconnect your device during this process. After it’s finished, eject your iPhone. And that’s how to transfer pictures from your laptop to iPhone.
Method #2 - Transfer Pictures from Laptop to iPhone including iPhone 12/12 Pro(Max)/12 Mini without iTunes
In some cases, you may not have iTunes on your laptop, or you may be unable to run it for whatever reason. Fortunately, you can still transfer photos from your laptop to your iPhone or iPad using third-party software known as Dr.Fone - Phone Manager (iOS).

Dr.Fone - Phone Manager (iOS)
Best Answer to How to Transfer Photos from Laptop to iPhone
- Transfer, manage, export/import your music, photos, videos, contacts, SMS, Apps, etc.
- Backup your music, photos, videos, contacts, SMS, Apps, etc. to computer and restore them easily.
- Transfer music, photos, videos, contacts, messages, etc from one smartphone to another.
- Transfer media files between iOS devices and iTunes.
- Fully compatible with all iOS versions that run on iPhone, iPad, or iPod touch.
Step 1 - Setting Up Dr.Fone - Phone Manager (iOS)
The software is available for both Mac and Windows computers. There is also a free trial version available.
Download the software. Then install the software onto your laptop. Follow the on-screen instructions to complete this process. Your laptop may restart during this process.
Step 2 - Connecting Your iPhone
Open the Dr.Fone - Phone Manager (iOS) software. Then, connect your iPhone or iPad using your USB cable. Your device will show up in the main window of the software as your device. On the main menu, click the "Phone Manager" option.

You may see an option on your iPhone asking if you’re using a trusted computer. Accept this notification to proceed.
Step 3 - How to Copy Photos from Laptop to iPad or iPhone
In the transfer menu, use the menu at the top of the screen and select ‘Photos’, or any other kind of media you wish to transfer, i.e. videos or music.
At the top of the Photos window, click the ‘Import files’ option and then select whether you wish to transfer a single file or a folder of photos.
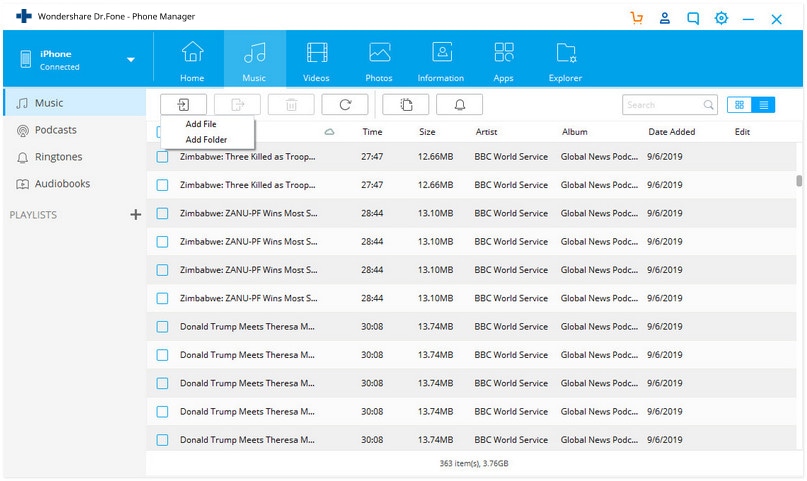
Once you’ve selected the folders or files that you wish to transfer by navigating your documents, click the ‘OK’ button. This will transfer the files to your device. Wait until the process is complete, disconnect your iPhone or iPad and you’ll be ready to go.
Method #3 - How To Transfer Pictures From Laptop to iPhone including iPhone 12/12 Pro(Max)/12 Mini with Dropbox
One method that you learn when learning how to transfer pictures from laptop to iPhone is to use if you’ve lost your USB cable. This may be the case if the USB port doesn’t work, or you wish to transfer your photos wirelessly, is using a cloud storage platform known as Dropbox. Here’s how to copy photos from laptop to iPhone.
Step 1 - Setting Up Dropbox on your Laptop
On your laptop, head over to the Dropbox website. Either sign in to your account or create one for free. When you’ve completed this, locate the photos on your computer and simply drag them into your Dropbox account to upload them to your cloud storage.
Step 2 - Setting Up Dropbox on Your iPhone or iPad
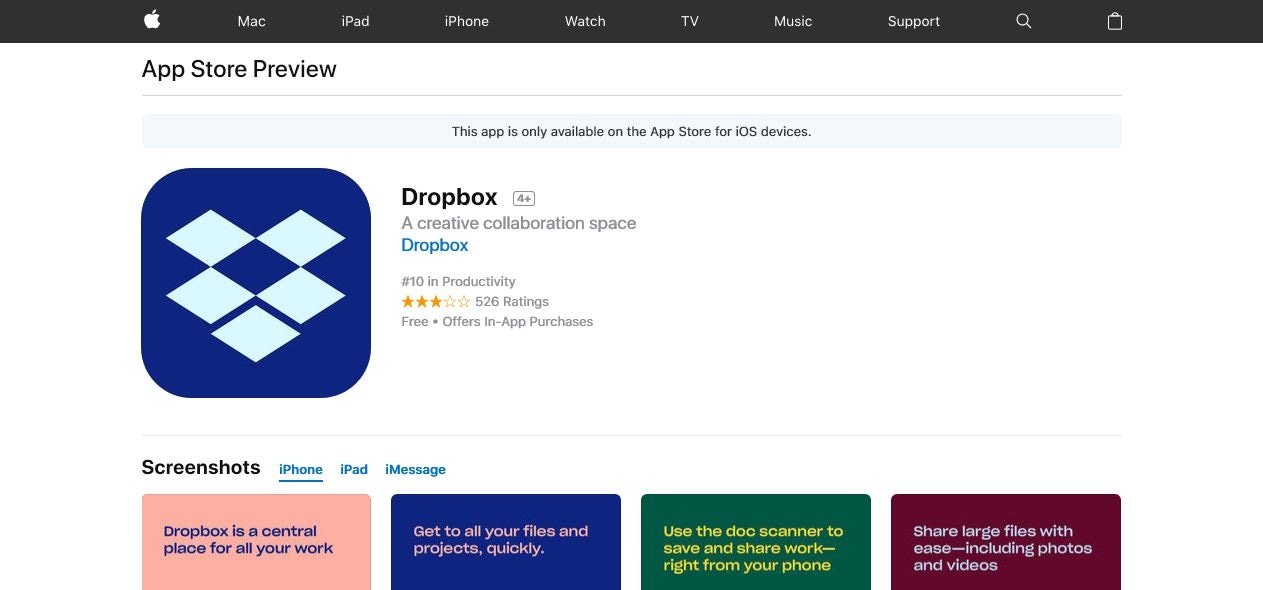
On your iOS device, access the iTunes Store and search ‘Dropbox’ into the apps search bar. Download and install this onto your device.
Once installed, log in to Dropbox using the same account details as the step above. This will allow you to access your photos on the Dropbox server at any time.
If you wish to download a photo or folder of photos to your device, hold down the photos you wish to download and click the ‘Download’ button, and the files will be saved to your device. That’s how to transfer photos from laptop to iPhone with Dropbox.
Recommend: If you are using multiple cloud drives, such as Google Drive, Dropbox, OneDrive, and Box to save your files. We introduce you Wondershare InClowdz to migrate, sync, and manage all your cloud drive files in one place.

Wondershare InClowdz
Migrate, Sync, Manage Clouds Files in One Place
- Migrate cloud files such as photos, music, documents from one drive to another, like Dropbox to Google Drive.
- Backup your music, photos, videos in one could drive to another to keep files safe.
- Sync clouds files such as music, photos, videos, etc. from one cloud drive to another.
- Manage all cloud drives such as Google Drive, Dropbox, OneDrive, box, and Amazon S3 in one place.
Summary
As you can see, there are many approaches you can take when it comes to learning how to copy photos from a laptop to iPhone. All the methods are relatively fast and will allow you to transfer your photos within a matter of minutes, giving you unrestricted access to your beloved memories.
iPhone Photos
- Convert HEIC to JPG
- 1. Convert HEIC to JPG on Linux
- 2. Convert HEIC to JPG Windows
- 3. Best HEIC Converter Online
- 4. Convert HEIC to JPG High Quality
- Export iPhone Photos
- 1. Upload iPhone Photos to Google Drive
- 2. Transfer Photo from iPhone to PC
- 3. Transfer Photo from iPhone to iPhone
- 4. Transfer from iPhone to iPhone
- 5. Transfer from iPhone to iPad
- 6. Move iPhone Photo to External Drive
- 7. Transfer from iPhone to Flash Drive
- 8. Extract Photos from iPhone
- 9. Download Photo from iPhone
- Import Photos to iPhone
- 1. Transfer from Laptop to iPhone
- 2. Transfer Photo from Camera to iPhone
- 3. Transfer Photo from Mac to iPhone
- 4. Transfer Photos from PC to iPhone
- 5. Transfer from iPhone to PC
- 6. Transfer from Android to iPhone
- 7. Transfer from Samsung to iPhone
- Manage iPhone Photos
- 1. Back up iPhone Photos
- 2. Get Photos off iPhone
- 3. Send Large Size Photos from iPhone
- 4. Photo/Video Compressor Apps
- 5. Delete Photos from iPhone/iPad
- 6. iPhone Photos Disappeared Suddenly
- 7. iPhone Photoshop Alternatives
- Recover iPhone Photos
- 1. Restore Deleted Photos from iPhone
- 2. Recover Photos from iPod Touch
- 3. Recover Deleted Picture from iPhone
- Transfer iPhone Photos to Mac
- Transfer iPhone Photos to PC
- 1. Transfer Data from iPhone to PC
- 2. Transfer Photo to Computer
- 3. Transfer Photo to PC without iTunes
- 4. Transfer Library to Computer
- 5. Send Photo from iPhone to Computer
- 6. Import Photo from iPhone to Windows
- 7. Transfer Photo to Windows
- Transfer Photos from Google Drive
- 1. Download from Google Drive to iPhone
- 2. Transfer from Google Photo to iPhone
- 3. Download from iCloud to iPhone
- Transfer Photos to Google Drive
- Image Convert Tips
- ● Manage/transfer/recover data
- ● Unlock screen/activate/FRP lock
- ● Fix most iOS and Android issues
- Learn More Learn More





James Davis
staff Editor