2 Ways to Transfer Photos from Camera to iPhone Quickly
Jul 12, 2024 • Filed to: Manage Device Data • Proven solutions
No matter how good we believe the camera of an iPhone is, it still is in no way a match to the picture quality of camera whose primary function is to take pictures professionally. As compared to that of a smartphone which is meant to be a multi-functional device. A DSLR camera, for example, can easily take shots in a professional mode giving its user much more control over the scene and manner in which pictures are taken as opposed to that of an iPhone that is shot mostly in Auto mode. However, there are some situations when you have taken shots on your professional camera and you wish to transfer photos from camera to iPad or iPhone probably for quick editing or to upload them to your social media accounts. What are you supposed to do? Well, there are quite a several ways to transfer photos from camera to iPhone wirelessly or by connecting the camera and iPhone.
Below are a few ways to transfer photos from camera to iPad or iPhone.
Part 1: Transfer photos from camera to iPhone/iPad using adapter
The use of adapters is one of the best means to perform file transfer from different devices of varying port diameters or completely different ports. Adapters convert the output of one device to the input of another, they adapt to different ports for diverse devices, hence their name. Apple has provided quite many different adapters for their devices to make it easy for users to easily transfer photos from a camera to an iPhone/iPad.
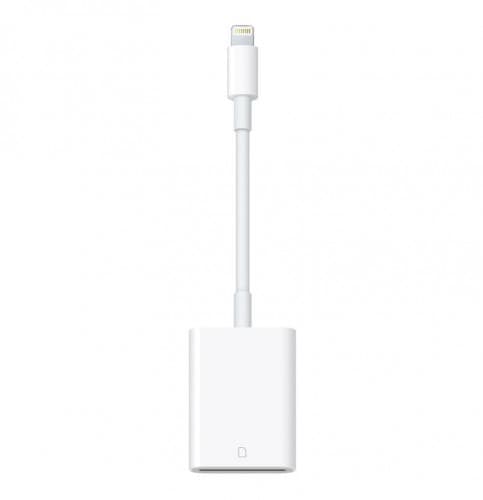
LIGHTNING TO SD CARD CAMERA READER
This particular type of adapter might not be a direct camera to the iPhone connection option but it is equally an easy method. This adapter has one end as that of a normal USB or iPhone charger that goes into the charging port of the iPhone while the other end has a card reader that accommodates an SD card. This adapter can be easily gotten from any Apple store or purchased online from popular gadget online stores for about $30. This method can be used to transfer photos from camera to iPhone in these few steps
1. First, get your lightning to SD card camera reader, then ensure to safely eject the SD card from your camera before removing it from the camera.
2. Now plug one end of the adapter into the charging port of your iPhone or iPad then insert the camera’s SD card into the card reader end of the adapter
3. Once your iPhone detects the inserted SD card, it should launch the iPhone Photos App with a prompt to import the photos available, you may also decide to import all.

LIGHTNING TO USB CAMERA ADAPTER
This particular adapter is way more straightforward to use, unlike the aforementioned SD card reader adapter. Although it does require an additional USB cable to function and perform the process to transfer photos from camera to iPhone, I guess that the downside to making use of this method, as direct as it is, it has its perk of having to keep an extra USB cable that would be plugged into the camera. This adapter can also be gotten for about the same price as the SD card reader adapter but it does not usually come with a USB cable. Steps to the making of this adapter are pretty basic just like its sibling SD card Reader adapter.
1. Simply plug in the adapter end meant for the iPhone charging port on your iPad or iPhone.
2. Now plug in a USB cable to the camera from which pictures are to be transferred.
3. Connect the USB cable from the camera to the USB port of the Adapter.
4. Once your iPad or iPhone reads the camera, the Apple Photos app will be launched.
5. You will see options to either import all or to select desired photos and import them.
6. And just like that, you have done a successful transfer of photos from camera to iPhone in no time. Piece of cake ain’t it?

Alternatively, you can purchase an iPad Camera Connection Kit provided by Apple. This kit contains both adapters that are needed to transfer photos from a camera to iPad in no time
Part 2: Transfer photos from camera to iPhone/iPad wirelessly
It is no doubt that we are in an age where inventors are trying as much as possible to reduce the use of wires to promote the use of wireless means to get this done in this century. I guess it started with the use of infrared transfers which still required some sort of contact, then can Bluetooth, a completely wireless transfer means for media files and others, and now we can make use of Wi-Fi adapters to perform faster transfers or even make use of cloud transfers; the awesomeness of inventions and technology.
WIRELESS ADAPTERS
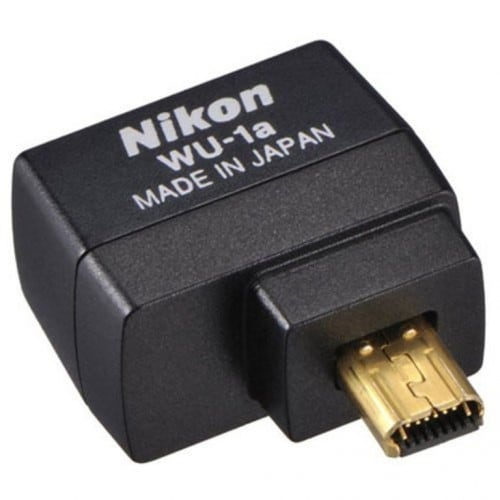
To make wireless transfers an easy task, some companies have invented wireless adapters that can be used to transfer photos to iPad wirelessly and in no time as well. Nikon, for example, has a WU-1A wireless adapter, cannon also has a W-E1 wireless adapter, just to mention a few. These wireless adapters might cost a little more than the conventionally wired adapters ranging from $35-$50 or more, but it sure is worth it if you are a fan of the wireless policy community. These adapters are also easy to use
1. First of all, download and install from Apple app store the Wireless Utility App for the producer of the wireless adapter you are making use of, in this case, Nikon
2. Plug the adapter into your Camera and it becomes Wi-Fi hotspot
3. Switch on the Wi-Fi of your iPhone and connect to the created hotspot
4. Then open the app and you can copy the photos on the camera from the mobile app.

Another means that can be used to transfer photos from camera to iPad wirelessly is if you own one of the cameras that come with Wi-Fi adapters integrated inside of them such as Nikon D750, Canon EOS 750D, Panasonic TZ80 and so on. You can connect these devices to the internet and then transfer your pictures to a cloud account such as Dropbox, Google Drive, and then you can access them from your iPhone at any time.
For whatever reason, you wish to transfer photos from camera to iPad or iPhone, ensure that you choose a method that best suits you, and gives you a hassle-free transfer. You can also decide to transfer all photos from your camera to your personal computer for much easier accessibility. So enjoy clicking and editing your loving memories as you please.
iPhone Photos
- Convert HEIC to JPG
- 1. Convert HEIC to JPG on Linux
- 2. Convert HEIC to JPG Windows
- 3. Best HEIC Converter Online
- 4. Convert HEIC to JPG High Quality
- Export iPhone Photos
- 1. Upload iPhone Photos to Google Drive
- 2. Transfer Photo from iPhone to PC
- 3. Transfer Photo from iPhone to iPhone
- 4. Transfer from iPhone to iPhone
- 5. Transfer from iPhone to iPad
- 6. Move iPhone Photo to External Drive
- 7. Transfer from iPhone to Flash Drive
- 8. Extract Photos from iPhone
- 9. Download Photo from iPhone
- Import Photos to iPhone
- 1. Transfer from Laptop to iPhone
- 2. Transfer Photo from Camera to iPhone
- 3. Transfer Photo from Mac to iPhone
- 4. Transfer Photos from PC to iPhone
- 5. Transfer from iPhone to PC
- 6. Transfer from Android to iPhone
- 7. Transfer from Samsung to iPhone
- Manage iPhone Photos
- 1. Back up iPhone Photos
- 2. Get Photos off iPhone
- 3. Send Large Size Photos from iPhone
- 4. Photo/Video Compressor Apps
- 5. Delete Photos from iPhone/iPad
- 6. iPhone Photos Disappeared Suddenly
- 7. iPhone Photoshop Alternatives
- Recover iPhone Photos
- 1. Restore Deleted Photos from iPhone
- 2. Recover Photos from iPod Touch
- 3. Recover Deleted Picture from iPhone
- Transfer iPhone Photos to Mac
- Transfer iPhone Photos to PC
- 1. Transfer Data from iPhone to PC
- 2. Transfer Photo to Computer
- 3. Transfer Photo to PC without iTunes
- 4. Transfer Library to Computer
- 5. Send Photo from iPhone to Computer
- 6. Import Photo from iPhone to Windows
- 7. Transfer Photo to Windows
- Transfer Photos from Google Drive
- 1. Download from Google Drive to iPhone
- 2. Transfer from Google Photo to iPhone
- 3. Download from iCloud to iPhone
- Transfer Photos to Google Drive
- Image Convert Tips
- ● Manage/transfer/recover data
- ● Unlock screen/activate/FRP lock
- ● Fix most iOS and Android issues
- Learn More Learn More


Alice MJ
staff Editor