Complete Guide to Solve to Internet Not Working On iPhone [2026]
Feb 11, 2026 • Filed to: Phone Repair Solutions • Proven solutions
We all know that an iPhone without the Internet is just an iPod. In other words, your money and struggle were wasted. Wireless Internet access or the Internet not working on the iPhone sometimes hinder a smartphone from working online. Repairing your Internet connection can be a difficult and annoying job for your iPhone, iPad, or iPod Touch.
This article will guide you and tells you some simple and easy steps to repair your wireless link. There are several complaints found on social media about iPhone cellular data, not running. After an upgrade to new iOS or an incorrect SIM, there may be many explanations for the device dispute problem. But the best thing is there are several tips and tricks to connect your iPhone to the Internet are accessible. So, let’s find out more about it.
Part 1: Wi-Fi or Cellular Data not working on iPhone?
Mobile Data doesn't work on your iPhone, and you're not sure why. Cellular connectivity helps you to browse the Internet, email messages, and the list goes on. The issue with cell phone communication typically arises in many ways, either due to lack of data or internet connectivity or data not working on the iPhone. Even sometimes your iPhone or iPad is connected to the mobile network (while Wi-Fi works), it still unable to connect several applications, or sometimes the Wi-Fi button doesn't work.
Part 2: How to Solve Wi-Fi not working on iPhone?
One of the main problems people face while using the iPhone is their Wi-Fi suddenly stop working or iPhone cellular data not working, which makes them clueless about what happens unexpectedly. You are using the internet one moment, and you find an iPhone Wi-Fi issue the next moment. So today, we described the most widely discussed wireless internet problems and their solutions.
2.1 Make sure that your router is on and you're within range
If your Internet appears to be slow or iPhone not connecting to the Internet, your Wi-Fi link may be a concern. The main reason maybe you are too far from the source, or you block the signal from thick walls, or your router is off. Make sure you're within your router's reach to use the Internet easily on your iPhone.
Check the strength of your Wi-Fi
To check the power of your Wi-Fi, look at the system for problems first. You should have a Wi-Fi link indication, whether you are using iOS or Android. Typically, the Wi-Fi sign contains four to five curved lines.

Router restart
Before considering troubleshooting the problem of no internet connection on the iPhone, let's do some basic router troubleshooting as it helped several people to fix it. Restart your router and try again linking your iPhone and see if it solves the problem. It is, therefore, best to wait for 10 seconds before the router is restarted.
2.2 Make sure that Wi-Fi is on and you can see your network
It may be important or helpful to check the network status of your iOS device. This may be the network of your wireless provider or your home Wi-Fi network.
Step 1: Look for and open Settings from your device's main screen.

Step 2: Look for the Wi-Fi icon with Open Settings. This area will indicate on the right the current Wi-Fi status.

Off: now, the Wi-Fi is disabled.
Not-Connected: Wi-Fi is linked, but your computer is not connected to the network at the moment.
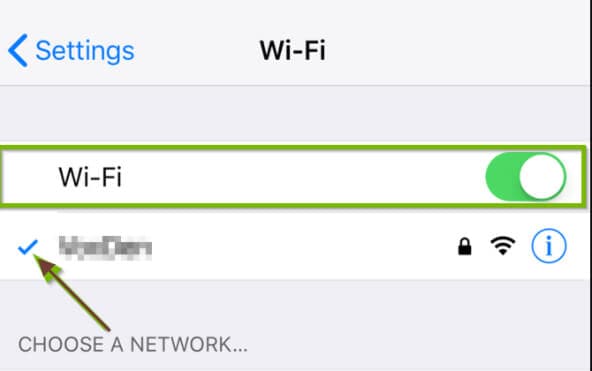
Step 3: You can also tap on Wi-Fi to check that the Wi-Fi switch is on. The switch should be orange, and the network you are connecting to be shown immediately below with a checkmark on the left.
2.3 Check for issues with your Wi-Fi network
When you have tried various solutions, and your data continues to work intractably, the next move might be to restore the network settings. This will uninstall all stored Wi-Fi networks on your phone and restore your cellular data settings to normal if mobile data is not working on the iPhone. This can also be useful if you have trouble with Wi-Fi.
Step 1: Open the Settings program.
Step 2: Scroll down and click on the menu option "General."
Step 3: Scroll down to the bottom and press the menu button "Reset."
Step 4: Choose the "Reset Network Settings" in the center of the panel.
Step 5: To authorize the reset, you are asked to enter your iPhone passcode.
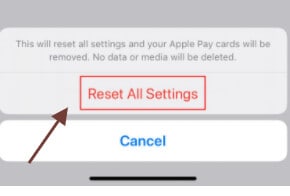
Step 6: Tap the "Reset Network Settings" button to confirm.
2.4 Check for your router connection
If you have trouble with a particular network, it's time to investigate what's going on. If you like to play with Wi-Fi, you should investigate your router's configuration to attempt to reboot or reset it. These configurations vary depending on the vendor, so we recommend you look up and start from your router. If you have a network that is not yours, discuss with the owner or IT administrator, or do other users also have this problem? Can the network restart? Otherwise, you might be out of luck.
2.5 Restart you iPhone
If your iPhone doesn't connect through your mobile data network to the Internet, attempt to restart your phone.
Step 1: Click and hold down the Home button and the Sleep/Wake button simultaneously and hold it down when you see the 'slide off' alternative.
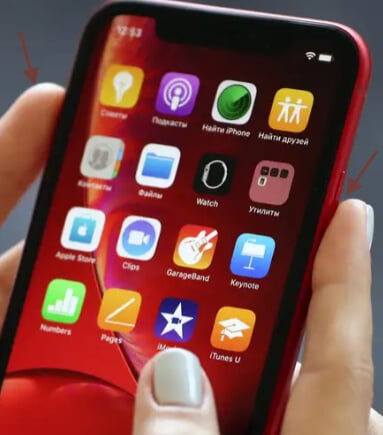
Step 2: You will see the silver Apple symbol after that, and your telephone will function again.
2.6 Check your iOS System issue
If your iOS system begins to stick, the basic way to retrieve your iPhone/iPad is to get the help of restore iTunes. It's great if you did a backup, but if you don't, it may be a hassle. This is why Dr.Fone - Repair has been published. It will quickly fix any iOS machine problems and normalize your phone.
To fix the iOS system, you will follow these steps.

Dr.Fone - System Repair
The easiest iOS Downgrade solution. No iTunes Needed.
- Downgrade iOS without data loss.
- Fix various iOS system issues stuck in recovery mode, white Apple logo, black screen, looping on start, etc.
- Fix all iOS system issues in just a few clicks.
- Works for all models of iPhone, iPad and iPod touch.
- Fully compatible with the latest iOS 14.

Step 1: First of all, launch Dr.Fone and pick “System Repair" from the main panel.

Step 2: Then connect your iPhone with a lightning cable to your computer. You can find two options when Dr.Fone recognizes your iOS device: Standard Mode and Advanced Mode.

Step 3: The tool detects the model form of your device automatically and shows iOS framework versions available. Pick a version and initiate by clicking on "Start."

Step 4: The iOS firmware is then downloaded.
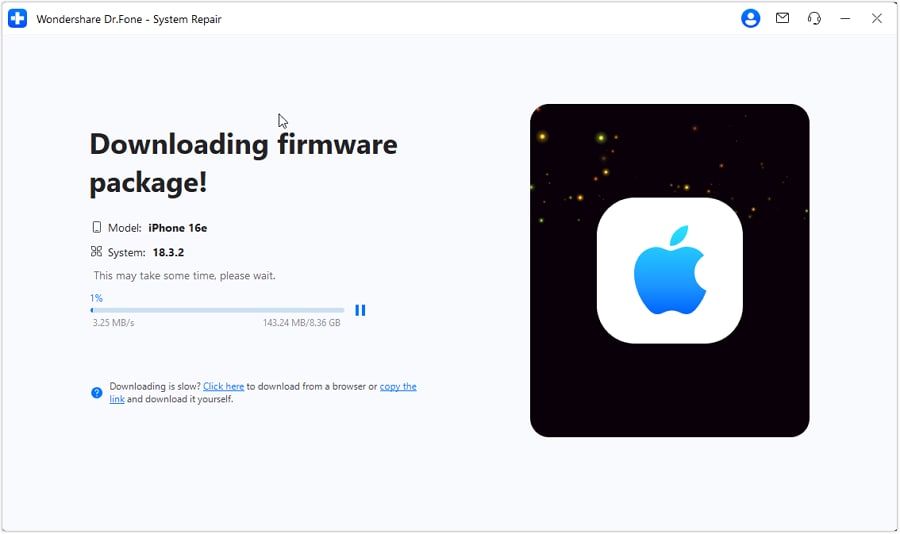
Step 5: The tool begins to review the downloaded iOS firmware after the update.
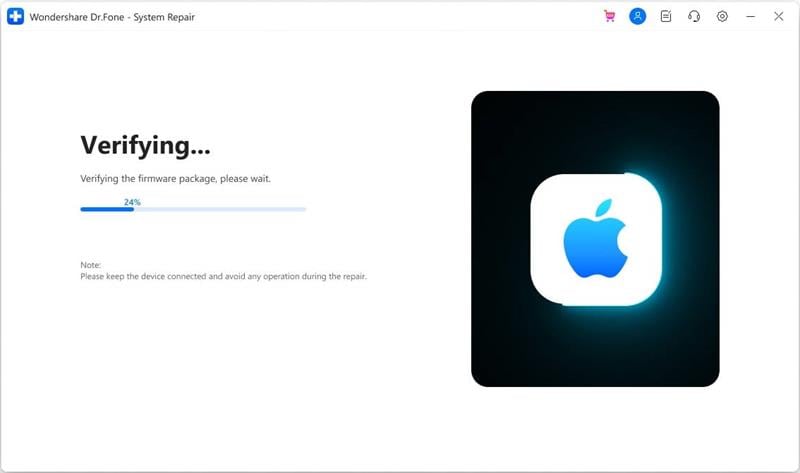
Step 6: This screen can be seen when the iOS firmware is tested. Tap on "Update Now to start fixing your iOS and get your iOS device back to work.

Step 7: Your iOS device will be fixed successfully in a few minutes.

Part 3: How to Solve Cellular Data not working on iPhone?
Cellular data is a term that means a cellular network connected to the Internet. You will also use the Internet to back off from Wi-Fi. Both iPhone models support cellular details and also support some iPad models branded as "Wi-Fi + Cellular."
If your cellular data is not working on the iPhone, there are several potential options that you can pursue. First of all, you should be conscious that there are many places where you simply can not have very good coverage. If this isn't what's happening, let's look at some solutions to follow.
3.1 Check mobile data is switched on
Control Center is the easiest way to search for mobile data. To check from the control center, you will need to follow these steps.
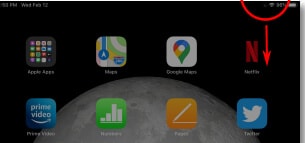
Step 1: Start Control Center first. iPhone X or newer/iPad running iOS 12 or later: turn right upside down the screen.
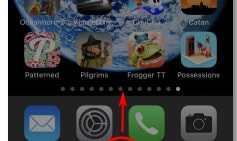
iPhone 8 or earlier, iOS 11 or earlier: swipe from the bottom of the device.
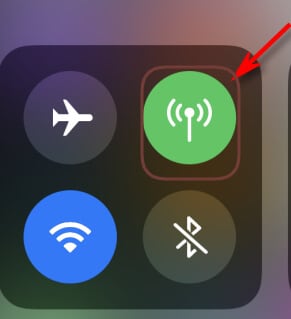
Step 2: Control Center will come up if you do so. Find the circular button that looks like a radio wave-like antenna. This is the mobile data button.
- If the cell data icon is orange, cell data is on.
- If the mobile phone data symbol is grey, it means cell data is inactivated.
b. Cellular Data is Turned On
You can also search for Wireless settings to see if your cellular data is on. It's a very easy step, therefore good to look at it before trying to work on other options.
Step 1: First of all, find the "Cellular Data" switch at the top of the cellular menu.

Step 2: To turn it on or off, press the switch. Then turn slides to the right, and it will become green when the cellular data is activated.

3.2 Check if your Data reach limitation
There is a simple way to search the data cap on your iPhone. You can also find out which applications consume the most mobile data if you are closely monitoring it at the end of the month.
Method 1: You will need to follow these steps.
Step 1: Open the settings on your iPhone.

Step 2: Tap on the "Cellular" section.

Step 3: On this screen, you can see a "current period" part.
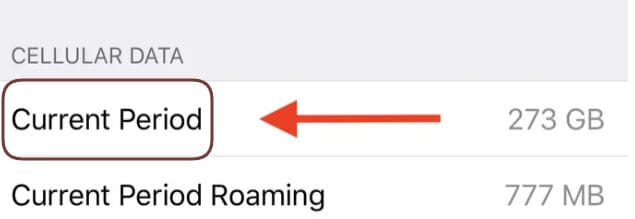
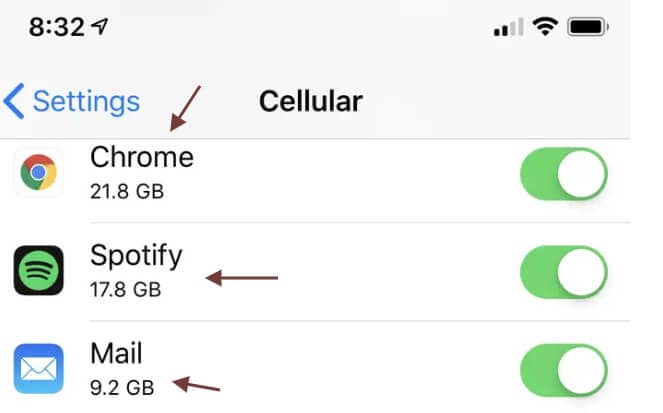
Step 4: The "current period" number to the right indicates exactly how much data you have used. Above, you'll see separate applications with a number below. This displays how much data you used on each app.
Contact your carrier directly.
When everything else fails, you will have the option to contact your carrier's service line or head straight to your nearest carrier's store to inform you how much data you have used and how much you are left with and change your package if you think that will be useful.
3.3 Check your SIM
Removal and reinstallation of the SIM card will also address network-related errors, including those concerning cellular functions on tablet or Internet is not working on the iPhone. If the issue was caused by the upgrade, a loose or defective SIM card may also be connected to it. To delete this from your iPhone, remove the SIM card, search for any signs of damage and bring it back if there are none.
Switch off your phone to get started. To avoid damage to the SIM card or the system itself, the phone should be switched off before you delete the SIM card. Delete the SIM card from your iPhone and reinstall it with the following steps:
Step 1: As the SIM card is switched on, put the SIM ejector tool on the side of your phone into the SIM tray.
Step 2: Use the tool softly until the SIM tray comes out.
Step 3: Remove your iPhone SIM card from the tray and search for obvious signs of liquid stains or marks from the card.
Step 4: If you did not find any signs of damage on the SIM card, placing it in the tray in the same direction as before.
Step 5: Making sure the SIM card is correctly placed and that the SIM card tray is covered.
Step 6: Now push the SIM tray back into your phone before you hear it click.
When the SIM tray is closed, turn the phone on and wait until the cellular network signal is restored. If the signals are reliable, allow Cellular Data to see if this solves the problem.
Restart your iPhone
You can again restart your iPhone to check out if the issue is solved.
Check your iOS System issue with Dr.Fone.
iPhones are certainly the industry leader, but they're even not without fault. Nothing's is perfect, of course, so how can they be? If you are an iPhone user, you can frequently face various types of glitches, from hardware to applications. It's really disturbing. Dr.Fone software is one of those apps to fix iPhone problems quickly. You can easily check your iOS system with its advanced repair tool and can fix your problem. A complete tutorial is given above for your help.
Conclusion
It's very annoying that due to some issues, you fail to use mobile data on your iPhone and run several applications or search on the Internet. We have given various suggestions above, and one of them would definitely save you from the issue of not operating iPhone cellular data.
iPhone Issues
- iPhone Storage Full
- 1. Stuck on Apple Logo Storage Full
- 2. Erase Content Settings not Working
- 3. iPhone Lagging
- 4. iPhone Running Slow
- iPhone Update Problems
- 1. Stuck on Updating iCloud Settings
- 2. iPhone Frozen During iOS Update
- 3. iPhone Checking for Update Stuck
- 4. iPhone Cellular Update Failed
- 5. iPhone Software Update Failed
- 6. iPhone Stuck on Update Requested
- 7. iPhone Update Error 1110
- 8. iPhone Stuck On Verifying Update
- 9. iPhone Won't Update
- 10. Update Server Couldn't Be Contacted
- 8. iPhone & iPad Security Updates
- 9. Update iPhone with/without iTunes
- 10. Can't Download or Update Apps
- iPhone Media Problems
- 1. Apple Music Song Not Available
- 2. iPhone Not Ringing
- 3. iPhone Echo Problem
- 4. iPhone Ringer Problems
- 5. iPhone Plays Music by Itself
- 6. Ringer Volume Changes by Itself
- 7. Music Won't Play on iPhone
- 8. Blurry Photos & Videos on iPhone
- 9. iPhone Volume Problems
- iPhone Sound Problems
- 1. YouTube no Sound
- 2. iPhone Microphone Problem
- 3. Test iPhone Microphone
- 4. Headphones No Sound from iPhone
- 5. No Sound on iPhone Game
- 6. iPhone Sound Not Working
- 7. iPhone Screen Recording no Sound
- iPhone Calling Problems
- 1. iPhone No Sound on Calls
- 2. Screen Goes Black During Call
- 3. iPhone Recent Calls Not Showing
- 4. iPhone Dropping Calls Issue
- 5. iPhone Calling Problem
- iPhone Camera Problems
- 1. iPhone Camera Black
- 2. iPhone Camera Blurry
- 3. iPhone Camera Not Working
- 4. iPhone Front Camera Not Working
- 5. TrueDepth Camera Not Working
- 6.Out-of-Focus Photos on iPhone 15
- iPhone Network Problems
- 1. Airpods Won't Connect to iPhone
- 2. iPhone Disabled Connect to iTunes
- 3. iPhone Not Syncing Problems
- 4. iPhone Internet Not Working
- 5. iPhone Keep Disconnecting from Wifi
- 6. iPhone WIFI Not Working
- 7. PC Not Recognizing iPhone
- 8. iPhone Stuck on Connect to iTunes
- 9. iPhone Not Showing up in iTunes
- 10. iTunes Not Detecting Your iPhone
- 11. iPhone Bluetooth Disconnect
- 12.Apple CarPlay Keeps Disconnecting
- Other iPhone Problems


Alice MJ
staff Editor
Generally rated4.5(105participated)