
 TL;DR:
You can securely encrypt a PDF file for email by setting an open or permissions password using macOS Preview, LibreOffice Writer, PDFelement, or the browser-based HiPDF tool.
● Mac users can natively lock documents offline via the Edit Permissions menu in the Preview app, whereas cross-platform offline encryption requires installed software like PDFelement or the open-source LibreOffice Writer.
● Standard PDF password encryption fails to protect document metadata like author names, and to prevent unauthorized interception, the lock code must be transmitted to the recipient through a separate communication channel rather than the same email.
● If a file becomes inaccessible, Dr.Fone - DocPassRemover can bypass 128-bit and 256-bit AES open and permission restrictions using AI and brute-force decryption modes without altering the original document formatting.
Ask AI for a summary
 ChatGPT
 Perplexity
 Gemini
 Claude
 Grok
Grok
Sending your sensitive documents via any digital approach can be a risky endeavor. That's why adding a layer of security before sharing a PDF is a smart move. Doing so keeps it safe from unwanted access and helps avoid data leaks or misuse. When you apply encryption, the file becomes readable only to those with the right password or permission.
So, even if the email is forwarded or accessed accidentally, the content stays secure. Many people think this process is difficult or requires special software, but that's not true. This deep dive will explore how to encrypt a PDF file for email in full detail. Follow along to find the best way to secure your documents and how to unlock them if you forget the lock code.
In this article
Part 1. Why Encrypt a PDF File for Email? Benefits & Scenarios
It cannot be stressed enough that you should always apply a security layer to your documents before sharing them. Hence, understanding why a person needs to encrypt their documents prior to sending them through email is crucial. Knowing the reasons and when to use encryption helps you choose the right approach. Summarized below are a few scenarios where learning how to encrypt a PDF for email is beneficial:
1. Business Reports and Proposals
When you send internal reports or project proposals over email, encryption helps keep sensitive figures and strategies safe from leaks. Not to mention that only the right team members or clients can open and view the document.
2. Signed Contracts and Legal Agreements
As you deal with legal documents, their core requirement is often accuracy and confidentiality. Encrypting the PDF prevents unwanted editing, keeping the terms secure and legally valid until both parties agree.
3. Financial or Medical Records
These types of files contain personal or regulated information that must be handled carefully. Encryption adds a strong layer of protection, especially if the email is mistakenly sent to the wrong address.
4. Academic Exams or Study Materials
When sharing tests, answer keys, or private student data, locking the PDF stops others from copying or misusing the content, which further maintains academic integrity.
5. Personal IDs and Certificates
From job applications to school admissions, personal documents are shared frequently. Encrypting these PDFs ensures that your identity-related data doesn't fall into the wrong hands.
6. Client Documents in Remote Work
Freelancers and remote workers often share deliverables online. Securing the file with a password not only protects client data but also shows professionalism and builds trust.
Part 2. Leading Approaches: How to Encrypt a PDF File for Email
With the why securing documents is a critical point hammered home, it is time to look at how to do so. Adding encryption to a PDF file is not as hard as long as the right approach is taken. Plus, you don't need to be tech-savvy or invest in expensive software to get the job done. Detailed below are the top 4 ways to encrypt a PDF for email:
Approach 1. Encrypt a PDF via Preview [Mac Only]
For Apple users, no additional software is needed on their MacBook to protect their documents. The native Preview app has the capability to lock a PDF with a password, both open and permission. Furthermore, the process needed to do so is straightforward, with no tech skills required. Follow these steps to encrypt a PDF for email via this technique in no time:
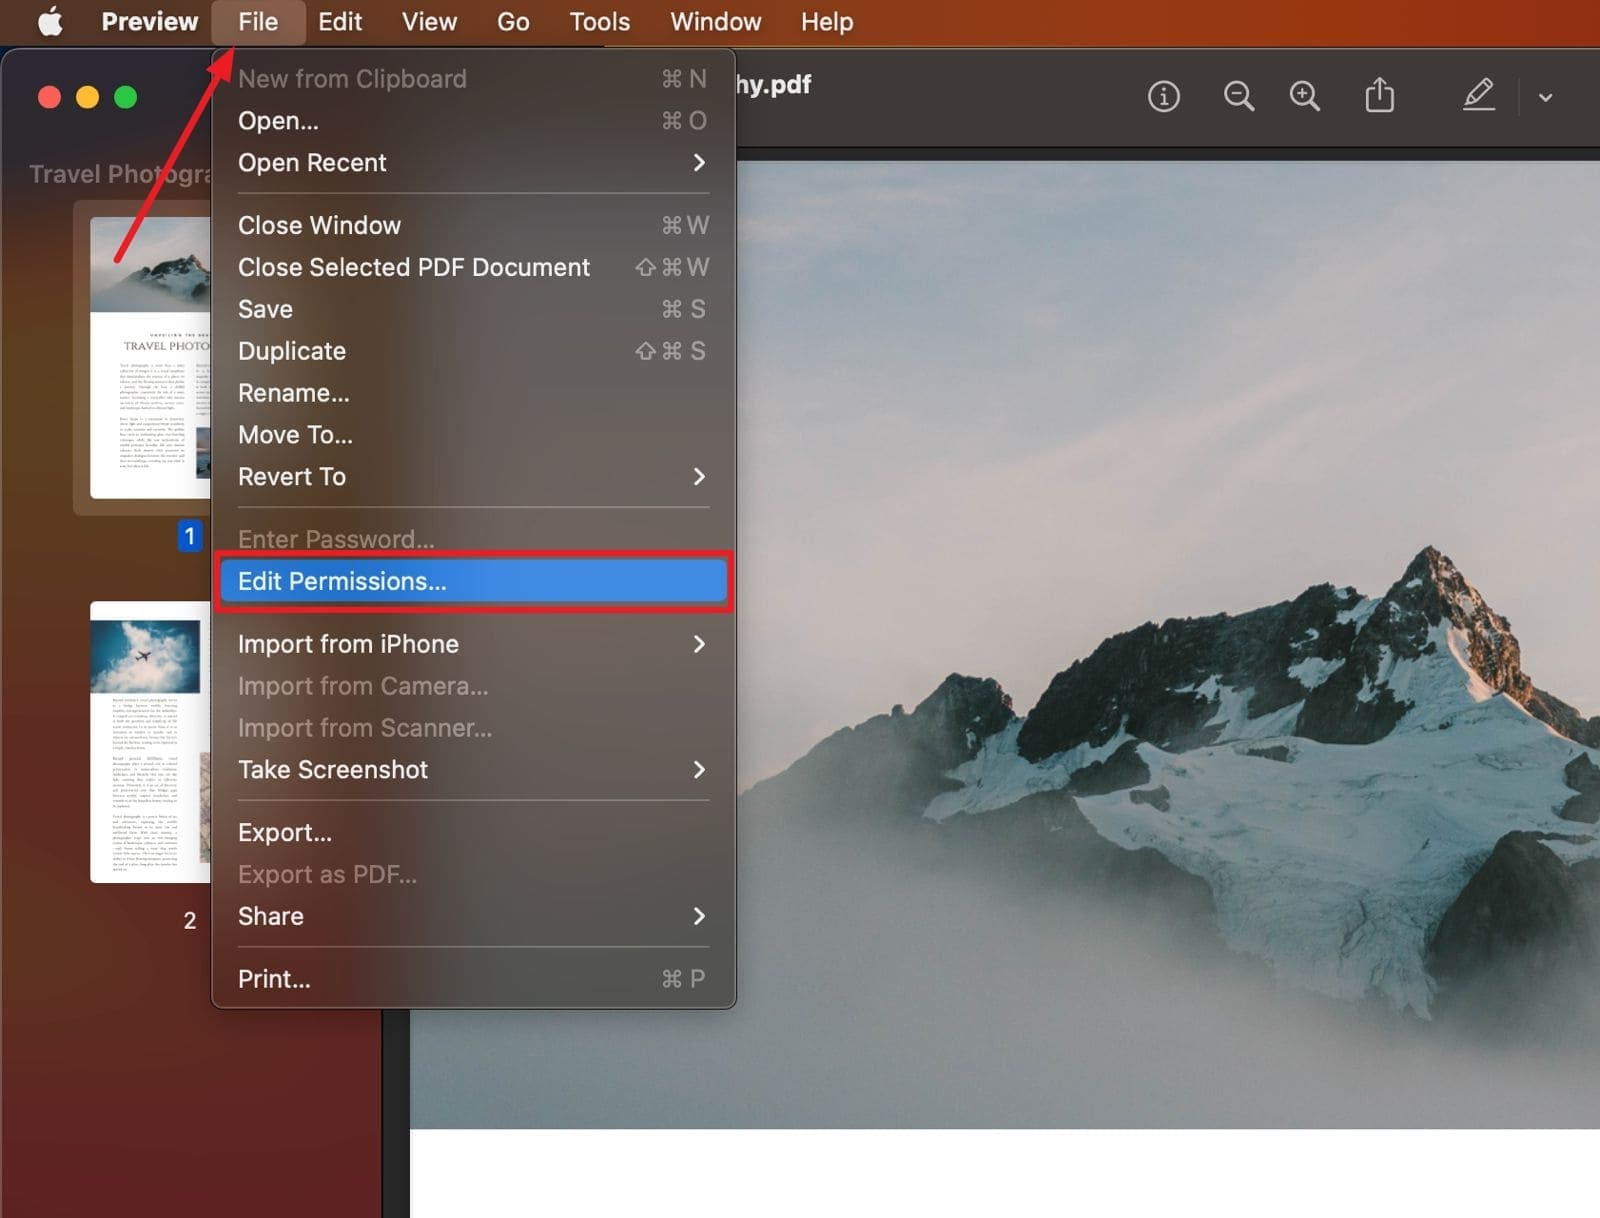
Step 1. Make your way to the PDF file you wish to protect and open it with the "Preview" app. Here, move to the "File" menu and opt for the "Edit Permissions" option.
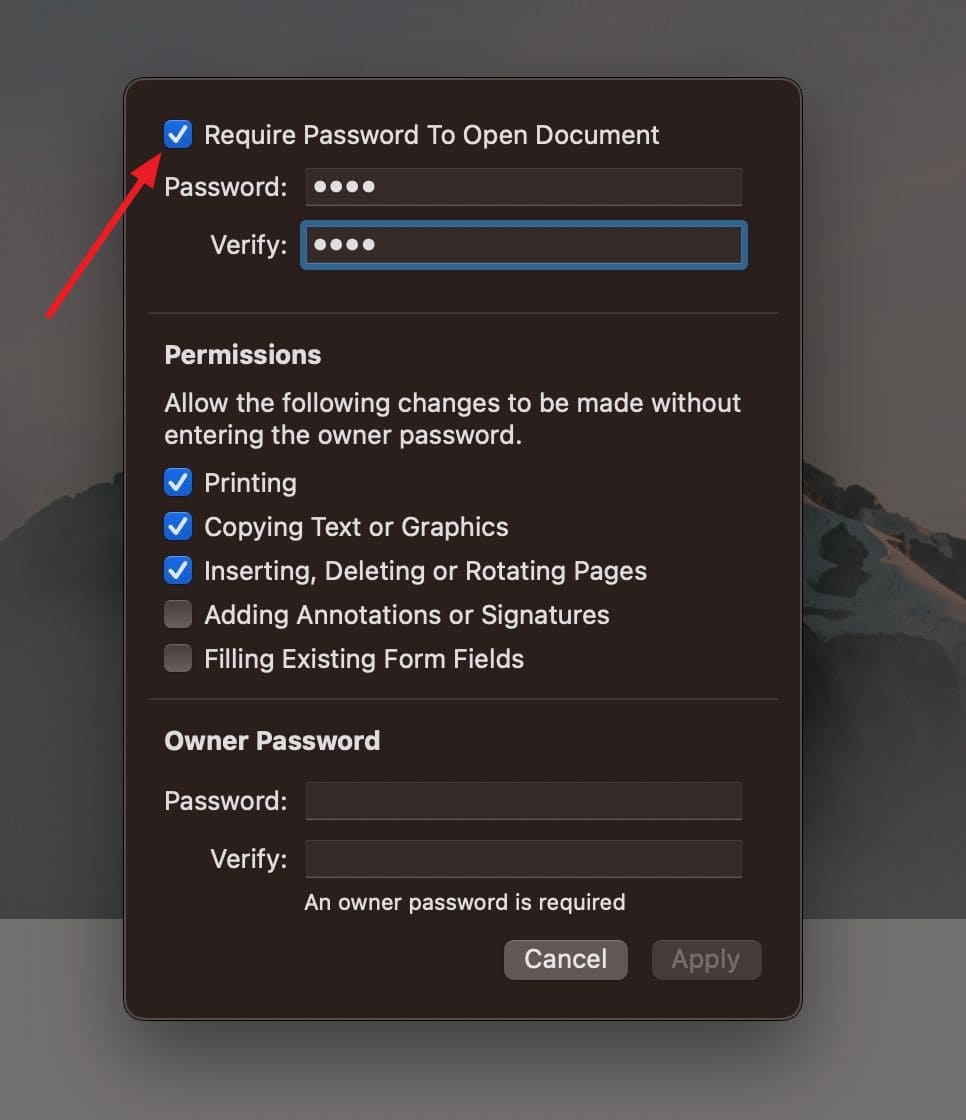
Step 2. As the pop-up window appears, tick the "Required Password To Open Document" box and enter the desired string for the lock code. To restrict different actions in the file, move to the "Permissions" section and uncheck all the ones you want to limit.
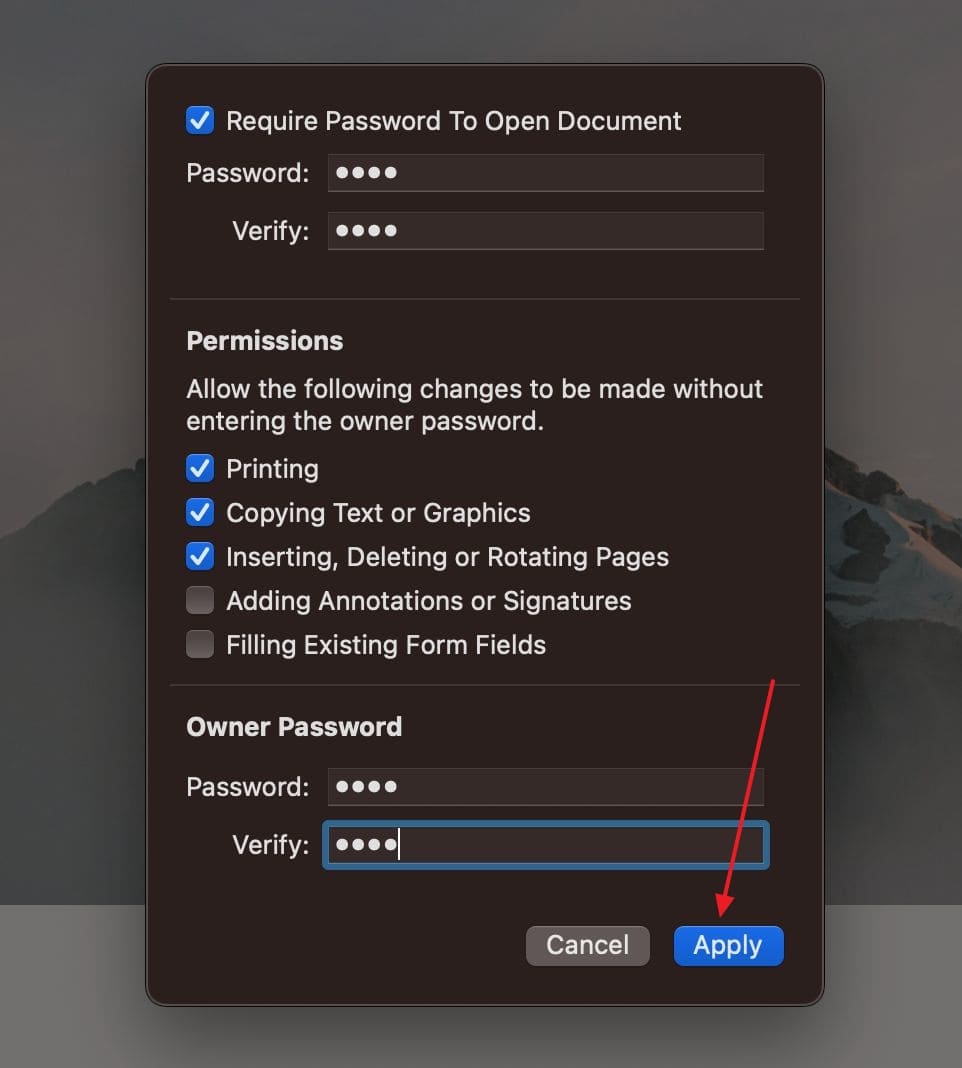
Step 3. When done, create an "Owner Password," which can be the same as the "Open Password." Lastly, hit "Apply" to add the protection layer and save the document so it takes effect before sharing the file via email.
Approach 2. Encrypt a PDF Using PDFelement
When looking for a more comprehensive but straightforward way, opting for a dedicated PDF editor is a recommended choice. PDFelement is a versatile choice that is readily available for both PC and Mac users. Providing tools to add passwords and set permissions, the program ensures your documents remain confidential and unaltered. When wanting to email a password-protected PDF, utilize these steps to do so with PDFelement:
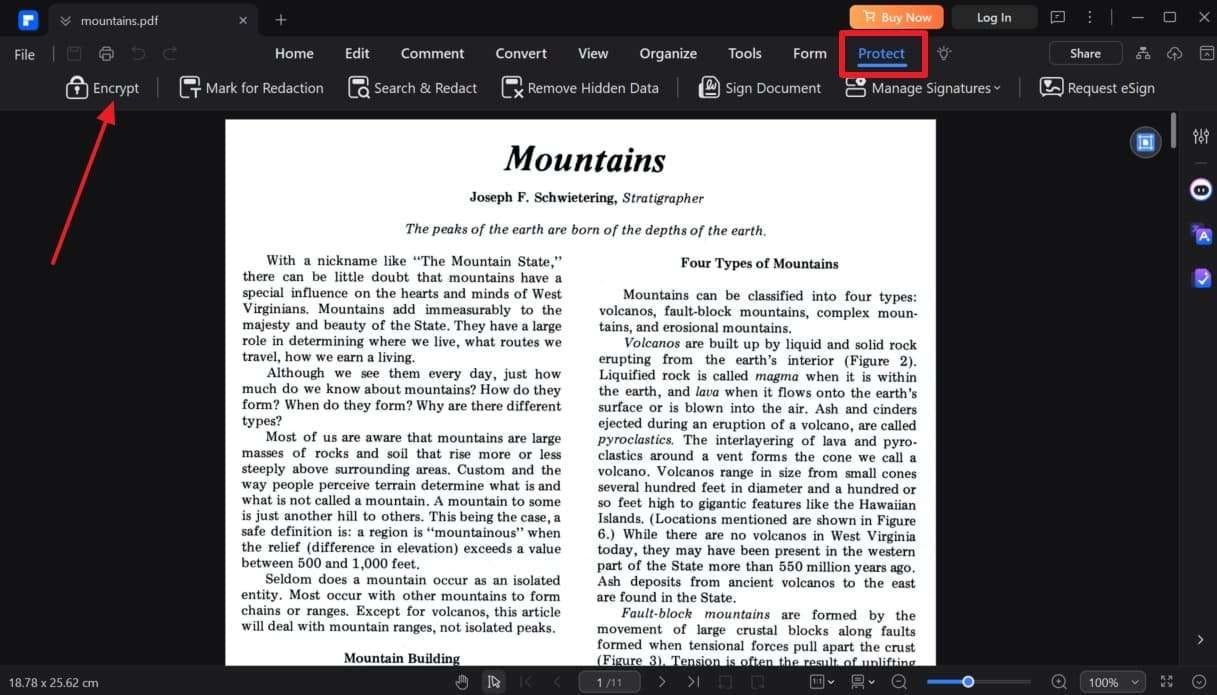
Step 1. Run the software on your system and employ the "Open Files" button to access the targeted document. At this point, get to the "Protect" tab from the top and opt for the "Encrypt" tool.
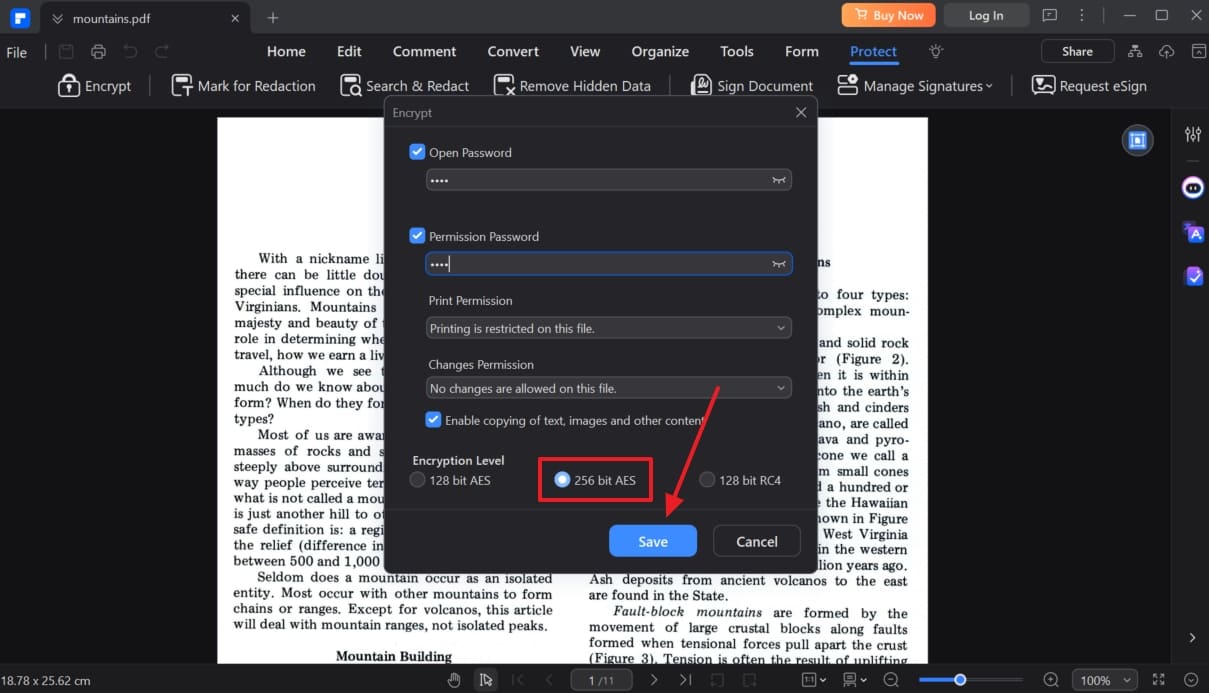
Step 2. Here, check the "Open Password" box and enter the string you want to use as the lock code. Then, move to tick the "Permission Password" box and alter the allowed actions via "Print Permission" and "Change Permission."
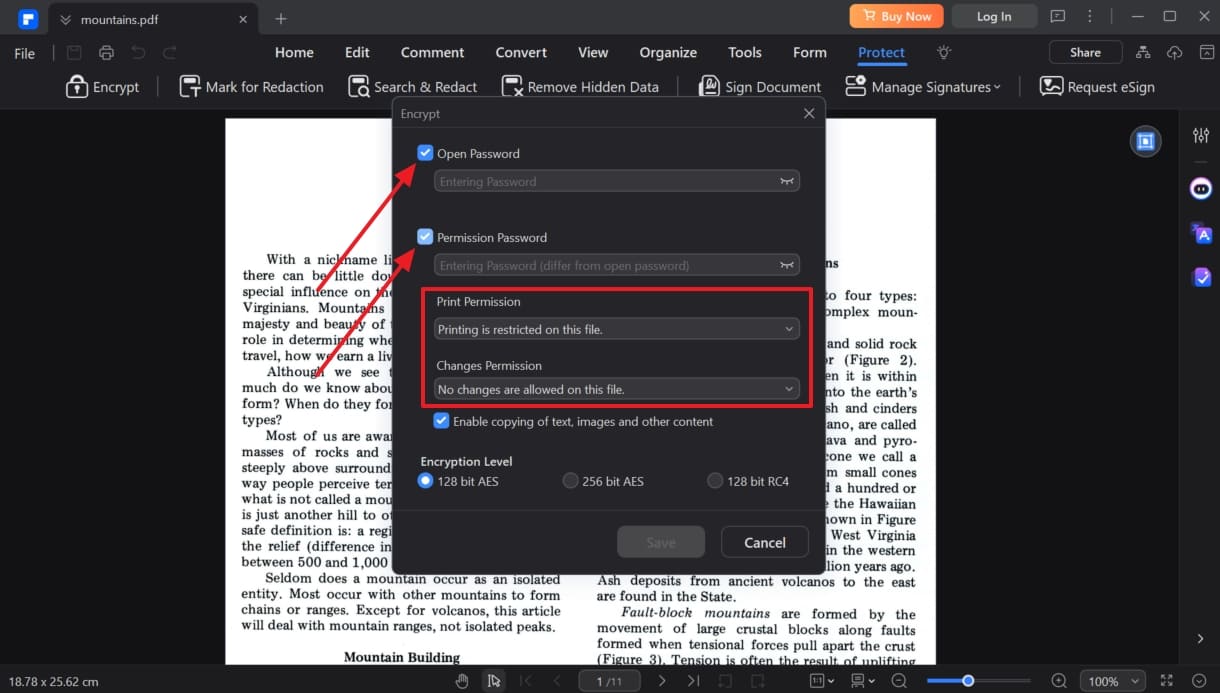
Step 3. Moving forward, enter the desired lock code for the permission password and opt for the targeted "Encryption Level." Finally, hit "Save" to add the changes and save your document for them to take effect.
Approach 3. Encrypt a PDF With Online Tools
A straightforward and no-installation method to secure your documents is to opt for a web app. Among the best available choices, HiPDF stands out for its dynamic interface and robust security features. This browser-based platform lets you encrypt your PDFs with a password, ensuring that only authorized individuals can access the content. The following is the guide needed to learn how to email encrypted PDFs with ease:
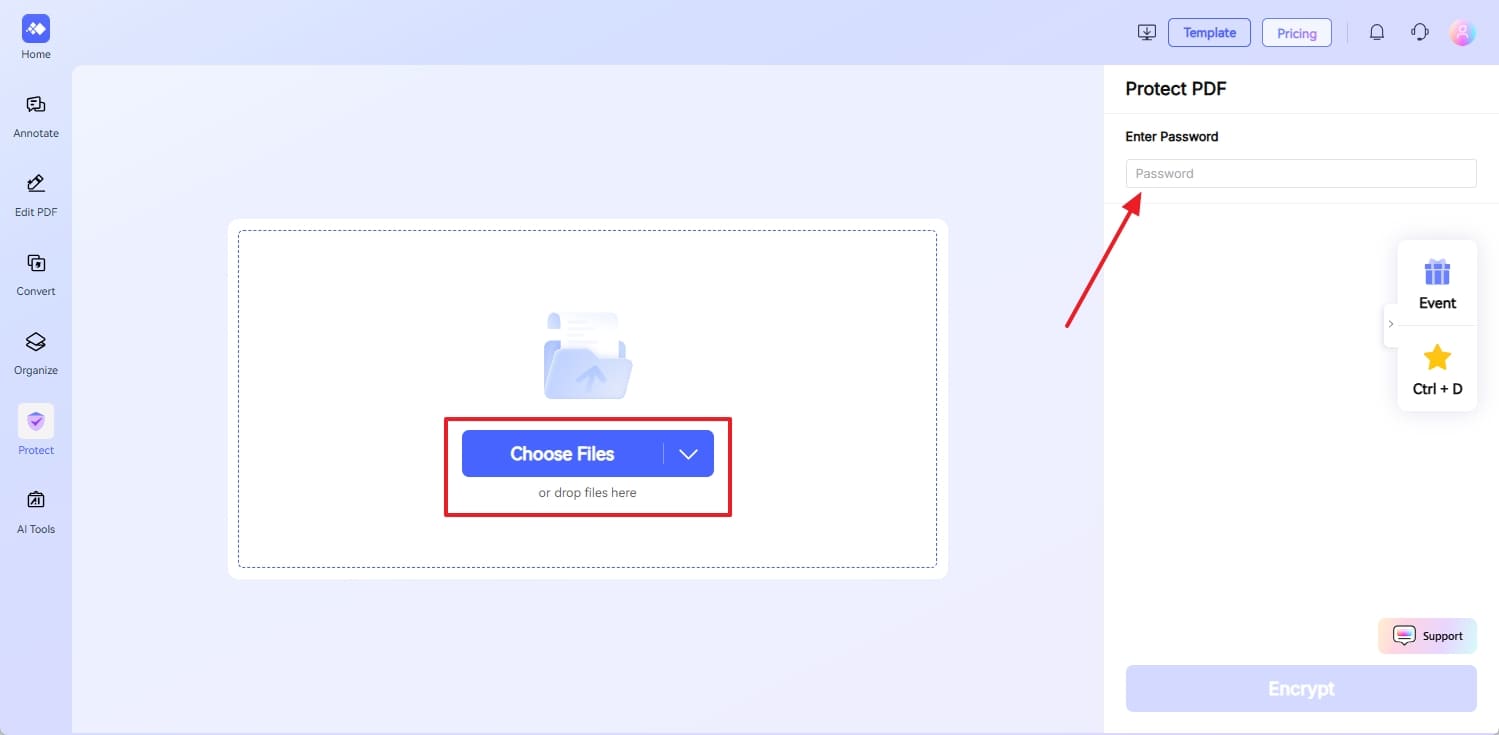
Step 1. Get to the "Protect PDF" tool of HiPDF and utilize the "Choose Files" to add the targeted document you intend to share via email. Once the file is uploaded, move to the right-side panel to enter the desired lock code in the "Enter Password" field.
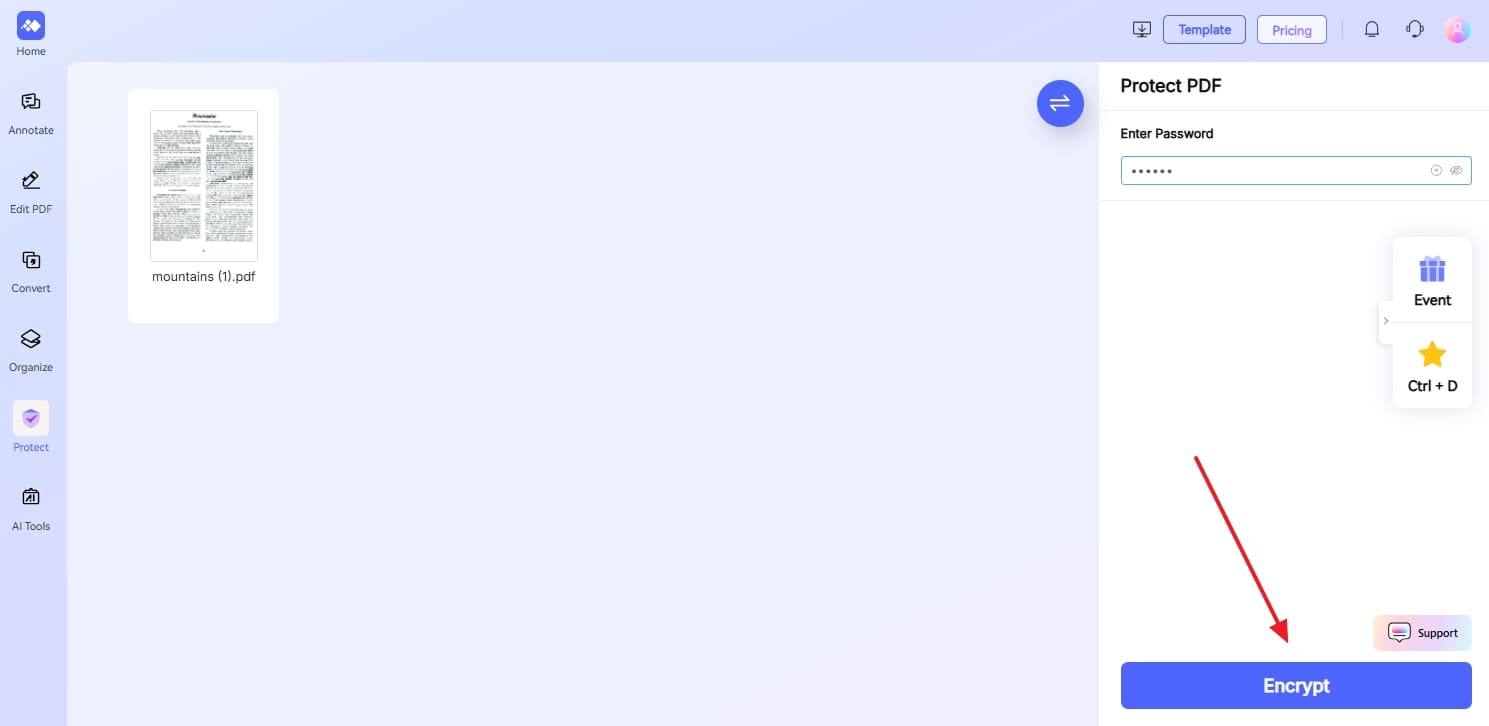
Step 2. Following that, hit the "Encrypt" button to let the program add a security layer to your PDF document. As soon as the process is complete, your locked file will be downloaded automatically.
Approach 4. Encrypt a PDF Using LibreOffice Writer
Available across all major platforms, this open-source program is a great choice for securing your document. LibreOffice Writer lets you add password protection and set specific permissions when exporting a file as a PDF. It ensures that your sensitive information remains confidential and that recipients can only perform your authorized actions. When in need to send a private document without worries, use these steps to learn how to email a password-protected PDF:
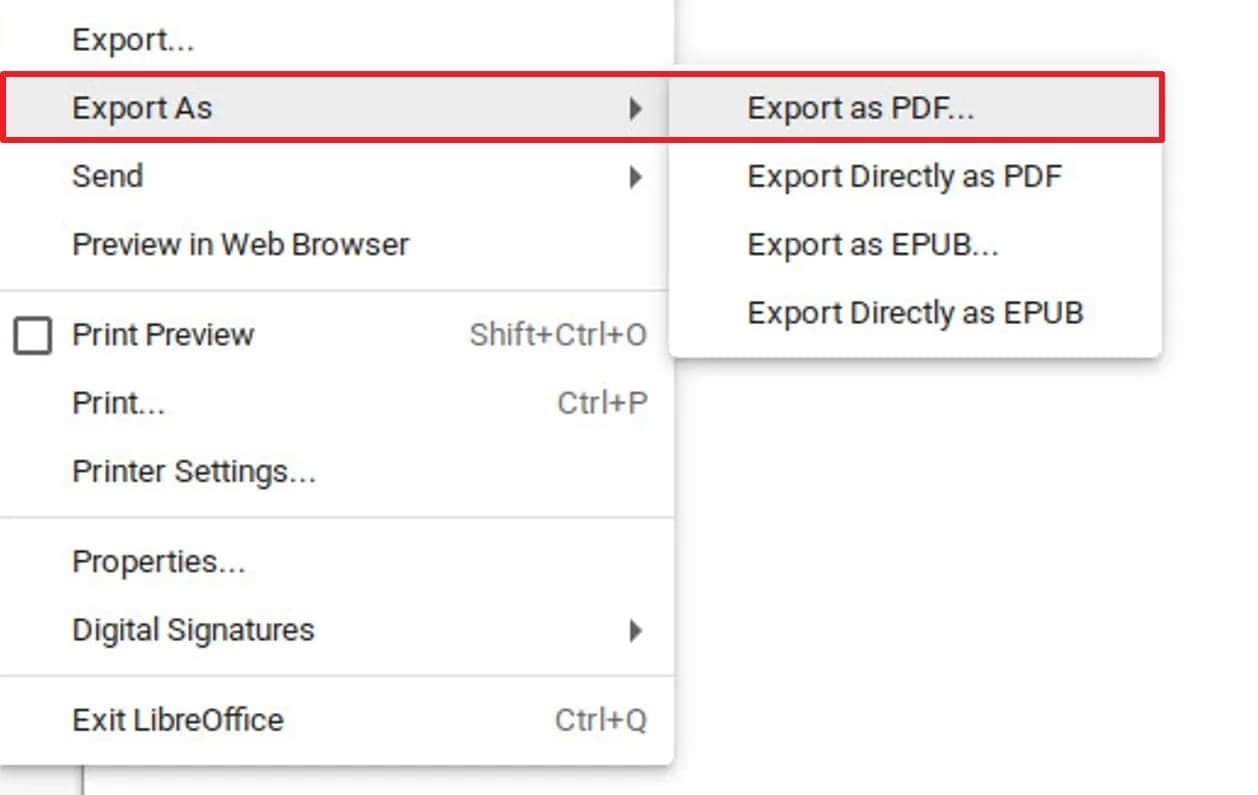
Step 1. Get the LibreOffice Writer up and running on your system and utilize the "Open" feature in the "File" menu to load the targeted document. Then, make your way to the "Export As" button in "File" and select "Export as PDF" to proceed.
Step 2. On the subsequent screen, move to the "Security" tab and hit the "Set Passwords" button. Lastly, utilize "Set Open Password" and "Set Permission Password" to secure your PDF files.
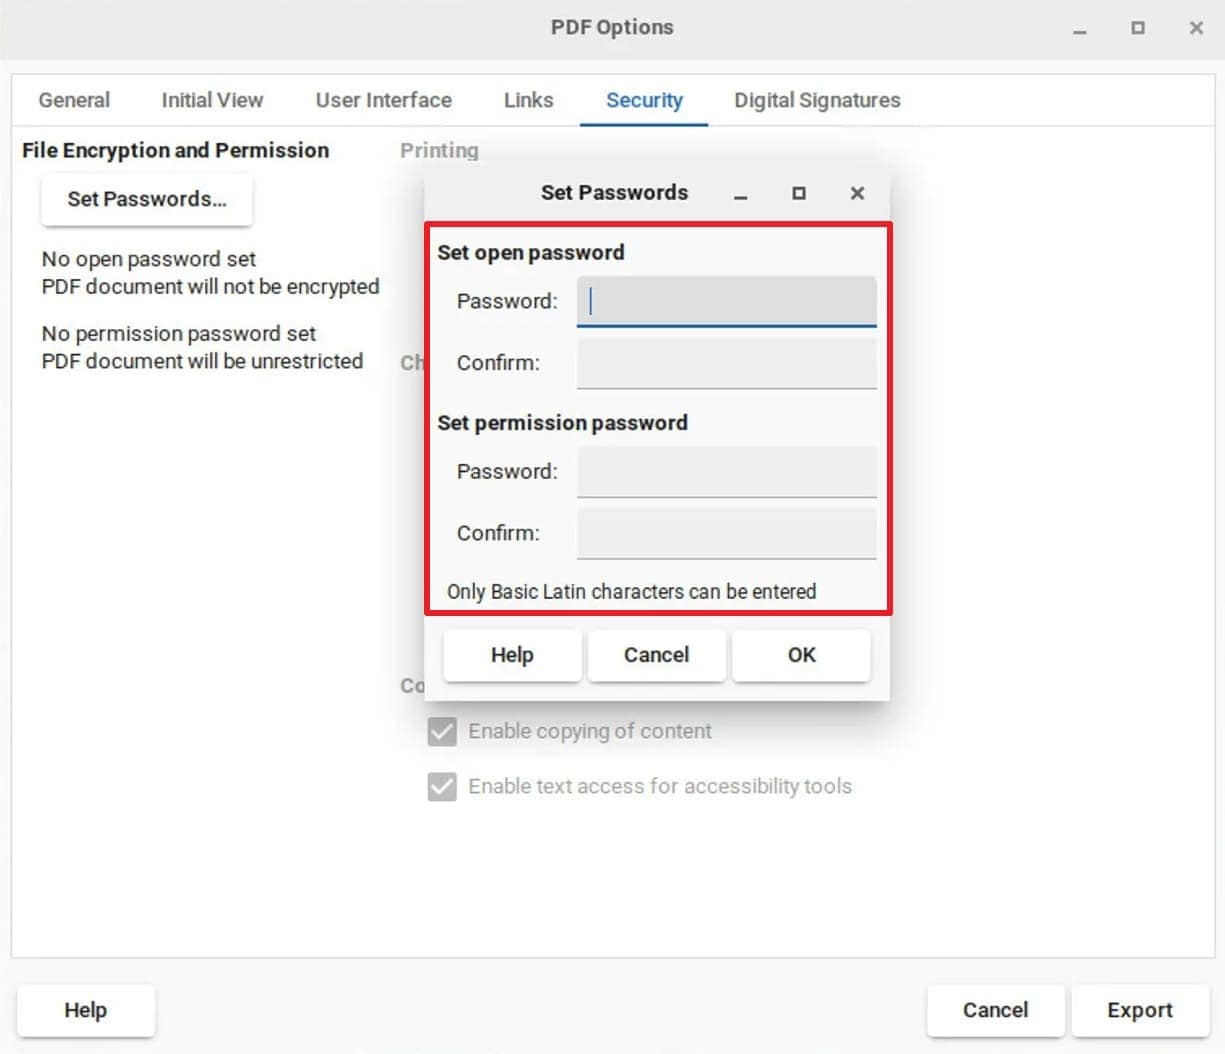
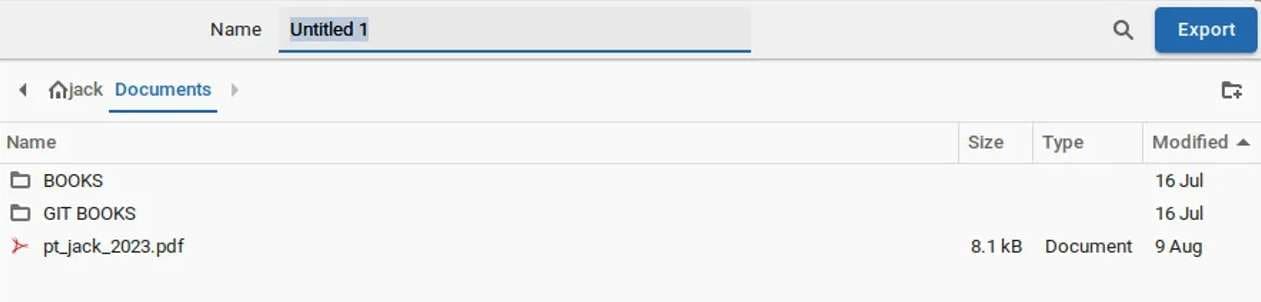
Step 3. After configuring the desired settings, click "OK" to return to the "PDF Options" dialog and tap "Export." Finally, choose the destination folder and filename before hitting "Save" to conclude the task.
Pro Tip. Failed To Decrypt Important Email? Try Dr.Fone Now [100% Working]
Sometimes, things don't go as planned, even with the best precautions. That is especially true when you are in dire need of opening a password-protected PDF you can't recall. When you've been locked out of an important document sent by email, don't worry. There's a reliable way to regain access without damaging your file or wasting hours. Dr.Fone – DocPassRemover is a professional choice widely trusted for regaining access to encrypted PDFs.
What makes it stand out is its 99% success rate, along with a guarantee of no data loss or content changes. Regardless of the encryption type on PDFs, this tool adapts to all levels of complexity. It uses three smart decryption modes: AI-boosted, Brute Force, and a Combined Method. You won't need any technical background to use it, and it works smoothly even for first-time users.
Key Features That Make Dr.Fone – DocPassRemover A Top Choice
- The tool runs on an ultra-fast engine that attempts up to 680,000 password combinations per second.
- Its advanced compatibility supports modern encryption types from 128-bit AES to 256-bit AES.
- Best of all, the original content and formatting of your document stay untouched.
Dr.Fone - DocPassRemover
Decrypt open passwords, remove restrictions & passwords - all in one go!
- Convert secured PDF to PDF even if you don't know the open password.
- The "Remove Password" feature is free when the password is already known.
- Automatically detects the PDF file's name, location, and specific lock status.
- Removes permission restrictions like editing, printing, and copying.
- Clean and easy interface, perfect for all users—no technical skills needed.
Detailed Guide on How To Decrypt a PDF Document Without Needing Any Passwords
With a near-perfect track record, this robust program ensures your file can get unlocked in no time. Follow these detailed steps to get rid of the security restrictions from your documents with ease:
For the Open Password
Step 1. Load the Locked PDF and Choose the Decryption Type
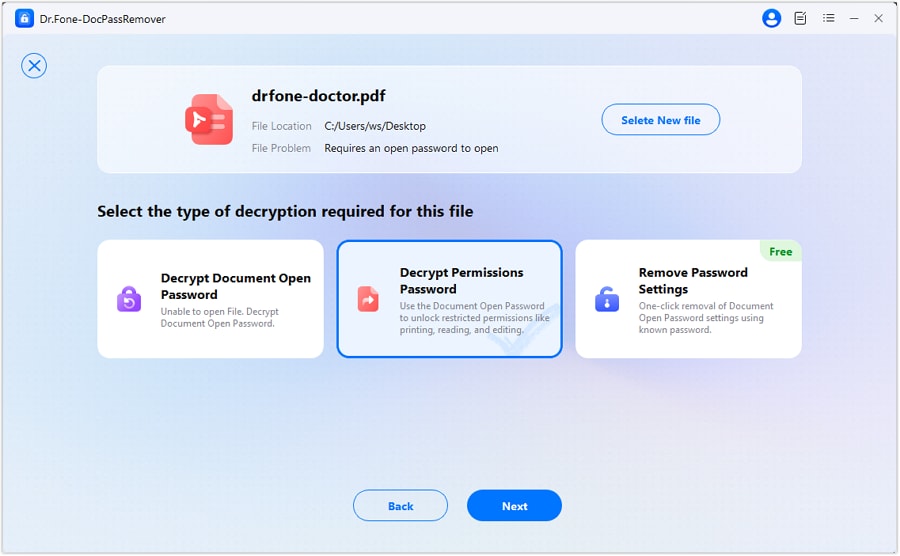
Get the operation going by running Dr.Fone – DocPassRemover and utilizing "Upload PDF File" to get the targeted document. Following that, choose "Decrypt Document Open Password" from the decryption types.

Step 2. Provide the Password Status & Select the Decryption Approach
Then, choose an option such as "I don't know anything about the password," depending on your knowledge about the lock code. Moving ahead, select the desired decryption method, like "Brute Force Decryption," to proceed.

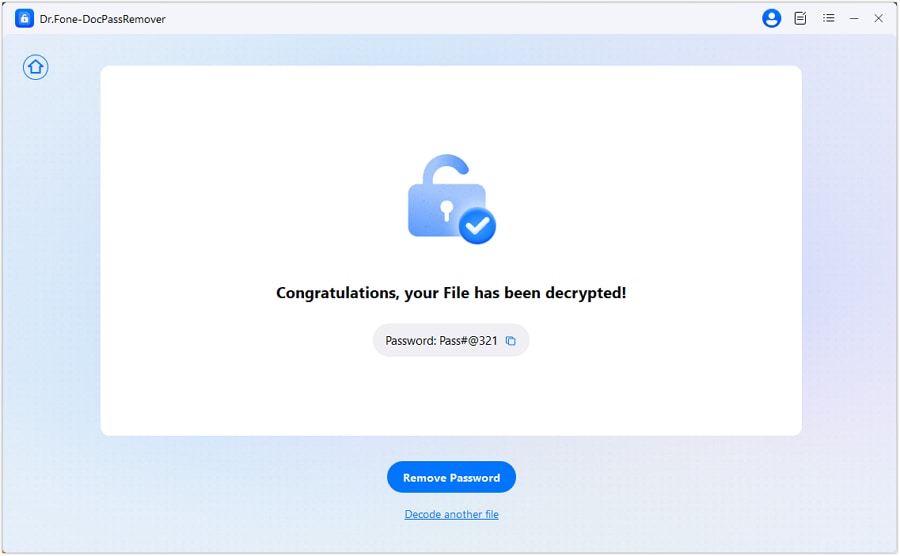
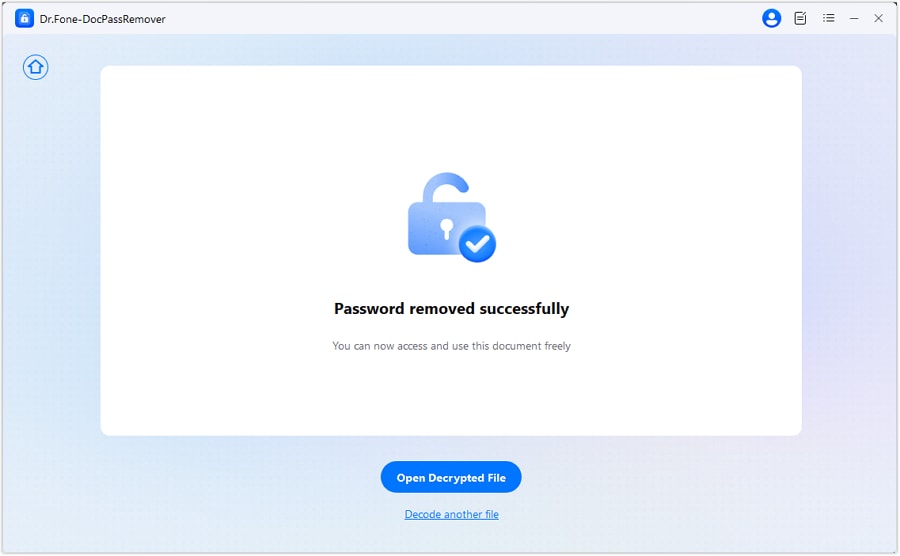
Step 3. Wait for The Document to Get Unlocked
At this point, the program will kickstart the operation to try different combinations to unlock your PDF. Once it is done, you can copy the provided document password or opt for "Remove Password" to get an unlocked file.
For the Permission Password
Step 1. Choose the Decrypt Permissions Password Option
As you run Dr.Fone – DocPassRemover, import the targeted locked document using the "Upload PDF File." Then, opt for "Decrypt Permissions Password" from the available choices to get started.
Step 2. Add the Open Password & Unlock the File
On the following screen, enter the required "Open Password" for the file and hit the "Start Decrypting" button. It will take the program a while to remove the restrictions, and you can access the unlocked file via "Open Decrypted File."
Part 3. Best Practices to Secure & Encrypt a PDF for Email
While encryption is a great first step, ensuring complete protection involves much more. Your PDF security also depends on how you manage and share it. Just setting a password isn't always enough, especially when dealing with highly sensitive content. Described below are some best practices to help you learn how to encrypt a PDF file for email:
- Use a strong and unpredictable password that is a mix of letters and numbers in a random sequence, complemented by allowed symbols.
- As a rule, never send the password for the locked PDF in the same email, but use a separate channel like messaging apps.
- Apply restrictions from editing to copying to maintain control over how your encrypted PDF is used after it's opened.
- Keep your encryption software updated to protect you against the latest security vulnerabilities and threats.
- Always double-check the recipient's email address to avoid sending your encrypted file to the wrong person by mistake.
- Use file expiry settings or open limits when available to restrict long-term access to sensitive PDF documents.
- Do not opt for public Wi-Fi when emailing encrypted PDFs unless there is no other choice, as unsecured networks increase the risk of cyberattacks.
Conclusion
In summary, securing your PDF files before sending them through email is more than just a precaution. It's a smart step toward protecting your sensitive information. When using native system tools or online platforms, the ability to encrypt a PDF for email ensures that only the right people can view or interact with your content. Following best practices like using strong passwords significantly reduces the risks tied to email sharing.
Still, no method is foolproof. If you are locked out of an encrypted PDF, Dr.Fone – DocPassRemover is a trusted solution. It handles both types of protection and works with various encryption standards to recover access quickly.
FAQ
-
Q: Is it safer to use both an open password and a permissions password on a PDF?
A: Absolutely! Using both types of lock codes adds layers of much higher protection. One of these prevents unauthorized opening, while the other controls actions like editing or printing. Opting for such a dual approach significantly reduces the risk of any unwanted access or alterations.
-
Q: How can I ensure the recipient doesn't share the encrypted PDF or its password?
A: While you can't control the other person's actions entirely, you can add watermarks. These are used to indicate confidentiality and communicate the importance of keeping the document private. As for a general rule, building trust and setting clear expectations are key.
-
Q: Does encrypting a PDF also protect its metadata?
A: That is not the case, as most of the standard security measures only apply to the content inside the document. The metadata, including information like the author's name or document creation date, remains unprotected. Hence, consider removing or editing metadata before sharing the PDF if you do not want to share it with anybody.


Ahmed Absal
staff Editor
Generally rated4.5(105participated)