
![Top 6 Methods: How to Edit a Locked Word Document [2026]](https://images.wondershare.com/drfone/article/2025/06/edit-locked-word-document-1.jpg)
 TL;DR:
You can edit a locked Word document by entering the password in the Restrict Editing menu, or bypass unknown passwords by modifying the document's XML code, uploading it to Google Docs, or using dedicated decryption software.
● To manually disable protection within the file structure, rename the .docx extension to .zip, extract the contents, open the word/settings.xml file in a text editor, and change the enforcement value from 1 to 0 before reverting the extension back to .docx.
● Uploading the restricted document directly to Google Docs automatically bypasses permission limitations, allowing full editing access without requiring any technical file modifications.
● For documents with unknown passwords, third-party tools like Dr.Fone - DocPassRemover can remove editing restrictions and decrypt open passwords by utilizing a Dictionary Attack to process a wordlist and unlock the file.
Ask AI for a summary
 ChatGPT
 Perplexity
 Gemini
 Claude
 Grok
Grok
Many times, you try to open a document only to find out you cannot change anything in it. This happens because the document is locked or protected with permission settings from the creator. In such situations, you might see that editing is disabled, or you are unable to select certain text or elements within the document. Consequently, you cannot access the data or make changes to the targeted file.
Since this is especially an issue with corporate documents that need quick access and editing, this article will discuss it in detail. You will learn about how to edit a locked Word document using different methods, including built-in options and other solutions. Furthermore, we will share an advanced password-removal tool that enables users to access their locked documents without knowing the password.
In this article
Part 1. How Can a Locked Word Document Hinder Your Workflow?
A locked Word document will not allow users to change any text or other elements within the file without entering the correct password. Subsequently, you might not be able to make important changes before a deadline if the document belongs to a team or company. Furthermore, such documents prevent you from filling in forms or copying content for reuse in another file.
Similarly, in a work or school environment, locked documents can slow down your tasks and prevent access to important information. Since you have to wait for someone to provide you access, it delays the work and leads to missed deadlines. Due to all these issues and to improve the workflow, you must learn how to edit a protected Word document.
Part 2. How To Edit a Protected Word Document Using Microsoft Word
Microsoft Word has a built-in Restrict Editing feature, which limits what others can do with the document. Users who know the password of the locked document can use it within the word processing tool to remove the editing restrictions. Learn how I can edit a locked Word document with these steps within the tool:
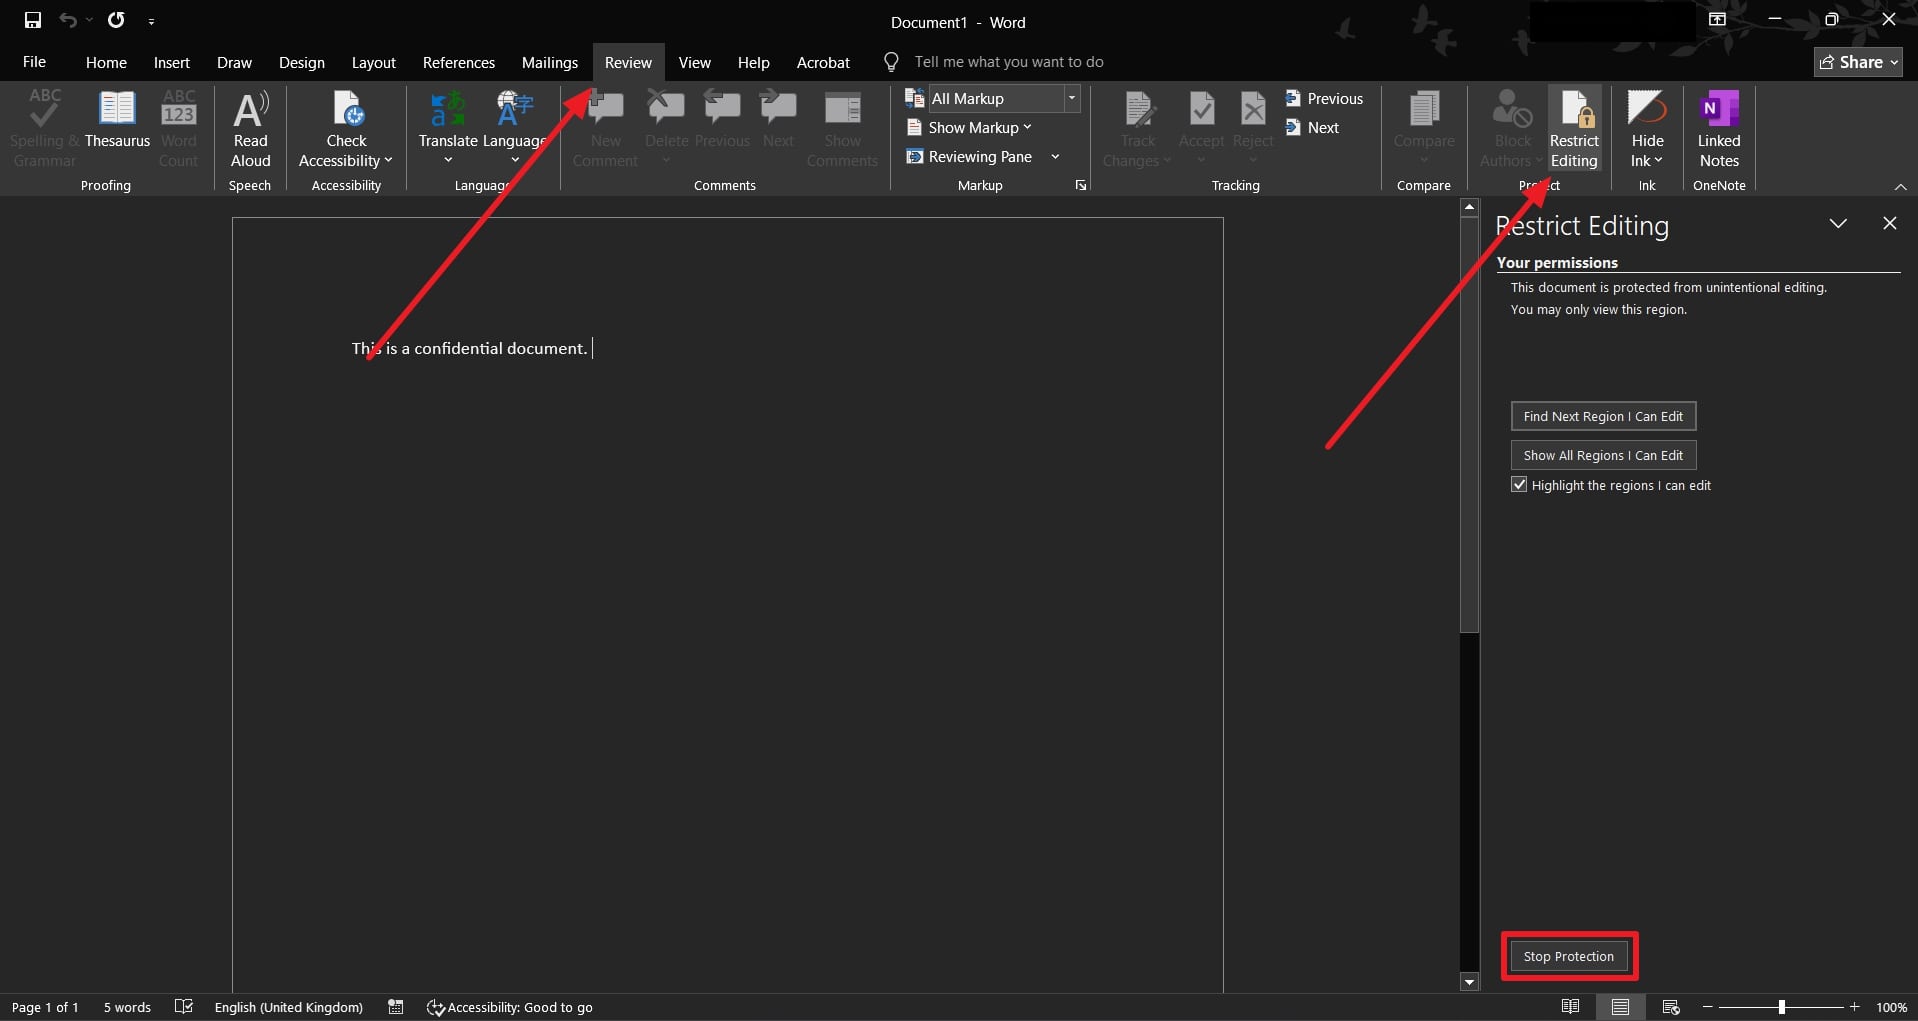
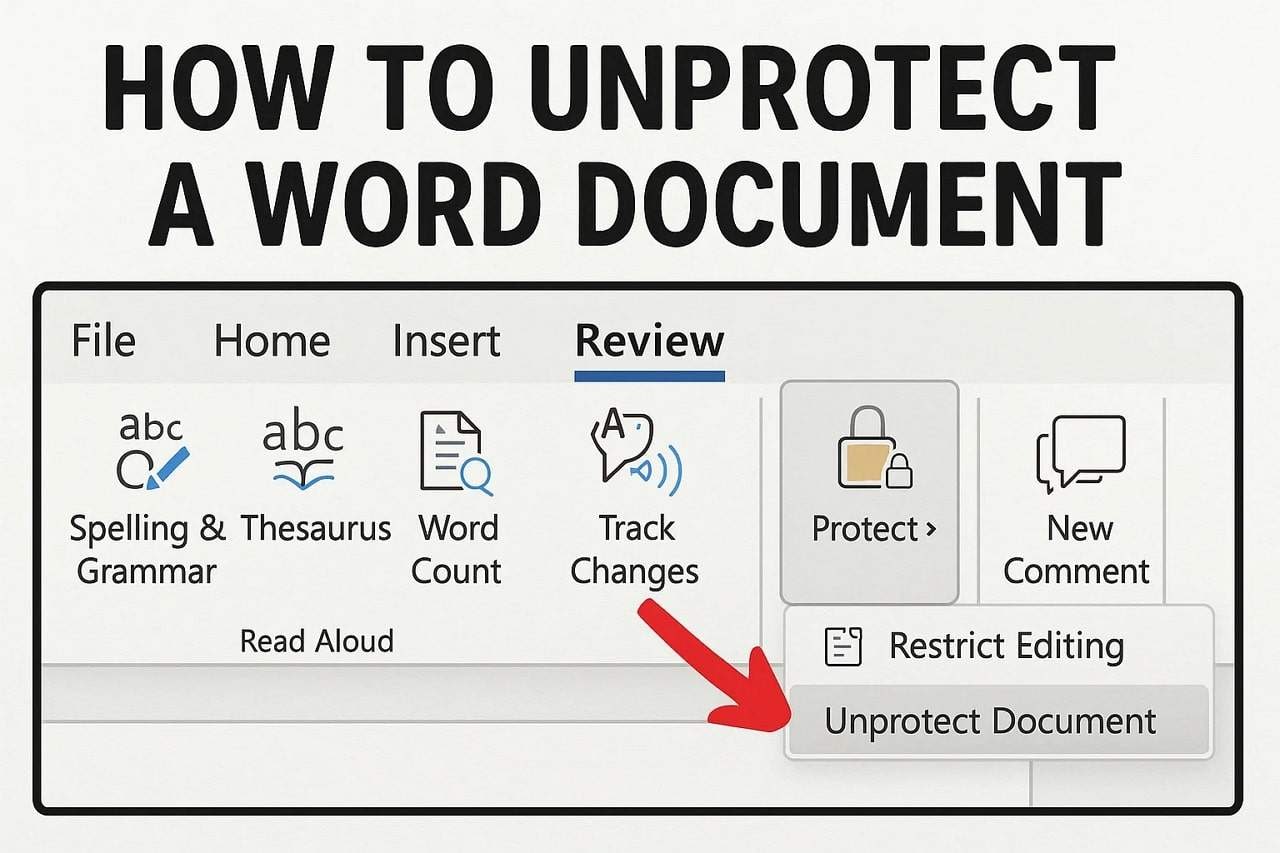
Step 1. Open the protected document in MS Word and head to the "Review" tab. Afterward, click the "Restrict Editing" option and press the "Stop Protection" button.
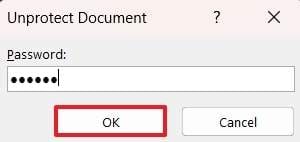
Step 2. Enter the password in the "Unprotect Document" pop-up and press the "Ok" button.
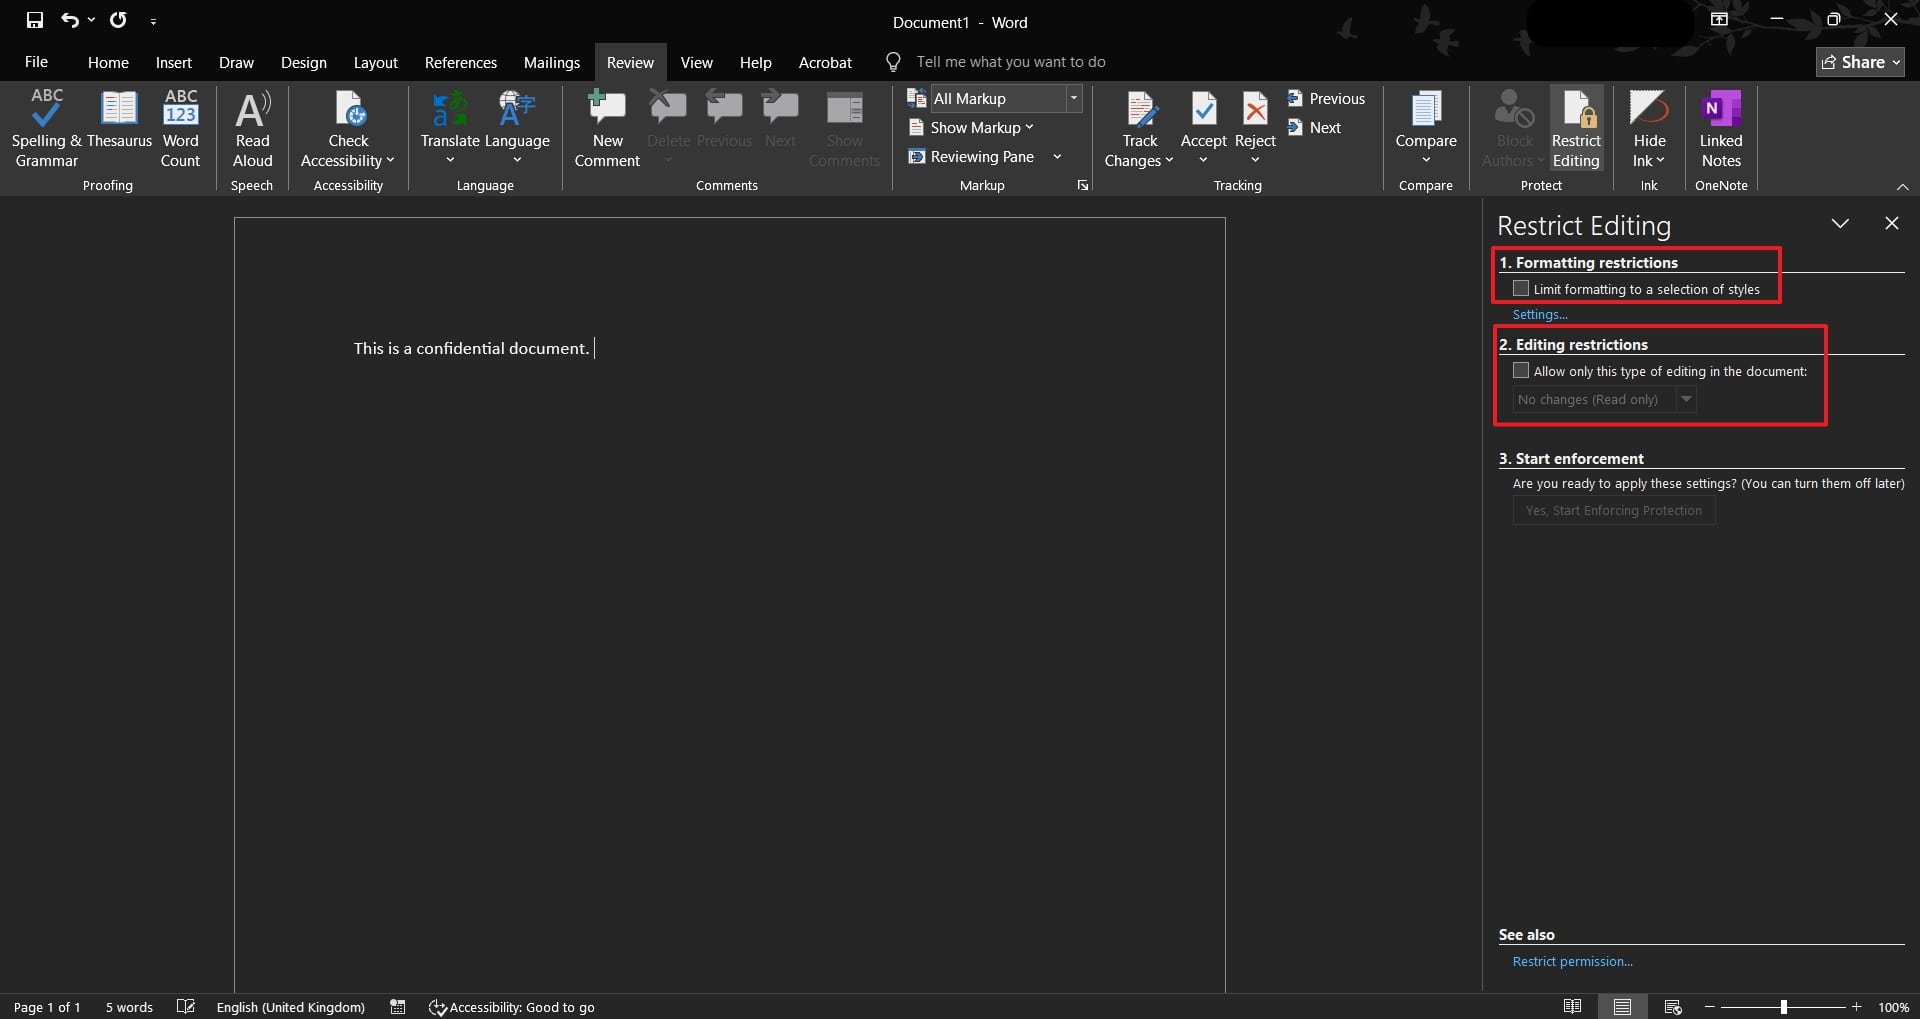
Step 3. Following that, ensure the "Formatting Restrictions" and "Editing Restrictions" options are disabled to end the process.
Pro Tip. How to Edit a Restricted Word Document Without Knowing the Password?
When you don't know the password, the only solution is to use tools like Dr.Fone - DocPassRemover, which enables users to unlock their documents without any key. The tool offers 3 different approaches to unlock the files, which not only remove the password protection but also the permission restrictions.
Dr.Fone - DocPassRemover
Decrypt open passwords, remove restrictions & passwords - all in one go!
- Convert secured PDF to PDF even if you don't know the open password.
- The "Remove Password" feature is free when the password is already known.
- Automatically detects the PDF file's name, location, and specific lock status.
- Removes permission restrictions like editing, printing, and copying.
- Clean and easy interface, perfect for all users—no technical skills needed.
Guide to Using Dr.Fone - DocPassRemover to Unlock Your Word Files
Using this solution, let's now learn how do I edit a protected Word document without any password through the following steps:
01of 03Import the Locked File into the Tool
Within the tool, import the locked Word document by pressing the "Select the File" button.

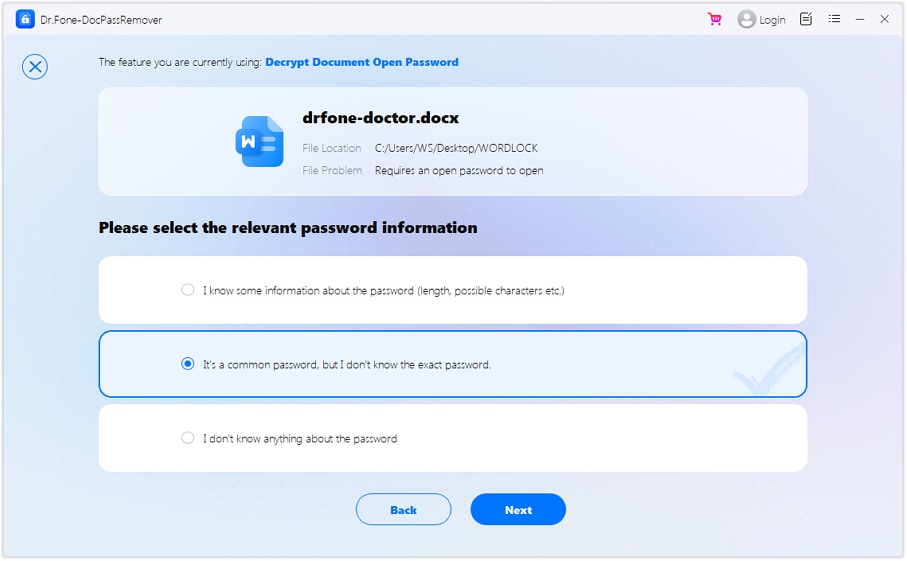
02of 03Provide Relevant Password Information
Afterward, choose the "It's a Common Password, But I Don't Know the Exact Password" option and hit the "Next" button.
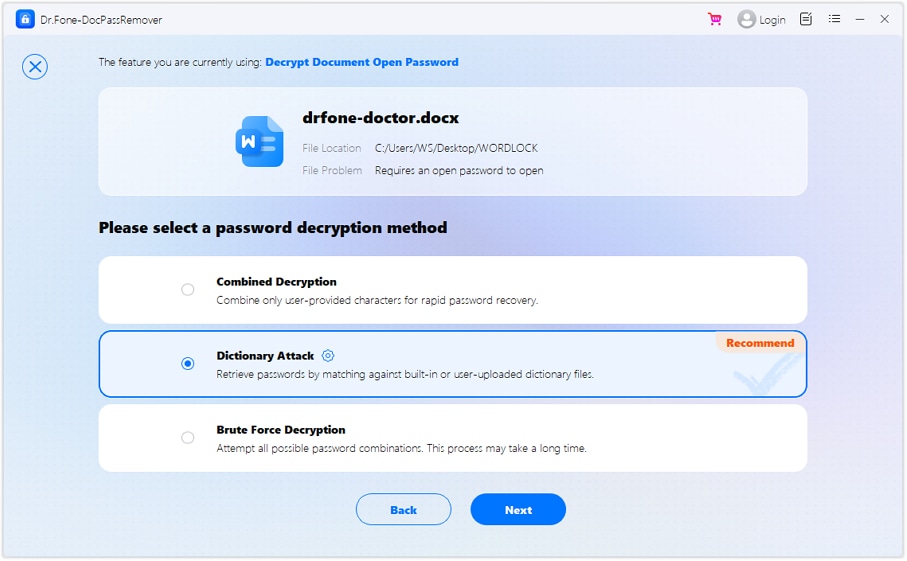
03of 03Choose the Suitable Password Decryption Method
Following that, utilize the "Dictionary Attack" feature and hit the "Next" button to download the wordlist and unlock the document.
Part 3. How Can I Edit a Locked Word Document: 4 Ways
Although DocPassRemover is recommended when you don't know the password, many other solutions work to allow edit access to your document. You can learn how can I edit a protected Word document using these additional methods through the following sections:
Method 1. Open the Locked Word Document in WordPad
Even though it is removed from newer versions, WordPad is a basic text editor that used to come with Windows systems. You can open your protected documents in this tool through the given guide to remove formatting and security settings if it is still accessible.
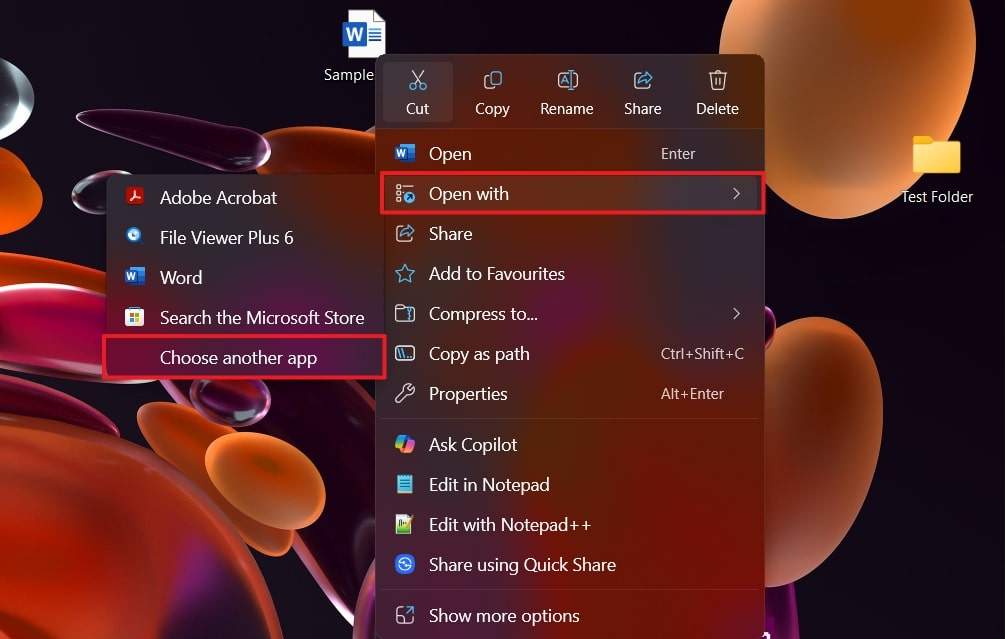
Step 1. Start by right-clicking on the locked Word file and choosing the "Open With" option. Following that, proceed with the "Choose Another App" option.
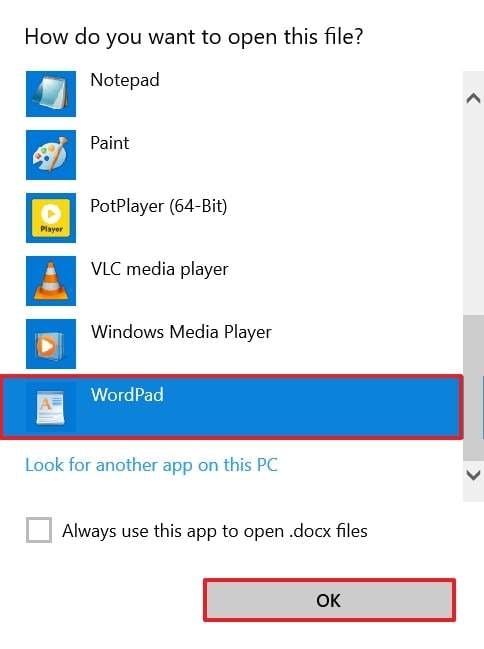
Step 2. Once all the available apps pop up, choose "WordPad" and hit the "Ok" button.
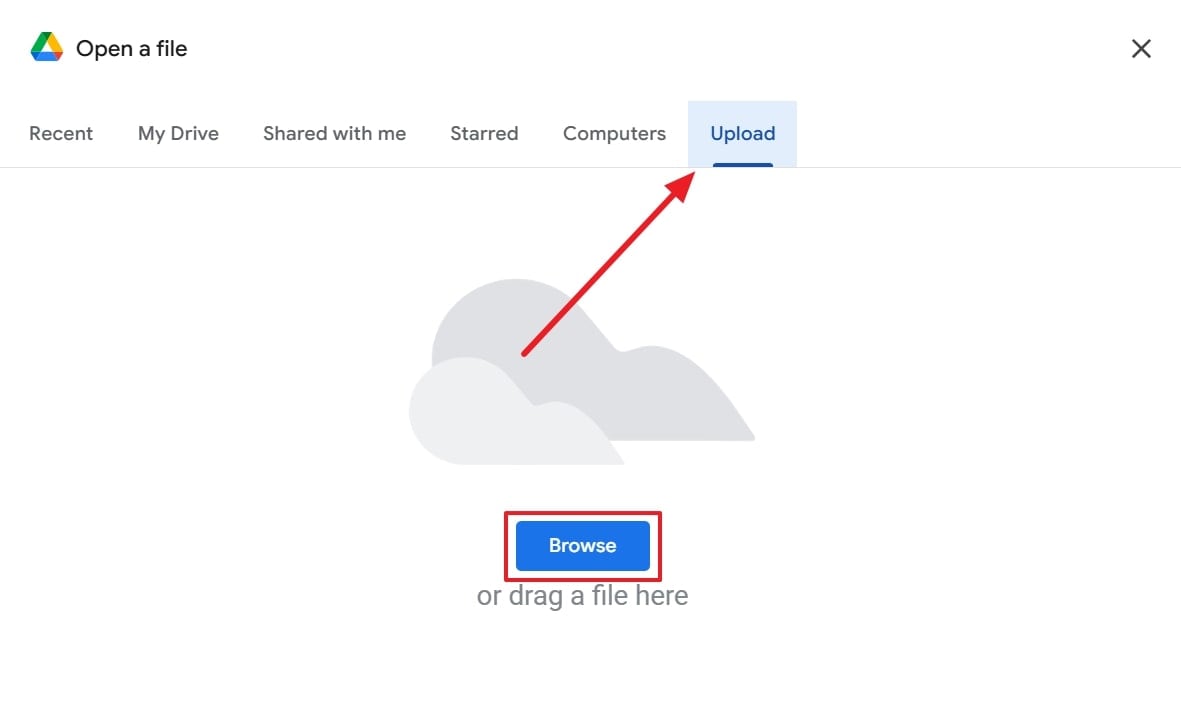
Method 2. Upload the Locked Word Document to Google Docs
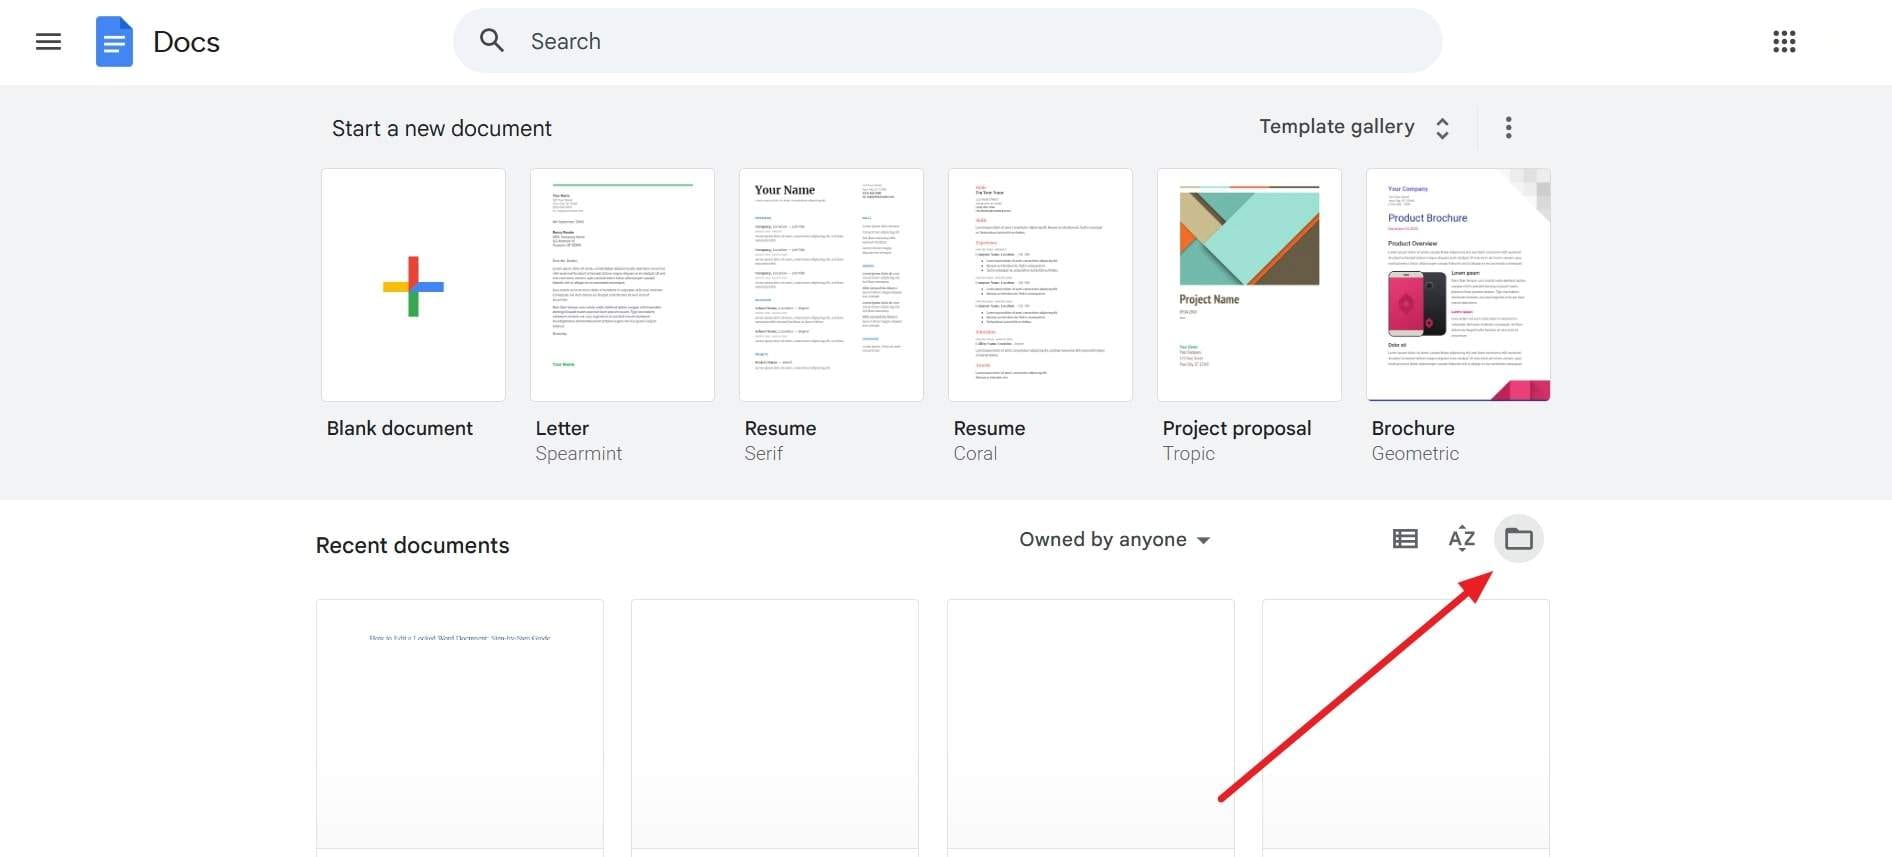
Another option is to use an alternative word processing tool and upload your file into it, which often removes permission restrictions. The ideal alternative is Google Docs, which works online and allows editing documents without any restrictions. Here is how to edit a restricted Word document by uploading it into Google Docs:
Step 1. Upon accessing the online workspace, hit the "Open File Picker" button.
Step 2. Following that, go to the "Upload" tab and tap the "Browse" button. Afterward, choose the protected Word file from your storage and press the "Open" button to upload it.
Method 3. Resave the Protected Word file as an RTF File
It's a good idea to convert the document into a Rich Text Format since it supports basic formatting but not advanced protection features. Similarly, doing so allows you to remove the password by opening it in any text editor. Learn how to edit a locked Word document by converting it into RTF format with these steps:
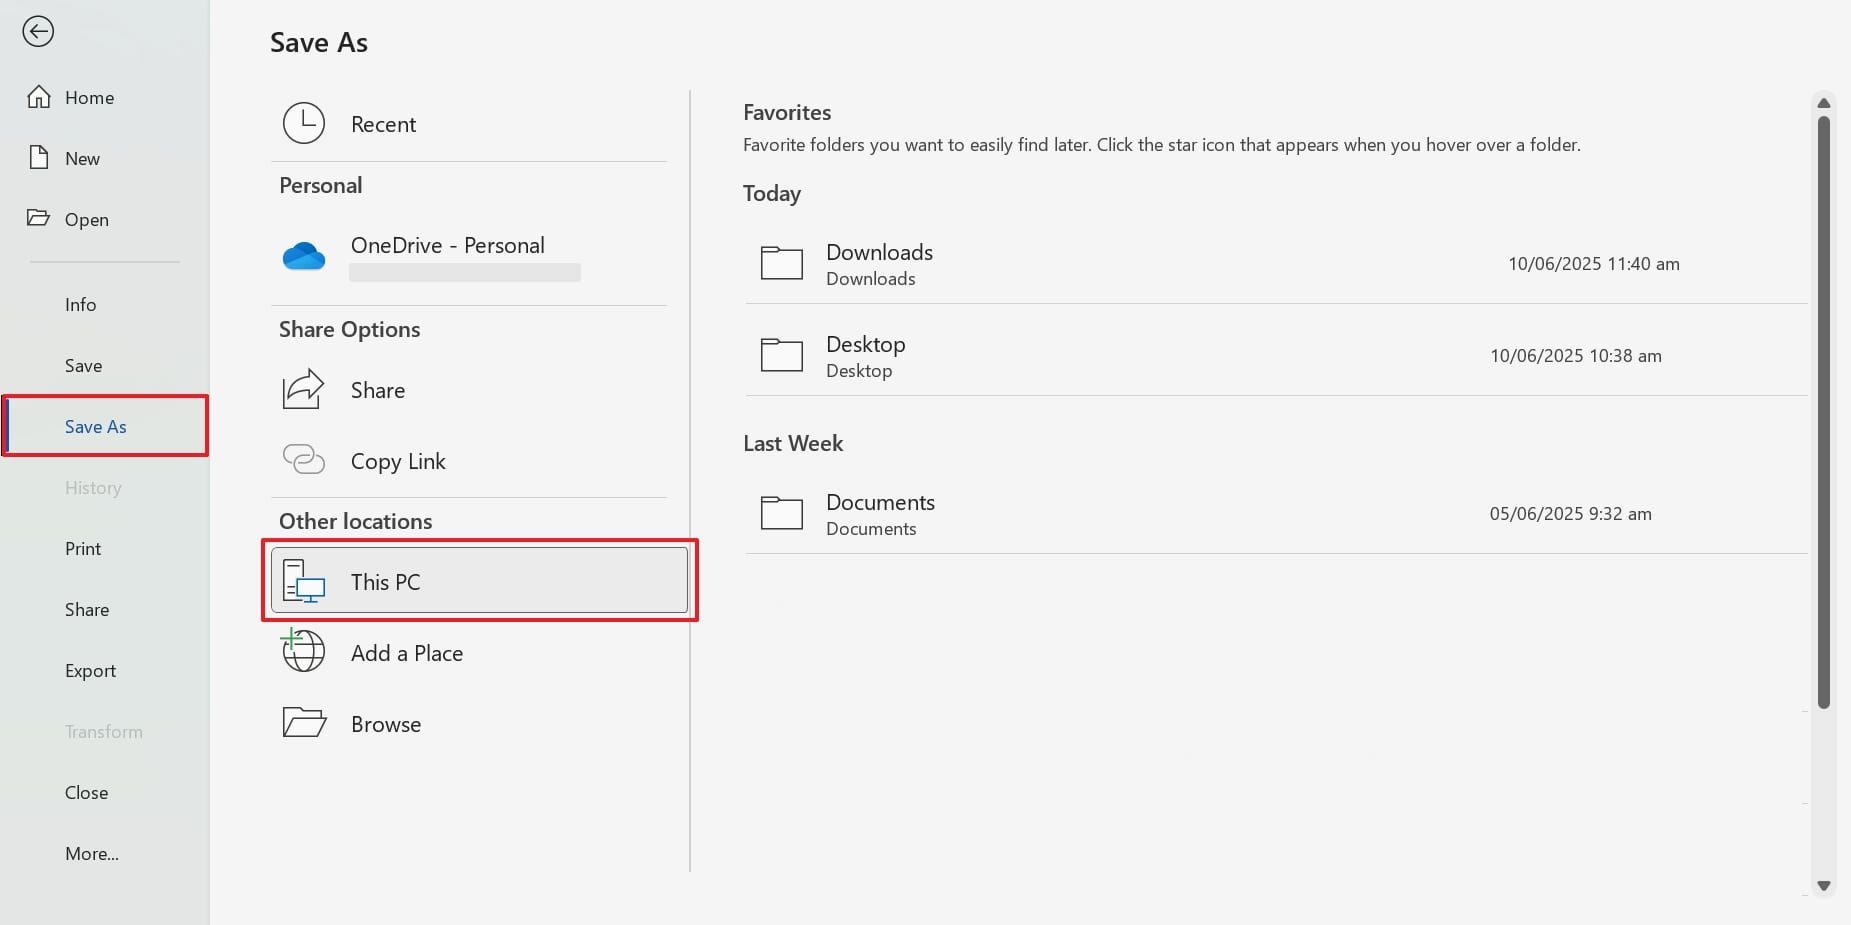
Step 1. To begin the procedure, open the locked document in Word and enter the "File" tab in the menu ribbon. Afterward, access the "Save As" tab and choose the "This PC" option to save the file there.
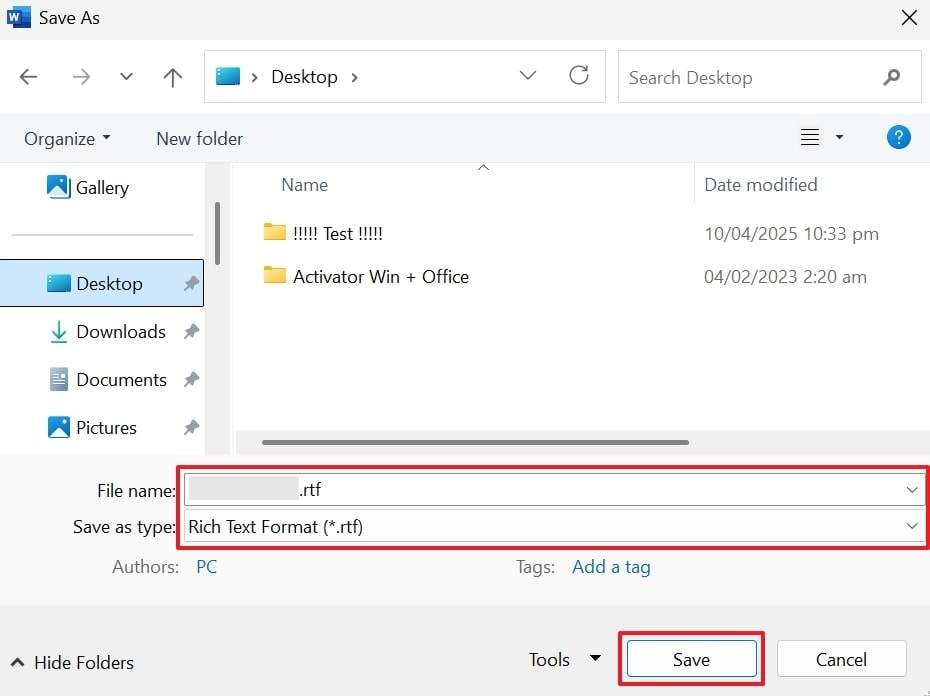
Step 2. Afterward, reveal the "Save As Type" drop-down, choose the "Rich Text Format," and hit the "Save" button.
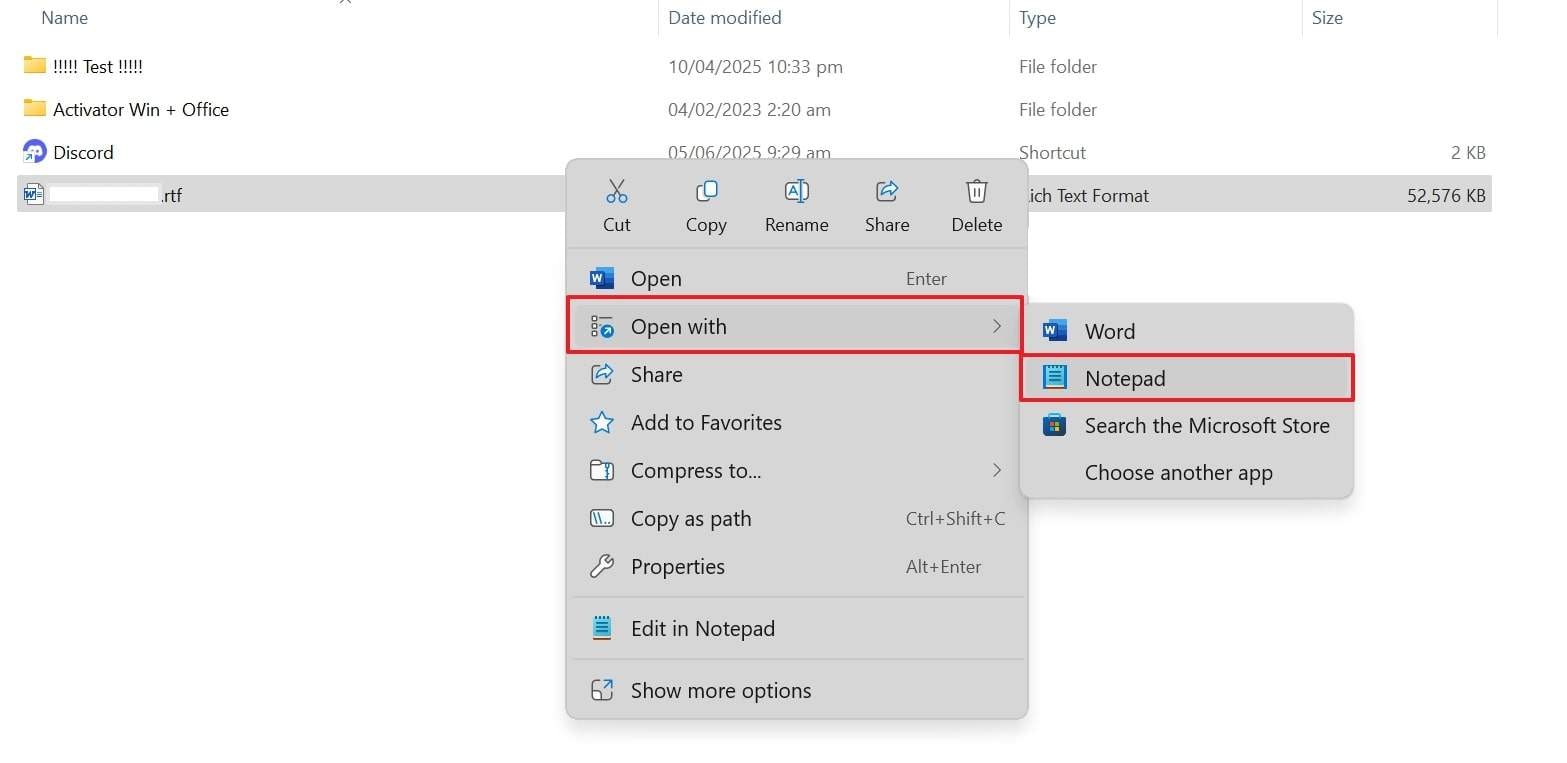
Step 3. Moving on, right-click the saved RTF file and choose "Notepad" using the "Open With" option.
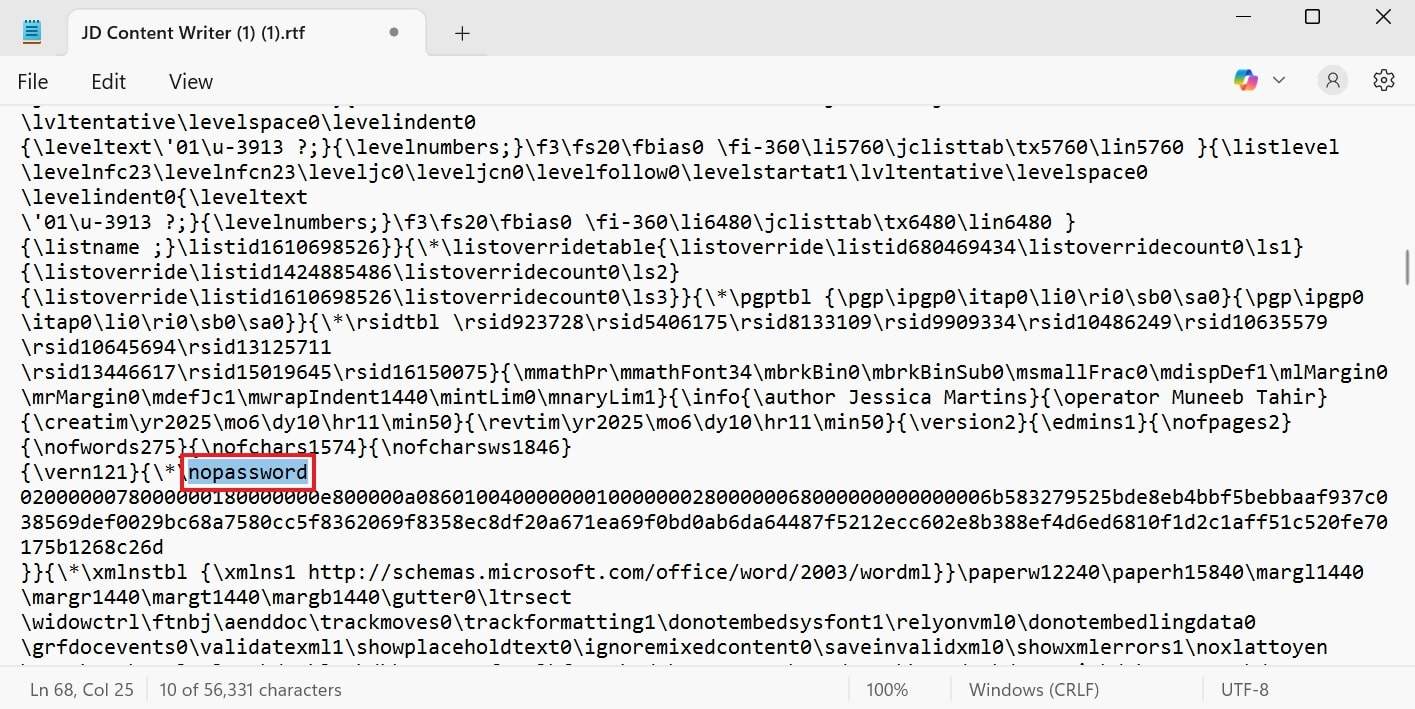
Step 4. Once done, click "CTRL + F" and search for "passwordhash" in the text.
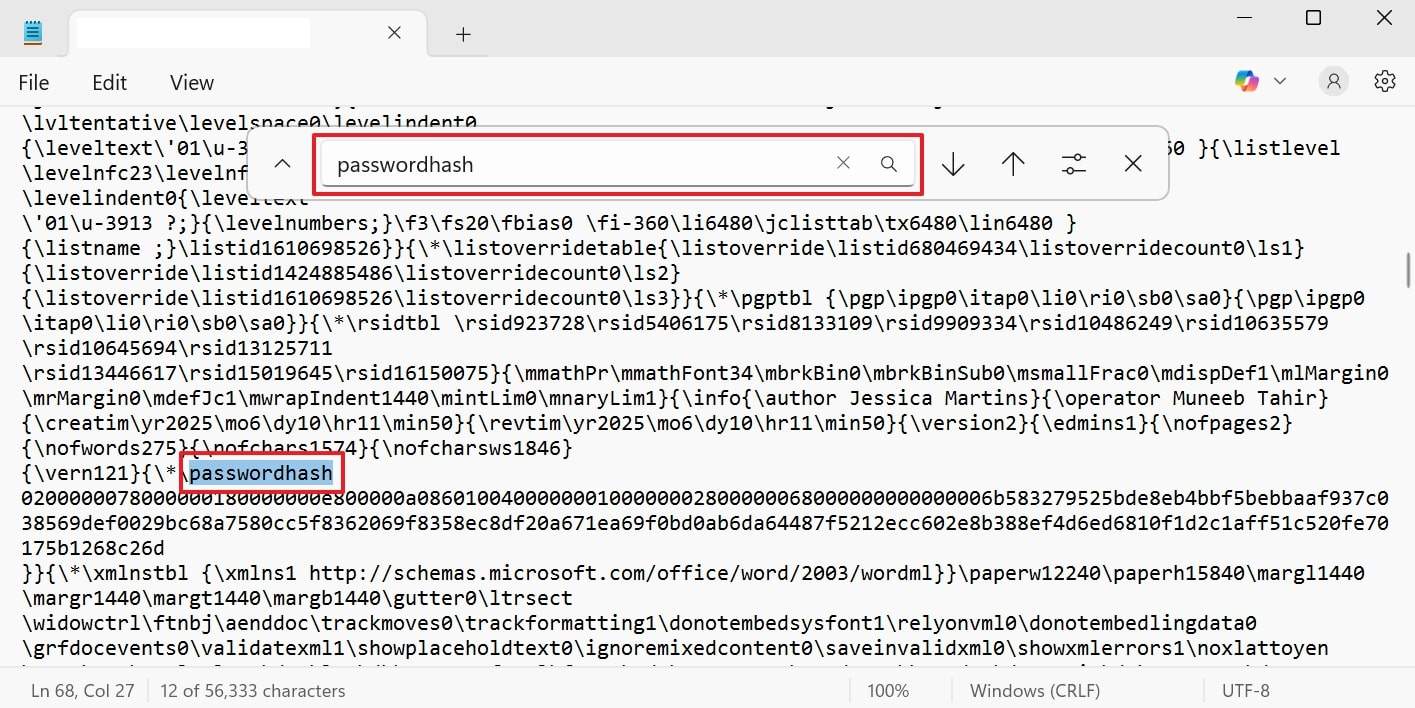
Step 5. Now, replace the selected text with "nopassword" and save the file in your storage. In the end, open it in Word and utilize the "Stop Protection" button under the "Restrict Editing" option in the "Review" tab.
Method 4. Modify the Document's XML Settings to Remove Editing Restrictions
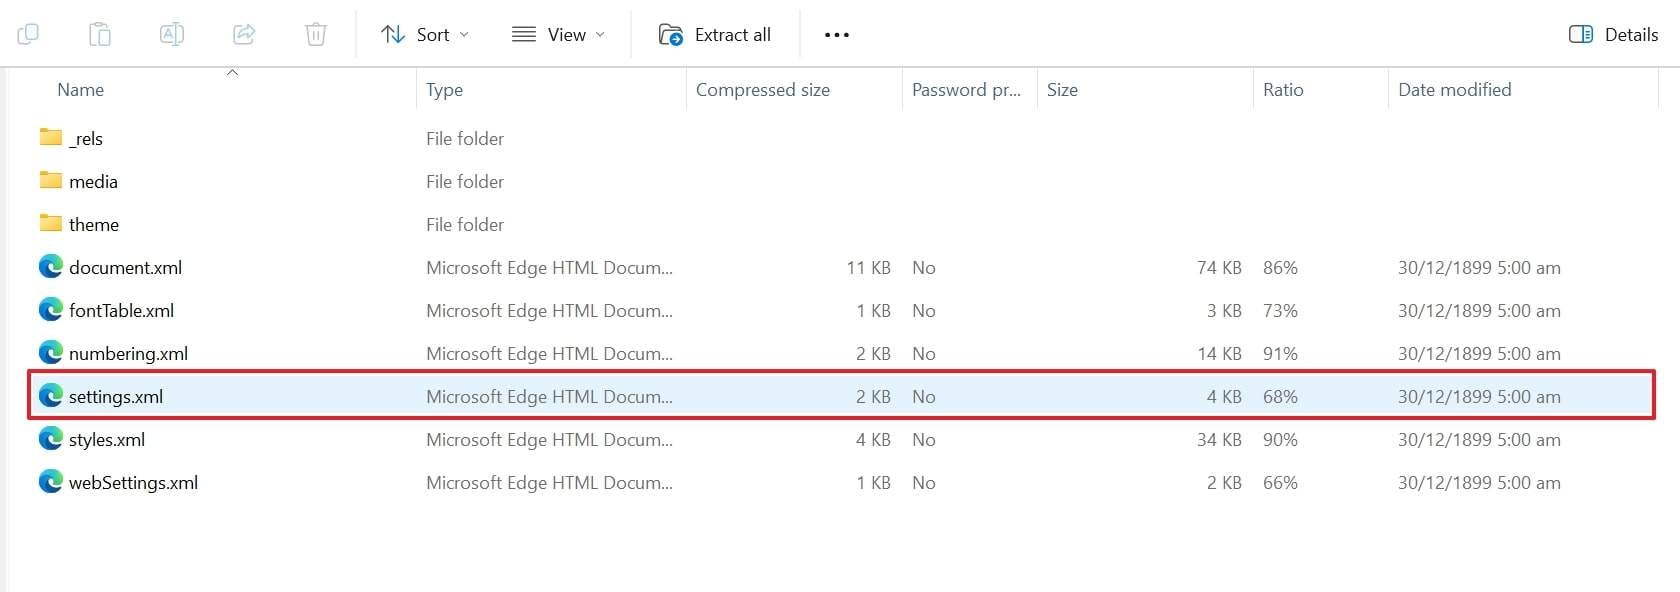
Word files that are stored in the DOCX extension are ZIP folders containing XML files. Consequently, you can rename these documents and change their extensions to ZIP format. Upon extracting them, you get various files that you can edit to remove the password protection. Here is how to edit a protected Word document with this method:
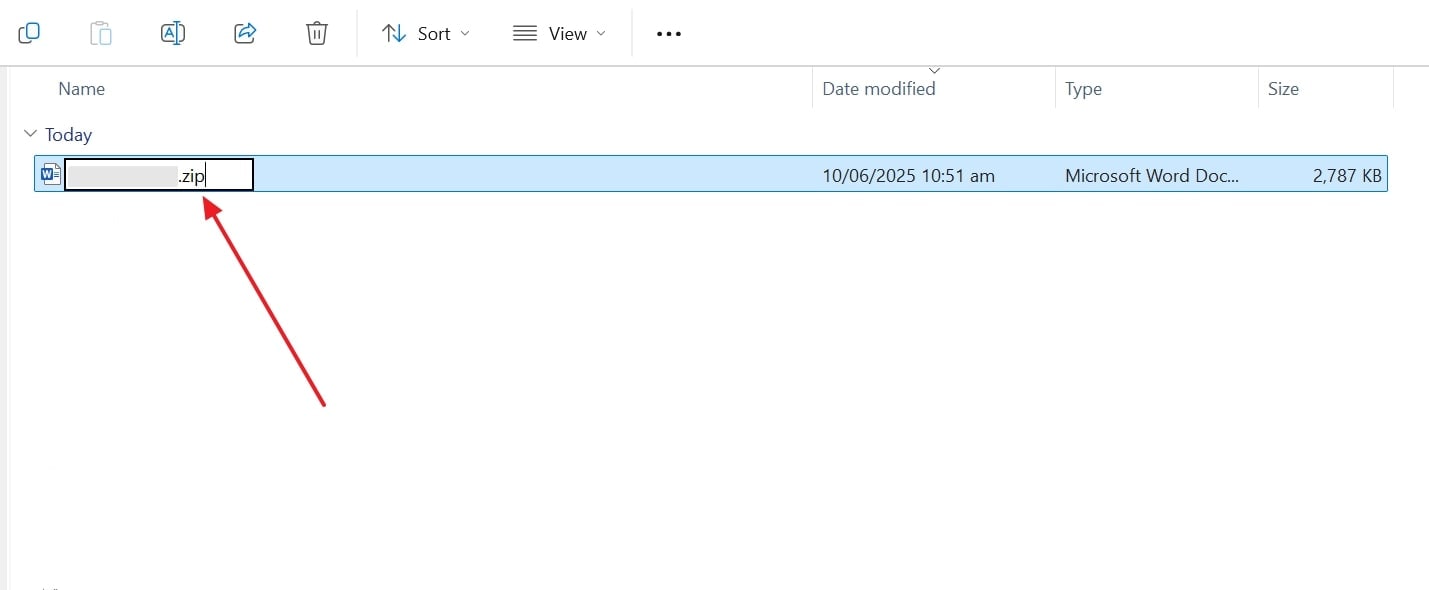
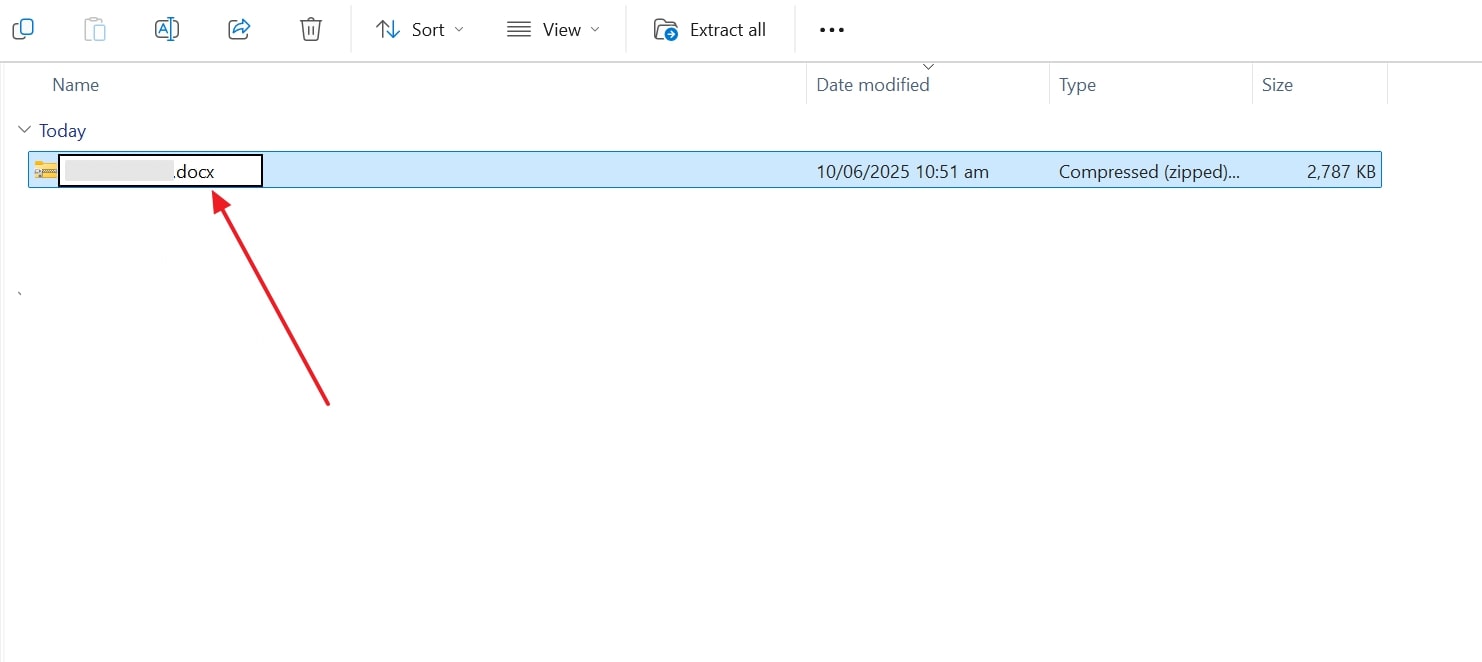
Step 1. Users must initiate by changing the file extension of the document from ".docx" to ".zip" and saving it.
Step 2. Afterward, extract the file and enter the "word" folder inside it.
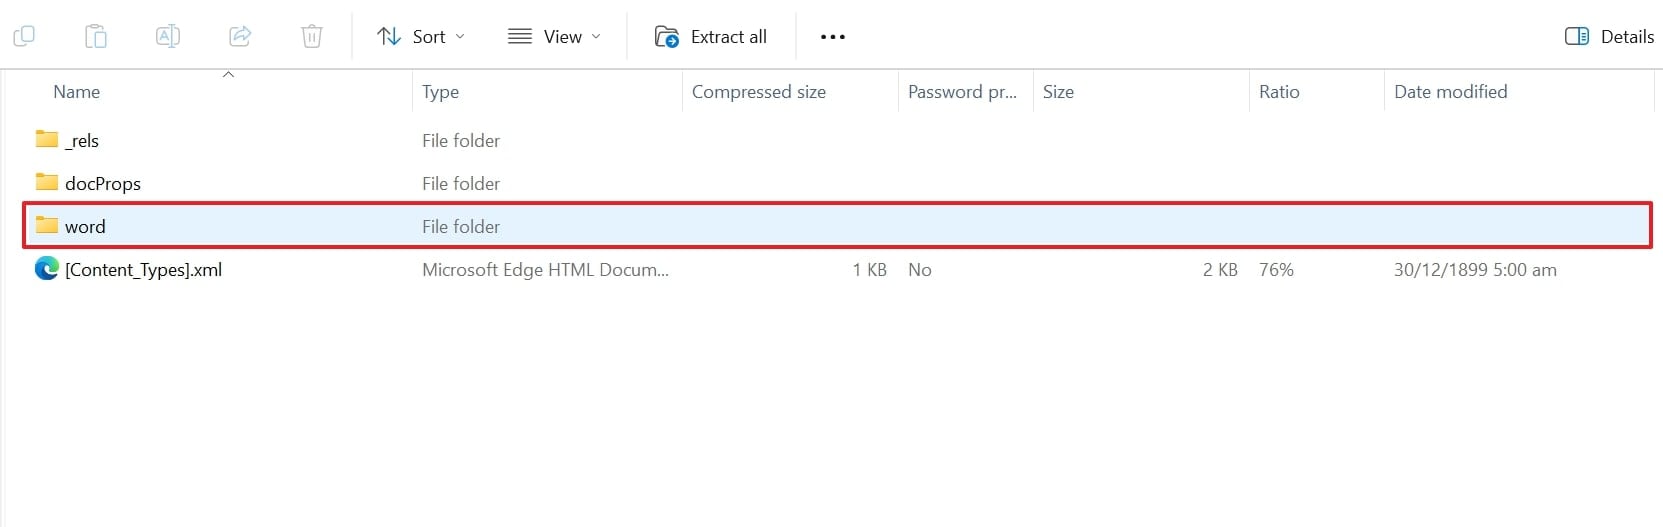
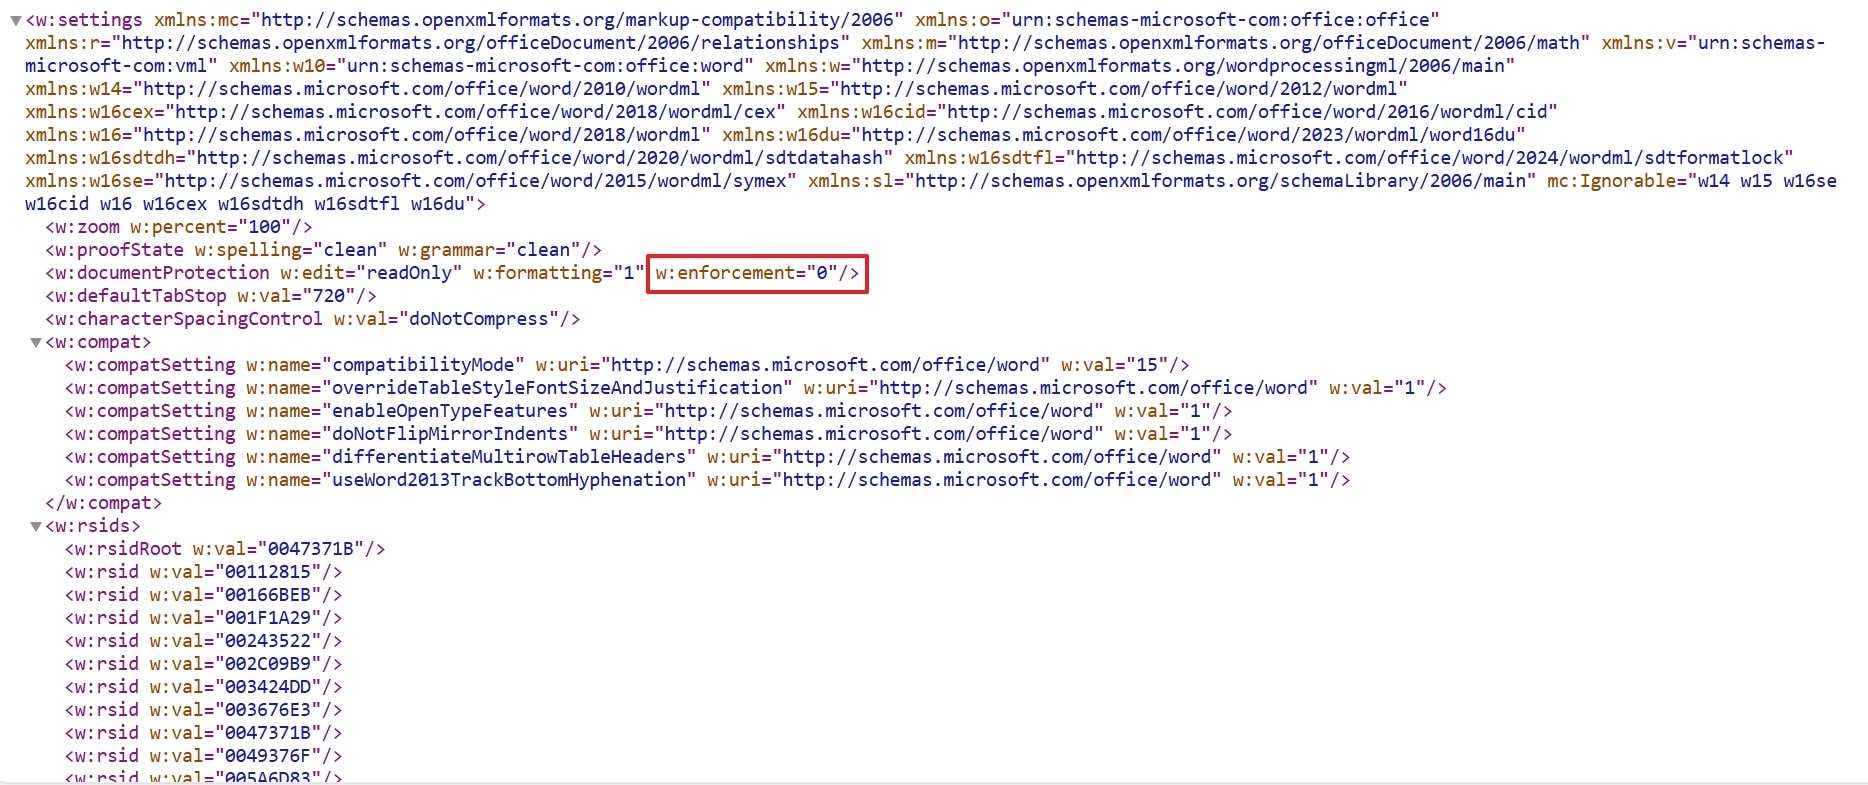
Step 3. Once you are inside the folder, double-click the "settings.xml" file to open it in any tool, such as "Notepad++."
Step 4. Afterward, press the "CTRL + F" buttons and search for "enforcement" in the text file. Upon finding it, change the value beside it from "1" to "0" and save the file.
Step 5. In the end, rename and change the extension from ".zip" to ".docx" and save the file.
Conclusion
To conclude, a protected file can prevent users from accessing its data, but ways on how to edit a locked Word document are still available. Methods like unlocking the file using a password within MS Word or opening it in Google Docs usually work. Furthermore, saving the file as an RTF file or ZIP format also worked. However, Dr.Fone - DocPassRemover is ideal as it works without needing a passcode.


Jane Lunes
staff Editor
Generally rated4.5(105participated)