
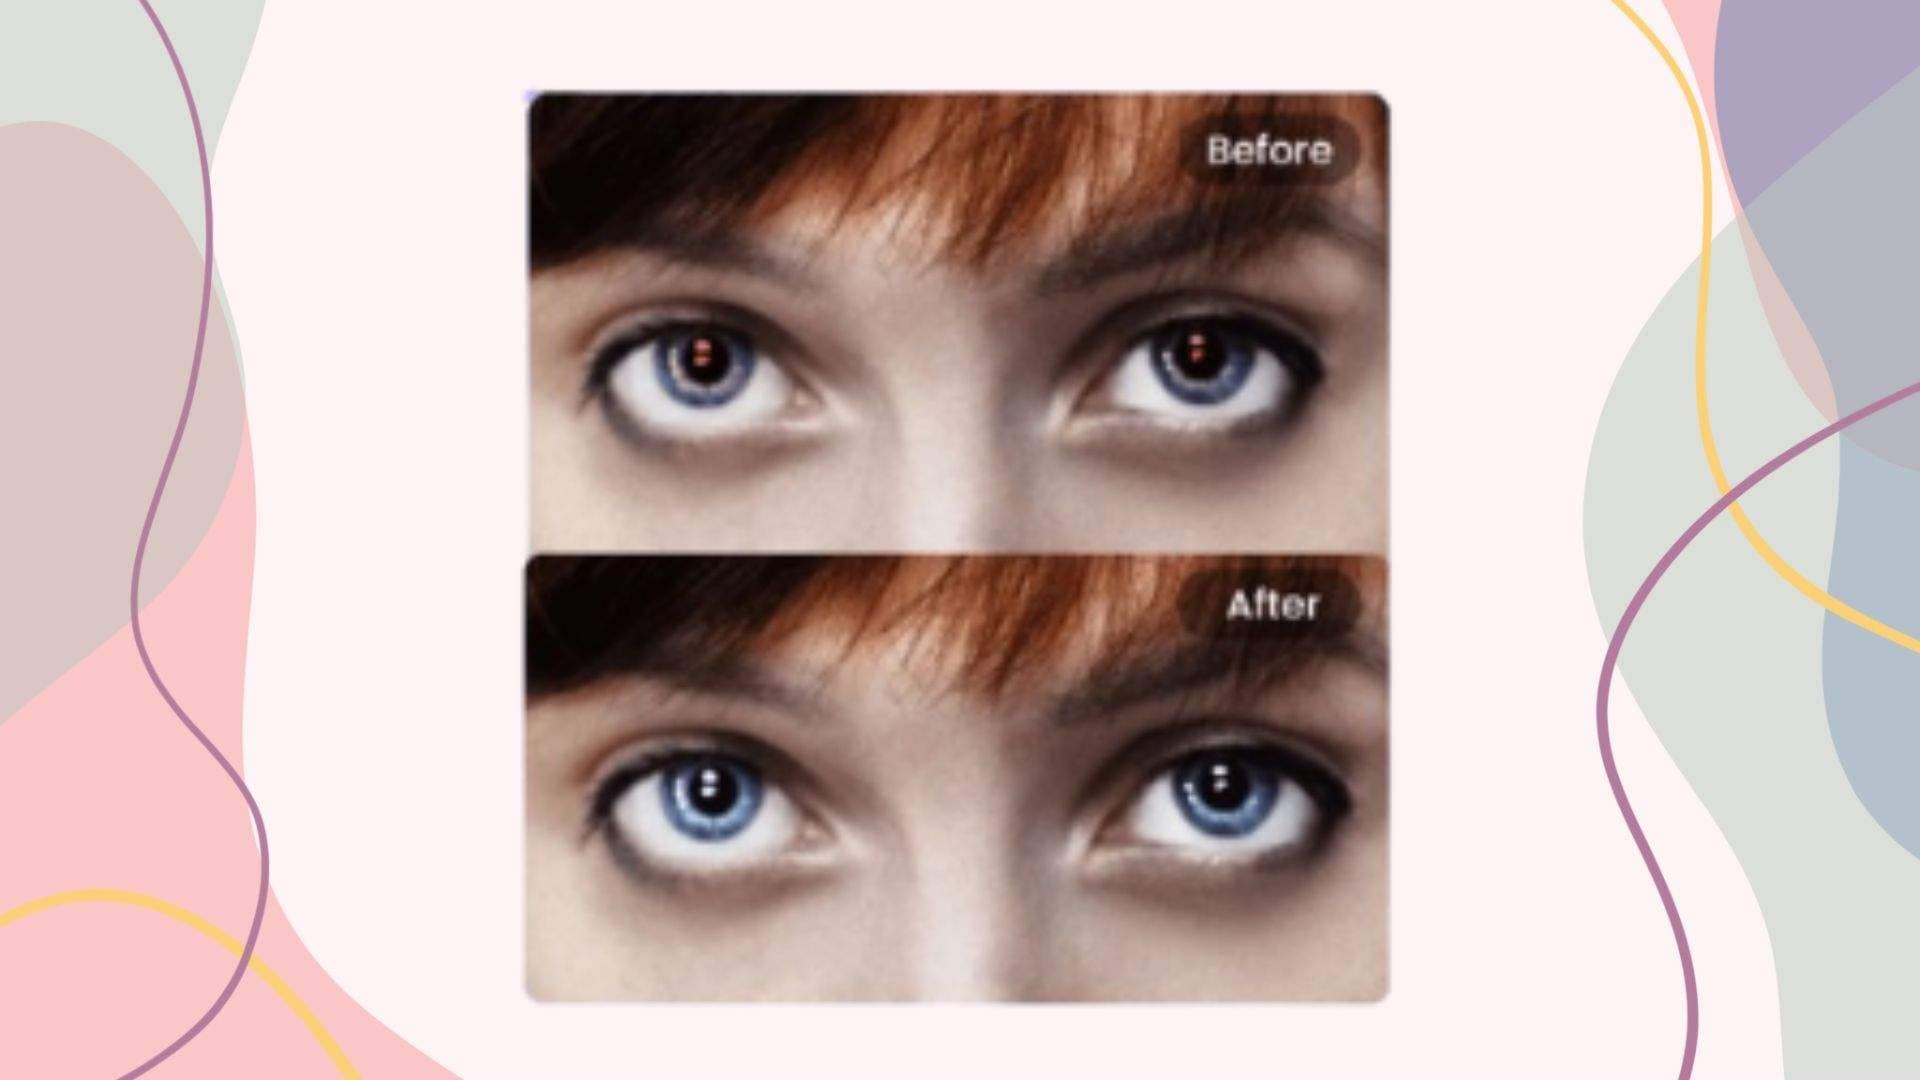
Red-eye in photos occurs when a camera flash reflects off a person's retina, creating an unnatural red glow in their eyes. This effect is common in low-light conditions and can make even the best pictures look unnatural.
Being knowledgeable on how to correct red eyes in photos is essential for enhancing photo quality and ensuring natural-looking portraits. Whether for personal memories or professional shots, knowing how to remove red eyes in photos can make a significant difference in the overall appeal of an image.
Moreover, the Dr.Fone app's AI Photo Enhancer provides advanced tools to enhance photo quality further. Utilizing AI-powered technology, it ensures your photos look flawless and professional.
In this article
Part 1: Understanding the Red Eye Effect
Red-eye occurs when a camera flash reflects off the retina, creating an unnatural red glow in the subject's eyes. This effect is most noticeable in low-light conditions and when using flash photography.
Why Does Red-Eye Occur in Low-Light and Flash Photography?
- Pupil Dilation: In dim lighting, the pupils expand to let in more light. When the flash goes off, the sudden brightness is reflected back from the retina.
- Flash Positioning: Most built-in camera flashes are close to the lens, making the reflected red light more prominent.
- Retina Reflection: The back of the eye contains blood-rich tissue, which reflects the flash, creating the red-eye effect.
Understanding these causes can help to prevent and be aware of how to remove red eyes from pictures, ensuring more natural-looking portraits.
Part 2: How to Remove Red Eye in Photos: Manual Methods
If your photos have red-eye and are frustrated with "how do i get rid of red-eye in photos", you can fix them using built-in editing tools on your smartphone or computer. Here are some simple manual methods to know how to get rid of red eyes in photos.
Using Built-in Red-Eye Removal Tools
Most smartphones and computers have built-in tools that will help you on how to get rid of red eye on photos.
- iPhone Photos App:
- Open the Photos app and select the photo with red-eye.
- Tap Edit, then select the Red-Eye Correction tool.
- Tap on the affected eyes to remove the red-eye.
- Save your changes.
- Android Google Photos or Gallery:
- Open Google Photos or your phone's Gallery app.
- Select the photo and tap Edit or Adjust (depending on your device).
- If a red-eye removal tool is available, use it to fix the issue.
- Save the edited image.
Editing with Desktop Software
For more precise control on how to get rid of red eyes in a picture, you can use built-in software on Windows or macOS.
- Windows Photos:
- Open the Photos app and select the photo.
- Click Edit & Create, then choose Edit.
- If the red-eye removal tool is available, apply it and save the image.
- macOS Photos:
- Open the Photos app and double-click the image.
- Click Edit, then select Red-Eye Correction.
- Click on each red-eye area to remove the effect.
- Save your changes.

These manual methods offer quick and effective ways on how to fix a red eye in a picture without needing third-party software.
Part 3: How to Remove Red Eye from Pictures: Using Third-Party Apps
If built-in tools don't give the desired results, third-party apps provide more precise and advanced red-eye correction features. These apps offer greater control, allowing you to fine-tune edits and be mindful of how you get rid of red eyes in photos. Whether you're editing on a smartphone or a computer, there are several effective tools available that will help you on how to fix red eyes in photos.
Best Mobile Apps for Red-Eye Correction
Many mobile photo editing apps offer dedicated red-eye removal tools. These apps provide quick fixes and additional enhancements to improve the overall quality of your pictures.
- Snapseed (iOS & Android): Snapseed is a free, professional-grade photo editing app developed by Google. It features a variety of tools, including the Healing Tool, which can effectively remove red-eye. The app is known for its simplicity and ease of use, making it a great option for quick edits.
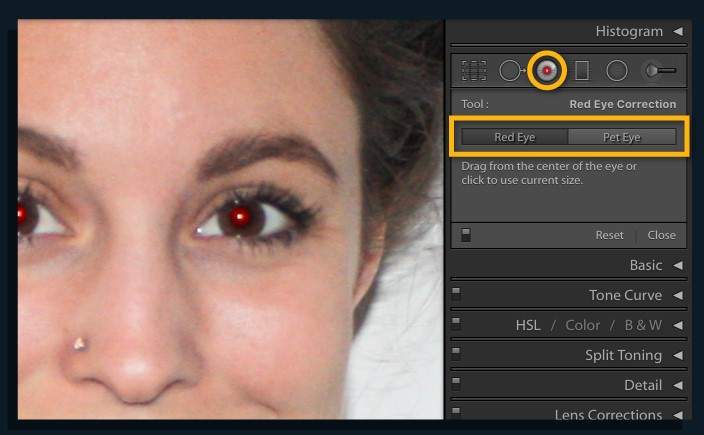
- Adobe Lightroom (iOS & Android): Adobe Lightroom is a powerful mobile photo editor designed for professional-quality image enhancements. It includes advanced correction tools, including a Red Eye Removal feature, which allows users to fix red-eye with a single tap. Lightroom also offers additional color adjustments to ensure the most natural-looking results.
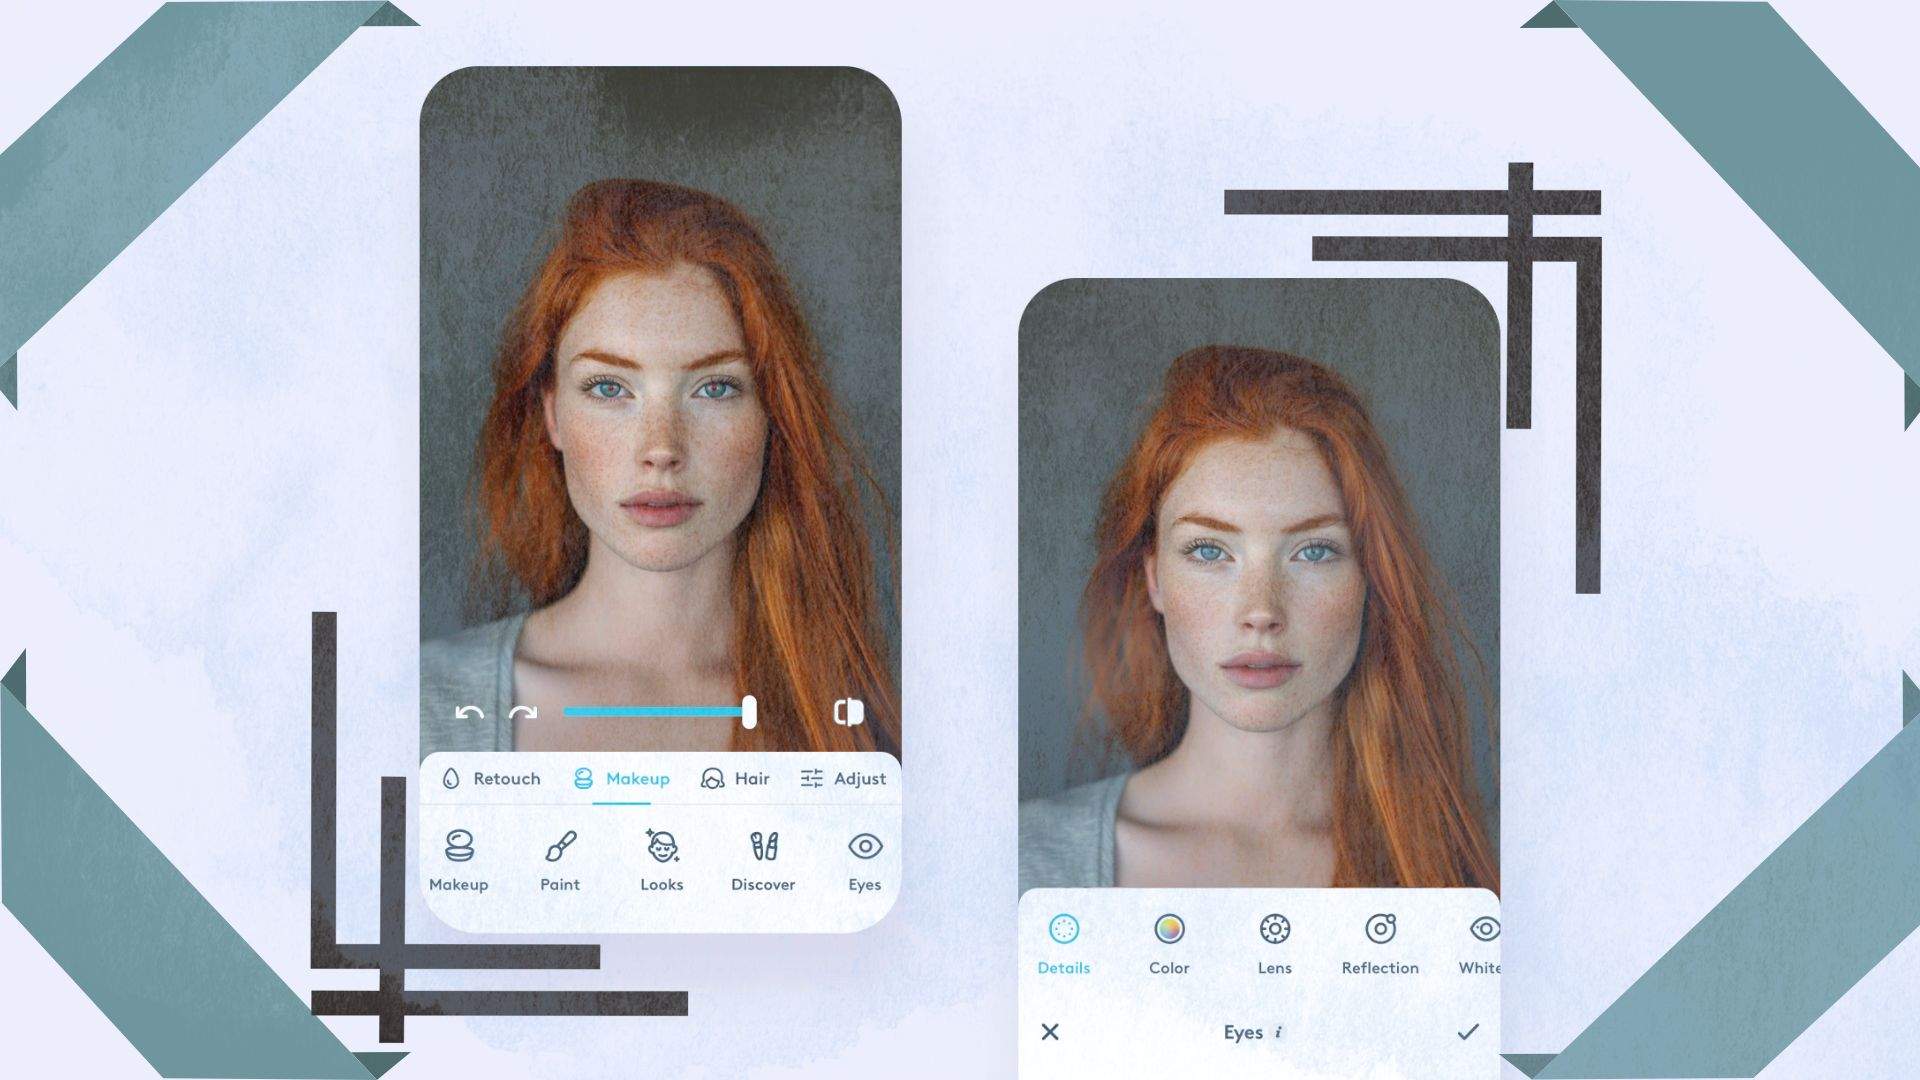
- Facetune (iOS & Android): Facetune is a portrait-enhancing app that provides various retouching tools, including red-eye correction. This app is specifically designed for enhancing selfies and portrait shots, making it a great option for those looking to fix red-eye and improve facial features simultaneously.
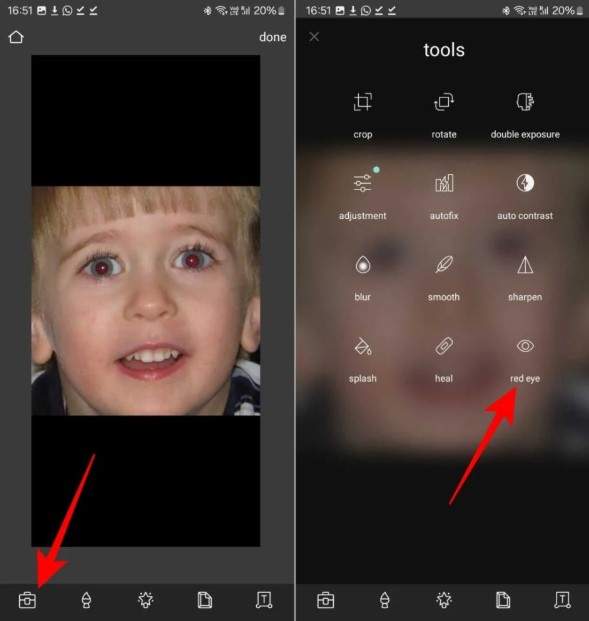
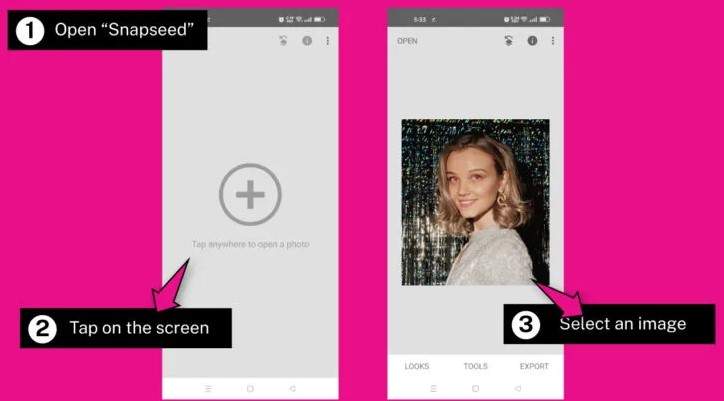
How to Remove Red Eye Using Snapseed
- Open the Snapseed app and import the photo.
- Tap on Tools, then select Healing.
- Zoom in on the red-eye area and tap to apply the correction.
- Review the changes and save the edited image.
Best Desktop Solutions for Red-Eye Removal
For more advanced editing and precise control on how to fix red eyes in pictures, desktop software provides professional-grade red-eye correction tools. These programs allow users to make detailed adjustments, ensuring a natural and realistic look.
- Adobe Photoshop: Adobe Photoshop is one of the most powerful image editing software available. It includes a dedicated Red Eye Tool, which automatically detects and removes red-eye from photos. In addition to red-eye correction, Photoshop offers numerous other features for enhancing and refining images.
- GIMP: GIMP (GNU Image Manipulation Program) is a free, open-source alternative to Photoshop. It provides various photo editing tools, including a Red Eye Removal filter. While GIMP requires more manual adjustments compared to Photoshop, it is a great option for users looking for a cost-free solution.
How to Remove Red Eye Using Adobe Photoshop
- Open the photo in Photoshop.
- Select the Red Eye Tool from the toolbar (found under the Spot Healing Brush Tool).
- Click on the red-eye area, and Photoshop will automatically apply the correction.
- Adjust the Pupil Size and Darken Amount if necessary to achieve a natural look.
- Save the final image.
Bonus Tip: Enhance Photo Quality with Dr.Fone App - AI Photo Enhancer
Fixing red-eye is just one step in making your photos look flawless. To take your images to the next level, Dr.Fone App – AI Photo Enhancer offers an all-in-one solution that enhances overall image quality. This AI-powered tool sharpens details, improves colors, and restores clarity, ensuring your photos look professional with minimal effort.
Why Choose Dr.Fone App - AI Photo Enhancer?
- Enhances Image Quality – Sharpens and refines images.
- AI-Powered Precision – Automatically detects and improves key photo details.
- User-Friendly Interface – Quick and easy steps for professional-grade results.
- Works on iOS & Android – Seamless experience across different devices.
Dr.Fone App - AI Photo Enhancer (iOS & Android)
100% Automatic Photo Enhancement: 1-Click Fixes
- Sharpen Blurry Images
- Denoise & Enhance Low-Light Photos
- Naturally Enhance Portrait Details
- User-Friendly & Beginner-Perfect


How to Enhance Photos Using Dr.Fone App - AI Photo Enhancer
01of 04Open the AI Toolbox
Launch the Dr.Fone App and tap the AI Toolbox at the bottom of the screen to access AI-powered editing tools. If you do not see this option, update your Dr.Fone app to the latest version.

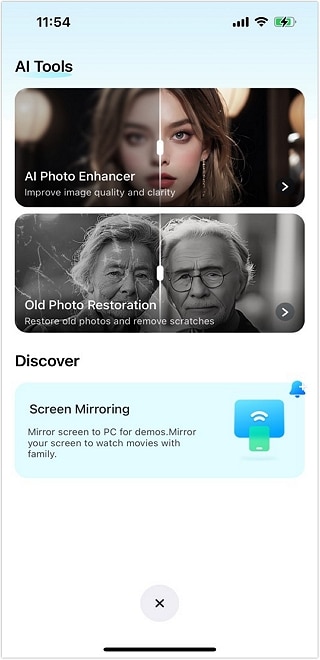
02of 04Select AI Photo Enhancer
In the AI Tools section, choose AI Photo Enhancer from the available options. This tool is designed specifically for improving photo quality and removing imperfections like red-eye.
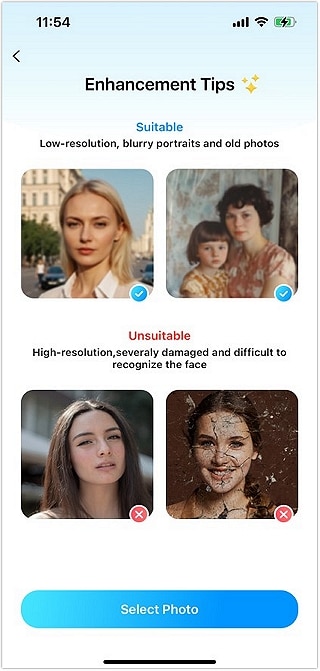
03of 04Upload Your Photo
Tap Select Photo and choose the image you want to enhance. The app provides a quick guide on selecting the best photos for enhancement, ensuring optimal results.
04of 04Enhance and Save
Click the Enhance button and let AI work its magic. A progress bar will appear, showing the enhancement process. Once completed, use the slider to compare the before-and-after effects, then tap Save to store your improved image.

With Dr.Fone App - AI Photo Enhancer, you can effortlessly correct red-eye and enhance photo quality with just a few taps, making it a great tool for achieving professional-level edits in seconds.
Part 4: Preventing Red Eye in Future Photos
Fixing red-eye is essential for improving photo quality, but preventing it in the first place can save time and effort. By making a few adjustments to your camera settings and photography techniques, you can reduce the chances of red-eye appearing in your pictures.
- Enable Red-Eye Reduction Mode: Most modern cameras and smartphones come with a red-eye reduction mode. This setting emits a series of pre-flashes before taking the photo, causing the subject's pupils to contract and minimizing the red-eye effect.
- Use Natural Lighting Instead of Flash: Red-eye occurs most often in low-light conditions where the camera flash is needed. Whenever possible, take photos in well-lit environments to avoid relying on artificial lighting.
- Adjust Camera Angles: The angle at which light enters the eyes can influence whether red-eye appears. Instead of taking photos straight on, try slightly tilting your camera or asking your subject to look a bit away from the lens.
By following these simple techniques, you can significantly solve the problem of "how do i remove red eye from photos" and ensure your images look more natural and professional.
Conclusion
Red-eye can take away from the quality of your photos, but with the right tools and techniques on how to remove red eye in photos, it is easy to fix and prevent. Built-in editing tools on smartphones and desktops offer quick manual corrections, while third-party apps like Snapseed, Adobe Lightroom, and Photoshop provide more advanced options.
For a faster and more efficient solution, Dr.Fone App – AI Photo Enhancer stands out as the best option. With its AI-powered technology, it not only removes red-eye but also enhances image quality in just a few taps.
FAQ
-
Q: Why does red-eye happen in photos?
A: Red-eye occurs when a camera flash reflects off the retina in low-light conditions. The red color comes from the blood vessels in the back of the eye. It happens more frequently when the subject's pupils are dilated due to dim lighting.
-
Q: How can I quickly remove red-eye from a picture?
A: You can use built-in red-eye removal tools in apps like iPhone Photos or Google Photos. For more advanced editing, apps like Dr.Fone - AI Photo Enhancer offer precise corrections with just a few taps.