100% Security Verified | No Subscription Required | No Malware

 :
: 
 ChatGPT
 Perplexity
 Gemini
 Claude
 Grok
Grok

By mistake, I deleted recent calls and I didn't back it up. How can I recover this deleted call history on my iPhone? I hope I can get them back. It is very important to me. I’ve lost information which I could really use. Please help!
An iPhone User
Many iPhone users delete call logs to safeguard their privacy, as these records contain sensitive information about incoming, outgoing, and missed calls. However, this routine cleanup can sometimes lead to accidental data loss. You might clear your call history only to realize you forgot to save a crucial phone number.
In such situations, knowing how to perform an iPhone call history recovery is essential. Whether you've accidentally wiped your logs or are dealing with data loss on a new device, there are effective solutions available to restore them. This guide will walk you through three proven methods to get your call logs back.
In this article
Part 1: How to Recover Deleted Call History on iPhone Directly Without Backup
It's a common scenario: you delete your call logs before creating a backup, or perhaps you never back up your device at all. The great news is that you can still retrieve deleted calls directly from your iPhone. When data is deleted, it isn't immediately erased; instead, the space it occupies is marked as available for new data. With the right iPhone call history recovery tool, you can scan for and restore these inaccessible files before they are overwritten.
For this task, a professional iPhone recovery software like Dr.Fone - Data Recovery (iOS) is highly effective. It can deeply scan your device's memory to find and recover lost data.
-
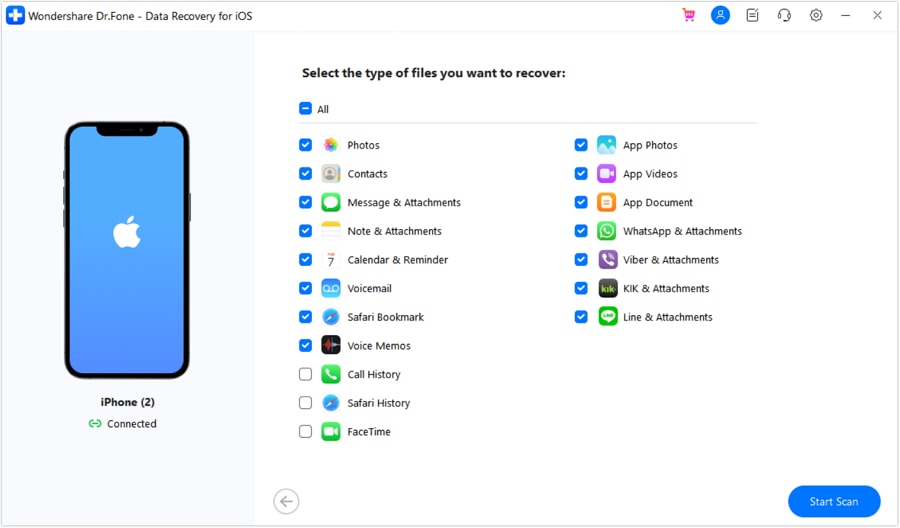
Step 1Connect Your iPhone and Initiate Scan
First, connect your iPhone to your computer. Launch the Dr.Fone toolkit and select “Data Recovery” from the main menu. On the next screen, choose “Recover from iOS Device.” The software will prompt you to select the types of data you wish to recover. To speed up the process, you can deselect everything except “Call History.”

-
Step 2Preview and Recover Deleted Call History
Click “Start Scan” to begin searching for your lost call history. Once the scan is complete, the program will display all recoverable data it found. This includes not just call logs but potentially other data types like contacts, messages, and photos. You can now preview the found items and decide which ones to recover. Select the call logs you need and click either “Restore to Device” to save them back to your iPhone or “Recover to Computer” to save them as a file on your PC.
 Recovers data after deletion, crashes, or device damage.
- Supports photos, messages, contacts, WhatsApp, and more.
- Supports all major iPhone, iPad, and iPod models.
- Preview and recover only what you need.

Part 2: How to Selectively Recover Call History on iPhone via iTunes Backup
Using iTunes to restore your device is often an all-or-nothing process. While an iTunes backup contains your call records, restoring it replaces all current data on your device. iTunes doesn't allow you to recover individual items; you must restore the entire backup. This means attempting an iPhone call history recovery via iTunes could overwrite recent messages, photos, and other files created since the backup was made.
Fortunately, Dr.Fone allows you to selectively extract data from an iTunes backup file without overwriting your existing data. Here's how:
-
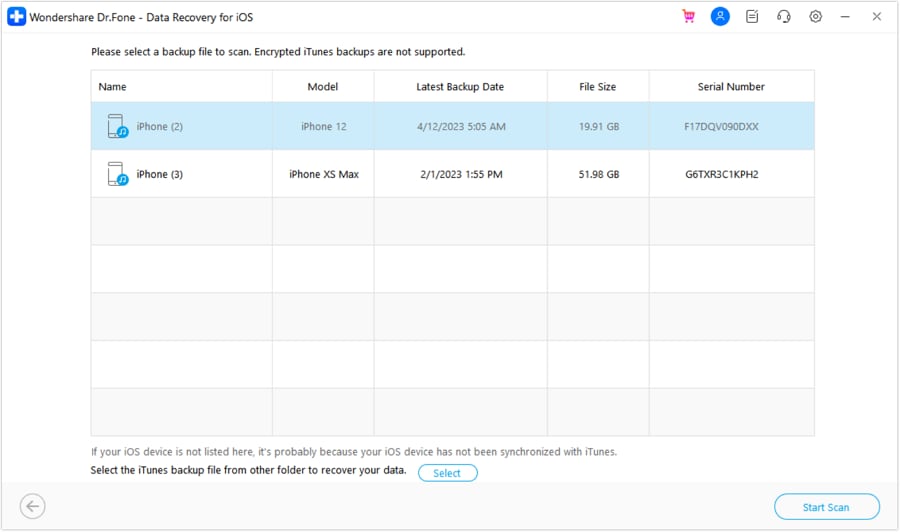
Step 1Choose and Extract the iTunes Backup File
If you have previously synced your iPhone with iTunes on your computer, you won't even need to connect your device. Simply launch Dr.Fone, select “Data Recovery” and then choose 'Recover from iTunes Backup File'. The program will display a list of all iTunes backups on your computer. Select the most relevant one and click 'Start Scan' to begin extracting its contents.
-
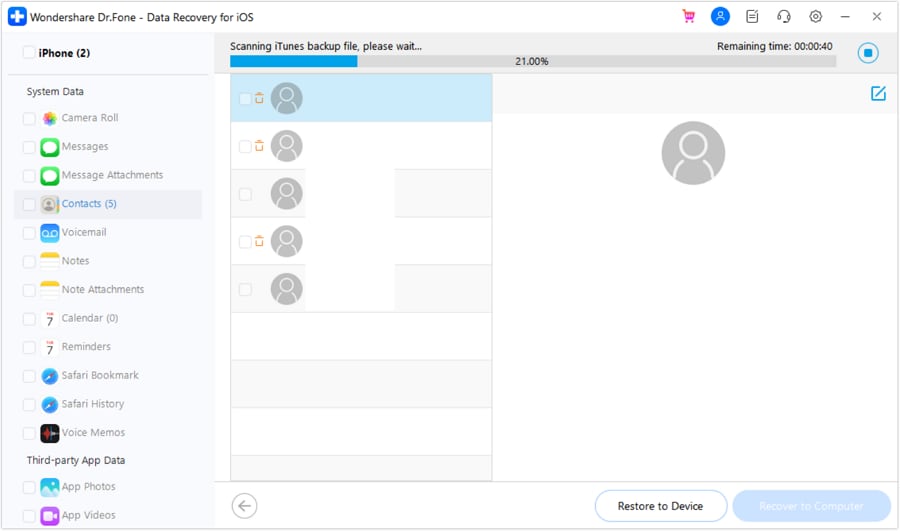
Step 2Preview and Recover iPhone Call Log
Dr.Fone will extract the backup data within a few moments. Once completed, you can preview all the contents, sorted by category. Click on the 'Call History' menu on the left side to view your call logs. You can review each entry, tick the items you want to keep, and save them to your computer by clicking the 'Recover' button. You can also restore them directly to your iPhone by selecting 'Recover to Device'.
Part 3: How to Retrieve Deleted Calls on iPhone via iCloud Backup
If you back up your iPhone to iCloud, you can also restore your deleted call logs from there. However, much like iTunes, the standard iCloud restore process requires a full restore, wiping your device and replacing its content with the backup. This is risky if you've created important new files since your last backup. For a safer and more precise iPhone call history recovery, using a tool that can selectively extract data from an iCloud backup is the ideal approach.
-
Step 1Sign in to Your iCloud Account
To access your online iCloud backup, you'll need your Apple ID and password. After running Dr.Fone, switch to the mode of “Recover from iCloud Backup File.” You will be prompted to enter your iCloud credentials to log in.

-
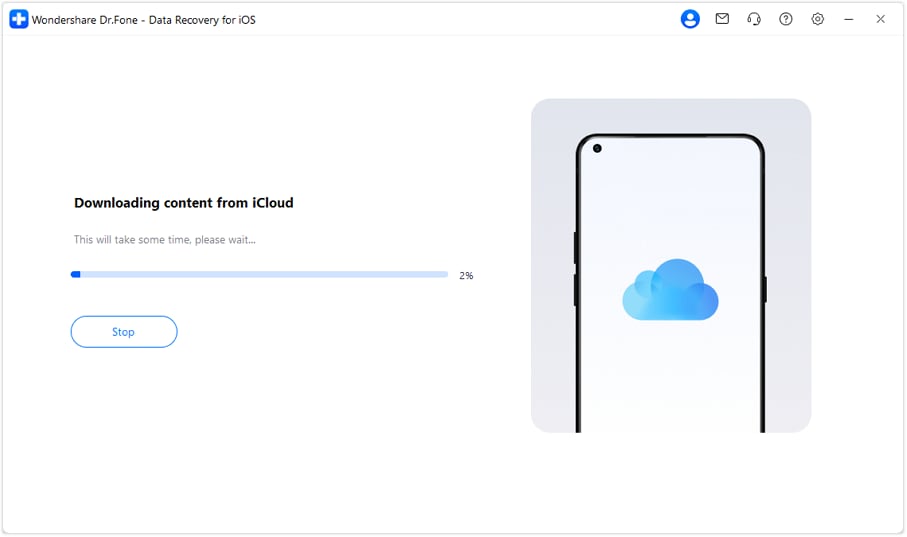
Step 2Download and Scan the iCloud Backup
Once logged in, Dr.Fone will detect all iCloud backup files associated with your account. Choose the backup that likely contains your deleted call history (usually the most recent one) and click 'Download.' This process securely downloads a copy of the backup file for scanning.
-
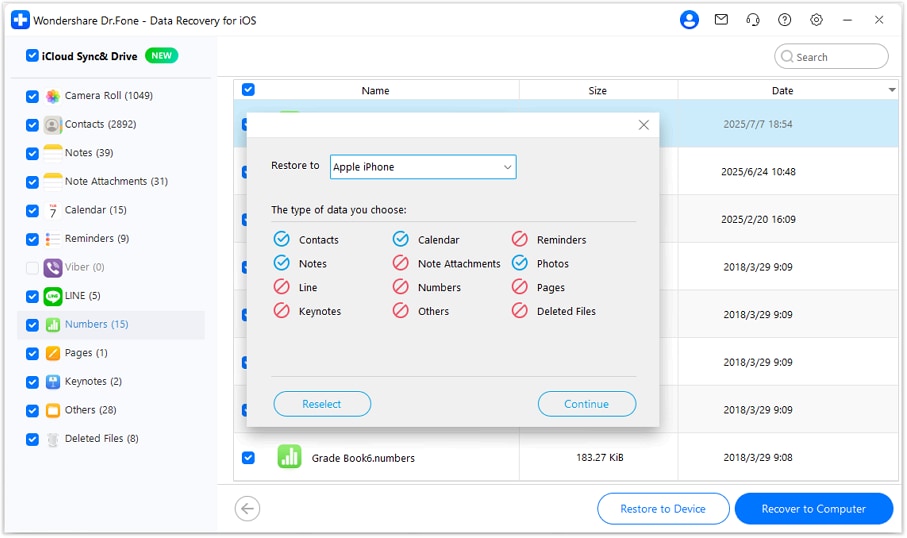
Step 3Preview and Retrieve Deleted Calls
After the download is complete, click the 'Scan' button to process the backup file. When the scan finishes, you can preview the contents in detail. Select 'Call History' to view all the call logs. Tick the specific entries you want to recover and choose to restore them to your computer or directly back to your iPhone.
Conclusion
Accidentally deleting your call history can be unsettling, especially when important contact information is lost. Fortunately, you now know that the situation is rescuable. Whether you need to recover calls directly from your device without a backup or selectively extract them from iTunes or iCloud, effective solutions are available. By using a reliable tool, you can perform iPhone call history recovery quickly and safely, ensuring that your valuable data is never truly gone for good.
FAQ
-
1. Can I recover call history on my iPhone if I don't have a backup?
Yes, it is possible. Deleted data remains on your device's storage until it's overwritten by new information. You can use a specialized data recovery tool like Dr.Fone to scan your iPhone's internal memory directly and retrieve the call logs before they are permanently erased. -
2. Will restoring from an iTunes or iCloud backup delete my current iPhone data?
Yes, performing a standard restore from iTunes or iCloud will completely overwrite all current data on your iPhone with the contents of the backup. To avoid this, use a third-party tool that allows you to preview the backup file and selectively recover only the call history without affecting your other data. -
3. How can I increase my chances of a successful call history recovery?
To maximize your chances, stop using your iPhone immediately after you realize the call logs are deleted. This prevents new data from being created and potentially overwriting the deleted files. The sooner you run a recovery scan, the higher the likelihood of success. -
4. Can I recover just one specific phone call instead of the entire log?
Standard restore methods from Apple do not allow this. However, tools like Dr.Fone - Data Recovery (iOS) let you preview all the recoverable call entries from your device or backup file. This enables you to select and restore only the specific calls you need, rather than the entire history.
 Add Wondershare Dr.Fone as a preferred source on Google