Move contacts, messages, photos, videos, app data, and more between iOS and Android.

 100% Security Verified | No Subscription Required | No Malware

 :
: 
 ChatGPT
 Perplexity
 Gemini
 Claude
 Grok
Grok
It can often feel complicated and time-consuming to migrate information from a discontinued operating system to a modern platform. If you are finally upgrading your legacy mobile device to a modern smartphone, understanding the nuances of windows phone to android transfer is critical for preserving your precious memories, work documents, and professional network.
Since these platforms utilize entirely different file architectures and cloud ecosystems, traditional direct sharing methods might hit a wall. Do not worry; whether you need to migrate local media or securely transfer contacts from windows phone to android, there are highly reliable workarounds available. Below, we break down exactly four ways to transfer data from Windows Phone to Android device for free so you can choose the method that best suits your technical comfort level.
In this article
Part 1. Transfer Data from Windows Phone to Android Device with a Computer
When it comes to moving large documents, audio-video files, and raw media from a Windows Phone to Android devices, utilizing your personal computer as a bridge is arguably the most straightforward solution. This acts as a manual "drag-and-drop" transfer method.
All you have to do is connect both of your mobile devices to your laptop or desktop PC simultaneously using compatible USB data cables. Once your computer recognizes the internal storage drives of both phones, simply open their respective storage folders side-by-side, highlight the content from the Windows Phone directory, and copy-paste it directly into the targeted Android device folders.
- Simplest manual method requiring no third-party software.
- Requires zero internet connection or Wi-Fi.
- Extremely fast data transfer rate, limited only by your USB speeds.
- Some legacy media files might not be natively supported on Android.
- Cannot transfer specialized formats like SMS text messages.
- VCF contact files might experience parsing issues during manual migration.
Part 2. Transfer Content from Windows Phone to Android with OneDrive
While Microsoft's smartphone operating system may have phased out, its powerful suite of cloud applications remains top-tier. Microsoft's OneDrive app is a stellar example of this. It acts as an incredible bridge for cross-platform data syncing. The app offers extensive support for Windows, iOS, and Android ecosystems, making it a perfect tool to sync your files wirelessly.
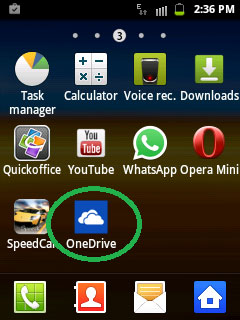
Check the detailed steps below to perform this windows phone to android transfer seamlessly using cloud technology:
-
Step 1 Install OneDrive on Both Devices
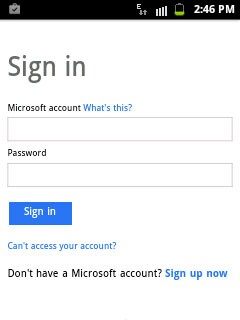
The first step is to visit your respective app stores and download the OneDrive application on both mobile devices. After downloading, launch it on your Windows Phone and it will prompt you to sign in using your official Microsoft account credentials.
-
Step 2 Access Your Cloud Home Page
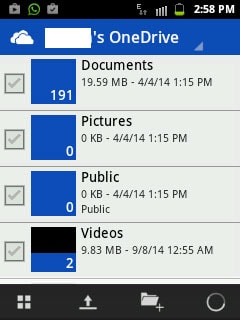
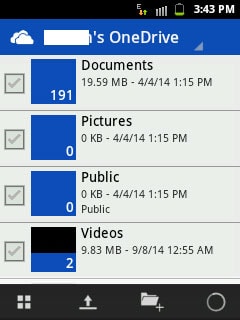
Once you sign in using your Outlook username and password, the app will instantly boot its home page, displaying any existing folders and documents you have previously stored in the OneDrive cloud.
-
Step 3 Prepare to Upload Files
While inside the app on your Windows Phone, locate and click on the 'Upload' icon (usually represented by an upward arrow or a plus sign).
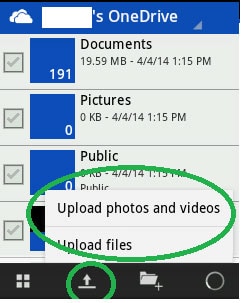
Click on the "Upload files" option if you wish to upload standard documents, PDFs, or audio tracks. If you intend to back up your camera roll, select the dedicated photos and videos option provided in the menu.
-
Step 4 Select the Targeted Content
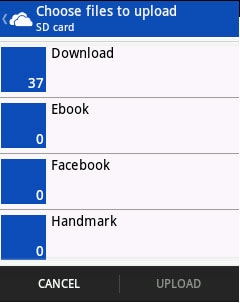
The system will display all the internal folders and sub-directories housed on your Windows Phone. Browse through them carefully and check off all the specific items you wish to carry over to your new Android device.
-
Step 5 Begin the Syncing Process
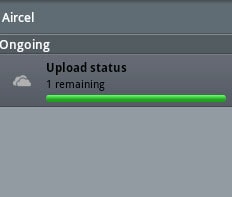
Once your selection is complete, hit "Upload." Depending on the size of the data and your internet speed, the application will take a few minutes to successfully mirror this content to the secure OneDrive server.
-
Step 6 Download onto Android
After ensuring 100% upload completion, grab your new Android smartphone and open the OneDrive application. Sign in with the exact same Microsoft credentials. Navigate through the newly updated folders, highlight what you need, and tap download to save them into your Android's local storage.

Part 3. Transfer Contacts with Outlook and Gmail
If your primary concern is maintaining your professional and personal address book, you will specifically need to transfer contacts from windows phone to android effectively. Utilizing a combination of Outlook and Gmail is the most logical route since both platforms support standardized CSV contact files.
Follow this exact procedure to securely transfer your address book without losing phone numbers or email addresses:
-
Step 1 Access Your Outlook Account Online
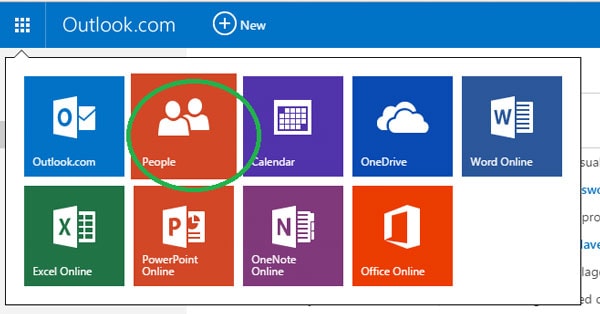
First, ensure your phone contacts are actively synced with your Microsoft account. Then, hop onto a desktop PC or tablet, open your web browser, and sign into your Outlook account. Click on the "People" icon located in the lower-left corner or from the top navigation grid menu.
-
Step 2 Export Contacts to CSV
On the subsequent screen, locate the "Manage" dropdown located near the top right of the dashboard. Select the "Export for Outlook and other service" option.
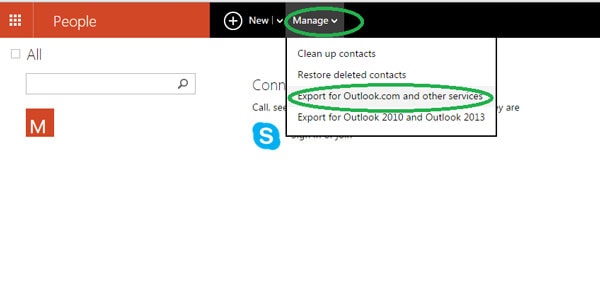
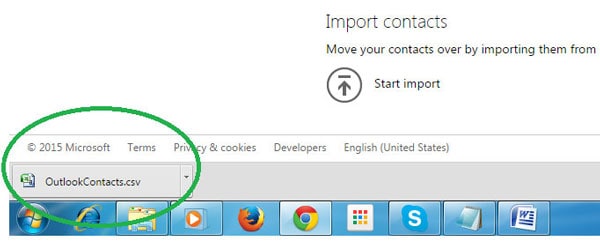
Immediately after clicking this command, Outlook will automatically compile your entire address book and trigger a download of a .CSV (Comma Separated Values) file straight to your computer's hard drive.
-
Step 3 Log Into Google Contacts
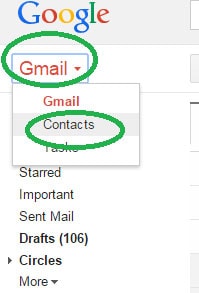
Now, open a new tab and navigate to Gmail (or directly to Google Contacts). Ensure you are logged into the Google Account associated with your new Android smartphone. Navigate to the Contacts dashboard.
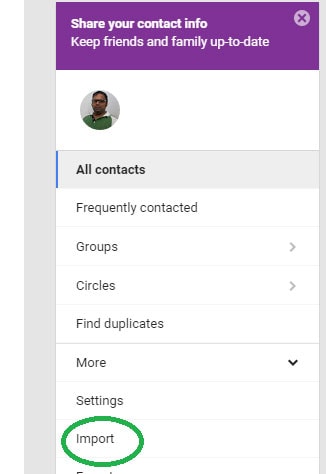
Within the side menu of the interface, scroll down until you spot the "Import" function and click it to bring up the file upload window.
-
Step 4 Upload the CSV and Sync
Once the pop-up modal appears, hit "Select file" and route the browser to the .CSV file you just downloaded from Outlook. After attaching it, simply click on "Import."
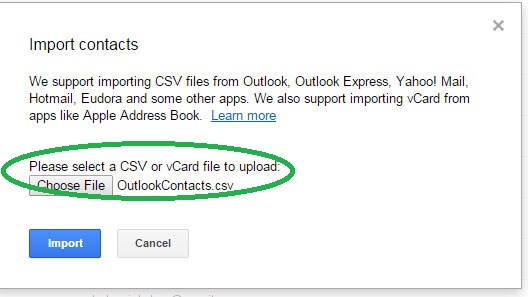
Within seconds, Google will parse the CSV data, map the necessary fields, and merge these entries into your active address book. Finally, unlock your Android device, go to Accounts & Sync, and force a refresh of your Google account. Your old connections will now dynamically populate into your new phone dialer app!
Part 4. Transfer Files Between Phones in 1-Click Using Dr.Fone
While manual syncing is great, managing multiple CSV files and cloud backups can be tedious for users who simply want their phone setup finished immediately. If you want a more unified strategy and happen to be transitioning multiple devices, Dr.Fone - Phone Transfer is a premier desktop utility designed to do all the heavy lifting for you.
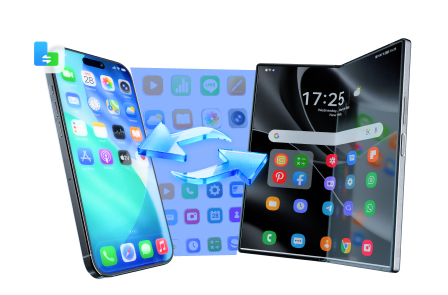
Bonus Feature: Dr.Fone - Phone Transfer allows you to transfer photos, videos, music, contacts, and SMS messages directly between mobile ecosystems (such as iPhone to Android or vice versa) with just a few deliberate clicks.
Here is how straightforward it is to perform cross-device data transfers using Dr.Fone:
 Move data between iOS to Android and vice versa.
- Transfer contacts, SMS, photos, videos, music, and more types.
- Available with all phones with Android and iOS versions.
- Simple, click-through process.
-
Step 1 Launch the Transfer Tool
Download and install Dr.Fone onto your PC or Mac. Once the dashboard opens on your computer, click on the "Phone Transfer" module prominently displayed on the homepage.

-
Step 2 Connect Both Handsets
Take two robust USB cables and hook both your source device and destination Android smartphone to the computer. Allow a moment for the software to detect them. You can click the "Flip" button at the top of the interface if the devices are positioned in the wrong Source/Destination orientation.
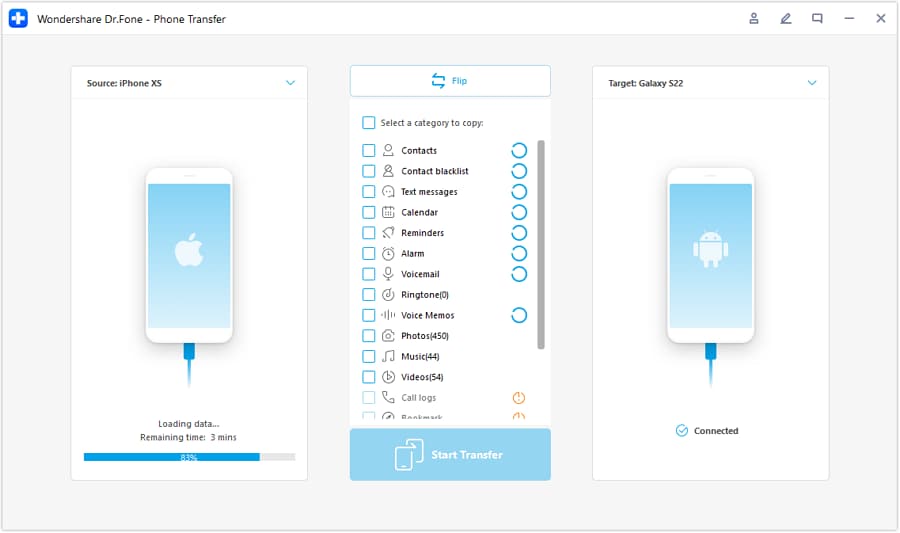
At this juncture, the software will scan the source phone and populate a checklist in the middle column. Select exactly which file types (Contacts, Text Messages, Photos, etc.) you want ported over.
-
Step 3 Execute the Data Migration
With your selections checked, click the "Start Transfer" button at the bottom right. The software handles the formatting bridges natively. Ensure both smartphones stay securely connected during this brief window until the success prompt appears.
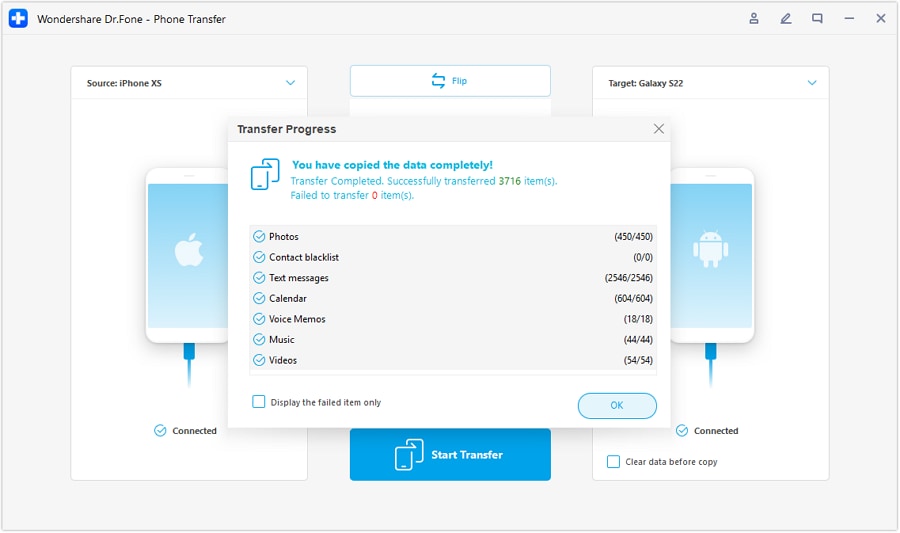




Conclusion
Making the jump to a new operating system no longer means leaving your digital history behind. By leveraging the four ways to transfer data from Windows Phone to Android device for free detailed above, you can confidently migrate everything from irreplaceable family photos to crucial business contacts. Whether you decide to perform a manual USB transfer, sync wirelessly through OneDrive, meticulously merge address books via Google Contacts, or automate the entire process using dedicated software like Dr.Fone, your data migration in 2026 can be smooth and completely hassle-free.
FAQ
-
1. Can I still use OneDrive for a windows phone to android transfer in 2026?
Yes, while Microsoft discontinued support for the Windows Phone operating system itself, any files previously uploaded or actively synced from the device to a Microsoft OneDrive account remain secure in the cloud. You can still download the Android OneDrive app and access all those files seamlessly. -
2. Will my Windows Phone apps carry over to my Android device?
No. Windows Phone and Android are built on completely different software architectures. An app designed for Windows Phone (a .xap or .appx file) cannot run natively on Android (which uses .apk or .aab files). You will need to search the Google Play Store on your new Android device to find and install the Android equivalent of your favorite apps. -
3. How can I directly transfer contacts from windows phone to android without a computer?
If you do not want to use a PC, ensure your Windows Phone contacts are synced to your Microsoft account. On your new Android device, simply add your Microsoft (Outlook/Hotmail) email in the Accounts & Sync settings. The Android system will automatically download and integrate those contacts into your phonebook without requiring manual CSV exports. -
4. Why won't my Windows Phone connect to my computer via USB?
If your PC fails to recognize the Windows Phone, first ensure the screen is unlocked when connected. Next, try using a different USB cable, as some cables are meant only for charging and lack data transfer pins. If the issue persists, you may need to check the Windows Device Manager to update or reinstall legacy USB drivers.
 Add Wondershare Dr.Fone as a preferred source on Google