Move contacts, messages, photos, videos, app data, and more between iOS and Android.

 100% Security Verified | No Subscription Required | No Malware

 :
: 
 ChatGPT
 Perplexity
 Gemini
 Claude
 Grok
Grok
Google Photos has solidified its position as the ultimate, go-to solution for managing digital pictures and preserving our most precious memories. This robust tool from Google provides an incredibly seamless cloud experience for storing, categorizing, and sharing not just photos and screenshots, but also high-definition videos across multiple devices.
However, as we accumulate thousands of memories in the cloud, a common scenario arises: we want to securely transfer them straight to our device's native local gallery. Whether you need offline accessibility during travels or prefer organizing all your media directly on your smartphone, learning how to transfer Google Photos to your gallery on Android is essential. Let us explore the quickest and most effective methods to achieve this in 2026.
In this article
- Part 1. Why Android Users Need To Transfer Google Photos to Gallery
- Part 2. How To Download A Photo From Google Photos to Gallery on Android
- Part 3. How To Transfer Multiple Photos From Google Photos to Your Gallery
- Part 4. How To Transfer All Photos From Google Photos to Gallery Using Google Takeout
- Part 5. Alternative: Transfer Photos from Computer to Gallery on Android with Easy Software
- Part 6. Why Can't I Transfer Google Photos to the Gallery?
Part 1. Why Android Users Need To Transfer Google Photos to Gallery
For the majority of Android users, Google Photos fundamentally acts as a primary backup solution. This automated functionality serves as an invaluable safety net, guaranteeing that precious photos and videos are firmly stored in the cloud, free from physical device damage, and retrievable from any internet-connected device.
Even though cloud backup is fantastic, it has practical limitations. Countless users still deeply value having their media immediately visible in the local gallery app. People are constantly asking how to transfer pictures from Google Photos to their gallery for several critical reasons:
- Unrestricted Offline Access: Internet connectivity is never guaranteed. If you are traveling, on a flight, or in a remote area, having files stored in your local gallery ensures you can still browse, edit, and reminisce without relying on Wi-Fi or mobile data.
- Seamless Native Integration: Many third-party editing tools, wallpaper applications, and native manufacturer tools are optimized to read files directly from the device's internal storage rather than fetching them from a cloud service.
- Instant Loading Speeds: Accessing a high-resolution photo from the cloud requires it to buffer and download temporarily, consuming time and bandwidth. Local files open instantly and eliminate annoying loading circles.
- Effortless Social Media Uploads: When uploading content to Instagram, TikTok, or Facebook, these platforms instinctively pull from your local camera roll or gallery folders. Transferring your media makes sharing a much smoother, single-step process.

Part 2. How To Download A Photo From Google Photos to Gallery on Android
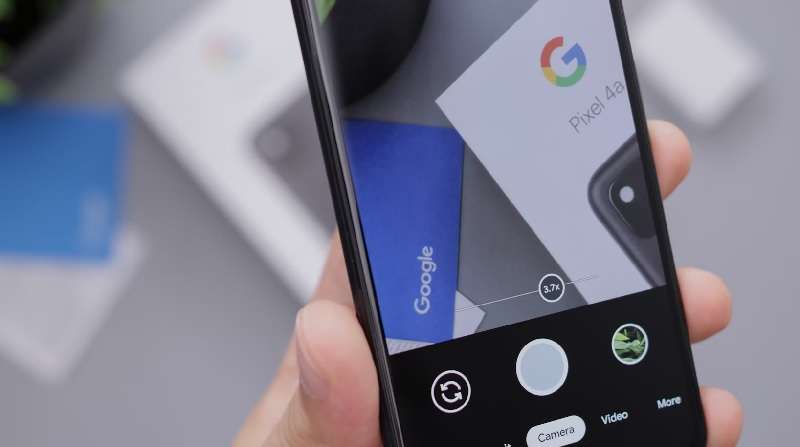
Let us begin with the most basic scenario: you found one specific memory and need to know exactly how to move photos from Google Photos to your gallery individually. The native Google app provides an incredibly straightforward mechanism to download a single file back into your device's physical storage.
Follow these quick steps on how to transfer a photo from Google Photos to your gallery:
-
Step 1 Launch Google Photos
Open the Google Photos application on your Android smartphone and ensure you are correctly signed in to the Google account where your files are backed up.
-
Step 2 Select Your Desired Image
Scroll through your timeline or albums and locate the exact photo you want to keep offline. Tap the image thumbnail to expand it to full-screen view.
-
Step 3 Access the Options Menu
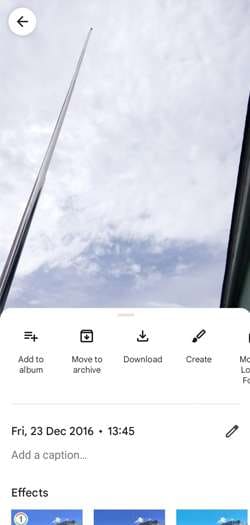
Look at the top-right corner of the screen. Tap the three-dot vertical menu icon (often referred to as the 'More options' button) to pull up the image details and actions.
-
Step 4 Save to Device
In the horizontal action bar or the menu popup, locate and tap on "Download" or "Save to device." The image will be immediately downloaded and filed into your phone's local internal storage (usually within a 'Restored' or 'Downloads' folder accessible via your gallery).
Part 3. How To Transfer Multiple Photos From Google Photos to Your Gallery
Downloading files one by one can become extremely tedious if you are compiling an album. When users search for how to transfer multiple photos from Google Photos to your gallery, they are looking for a batch solution. Thankfully, by leveraging your Android's file management system, you can pull multiple selections effortlessly.
Here is how to copy photos from Google Photos to your gallery simultaneously:
-
Step 1 Enter Selection Mode
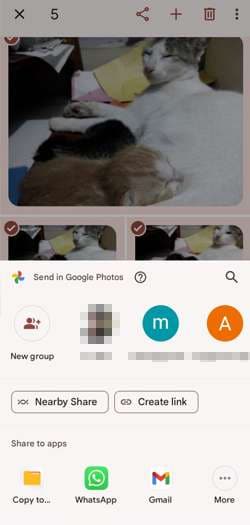
Open Google Photos on your Android device. Find the cluster of photos you need, tap and hold (long-press) on the first photo until a checkmark appears.
-
Step 2 Choose Multiple Images
Once in selection mode, slide your finger or tap on subsequent images to add them to your download queue. You can also select entire dates by tapping the checkmark next to the date header.
-
Step 3 Initiate the Transfer Command
With all desired items highlighted, tap the Share icon or the three-dot menu icon (depending on your UI version), and search for an option labeled 'Save to device', 'Download', or alternatively, use the 'Copy to Files' functionality if you wish to direct them to a specific folder.
-
Step 4 Assign Destination Folder
If prompted by a file manager, navigate to the specific local directory where you want these files housed (like 'DCIM' or 'Pictures'), and finalize the process by tapping 'Save' or 'Paste'. The batch download will commence immediately.
Part 4. How To Transfer All Photos From Google Photos to Gallery Using Google Takeout
When switching devices, abandoning cloud storage entirely, or performing a massive backup, learning how to transfer all photos from Google Photos to your gallery at once is necessary. The official and most robust way to extract your entire library is by utilizing Google Takeout.
This automated service bundles your library into manageable ZIP files. Here is how to move all photos from Google Photos to your gallery using this method:
-
Step 1 Access the Takeout Dashboard
For the smoothest experience, open a web browser on your computer and navigate to the official Google Takeout website. Log into the account containing your photo library.
-
Step 2 Select Google Photos for Export
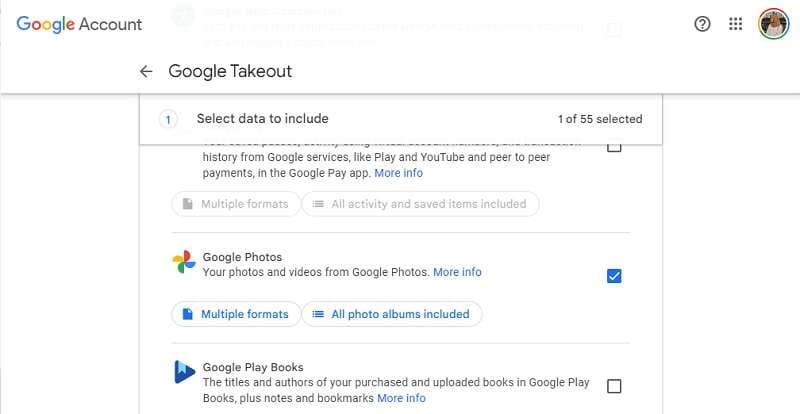
By default, all Google services are selected. Click "Deselect all" at the top, scroll down the comprehensive list, and check the box explicitly next to 'Google Photos'. Proceed by clicking "Next Step" at the bottom.
-
Step 3 Configure Export Settings
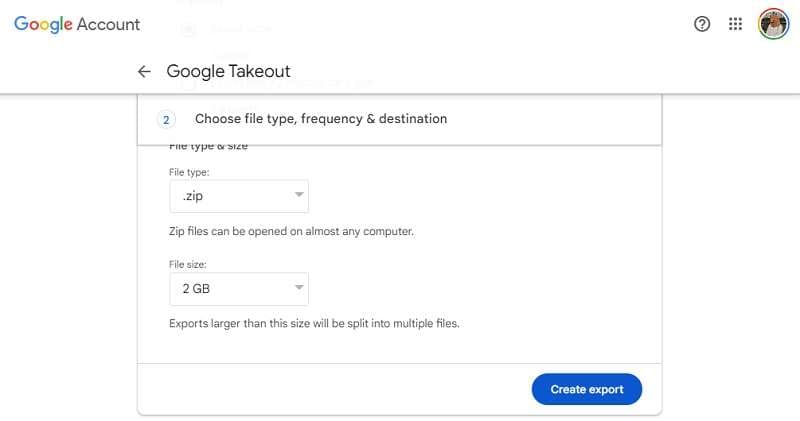
Define how you want to receive this massive file. You can choose "Send download link via email" or directly push it to another cloud drive. Select '.zip' as the file type, and pick a maximum file size (e.g., 2GB or 10GB chunks). Click "Create Export" to begin the archiving process.
-
Step 4 Wait for Completion and Download
Google will now compile your library. Depending on your data volume, this can take hours or even days. Once ready, you will receive an email. Click the provided download link to save the ZIP archives to your PC.
-
Step 5 Transfer to Android Device
Extract the ZIP files on your computer. Connect your Android device via USB, open its internal storage folder (like DCIM), and drag the extracted photo folders directly onto your phone for instant gallery access.
Part 5. Alternative: Transfer Photos from Computer to Gallery on Android with Easy Software
While extracting data through Google Takeout handles the downloading phase, moving gigabytes of unzipped photos via a basic USB connection can sometimes be slow, prone to disconnection errors, or result in disorganized gallery folders. For a more sophisticated alternative, dedicated data management software like Wondershare Dr.Fone provides a seamless bridge between your PC and Android.
The Phone Manager feature within Dr.Fone is specifically engineered to handle massive data migrations. It allows you to selectively import downloaded Google Photos directly into proper gallery albums on your phone without clutter or metadata loss. Here is how to execute this transfer effortlessly:
 Effortlessly manage data through preview, delete, export, etc.
- Transfer all data between devices.
- Robust backup solutions for reliable data protection.
- Mirror screens to PC for meetings, teaching, and control.

-
Step 1 Launch Dr.Fone and Connect Device
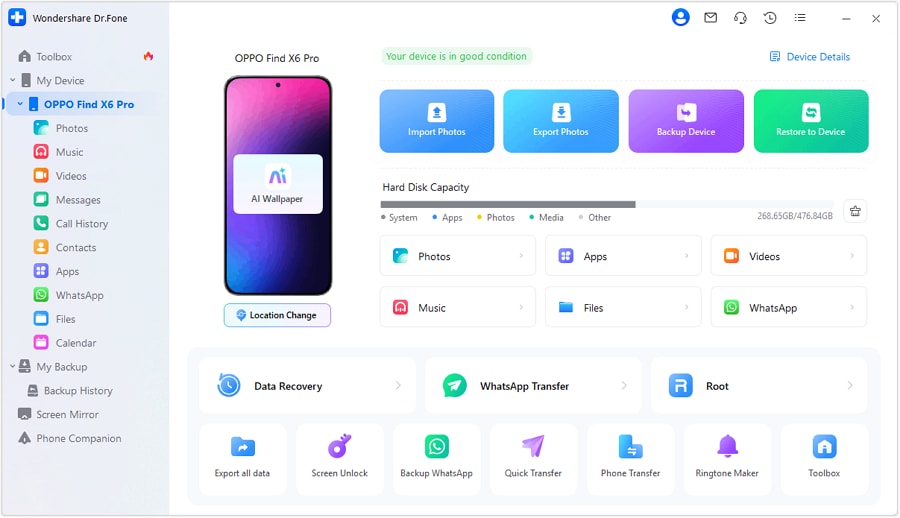
After downloading your photos to your PC, open Wondershare Dr.Fone. Connect your Android smartphone to the computer using a reliable USB cable. Navigate to the "Phone Manager" module on the main interface.
-
Step 2 Navigate to the Photos Tab
Once your device is recognized, click on the "Photos" tab located at the top menu. This will display your phone's current gallery layout. Click on the "Add" icon (which usually looks like a folder with a plus sign) to browse for your saved Google Takeout files.

-
Step 3 Execute the Transfer
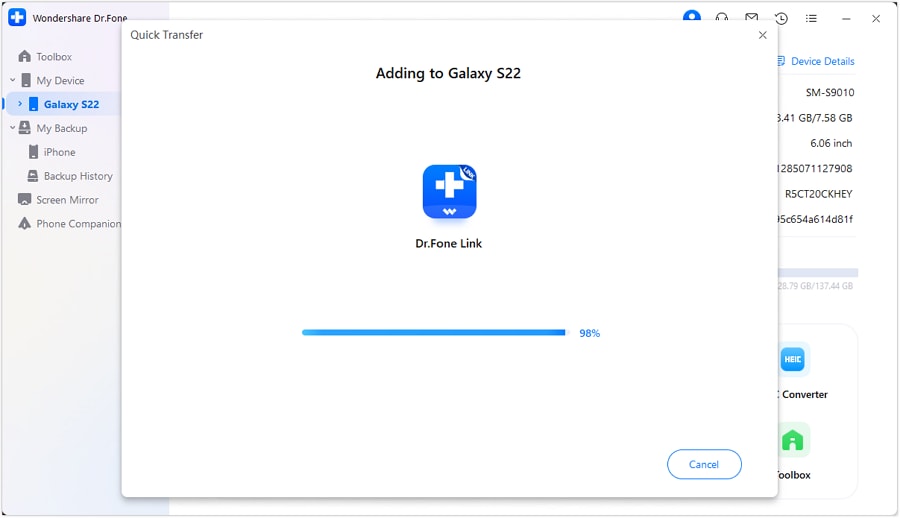
You can opt to "Add File" or "Add Folder" to migrate entire albums at once. Select the specific photos you extracted earlier, and the software will rapidly begin syncing them into your phone's storage structure, ensuring they display perfectly in your gallery app.
-
Step 4 Safely Disconnect
Wait for the progress bar to complete. Once finished, Dr.Fone will notify you of a successful import. You can now safely disconnect your Android and view your transferred memories.




Part 6. Why Can't I Transfer Google Photos to the Gallery?
Even when you closely follow the steps for how to transfer photos from Google Photos to your gallery, you might encounter unexpected roadblocks. Do not panic; most of these hurdles are tied to system settings rather than permanent bugs. Here are the most prevalent issues and how to troubleshoot them:
- Insufficient Storage Space: This is the most common culprit. High-resolution photos and 4K videos consume massive amounts of data. Navigate to your device's Settings > Storage to verify you have enough available gigabytes before initiating a large batch transfer.
- Strict Permission Denials: For Google Photos to write data into your local gallery, it requires specific OS permissions. Go to Settings > Apps > Google Photos > Permissions, and ensure that 'Storage' or 'Files and media' access is toggled to "Allow".
- File Format Compatibility: Occasionally, photos backed up from iPhones (like HEIC formats) or specialized RAW files may not be natively supported by an older Android's built-in gallery app. Although they transfer successfully, they might appear blank or unreadable until you install a compatible viewer or convert them to JPEG.
- Corrupted App Cache: A bloated application cache can freeze downloads. Navigate to your app settings, find Google Photos, and hit 'Clear Cache' to resolve temporary software glitches.
Conclusion
Taking the initiative to learn how to move Google Photos to your gallery provides you with total control over your digital footprint. By relocating your media, you guarantee offline viewing capabilities, enhance your phone's integration with local editing apps, and bypass unnecessary loading times associated with cloud dependency.
Whether you are pulling down a single cherished memory using the app's native download button, exporting your entire decade of history via Google Takeout, or streamlining the PC-to-Android leap with powerful utilities like Wondershare Dr.Fone, having the right methodology makes all the difference. Safeguard your data wisely and enjoy instantaneous access to your local gallery anytime.
FAQ
-
1. Where do photos downloaded from Google Photos go on my Android device?
When you download a photo directly via the Google Photos app, it is typically saved to a local folder named "Restored" or "Downloads" within your internal storage. You can locate this folder by opening your device's native Gallery app or by using a File Manager and navigating to internal storage > Pictures or DCIM. -
2. Will transferring photos to my local gallery delete them from my Google cloud?
No. Downloading or saving a photo to your device simply creates a local copy. The original file remains safely backed up in your Google Photos cloud account unless you explicitly choose to delete it and empty the Google Photos trash bin. -
3. Why is the 'Save to device' option missing for some of my photos?
If the "Save to device" option is entirely absent, it generally means that the specific photo is already stored locally on your device's internal memory. The option only appears for files that are currently stored exclusively in the cloud. -
4. Can I directly download an entire album from the Google Photos app?
Currently, the Android mobile app does not support downloading an entire album with a single button press. To bypass this, you must either long-press to manually select all photos in the album to download, or use Google Takeout on a computer to export the album as a ZIP file.
 Add Wondershare Dr.Fone as a preferred source on Google