100% Security Verified | No Subscription Required | No Malware

 :
: 
 ChatGPT
 Perplexity
 Gemini
 Claude
 Grok
Grok
If you have navigated here, you likely encountered the frustrating 'iPad could not be restored error 9', 3014, or 3194 message while attempting to update or restore your device. Perhaps you were installing an essential firmware update, only to be interrupted by a sudden connection failure. Updating an iOS device can sometimes be a hassle, and seeing a popup claiming the ipad could not be restored only adds to the stress.

Fortunately, you are not the only Apple user dealing with this hurdle, and it is rarely a sign of critical hardware failure. In most cases, these iTunes communication issues are highly manageable at home. In this comprehensive guide, we will walk you through the most effective methods to clear these alerts, ensuring you rarely need to visit an expensive repair center.
In this article
Part 1. What to Do After Error 9, 3014, or 3194 Occurs
Even though these errors can bring your digital life to a sudden halt, they are fundamentally software and network communication glitches. Read through the subsequent sections to resolve these issues manually, saving yourself from paying hundreds of dollars at a local Apple Store.
1-1. How to Fix Error 9, 4013, and 4010
The iPhone or iPad error 9 is a specific Apple code that generally appears when updating or restoring your device. It represents a direct failure in establishing a stable connection between Apple's firmware servers and your device. Simply put, your iPad or iPhone is entirely unable to reach the servers required to authorize the update.
Interestingly, the error behavior is virtually identical if your iOS device unexpectedly disconnects from the computer's USB port or iTunes during the process. Under similar circumstances, you might see an alert stating that the 'iPad could not be restored error 4013', or you might encounter the 'iPad could not be restored error 4010'. Since the root causes are identical, the troubleshooting methods below apply to all these codes:
Solution 1 Update Your iTunes Application
Launch iTunes on your Mac or Windows PC. Log in by entering your Apple ID and password. If you are already logged in, navigate to Apple Menu > Music > Check for Updates. Follow the on-screen prompts to initiate the software update and wait for a few minutes until the installation finalizes. Ensuring iTunes is updated bridges the communication gap smoothly.

Solution 2 Hard Reset Your iOS Device
Seeing Error 9 does not always guarantee a server outage; occasionally, the device's internal cache is frozen. To remedy this, press and hold the Volume Down button + Power button simultaneously for a few seconds. Release them once the power-off slider appears. Drag it to turn off your device completely. After a brief pause, press the power button again to reboot.
Solution 3 Update iOS and macOS Operating Systems
For iOS: Access the Settings app on your iPhone or iPad, tap on General, and select Software Update. Wait for the system to scan for available packages. If an update is ready, tap Download and Install.
For macOS: From the top Apple menu, select System Settings (or Preferences) > Software Update. If a newer system version is available, click Restart Now. Completing this ensures full compatibility between your Mac and the connected device.


1-2. How to Fix Error 3014
Error 3014, frequently associated with the dreaded 'white screen of death,' primarily occurs when an iPhone or iPad reset or update is unexpectedly interrupted. Because Apple frequently updates iOS, attempting multiple firmware changes within a short timeframe can sometimes cause verification bottlenecks, triggering error 3014. Here is how to fix this pesky alert:
Solution 1 Update iTunes Software
This universal fix applies to almost all restore errors. Tap on the Help tab on the top menu bar of your PC, followed by Check for Updates. An outdated iTunes client severely impedes the verification process required for a clean installation.
Solution 2 Maintain Updated Operating Systems
As mentioned in the previous section, maintaining the latest macOS or Windows version is critical. When your host computer is fully up to date, it significantly reduces the likelihood of background processes conflicting with the Apple server handshake.
Solution 3 Inspect Security Software and Firewalls
Third-party antivirus programs and aggressive Windows firewalls often flag iTunes network traffic as suspicious, breaking its communication with Apple. Ensure your security tools are updated, or temporarily disable them while updating your iOS. Remember to switch them back on once the iPad restore completes successfully.
1-3. How to Fix Error 3194
Error 3194 is another common hurdle that indicates iTunes is entirely blocked from reaching the Apple signature server. It frequently arises when network security software redirects traffic or when users have previously altered their system files to downgrade firmware. Follow these advanced troubleshooting techniques:
Solution 1 Check and Edit Host Files
First, ensure iTunes is completely closed. On a Mac, access the Terminal application from the Utility folder. Type
sudo nano /etc/hostsand press Return to open the host file in a text editor. Look for the address entry 74.208.105.171 gs.apple.com. This specific entry redirects the signature verification to alternative servers (often used for jailbreaking). If it is present, delete the line or add a '#' symbol before it to comment it out, then save the changes. If it's absent, adding the official Apple server IP might occasionally bypass local ISP blocks.Solution 2 Execute a Remote Factory Reset
If you have previously jailbroken the device or altered its core communication protocols, a remote iCloud wipe might be necessary.
Step 1: Navigate to the iCloud website on a browser and open the Find iPhone module, which displays a map of your registered Apple devices.
Step 2: From the dropdown list, select the specific device experiencing Error 3194 and click the Erase button. Confirm the prompt to initiate an automatic remote wipe back to factory settings.

Step 3: Once the device is entirely erased and restarts, configure it as a new device. Connect it to a freshly installed version of iTunes, and Error 3194 should be fully resolved.
Part 2. How to Easily and Safely Restore iPad Pro/Mini/Air/4
If the aforementioned communication errors cannot be fixed due to deeper hardware or system corruption, your last resort might involve taking the device to a technician or forcing a deep factory reset—which inevitably leads to data loss. However, you can safeguard your precious files by utilizing highly-rated data recovery software before taking drastic measures.
Wondershare Dr.Fone - Data Recovery (iOS) stands as an exceptional solution for retrieving lost information across iOS platforms. It is engineered to meticulously recover various data types, including messages, photos, contacts, calendars, notes, attachments, and more, ensuring that the statement 'ipad could not be restored' does not equate to 'data lost forever.'
 Recovers data after deletion, crashes, or device damage.
- Supports photos, messages, contacts, WhatsApp, and more.
- Supports all major iPhone, iPad, and iPod models.
- Preview and recover only what you need.
The recovery workflow is highly intuitive. Just follow these structured steps to secure your files:
Step 1 Launch the Application
After successfully installing the Dr.Fone software on your computer, launch the application. From the main welcome dashboard, navigate to the Toolbox tab and select Data Recovery.

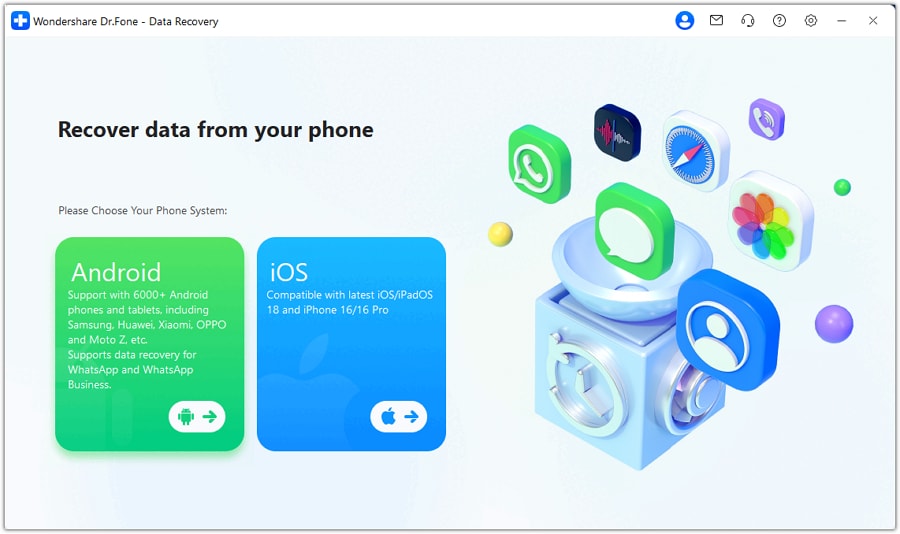
Step 2 Choose Your Operating System
When the new window appears, you will be prompted to select the specific ecosystem you wish to extract data from. Click on the iOS option to proceed.
Step 3 Select the Recovery Mode
Initiate the core data extraction sequence by clicking on the Recover Data from an iOS device module among the available selections.

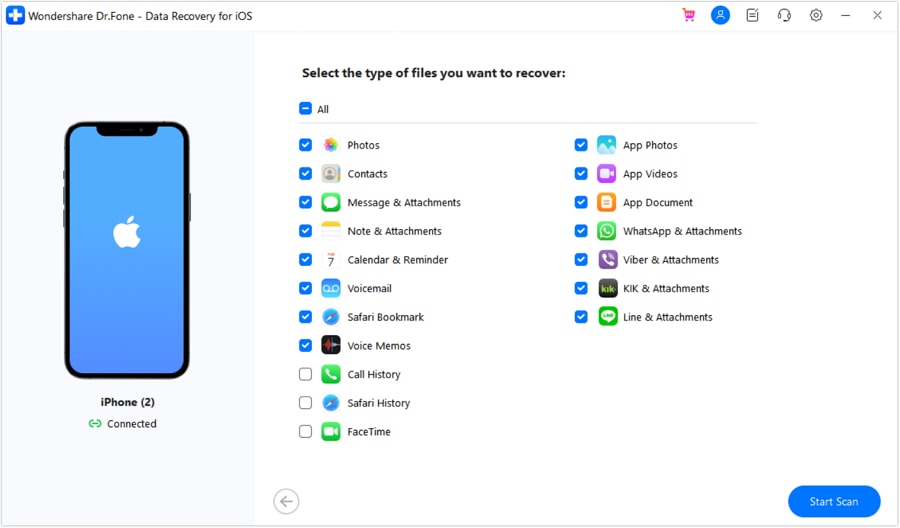
Step 4 Connect Device and Select File Types
The interface will prompt you to connect your affected iPhone or iPad via a certified USB cable. Wait for the system to detect the hardware. Once recognized, select the precise file categories you wish to salvage. Afterward, click Start Scan at the bottom right corner.
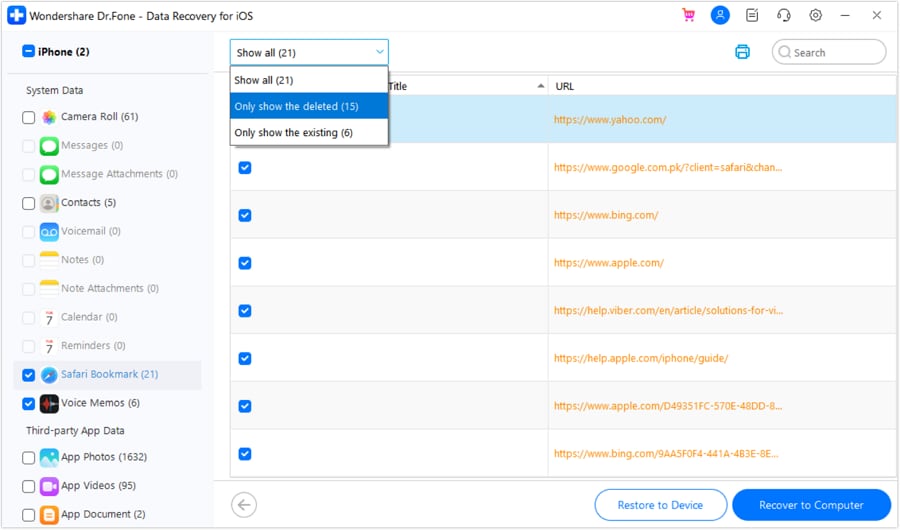
Step 5 Preview the Scanned Items
Dr.Fone will deeply scan your device's internal storage partitions for several minutes. Once finished, it displays a comprehensive preview of all recoverable elements. Browse through the lists, check the items you need, and click Restore to Device or save them to your computer.
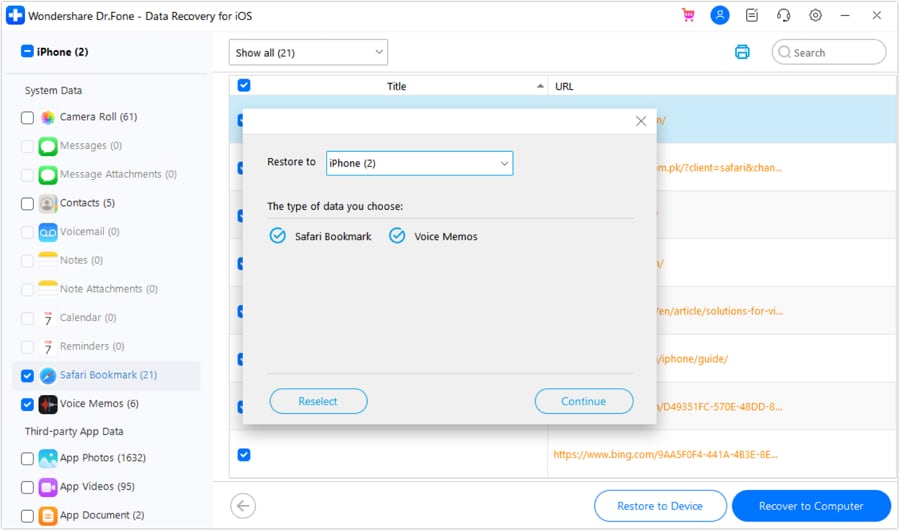
Step 6 Finalize the Export
Select a secure destination folder on your hard drive to archive these recovered files safely. Click Continue to finalize the recovery process effortlessly.


Conclusion
Regardless of whether you encounter the 'iPad could not be restored error 9', 3014, 3194, or the dreaded 'iPad could not be restored error 4013', there are straightforward yet potent troubleshooting methods available. By simply updating the iTunes app, refreshing your operating systems, or adjusting network firewalls, you can quickly eliminate the communication barrier preventing Apple's server authentication. If standard fixes fail and a complete factory wipe is inevitable, leveraging Dr.Fone - Data Recovery (iOS) beforehand guarantees that your irreplaceable data remains entirely secure.
FAQ
1. What exactly does 'iPad could not be restored error 9' mean?
Error 9 is a standard alert indicating a sudden break in communication between your connected iPad, your computer's USB port, and Apple's firmware validation servers during a restore or update procedure.2. Are the solutions for Error 4013 and Error 4010 identical to Error 9?
Yes. Whenever the alert states that the 'iPad could not be restored error 4013' or 4010, the underlying cause is identical to Error 9—a severed USB or network connection—and the recommended fixes are the same.3. Can an outdated antivirus cause iTunes update failures?
Absolutely. A rigid or outdated third-party firewall often flags iTunes network traffic as an unauthorized threat, abruptly halting the communication process and triggering errors like 3194 or 3014.4. Will I lose my files if I remote wipe my iPad to fix Error 3194?
A remote factory reset via iCloud will permanently erase all data on the target device. It is highly recommended to extract and save your files using specialized software like Dr.Fone before initiating a full reset.
 Add Wondershare Dr.Fone as a preferred source on Google