
iPad Won't Connect to Hotspot? 5 Easy Fixes (2026 Guide)

Jun 30, 2026 • Filed to: Phone Repair Solutions • Proven solutions
 TL;DR:
You can resolve an iPad failing to connect to an iPhone hotspot by verifying tethering permissions, adjusting frequency bands for older devices, or wiping corrupted network settings to factory defaults.
● If tethering from an iPhone 12 or newer, enable Maximize Compatibility in the Personal Hotspot settings to force the connection from 5 GHz down to a stable 2.4 GHz band for older iPad models.
● Executing a Reset Network Settings on the iPad eliminates connection inconsistencies by erasing all temporary Wi-Fi, Bluetooth, VPN, and cellular data caches back to their factory defaults.
● If basic updates or resets fail to restore connectivity due to underlying iPadOS faults, the Standard Repair mode within Dr.Fone - System Repair (iOS) can attempt to fix system-level Wi-Fi errors while retaining existing device data.
Ask AI for a summary
 ChatGPT
 Perplexity
 Gemini
 Claude
 Grok
Grok
I have tried so many times to connect my iPad WiFi to my iPhone hotspot, but they keep telling me “unable to connect to your iPhone”. Why?
Wireless connectivity is essential for every mobile device, and iPads are no exception. But many users report a common issue—iPad can't connect to hotspot or Wi-Fi after recent software updates. This unexpected problem disrupts seamless browsing and leaves users frustrated as their iPad struggles to maintain a stable connection.
If you are one of the users facing this problem, we have several options to assist you in resolving it. Before we proceed with the remedies, we require you to perform some simple checks if your iPad not connecting to hotspot.
Part 1: 5 Simple Tips You Should Try on iPad
Tips 1. Restart your iPad
If your iPad not connecting to hotspot, it's usually a good idea to turn it off and on again. Restarting an iPad from a powered-off state also addresses Wi-Fi connectivity issues. Try it now if you haven't already.
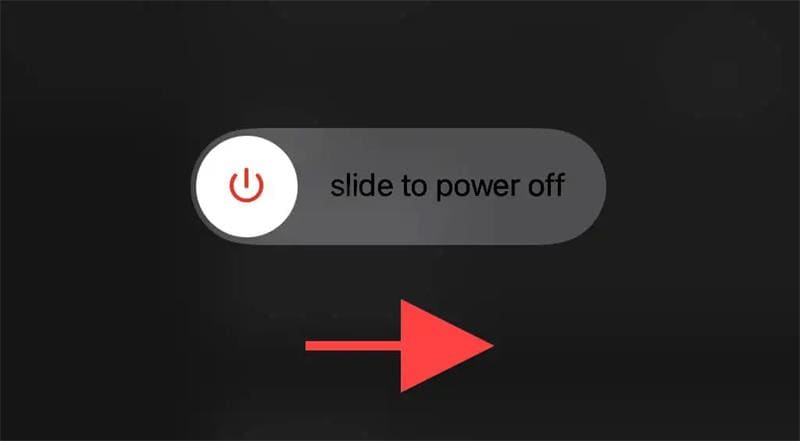
- Step 1. Go to General > Shut Down in the iPad's Settings app.
- Step 2. Swipe the Power button until the iPad completely turns down.
- Step 3. To restart the device, press and hold the Top button.
Tips 2. Check if the hotspot is enabled in "Personal Hotspot."
Before trying advanced fixes, first check the basics. Often, when iPad can't connect to hotspot, the issue is simply that tethering on the iPhone is disabled. An iOS update or accidental toggle in Control Center may turn it off. To restore connectivity, go to your iPhone settings and confirm that Personal Hotspot is enabled.
- Step 1. Go to Settings > Cellular Data to see if your hotspot is activated (or Mobile Data). If the Personal Hotspot option is not enabled, it will be greyed out.
- Step 2. To activate it, switch on Cellular Data (or Mobile Data). Then, under Personal Hotspot, turn on Allow Others to Join.
📱 iPhone Frozen? Fix It in 3 Steps – No Data Loss!
Struggling with a frozen iPhone screen? 🤔 Our guide covers 6 common causes, step-by-step fixes for all models (iPhone 6s to iPhone 17), and safe data recovery. 98.6% success rate! ✨
Tips 3. Disable and enable Wi-Fi on iPad
Turning off and reactivating your iPad's Wi-Fi module is the most straightforward approach to eliminating temporary issues that prevent it from functioning correctly.
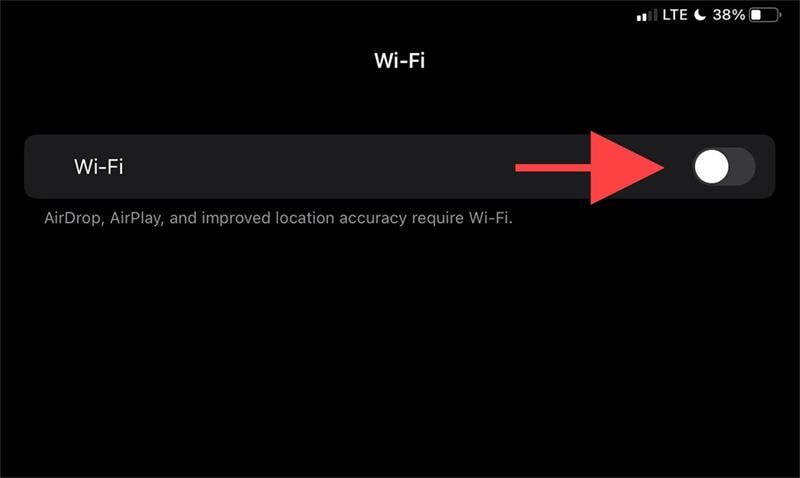
- Step 1. On your iPad, launch the Settings app. Select the Wi-Fi option.
- Step 2. Switch off the Wi-Fi switch. Allow at least 10 seconds.
- Step 3. Turn on the Wi-Fi switch and select the hotspot from the My Networks or Networks menu.
Tips 4. Disable and enable Airplane mode
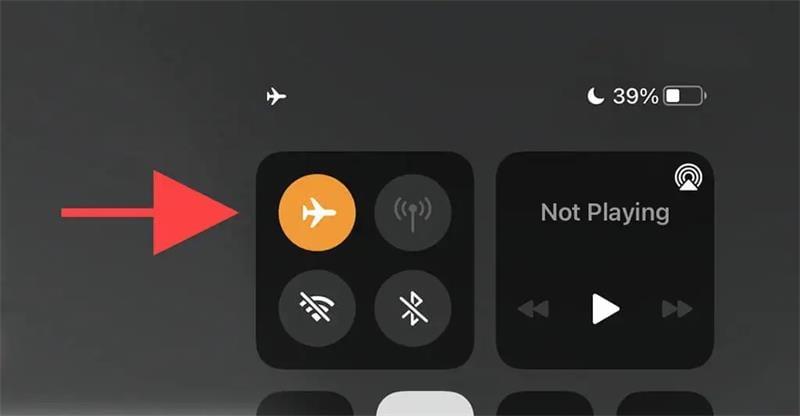
Toggling Airplane Mode on and off helps to restart all network-related radios and is another simple fix for an iPad hotspot not working problem.
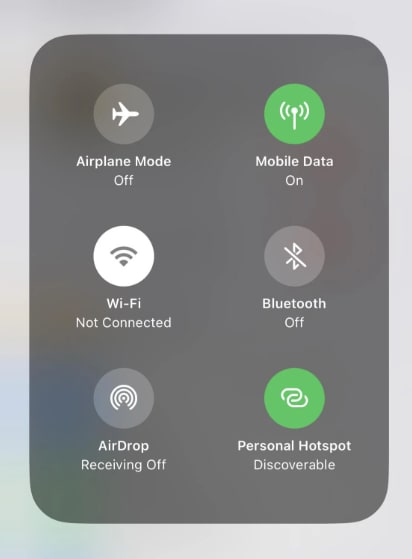
- Step 1. Swipe down from the top-right corner of the screen to bring up the iPad's Control Center.
- Step 2. To turn off Wi-Fi, Cellular, and Bluetooth, tap the Airplane Mode icon.
- Step 3. Wait up to 10 seconds before tapping the Airplane Mode icon again.
Tips 5. Reconnect the hotspot after forgetting it
If your iPad Not Connecting to iPhone Hotspot, you can try forgetting and returning to the network.
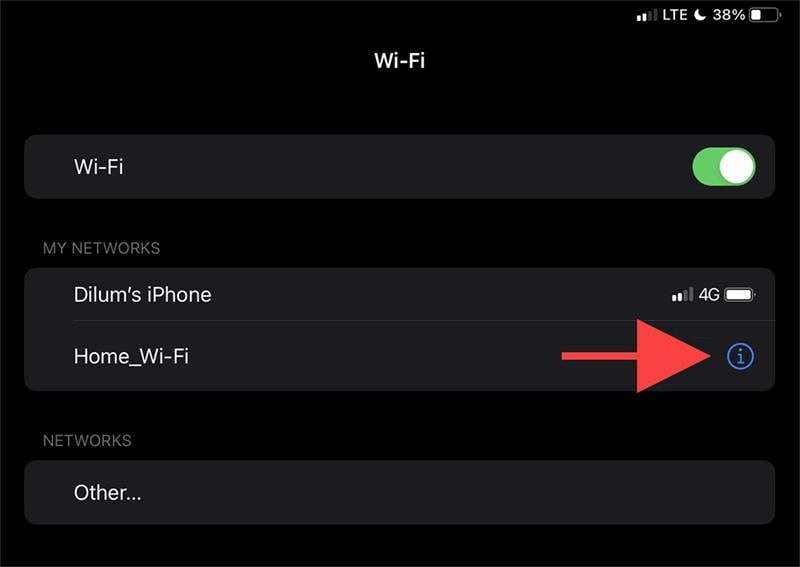
- Step 1. Tap Wi-Fi in the iPad's Settings app.
- Step 2. Find the network under My Networks and touch the Info icon.
- Step 3. Select Forget This Network. Under the Networks section, select the Wi-Fi network.
- Step 4. Tap Join after entering the network password.
Tips: Looking for an all-in-one mobile management software? Look no further than Dr.Fone App - the ultimate choice for all your needs:
- For iOS Users: Free up space with Smart Clean, remove any restriction including screen lock, iCloud activation lock, MDM, or Apple ID, and transfer data easily between devices with our all-in-one iOS solution.
- For Android Users: Bypass screen locks and FRP with our Android unlocker, change your location with one click, and repair damaged Samsung devices with ease.
Discover more possibilities for mobile management solutions with Dr.Fone App (iOS) and Dr.Fone App (Android). Don't miss out, try it now and revolutionize your smartphone experience.


Part 2: 5 Easy Ways to Fix iPad Not Connecting to iPhone Hotspot
Fix 1. Update iPad to the latest version
Wi-Fi problems can also develop due to a faulty version of the iPad's operating system—iPadOS. The only solution is to update it. To do so, navigate to Settings > General > System Software.
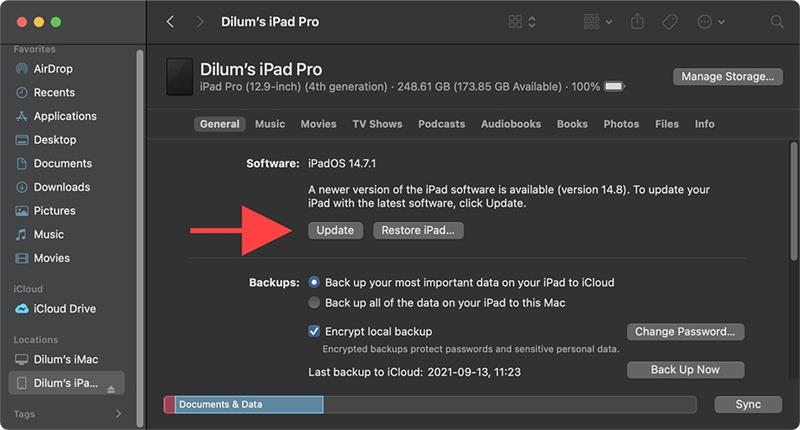
- Step 1. If there are no other Wi-Fi hotspots available (or you cannot connect to any network), you must use a Mac or PC with an active internet connection.
- Step 2. On your Mac, launch the Finder app. If you're using a PC, you'll need to launch iTunes. Connect your iPad to your computer via a USB cable. If this is your first time using iPadOS, unlock it and tap Trust.
- Step 3. In Finder or iTunes, select your iPad. Choose the Check for Updates option.
- Step 4. o apply any pending changes, select Update.
Fix 2. Go to "Reset Network Settings"
Many users report that one of the main reasons why an iPad can't connect to hotspot is due to network inconsistencies. Temporary data stored in your device’s settings—such as Cellular, Wi-Fi, Bluetooth, or VPN configurations—can sometimes interfere with the hotspot connection. These corrupted or conflicting settings may prevent your iPad from recognizing or maintaining a stable link to your iPhone’s hotspot.
Suppose this is the cause of the Personal Assistant problem. In that case, you should resolve it by resetting your network settings to remove all networking temp data caches and all cellular settings to their factory values. It is how you do it:
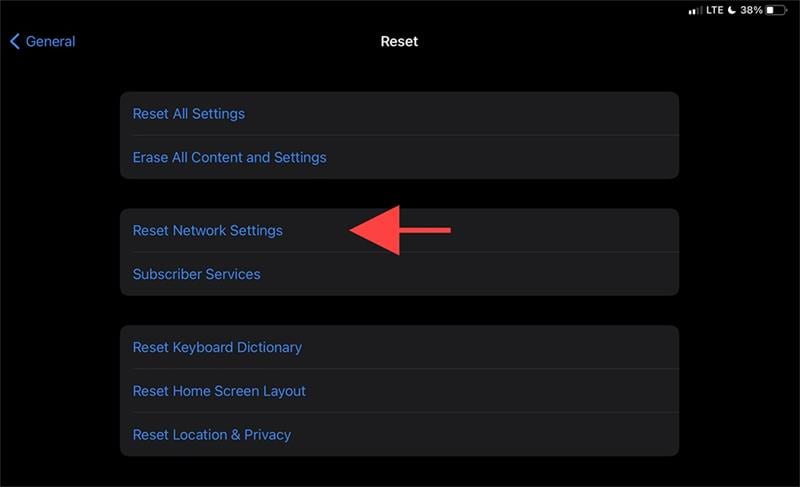
- Step 1. Tap the Settings icon on your iOS device's home screen.
- Step 2. Within the Settings menu, select General, then Reset from the dedicated menu that appears.
- Step 3. Once you've reached the Reset tab, select Reset Network Settings.
- Step 4. After that, you'll be asked to confirm your action by tapping on Reset Network Settings again.
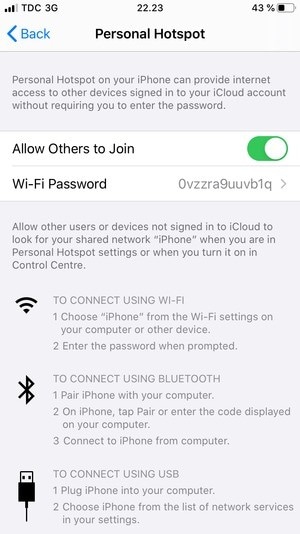
Fix 3. Enable "Allow Others to Join"
To create a personal hotspot (Wi-Fi + Cellular) on your iPhone or iPad, go to Settings > Personal Hotspot > Allow Others to Join and turn it on (if you don't see Personal Hotspot in Settings, go to Cellular > Personal Hotspot). Take down the Wi-Fi password.
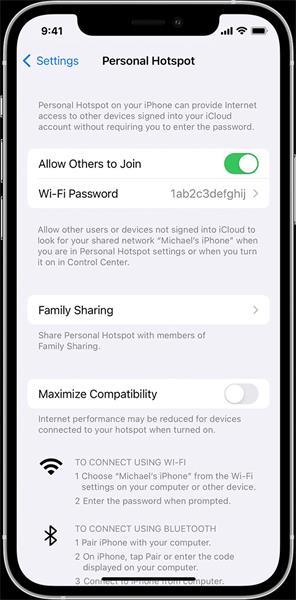
Fix 4. Turn on "Maximize Compatibility"
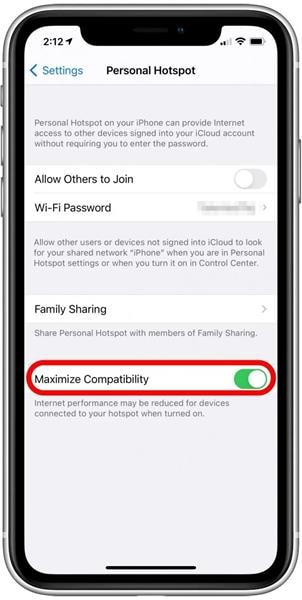
If you’re using an iPhone 12 or newer, your hotspot runs on 5 GHz Wi-Fi for faster speeds. However, this can cause issues when an iPad can't connect to hotspot, especially on older models. To fix this, go to your iPhone settings and enable Maximize Compatibility, which switches the hotspot to a stable 2.4 GHz connection for better device support.
- Step 1. Launch the Settings app. Select Personal Hotspot.
- Step 2. Toggle the Maximize Compatibility switch on or off. (When enabled, the toggle is green; when deactivated, it is grey.)
Fix5. Using Dr.Fone-System Repair [Best Solution]
Why isn't my iPad hotspot not working after upgrading to iPadOS? A system error should cause the Wi-Fi problem. Wondershare Dr.Fone - System Repair (iOS) is software that can help you with a single click if your iPad disconnects from Wi-Fi due to a system fault. To resolve the Fix Wi-Fi Issues on iPad operating iPadOS, follow the procedures outlined below.
Furthermore, Dr.Fone - System Repair has made it easier than ever for customers to recover their iPhone, iPad, or iPod Touch from the white screen, Recovery Mode, Apple logo, or black screen, as well as address other iOS issues. While repairing the iOS system faults, no data will be lost.
Dr.Fone - System Repair (iOS)
Fix iOS System Issues on Your Own
- Fixes various iOS issues like iPhone stuck on Apple logo, white screen, stuck in recovery mode, etc.
- Works smoothly with all versions of iPhone, iPad, and iPod touch.
- Retains existing phone data during the fix.
- Easy-to-follow instructions provided.
Steps to Fix iPad Not Connecting to iPhone Hotspot:
- Step 1: After successfully installing Dr.Fone, start it on your PC. Select “System Repair” from the drop-down menu on the homepage.
- Step 2: After that, you must specify the type of smartphone you are repairing. Choose “iOS” because iPhones are being dealt with.
- Step 3: You will be taken to a new screen where you must pick “iOS Repair” to repair the iPhone's system faults.

- Step 4: Even if the iOS system issue on your device is not listed, you can still select “Repair Now” and start with the recovery process.
- Step 5: To begin with the iOS repair, choose “Standard Repair” from the two options. This mode will attempt to fix your iOS device while protecting all data from loss.

- Step 6: You must boot your iOS device into Recovery Mode. Following successful coverage, click "Enter Recovery Mode" to proceed. If your device is unresponsive or performing strangely, select the "Guide to Recovery Mode" option.

- Step 7: The following window displays a list of different iOS firmware that can be installed on the iOS device. Click “Download” to begin the installation process for any of them.

- Step 8: The iOS firmware begins to download and is displayed in the progress bar across the PC.
- Step 9: After verifying the iOS firmware, select the “Repair Now” option to begin the iOS system recovery process. A progress bar depicts the repair procedure on the following screen.

- Step 10: When you're finished, the prompt window displays the successful completion of the process. To finish the execution, press the “Done” button.

Conclusion
That's all we've got for iPad Not Connecting to iPhone Hotspot. If none works, you can contact your Internet service provider or carrier to confirm that the network is operational. A temporary outage could be affecting network-related services in your area.
For stubborn issues where an iPad can't connect to hotspot, third-party repair tools can be extremely helpful. One of the most reliable options is Dr.Fone - System Repair (iOS), a professional software designed to fix common iOS glitches, network errors, and connectivity problems without data loss. Using this tool can quickly resolve system-related bugs that prevent your iPad from connecting to your iPhone hotspot.


iPad Issues
- iPad Beta Install
- iPad DFU Mode
- 1. Backup iPad in DFU Mode
- 2. Put iPad in and get out of DFU mode
- 3. Restore iPad from DFU mode
- 4. Get iPad In and Out of DFU Mode
- iPad Recovery Mode
- 1. iPad Recovery Mode Not Working
- 2. Restore iPad Stuck in Recovery Mode
- 3. Put iPad in Recovery Mode
- iPad Update/Downgrade
- 1. Downgrade iPadOS 16 Beta to 15
- 2. Fix iPad Stuck on Preparing Update
- 3. Fix iPad Stuck On Update Requested
- 4. Fix iPad stuck at Verifying Update
- 5. Fix iPad not updating
- iPad Common Problems
- 1. 5 Ways to Fix iPad Boot Loop
- 2. Fix Poor Wi-Fi Signal on iPad
- 3. Fix iPad crashes
- 4. Fix Wifi keeps dropping on iPad
- 5. Fix iPad Not Connecting to Hotspot
- 6. Fix iPad Overheating
- 7. Fix Common iPad Problems Easily
- 8. Fix iPad Keeps Restarting
- 9. Fix iPad Stuck in Headphone Mode
- 10. Fix iPad Won't Connect to Wi-Fi
- 11.Solutions for iPad Won't Rotate
- 12.Solutions for iPad Won't Turn Off
- 13.Fix My iPad Won't Turn On
- 14.Ways to Speed Up the Slow iPad
- 15.Fix iPad Won't Sync with iTunes
- 16.Fixe Ghost Typing and False Touch
- 17.Repair iPad Touch ID Not Working
- 18.Fix iPad Keeps Freezing
- 19.Fix Disabled iPad
- iPad App Problems
- 1. Fix iPad Sound Not Working
- 2. Fix Wallpaper not Displaying
- 3. 12 Fixes for Apps Not Downloading
- 4. Fix All iPad Email Problems
- 5. Fixe iPad No Sound in Games
- 6. Ways to Fix No Sound on iPad
- 7. Fix iPad Not Receiving Emails
- 8. Fixe Safari Crashing on iPads
- 9. Fix YouTube Not Working on iPad
- 10. Force Quit Frozen Apps On iPad
- 11.Fix 'Cannot Connect to App Store'
- iPad Button Problems
- 1. Fix iPad Home Button Not Working
- 2. Fix iPad Power Button Not Working
- 3. Fixes for iPad Volume Button Stuck
- iPad Charging Problems
- 1. Fix iOS 16 Battery Drain Issues
- 2. Fixe iPad Battery Draining Fast
- 3. Ways to Speed Up iPad Charging!
- 4. Fixes for iPad Not Charging
- 5. Fix IPad Not Charging
- iPad Keyboard Problems
- 1. Fixe iPad Keyboard Not Working
- 2. Fix Keyboard Trackpad Not Working
- 3. Smart Keyboard Folio VS Magic Keyboard
- iPad Screen Problems


James Davis
staff Editor
Generally rated4.5(105participated)