5 Useful Solutions to Fix iPad Touch ID Not Working

May 22, 2026 • Filed to: Phone Repair Solutions • Proven solutions
 TL;DR:
Fixing an unresponsive iPad Touch ID involves addressing underlying software glitches by hard rebooting the device, updating the iOS firmware, re-registering your fingerprint, or using a system recovery tool like Dr.Fone-System Repair.
● Physical damage to the Touch ID sensor from dirt, moisture, or bending cannot be resolved through software troubleshooting and requires a hardware replacement.
● When utilizing Dr.Fone-System Repair, selecting Standard Repair will fix the system without data loss, while falling back on Advanced Repair will completely erase the device data.
● If the authentication failure occurs after a recent iOS update, you must delete the existing fingerprint profile via Settings > Security > Fingerprint, restart the device, and scan the finger again.
Ask AI for a summary
 ChatGPT
 Perplexity
 Gemini
 Claude
 Grok
Grok
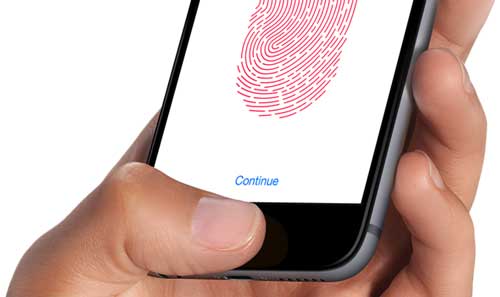
As technology continues to evolve, so does the need for a more secure form of authentication. The iPad touch ID is an excellent example of this, allowing users to access their devices quickly and easily securely.
However, despite the security benefits of the iPad touch ID, some issues still need to be addressed. Sometimes the iPad touch ID not working correctly. To address these issues, we will discuss solutions that will make the iPad Touch ID more convenient.
With these solutions, users can enjoy the convenience and security of the iPad Touch ID without worrying about compromising their data.
- Part 1: Here is Why Your Touch ID is Not Working on iPad
- Part 2: 5 Useful Ways to Fix iPad Touch ID is Not Working
- 1.Dr.Fone-System Repair

- 2.Hard Reboot your Device
- 3.Update your iPad to the Latest Version
- 4.Remove and Set your Fingerprint Again
- 5.Contact Apple Support
- Part 3: How to Set Up Touch ID on My iPad
Part 1: Here is Why Your Touch ID is Not Working on iPad
- The most common reason your Touch ID is not working on your iPad is physical damage to your Touch ID sensor. This can be caused by dirt, dust, moisture, or other debris getting stuck in the sensor or bending or damaging the device. If your Touch ID sensor has been damaged, it will need to be replaced to restore functionality.
If you have ruled out physical damage to the Touch ID sensor, you may need to check a few other settings.
- Make sure you are using the correct fingerprints registered with your device. You may need to re-register your fingerprints if you have recently updated your device.
- You can also try resetting your network settings, which can sometimes help reset the Touch ID system.
- Sometimes software problems can cause the iPad Touch ID not to work. This means the fingerprint you use to unlock the iPad won't work. If this happens, you need to look for the signs and symptoms of a malfunctioning Touch ID. These may include an unresponsive screen or loud clicking when attempting to unlock the iPad.
Part 2: 5 Useful Ways to Fix iPad Touch ID is Not Working
1.Dr.Fone-System Repair
Dr.Fone-System Repair is a powerful repair tool designed to fix various iOS issues, including the iPad fingerprint not working. The software is easy to use and can safely and effectively resolve any iPad issue. Dr.Fone-System Repair provides an advanced repair mode to fix the problem without data loss or damage.
It can also fix common iOS problems such as being stuck in recovery mode, black screens, frozen screens, and more. It also offers one-click solutions to help you fix the most common iPad issues. With Dr.Fone-System Repair, you can get your iPad working again. Here are the steps to follow:
Step 1: Open Dr.Fone on your computer after installation. From the homepage, select "System Repair".

Step 2: Specify the type of smartphone you are repairing by choosing "iOS".
Step 3: In a new screen, please select the "iOS Repair" option to fix the system issues of your iPhone.
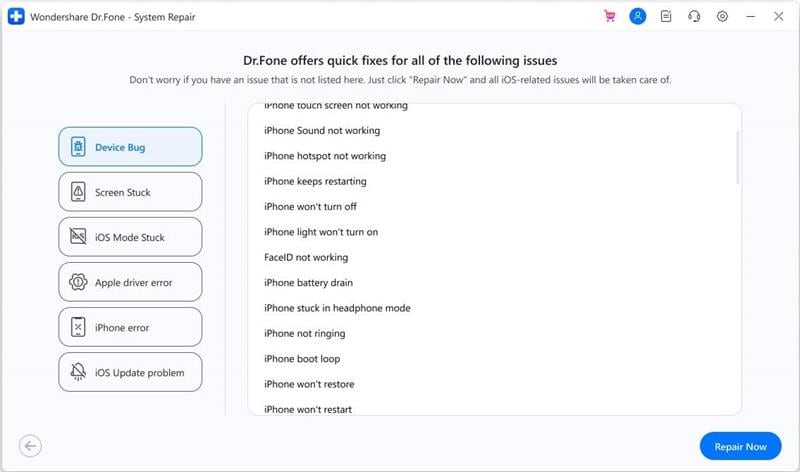
Step 4: Check if Dr.Fone - System Repair (iOS) supports the specific issues your device is dealing with from the list provided. If it does, then click on "Repair Now" to continue. Even if the iOS system issue is not on the list, you can still proceed with recovery by selecting "Repair Now".
Step 5: Select "Standard Repair" out of the two options to start the iOS repair. This mode will fix your iOS device while keeping all data secure.

Note: Standard Repair usually solves most iOS system issues without erasing the device data. If the Standard Repair fails, you can try the Advanced Repair, which fixes even more iOS system issues but erases the device data.
Step 6: Put your iOS device into Recovery Mode. First, connect the device to the computer through a USB connection. Then enter the password for the lock screen and tap on "Trust" when it appears as a pop-up. Once trust is established, click on "Enter Recovery Mode". If your device is unresponsive or acting abnormally, you can use the "Guide to Recovery Mode" option.

Step 7: Follow the on-screen instructions for your model to put your device into Recovery Mode.
Step 8: The platform will detect your device once it is in Recovery Mode.
Step 9: The following window will display a list of different iOS firmware available for installation on your iOS device. Select the one you want and click "Download" to start the process.

Step 10: The iOS firmware will download and be displayed across the progress bar.
Step 11: After downloading, the platform will verify the firmware before installing it on iOS to prevent any problems.
Step 12: Once the iOS firmware is verified, click "Repair Now" to start the iOS system recovery process.

Step 13: The progress bar will show the repair process. When it is complete, the prompt window will say the process was successful. Click "Done" to finish.
2.Hard Reboot your Device
One of the most common issues with an iPad Touch ID not working correctly. This can be caused by various things, including a dirty or damaged home button. Fortunately, there are some practical ways to fix this issue. The first step is to reboot your device hard. To do this:
- Press and hold the Sleep/Wake button (on the top of your iPad) and the Home button (on the front of your device) simultaneously for at least 10 seconds.
- Once the Apple logo appears, release the buttons and let your iPad restart normally.
- Try using Touch ID again.

3.Update your iPad to the Latest Version
If your iPad fingerprint not working, try updating it to the newest version of iOS. Because the outdated iOS version will bring about some bugs, your iPad cannot work like before. To do this, you can check the steps below:
- Connect your iPad to a Wi-Fi network.
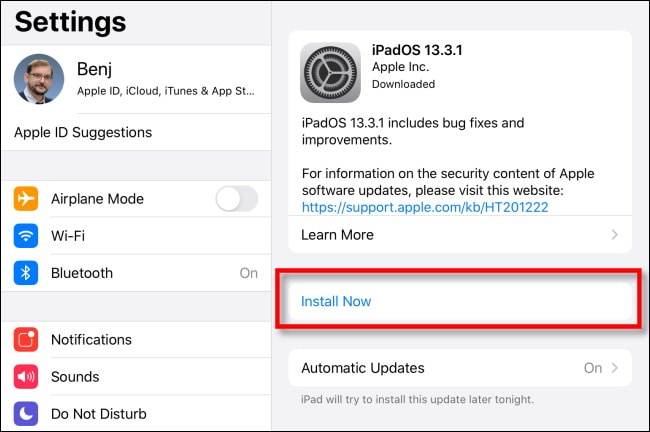
- Go to the Settings app and select General.
- Tap Software Update.
- If an update is available, tap Download and Install.
- Follow the on-screen instructions to complete the update.
- After the update, open the Settings app again, select Touch ID & Passcode, and re-enter your passcode.
- Try using Touch ID again.
4.Remove and Set your Fingerprint Again
Some problems come with the wrong settings. So, to fix it, you can reset Touch ID, this may help your iPad work well again. If your Touch ID not working on iPad correctly, you can try the following steps to fix it:
- Go to Settings > Security > Fingerprint.
- Tap on "Remove Fingerprint" to delete the existing fingerprint.

- Restart your device.
- Re-add your fingerprint by following the on-screen instructions.
- Make sure your finger is placed correctly on the scanner and that you press firmly for the entire scan duration.
- Tap on "Done" once the scan is complete.
- Test your fingerprint to make sure it's working correctly.
5.Contact Apple Support
If your Touch ID is not working, you should contact Apple Support directly. They will be able to help you troubleshoot the issue and provide an appropriate solution.
Apple Support can also advise keeping your Touch ID in good working condition. They may suggest cleaning the sensor, resetting the device, updating the software, or replacing the device if necessary.
They can also provide technical support and instructions on how to use Touch ID. Additionally, they can advise on security measures and settings to keep your device and data secure.
Part 3: How to Set Up Touch ID on My iPad
Setting up Touch ID on an iPad is simple. You need to follow these steps:
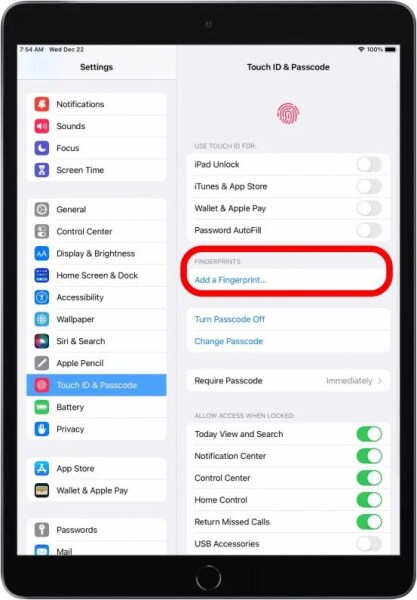
- Open the Settings app on your iPad.
- Tap "Touch ID & Passcode."
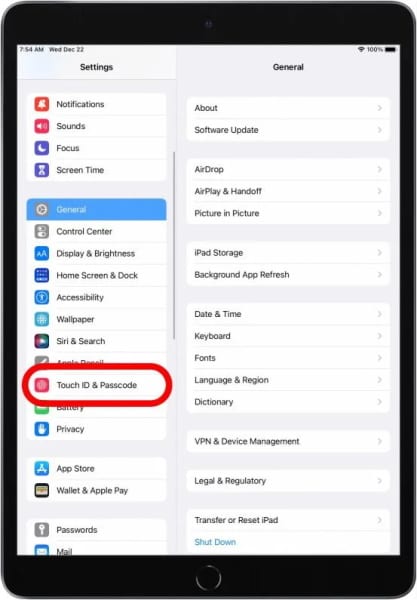
- Enter your passcode to access the settings.
- Tap "Add a Fingerprint".
- Place your finger on the Home button, and lift it off when you feel a slight vibration.
- Continue to place and lift your finger, adjusting the position each time until the iPad has scanned your finger.

- When the iPad has scanned your finger sufficiently, you'll be asked to adjust the position of your finger and scan it again.
- When the iPad successfully scans your finger, it will ask you to enter a passcode for your fingerprint.
- Enter a passcode twice, and then tap "Done".
The Bottom Line
If your Touch ID is not working correctly, there are several solutions you can try. Following the above solutions will help you get the most out of your iPad Touch ID and ensure your device is secure.
For those looking for a reliable and easy-to-use solution, Wondershare Dr.Fone - System Repair is an ideal choice. It has a powerful repair mode that can fix the iPad Touch ID not working issue without erasing data. Additionally, the one-click solution can help you quickly and easily repair the most common iOS problems.


iPad Issues
- iPad Beta Install
- iPad DFU Mode
- 1. Backup iPad in DFU Mode
- 2. Put iPad in and get out of DFU mode
- 3. Restore iPad from DFU mode
- 4. Get iPad In and Out of DFU Mode
- iPad Recovery Mode
- 1. iPad Recovery Mode Not Working
- 2. Restore iPad Stuck in Recovery Mode
- 3. Put iPad in Recovery Mode
- iPad Update/Downgrade
- 1. Downgrade iPadOS 16 Beta to 15
- 2. Fix iPad Stuck on Preparing Update
- 3. Fix iPad Stuck On Update Requested
- 4. Fix iPad stuck at Verifying Update
- 5. Fix iPad not updating
- iPad Common Problems
- 1. 5 Ways to Fix iPad Boot Loop
- 2. Fix Poor Wi-Fi Signal on iPad
- 3. Fix iPad crashes
- 4. Fix Wifi keeps dropping on iPad
- 5. Fix iPad Not Connecting to Hotspot
- 6. Fix iPad Overheating
- 7. Fix Common iPad Problems Easily
- 8. Fix iPad Keeps Restarting
- 9. Fix iPad Stuck in Headphone Mode
- 10. Fix iPad Won't Connect to Wi-Fi
- 11.Solutions for iPad Won't Rotate
- 12.Solutions for iPad Won't Turn Off
- 13.Fix My iPad Won't Turn On
- 14.Ways to Speed Up the Slow iPad
- 15.Fix iPad Won't Sync with iTunes
- 16.Fixe Ghost Typing and False Touch
- 17.Repair iPad Touch ID Not Working
- 18.Fix iPad Keeps Freezing
- 19.Fix Disabled iPad
- iPad App Problems
- 1. Fix iPad Sound Not Working
- 2. Fix Wallpaper not Displaying
- 3. 12 Fixes for Apps Not Downloading
- 4. Fix All iPad Email Problems
- 5. Fixe iPad No Sound in Games
- 6. Ways to Fix No Sound on iPad
- 7. Fix iPad Not Receiving Emails
- 8. Fixe Safari Crashing on iPads
- 9. Fix YouTube Not Working on iPad
- 10. Force Quit Frozen Apps On iPad
- 11.Fix 'Cannot Connect to App Store'
- iPad Button Problems
- 1. Fix iPad Home Button Not Working
- 2. Fix iPad Power Button Not Working
- 3. Fixes for iPad Volume Button Stuck
- iPad Charging Problems
- 1. Fix iOS 16 Battery Drain Issues
- 2. Fixe iPad Battery Draining Fast
- 3. Ways to Speed Up iPad Charging!
- 4. Fixes for iPad Not Charging
- 5. Fix IPad Not Charging
- iPad Keyboard Problems
- 1. Fixe iPad Keyboard Not Working
- 2. Fix Keyboard Trackpad Not Working
- 3. Smart Keyboard Folio VS Magic Keyboard
- iPad Screen Problems


James Davis
staff Editor
Generally rated4.5(105participated)