iPad Stuck on Update Requested? Here's How to Fix It
Oct 23, 2025 • Filed to: Phone Repair Solutions • Proven solutions
Is your iPad stuck on update requested? If so, you're not alone. Many iPad users encounter this issue; fortunately, there are ways to resolve it. You no longer have to feel stuck or frustrated with your device.
The Update Requested screen often appears because iOS updates can sometimes encounter minor issues. However, there are a few easy steps you can take to troubleshoot and get your iPad working smoothly again. Whether it’s clearing space, fixing your internet connection, or restarting the process, you’ve got options.
This guide is here to help you solve the problem quickly and effectively. With a little guidance, you'll have your iPad back in action in no time. Let's get started!

What Is Update Requested On iPad?
Before we discuss how to fix the iPad or even the iPhone stuck on the update-requested screen, let's take a moment to review this issue and why it can occur. When your iPad displays the "update requested" message, Apple's servers have detected a new version of the iOS software available for your device. When this happens, the iPad will prompt you to update your device.
If, for some reason, this process doesn't complete correctly or gets stuck along the way, you may be unable to use your iPad until the issue is resolved. The iPad update requested message can occur due to a variety of reasons, including:
- Poor Internet connection: If the iPad doesn't have access to a reliable Internet connection while updating, it may get stuck on the update requested iPad screen.
- Software glitches: In some cases, software bugs or glitches can cause unexpected issues during an update.
- Hardware issues: If the iPad's hardware is faulty or has been damaged, it may cause problems during an update.
These are just a few of the causes for an iPad being stuck on Update Requested. Thankfully, there are several methods for fixing this issue and getting your device back up and running as usual. The following section will discuss some of these solutions in more detail.
📱 iPhone Frozen? Fix It in 3 Steps – No Data Loss!
Struggling with a frozen iPhone screen? 🤔 Our guide covers 6 common causes, step-by-step fixes for all models (iPhone 6s to iPhone 17), and safe data recovery. 98.6% success rate! ✨
How to Fix an iPad Stuck on Update Requested?

Now that you understand this issue and why it can happen, let's discuss how to fix it. Below, we'll discuss some of the best methods for resolving an iPad stuck on the update requested.
1. Hard Reset Your iPad
A hard reset usually fixes the issue if your iPad is stuck on the Update Requested screen. This will involve unplugging your device from power.

- Press and hold the Home button and the Power button simultaneously until the Apple logo appears on the screen.
- Then release the buttons and wait for your device to reboot. After the reboot, your iPad should restart the update process.
Sometimes, it can take a few attempts to get the hard reset to work, but it should eventually be successful and get you back on track. Hard resetting your iPad can also help to clear any software glitches or bugs that might be causing the update process to freeze.
If your iPad is still stuck on the Update Requested screen after several hard resets, try some of the other solutions listed below.
2. Check Your Network Connection
After a hard reset, the next step is to ensure your network connection is stable. Here's what to do:
-
Verify Wi-Fi Connection: Ensure your device is connected to a stable Wi-Fi signal. If the connection is weak, try disconnecting and reconnecting, or switch to a different network.
-
Switch to Wi-Fi (if using cellular data): Wi-Fi typically provides a more stable connection, reducing the chances of interrupted updates.
-
Reset Network Settings: If you're having ongoing issues, reset your device's network settings, router, or modem.
-
Optimize Signal Strength: Position your device closer to the router, making sure no obstacles are blocking the signal.
-
Contact Your ISP: If none of these steps resolve the issue, reach out to your Internet service provider. They can help troubleshoot and ensure your connection meets iOS update requirements.
By following these steps, you’ll improve your network stability and avoid interruptions. If none of these steps work, it might be time to try a different approach.

3. Charge Your iPad
A low battery can prevent your iPad from completing the update process. Follow these steps to ensure proper charging:
-
Check Battery Level: Make sure your iPad has at least 50% battery before starting the update.
-
Use a Reliable Charger: If possible, switch to a spare charger or power adapter to ensure your device gets enough power.
-
Plug Into a Wall Outlet: Use a USB power adapter connected directly to a wall outlet. Avoid external sources like computers or vehicle ports, as they may not provide sufficient power.
-
Restart After Charging: Once your iPad is charged, restart it and try running the update again.
If the update still doesn’t proceed, consider other troubleshooting methods or check for potential compatibility issues with the latest iOS version.

4. Remove Software Update
Sometimes, the iPad may be stuck on the Update Requested screen due to corrupt software update files. If this is causing your issue, then you'll need to delete these files from your device.
- To do this, go to Settings > General > Storage & iCloud Usage > Manage Storage and then select the "Software Update" option.
- Tap "Delete Update" and confirm your choice when prompted. This should remove the corrupt update files from your iPad and hopefully fix the issue.
- If this doesn't work, then you can try resetting all your settings by going to Settings > General > Reset and select "Reset All Settings."

This will not delete any of your data but will reset all your settings to their defaults. Once your settings have been reset through the settings app, try restarting your device and see if the update process can continue. The iOS update stuck issue should now be fixed.
5. Free Up The iPad Storage

If your iPad needs more storage space to complete the update, it may get stuck on the Update Requested screen. To fix this issue, try freeing up some space on your device.
- Go to Settings > General > Tap iPhone Storage & iCloud Usage and check how much storage space is available on your iPad. If you don't have enough free space, you'll need to find ways to free up some of it.
- Try deleting unused apps or files that take up a lot of space. You can also transfer your photos and videos to iCloud or an external storage device.
- Once you have freed up some space, try restarting your device and see if the update can proceed. This should fix the issue. If it doesn't, you may have to try other solutions.
Remember that iPad software updates require at least 3GB of free space for the installation process. If your device doesn't have enough free storage available, it will be unable to finish the update and may get stuck on the Update Requested screen. So, make sure you check the storage space to download iOS update files before attempting the update.
6. Dr.Fone-System Repair
Wondershare Dr.Fone - System Repair (iOS) is a powerful tool that can help you fix various iOS-related issues, including the iPad being stuck on the update-requested screen. It’s an easy-to-use tool designed to resolve issues such as frozen screens, boot loops, or update errors.
It is simple to use and can help you get your device out of the update-requested loop and back to normal quickly and efficiently. So, if none of the above solutions have worked for you, then give Dr.Fone - System Repair (iOS) a try because it may be exactly what you need to fix the issue. Sometimes, nothing else is better than a professional tool for the job.
And Dr.Fone stands out by offering powerful features such as upgrading to the latest iOS 26 beta or downgrading to iOS 18. Whether you want to explore the exciting new features of iOS 26 beta or roll back to an older version, Dr.Fone lets you do it without data loss or complex technical steps.
With just a few clicks, you can get your iPad back to working perfectly. Say goodbye to system headaches and give Dr.Fone a try today for a fast, hassle-free fix!
Dr.Fone - System Repair (iOS)
Fix your iPhone problems without data loss!
- Fix iOS issues in a few clicks without any data loss
- Troubleshoot and repair a variety of iPhone errors
- Enjoy a safe, reliable, and seamless experience
- Work for all models of iPhone, iPad, and iPod touch
Follow these simple steps to get through your iPad stuck on update requested problem with this method:
Step #1: Launch Wondershare Dr.Fone - System Repair (iOS), and on the homepage, you'll find the option "System Repair."

Step #2: Select "iOS" as your device type and proceed with "iOS Repair" to address your system issue.

Step #3: Pick Standard Repair, connect the iPad, and let the tool put it into Recovery Mode following the steps.


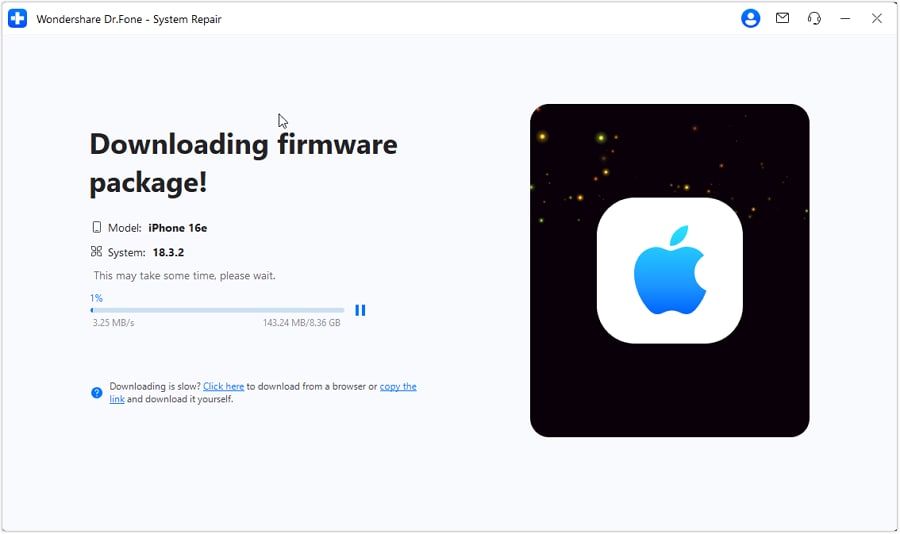
Step #4: Choose the latest firmware version and click Download (it will verify once complete).


Step #5: After verification, Dr.Fone will install the update and finish repairing your device.

Hopefully, these solutions have helped you get your iPad out of the update-requested loop and enabled it to finish the update process successfully.
In case the Apple server is having issues or the update is incompatible with your device, you may need to wait until the problem is fixed. If none of these solutions have worked, you should take your iPad to an Apple Store and let the experts handle it.
The Bottom Line
All the above solutions will help you fix the iPad stuck on the Update Requested screen. But, if you need something else, then Wondershare Dr.Fone - System Repair (iOS) is the best option. It is designed to tackle various iOS-related issues quickly and effectively.
This robust program can quickly and effectively resolve most iOS-related issues, so you don't have to worry about dealing with the issue yourself. The program also features a wide range of other valuable functions for iOS and even Android devices, so you can rest assured that you're in good hands.
iPad Issues
- iPad Beta Install
- iPad DFU Mode
- 1. Backup iPad in DFU Mode
- 2. Put iPad in and get out of DFU mode
- 3. Restore iPad from DFU mode
- 4. Get iPad In and Out of DFU Mode
- iPad Recovery Mode
- 1. iPad Recovery Mode Not Working
- 2. Restore iPad Stuck in Recovery Mode
- 3. Put iPad in Recovery Mode
- iPad Update/Downgrade
- 1. Downgrade iPadOS 16 Beta to 15
- 2. Fix iPad Stuck on Preparing Update
- 3. Fix iPad Stuck On Update Requested
- 4. Fix iPad stuck at Verifying Update
- 5. Fix iPad not updating
- iPad Common Problems
- 1. 5 Ways to Fix iPad Boot Loop
- 2. Fix Poor Wi-Fi Signal on iPad
- 3. Fix iPad crashes
- 4. Fix Wifi keeps dropping on iPad
- 5. Fix iPad Not Connecting to Hotspot
- 6. Fix iPad Overheating
- 7. Fix Common iPad Problems Easily
- 8. Fix iPad Keeps Restarting
- 9. Fix iPad Stuck in Headphone Mode
- 10. Fix iPad Won't Connect to Wi-Fi
- 11.Solutions for iPad Won't Rotate
- 12.Solutions for iPad Won't Turn Off
- 13.Fix My iPad Won't Turn On
- 14.Ways to Speed Up the Slow iPad
- 15.Fix iPad Won't Sync with iTunes
- 16.Fixe Ghost Typing and False Touch
- 17.Repair iPad Touch ID Not Working
- 18.Fix iPad Keeps Freezing
- 19.Fix Disabled iPad
- iPad App Problems
- 1. Fix iPad Sound Not Working
- 2. Fix Wallpaper not Displaying
- 3. 12 Fixes for Apps Not Downloading
- 4. Fix All iPad Email Problems
- 5. Fixe iPad No Sound in Games
- 6. Ways to Fix No Sound on iPad
- 7. Fix iPad Not Receiving Emails
- 8. Fixe Safari Crashing on iPads
- 9. Fix YouTube Not Working on iPad
- 10. Force Quit Frozen Apps On iPad
- 11.Fix 'Cannot Connect to App Store'
- iPad Button Problems
- 1. Fix iPad Home Button Not Working
- 2. Fix iPad Power Button Not Working
- 3. Fixes for iPad Volume Button Stuck
- iPad Charging Problems
- 1. Fix iOS 16 Battery Drain Issues
- 2. Fixe iPad Battery Draining Fast
- 3. Ways to Speed Up iPad Charging!
- 4. Fixes for iPad Not Charging
- 5. Fix IPad Not Charging
- iPad Keyboard Problems
- 1. Fixe iPad Keyboard Not Working
- 2. Fix Keyboard Trackpad Not Working
- 3. Smart Keyboard Folio VS Magic Keyboard
- iPad Screen Problems


James Davis
staff Editor
Generally rated4.5(105participated)