My iPad Won't Update? 12 Fixes Are Here!

Jul 12, 2024 • Filed to: Mobile Repair Solutions • Proven solutions
iPads are a very Generous version of the latest technology innovations that have been introduced in the market. Are you another fed-up owner of an iPad facing issues with updating your iPad? Have you gone through multiple solutions and still couldn't find an answer to why iPad won’t update? This article has put a comprehensive set of solutions and fixes in light for you.
You can go through these 12 diverse and effective fixes to resolve your question, "why won’t my iPad update?" Hopefully, these solutions will be a good breakthrough for you in the search for the right one.
Part 1: Why Won’t My iPad Update?
This part will introduce some tentative conditions that you might be in that prevent you from updating your iPad. To figure out if you are tentatively in any of the provided options, which is why your iPad is not updating, go through the following points in detail:
1. Device is Not iPadOS Supported
One of the first reasons that may pre-emptively stop you from updating your iPad is your device. The device you own may not be iPadOS 15 supported, so you cannot have it updated. To get to know if your device can be updated, look across the following list:
- iPad Pro 12.9 (5th Gen)
- iPad Pro 11 (3rd Gen)
- iPad Pro 12.9 (4th Gen)
- iPad Pro 11 (2nd Gen)
- iPad Pro 12.9 (3rd Gen)
- iPad Pro 11 (1st Gen)
- iPad Pro 12.9 (2nd Gen)
- iPad Pro 10.5 (2nd Gen)
- iPad Pro 12.9 (1st Gen)
- iPad Pro 9.7 (1st Gen)
- iPad Air (5th Gen)
- iPad Air (4th Gen)
- iPad Air (3rd Gen)
- iPad Air (2nd Gen)
- iPad Mini (6th Gen)
- iPad Mini (5th Gen)
- iPad Mini (4th Gen)
- iPad (9th Gen)
- iPad (8th Gen)
- iPad (7th Gen)
- iPad (6th Gen)
- iPad (5th Gen)
2. Lack of Storage Space
Any OS that operates across a device requires some storage space. If you own an iPad and cannot update it, there is a fair chance that your storage space might be ending. Usually, iPadOS updates require some potential space of 1GB or more. To counter such conditions, it is advised that you should delete all the unused applications and data across your iPad.
To make the process smooth, you can consider opting for Dr.Fone – Data Eraser (iOS) to effectively delete unused apps and data across your iPad. This would surely help you free some space and resolve the error of "why won’t my iPad update?”
3. Network Instability
Your iPad won’t update software over a very basic reason of an unstable network. To download any iPadOS across your device, it is necessary to have a good internet connection. However, an unstable network may prevent you from executing this process smoothly. It may be possible that you may be downloading other content across your iPad, which needs to be avoided.
On the other hand, to prevent getting into such a mess, you should enable and disable the Airplane mode across your iPad to ensure network stability. If your network may not work, it is preferred that you should shift across a new Wi-Fi or mobile data network.
4. Beta Version is Installed
There is a primal chance you may have your iPad in a beta version of the iOS. To resolve the issue of the iPad won’t update, you should consider getting your iPad out of the Beta version. Only then will you be able to have your iPad updated to the latest iPadOS version.
5. Issues within the Apple Server
Whenever you are unable to update your iPad, it is preferred that you should check out the status of the Apple Server. With the server not working properly, there is no chance that you will be able to update your iPad. This usually occurs when Apple releases a new update, and thousands of users are downloading the software simultaneously.
To check the status of the Apple Server, you should check out its page. Green circles across the website page will indicate its availability. Any server that doesn’t display a green circle is encountering an issue. If you face such a problem, you have to wait until Apple resolves the issue.
6. Low Battery of Device
A tentative reason why your iPad is not updating maybe because of its low battery. You should check that your iPad should be above the 50% charging mark to proceed with the update. In other cases, you need to keep your device in charge to update the device to the latest iPadOS.
Part 2: What to Do if the iPad Still Won’t Update?
As you make yourself aware of a few reasons preventing you from updating your iPad, you may need to go beyond these to resolve the existing problems. If you fail to find a resolution for your iPad update not working, you need to look across these methods to figure out the issue with your iPad.
Method 1: Restart iPad
The first approach you can adopt to update your iPad properly is restarting it. This will potentially help you in resolving the issue of why won’t my iPad update. Follow the simple steps to restart your iPad successfully:
Step 1: Open “Settings” on your iPad and access “General” from the available options. Find the "Shut Down" option in the list and turn off your iPad.
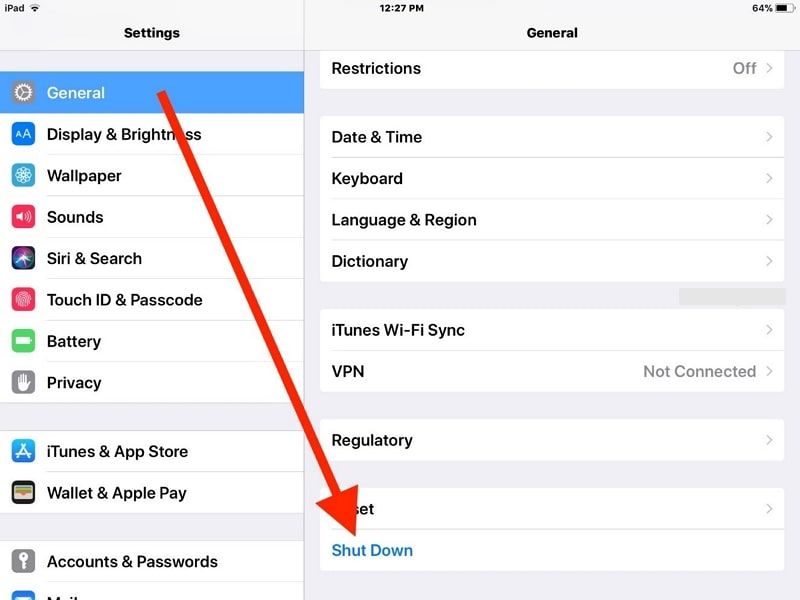
Step 2: Hold the Power button of your iPad to turn on the iPad. Check if the iPad can update now.
Method 2: Delete iOS Update and Download Again
This method can be quite effective in helping your update your iPad. If you cannot update your device, this conventional method will provide you with the perfect stance for updating your device. For this, you need to look across the steps as shown below:
Step 1: Lead into the “Settings” of your device and navigate to the “General” option. Find the option of “iPad Storage” in the available list of options.
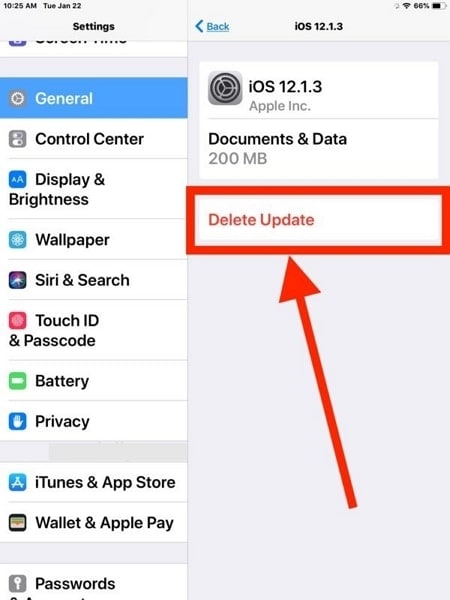
Step 2: Locate the iPadOS version among the list that appears on the next screen. Tap to open it and discover the “Delete Update” button. Click to re-confirm the process and execute it successfully.
Step 3: Once your iPadOS version is successfully deleted, re-open “Settings” and navigate to the “General” option.
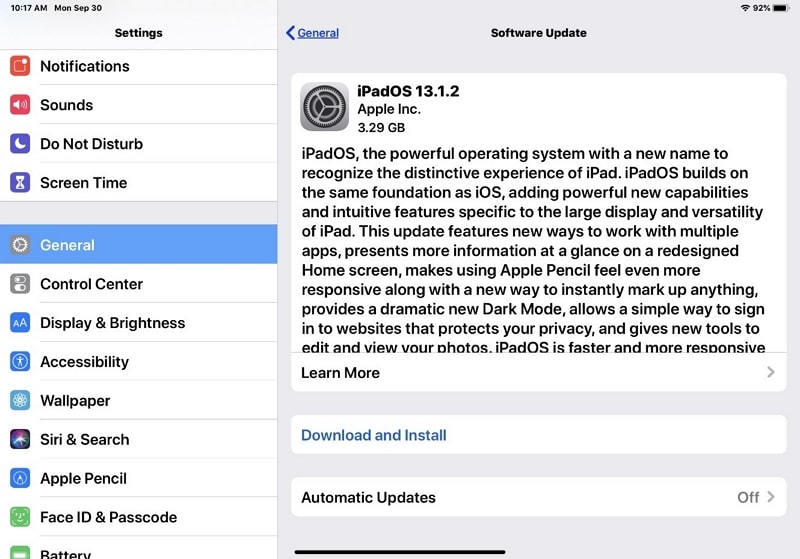
Step 4: Proceed into the option of “Software Update” and let your device automatically detect an iOS update across your device. Download the update and install it across your device.
Method 3: Reset All Settings
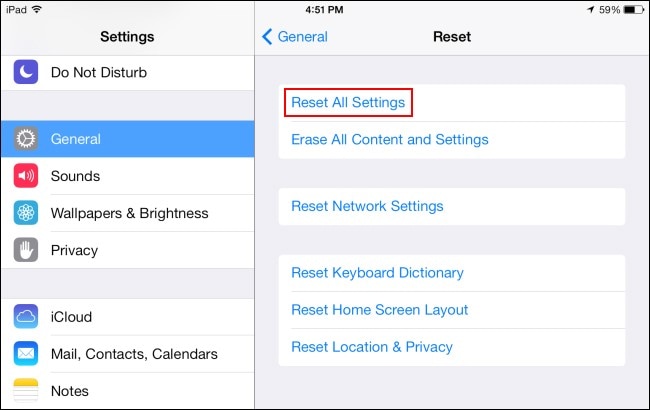
Another impressive approach to resolve the issue of iPad won’t update by resetting all settings of the device. This is a different approach than resetting the device to factory defaults. Some tentative settings are reset across this procedure. To make sure you execute it successfully, look into the following steps:
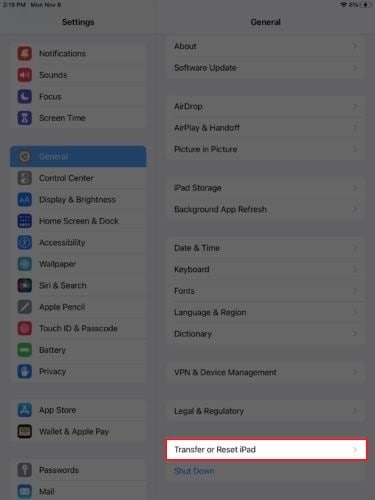
Step 1: Open “Settings” on your iPad and lead into the “General” section.
Step 2: Find the option of "Transfer or Reset iPad" in the list and proceed. Find the "Reset" button at the bottom of the next window.
Step 3: To execute the process, click on "Reset All Settings" and confirm the pop-up message. Your iPad will restart, and all the settings will reset successfully.
Method 4: Use iTunes/Finder to Update iPad
Still failing to resolve the issue of the iPad not updating? You need to consider this method for making significant changes across your iPad and resolve all errors that are hindering its proper operation. iTunes or Finder can be a tentative solution for this issue. If you own a Windows PC or a Mac with macOS Mojave or earlier, you will have iTunes. Conversely, if you have a Mac with macOS Catalina or later, you will have Finder across the device.
Make sure that you back up the device before going through this process. Follow the steps below after you have successfully backed up your iPad:
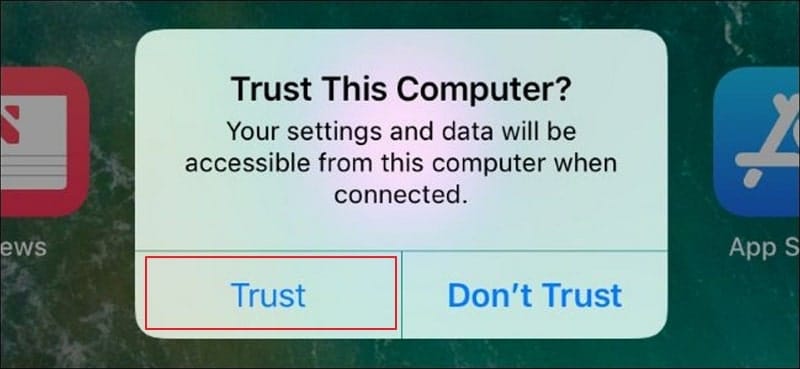
Step 1: Connect your iPad with the PC or Mac through a cable connection. Open iTunes or Finder according to your available device. Allow access to your computer and iPad, likewise if you are establishing a connection for the first time.
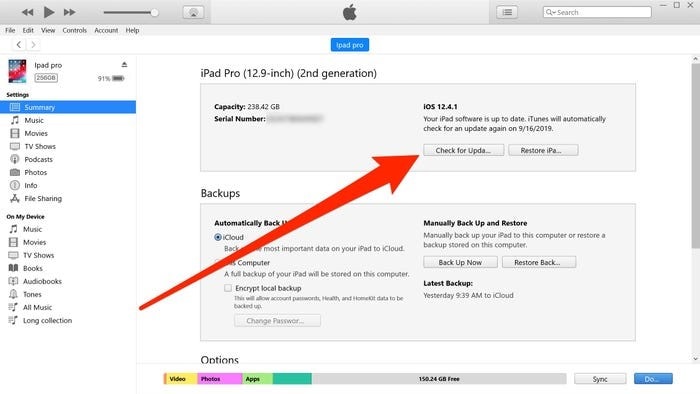
Step 2: If you are using iTunes, click the “iPad” icon on the left and select "Summary" from the available options below. However, click "General" to proceed if you are on Finder.

Step 3: Find the option of “Check for Update” across the window. On locating an update successfully, click on “Download and Update” to allow your iPad to get updated.
Method 5: Use Professional Software to Fix iPad Won’t Update (No Data Loss)
Are you still confused about how to update your iPad? You should consider using an effective tool under the name of Dr.Fone – System Repair (iOS). This platform is known for fixing all kinds of iPadOS errors across your device. With a variety to cover, the user can also keep their data intact throughout the process. Along with that, they are provided the opportunity to consider different modes for effective resolution.
Before using this platform, you should make yourselves aware of a few advantages that make it a very special option in the methods for updating the iPad.
- Fixes most of the iPhone and iPad issues without data loss.
- It is supported by iPadOS 15 and works for all models of iPad.
- Provides a very easy and simple process for execution.
- Does not require the device to jailbreak.
Follow the steps to fix the issue of the iPad update not working successfully:
Step 1: Launch and Access Tool
You need to download and install the latest version of Dr.Fone on your computer. Proceed to launch the tool and select “System Repair” from the available options.

Step 2: Connect Device and Mode
Connect your iPad with the computer and let the platform detect it. Once detected, select “Standard Mode” across the next window.

Step 3: Finalize Version and Proceed
The tool provides the model type of the iPad on the next screen. Verify the information and click "Start" to download the related iOS firmware.

Step 4: Install Firmware
Let the platform download and verify the downloaded firmware successfully. Once done, click on “Fix Now” to start repairing the iPad. A message of successful repair appears on the screen of your iPad.

Method 6: Use DFU Mode to Restore iPad
Dr.Fone - Phone Backup (iOS)
Selectively backup your iPad/iPhone data in 3 minutes!
- One click to backup the whole iOS device to your computer.
- Allow previewing and selectively export contacts from your iPad/iPhone to your computer.
- No data loss on devices during the restoration.
- Works for all iOS devices. Compatible with the latest iOS version.


If you are failing to find an optimal solution for your iPad, you can go across the DFU Mode to find an appropriate resolution to the problem. However, the user needs to remember that they should back their device before putting it in DFU mode. You can consider opting for Dr.Fone – Phone Backup (iOS) to back up the data for successful execution. To understand the steps for putting your iPad in DFU mode and restoring it, go through the steps described below:
Step 1: You need to launch iTunes/ Finder and plug in your iPad.
Step 2: To put your iPad into DFU mode, you need to be careful with the steps described below. However, you need to follow the steps according to your iPad model.
For iPad with Home Button
- Press and hold your iPad's Power Button and Home Button until the screen turns black.
- As the screen turns black, you need to release the Power Button after three seconds. However, keep holding the Home button.
- You need to keep holding the Home button until the iPad appears across iTunes/Finder.

For iPad with Face ID
- Tap the Volume Up and Volume Down buttons of your iPad simultaneously. Long press the Power button of your iPad until the screen turns black.
- As soon as it turns black, hold the Volume Down button and the Power Button. Keep the buttons holding for a few seconds.
- Leave the Power Button and keep holding the Volume Button for a few more seconds. The device will appear across iTunes/Finder successfully.

Step 3: If the screen remains black and the device appears across iTunes/Finder, it is successfully put across DFU Mode. You will receive a notification about a new device across iTunes/Finder.
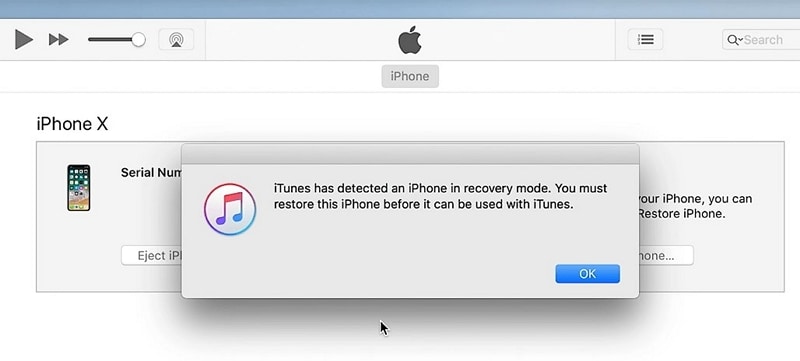
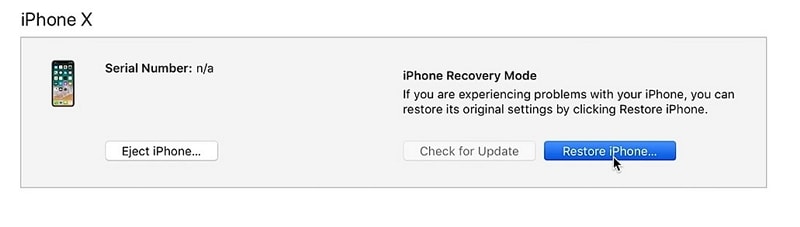
Step 4: Find the box with the option of "Restore iPad" across the window. Click and select "Restore" on the next pop-up. The process of restoration runs across the device, and it will restart automatically once completed.
You can watch the video below to update old iPad/iPhone to new iOS version
Conclusion
Have you figured out the appropriate solution for your iPad? This article has provided comprehensive solutions to your existing problem. After going through this article, you will surely find out a proper solution to why won’t my iPad update. We hope that you’ll be able to use your iPad freely and with no hindrance.


iPad Issues
- iPad Beta Install
- iPad DFU Mode
- 1. Backup iPad in DFU Mode
- 2. Put iPad in and get out of DFU mode
- 3. Restore iPad from DFU mode
- 4. Get iPad In and Out of DFU Mode
- iPad Recovery Mode
- 1. iPad Recovery Mode Not Working
- 2. Restore iPad Stuck in Recovery Mode
- 3. Put iPad in Recovery Mode
- iPad Update/Downgrade
- 1. Downgrade iPadOS 16 Beta to 15
- 2. Fix iPad Stuck on Preparing Update
- 3. Fix iPad Stuck On Update Requested
- 4. Fix iPad stuck at Verifying Update
- 5. Fix iPad not updating
- iPad Common Problems
- 1. 5 Ways to Fix iPad Boot Loop
- 2. Fix Poor Wi-Fi Signal on iPad
- 3. Fix iPad crashes
- 4. Fix Wifi keeps dropping on iPad
- 5. Fix iPad Not Connecting to Hotspot
- 6. Fix iPad Overheating
- 7. Fix Common iPad Problems Easily
- 8. Fix iPad Keeps Restarting
- 9. Fix iPad Stuck in Headphone Mode
- 10. Fix iPad Won't Connect to Wi-Fi
- 11.Solutions for iPad Won't Rotate
- 12.Solutions for iPad Won't Turn Off
- 13.Fix My iPad Won't Turn On
- 14.Ways to Speed Up the Slow iPad
- 15.Fix iPad Won't Sync with iTunes
- 16.Fixe Ghost Typing and False Touch
- 17.Repair iPad Touch ID Not Working
- 18.Fix iPad Keeps Freezing
- 19.Fix Disabled iPad
- iPad App Problems
- 1. Fix iPad Sound Not Working
- 2. Fix Wallpaper not Displaying
- 3. 12 Fixes for Apps Not Downloading
- 4. Fix All iPad Email Problems
- 5. Fixe iPad No Sound in Games
- 6. Ways to Fix No Sound on iPad
- 7. Fix iPad Not Receiving Emails
- 8. Fixe Safari Crashing on iPads
- 9. Fix YouTube Not Working on iPad
- 10. Force Quit Frozen Apps On iPad
- 11.Fix 'Cannot Connect to App Store'
- iPad Button Problems
- 1. Fix iPad Home Button Not Working
- 2. Fix iPad Power Button Not Working
- 3. Fixes for iPad Volume Button Stuck
- iPad Charging Problems
- 1. Fix iOS 16 Battery Drain Issues
- 2. Fixe iPad Battery Draining Fast
- 3. Ways to Speed Up iPad Charging!
- 4. Fixes for iPad Not Charging
- 5. Fix IPad Not Charging
- iPad Keyboard Problems
- 1. Fixe iPad Keyboard Not Working
- 2. Fix Keyboard Trackpad Not Working
- 3. Smart Keyboard Folio VS Magic Keyboard
- iPad Screen Problems
Daisy Raines
staff Editor
Generally rated4.5(105participated)