How to Transfer Photos From iPod to iPhone in Easy Steps?

May 22, 2026 • Filed to: Data Transfer Solutions • Proven solutions
 TL;DR:
You can safely transfer photos from a discontinued Apple iPod to an iPhone using native cloud services like iCloud, direct sharing via AirDrop, or desktop tools like iTunes and Wondershare Dr.Fone to prevent permanent data loss.
● iCloud provides the most straightforward automatic sync via Apple ID settings, while AirDrop and Google Photos require newer iPod models that support app installations and localized file sharing.
● Transferring photos via iTunes involves a longer manual process of first copying the iPod image folders to a computer's local storage before syncing them to the connected iPhone.
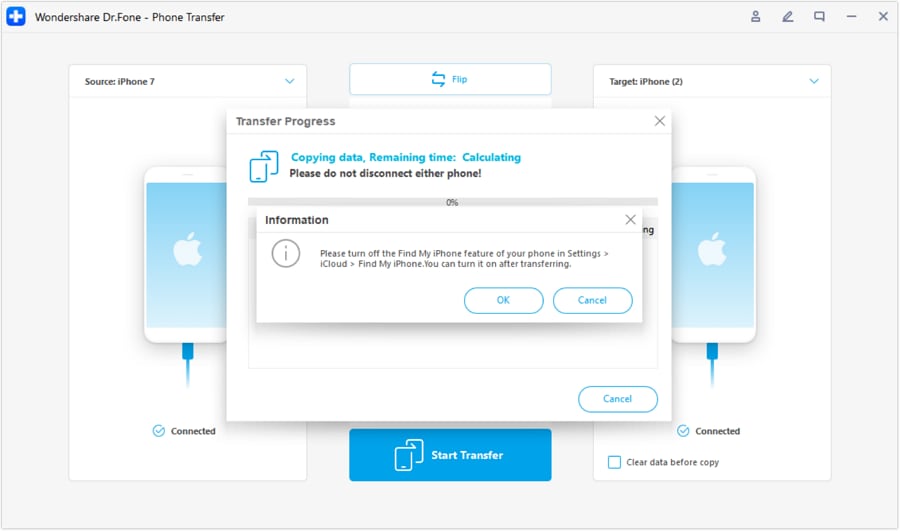
● Using Wondershare Dr.Fone for direct device-to-device transfers or backups requires users to temporarily disable the Find My feature on both iOS devices before initiating the software.
Ask AI for a summary
 ChatGPT
 Perplexity
 Gemini
 Claude
 Grok
Grok
It’s undeniable that the Apple iPod can certainly offer a lot of wonderful things to users. For instance, you can use this portable iOS device to stream videos, listen to music, and store media files. Yes. In terms of entertainment, iPods can do a lot of wonderful things for you. Can you take and store photos on iPods? The short answer is absolutely yes. If you’re using the modern versions of this device, capturing and storing snaps is a walk in the park. That’s why many users prefer to use it for this kind of activity.
There is no denying that the iPod is among the cutting-edge innovations that revolutionize our digital world. It takes our entertainment experience to a whole new level. However, don’t forget that Apple has already discontinued the worldwide production of this iOS device. Along with this, the developers have also stopped updating the iPod’s security patches and software. Don’t worry. You can still use your existing iPods if they are working fine on your end. But just a friendly reminder: Back up your photos to a safe place immediately. How so? It’s very simple. Transfer your photos from your iPod to your iPhone. It’s better to be safe than sorry.
In this article, we will delve into the highlights and benefits of the Apple iPod. We will also provide a few methods on how to transfer photos from iPod to iPhone. Continue reading below to learn more.
- Can You Transfer Photos From an iPod to an iPhone?
- How to Transfer Photos From iPod to iPhone?

- BONUS TIP: Back Up Your iPod Photos Before the Data Transfer
Can You Transfer Photos From an iPod to an iPhone?
Originally, iPods are designed to serve as music players. They are equipped with a mass storage capacity that can usually hold more than 10,000 songs. However, Apple has decided to upgrade the fundamental features of iPods over time. The last iPod generation that the tech giant produced is no longer just a music player. It was literally a portable entertainment setup that almost works like an iPhone in this regard. Yes. The newer iPod versions are capable of running lots of iOS apps, streaming online content, and taking high-quality photos. Do you own one at home? If so, you’ll know that modern iPods can do all these things with just the snap of a finger.

It’s true that Apple has already discontinued the iPod product line in 2022. That means there will be no new iPods to be released anymore. Likewise, the security and software of the existing units will no longer be updated and enhanced. Should you stop using your iPods now and keep them inside the cabinet? The short answer is absolutely no. You can still use your iPod like before. So long as your unit remains in good shape and functional state, it’s totally fine. Use your iPod for as long as you want. But don’t forget to back up your photos to another device. Why so? It’s simply a precautionary measure in case your iPod breaks down and becomes completely inaccessible. If you’re able to transfer your photos from your iPod to your iPhone, at least you can access them easily. Don’t sweat it. There are numerous techniques out there that can help you transfer photos from your iPod. Just choose one that perfectly suits your needs and preferences.
How to Transfer Photos From iPod to iPhone?
It’s probably fair to say that transferring photos from your iPod to your iPhone is indeed necessary. As mentioned earlier, iPods have already lost support from Apple. That’s why you need to be prepared in case something terrible happens on your end. While you still can, don’t hesitate to transfer your photos from your iPod to your iPhone for backup. Don’t worry. It’s a piece of cake. There are many methods you can try to do this procedure in easy steps. Do you want to know what those are? Check out the list below.
Method 1: Transfer photos from iPod to iPhone via iCloud.
The easiest way to transfer your photos from iPod to iPhone is to back them up to iCloud. If you do it so, you can easily access the photos from your iPhone using the iCloud services. No need to send them out one by one. All you have to do is log in to the Apple ID you use to back up your iPod photos. Yes. It’s just as simple as that. Do you want to try it now? Here’s a short guide for you.


Method 2: Transfer photos from iPod to iPhone via iTunes.
Another method you can consider is to sync your iPod and iPhone via iTunes. It’s quite a long process compared to other techniques. Nonetheless, it’s also an effective way to transfer your photos from your iPod to your iPhone. Do you want to know how? If so, check out the guide provided below and follow the indicated steps accordingly.


Method 3: Transfer photos from iPod to iPhone via AirDrop.
The newer iPod models support AirDrop. If you own one, you can definitely use it to transfer your photos from your iPod to your iPhone. Don’t worry. It’s indeed a walk in the park. Do you want to try it now? Here’s a short guide that can help you get started.


Method 4: Transfer photos from iPod to iPhone using Google Photos.
The Google Photos application is compatible with the newer models of iPods. If your unit can install this app, then use it to transfer photos from your iPod to your iPhone. Don’t worry. It’s a piece of cake. All you have to do is turn on the backup feature of this media-hosting software on your account. Do you want to try it now? If so, here is the guide for you.


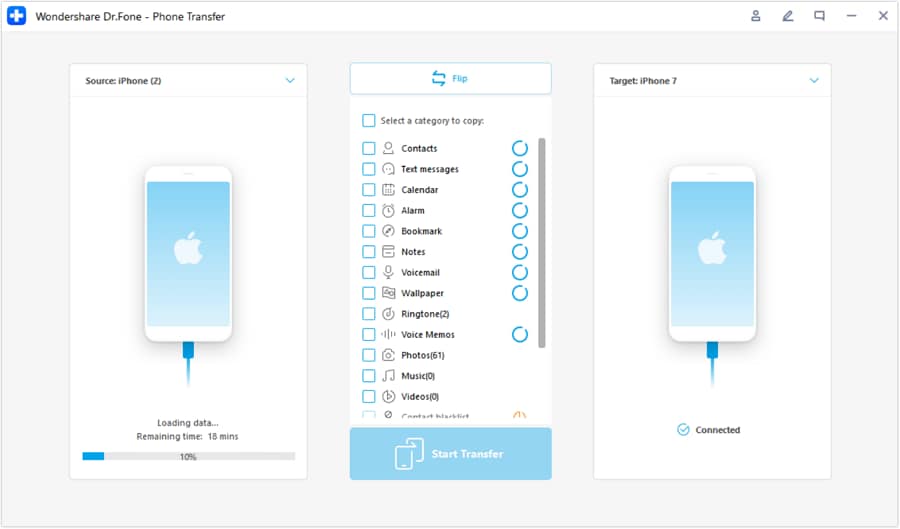
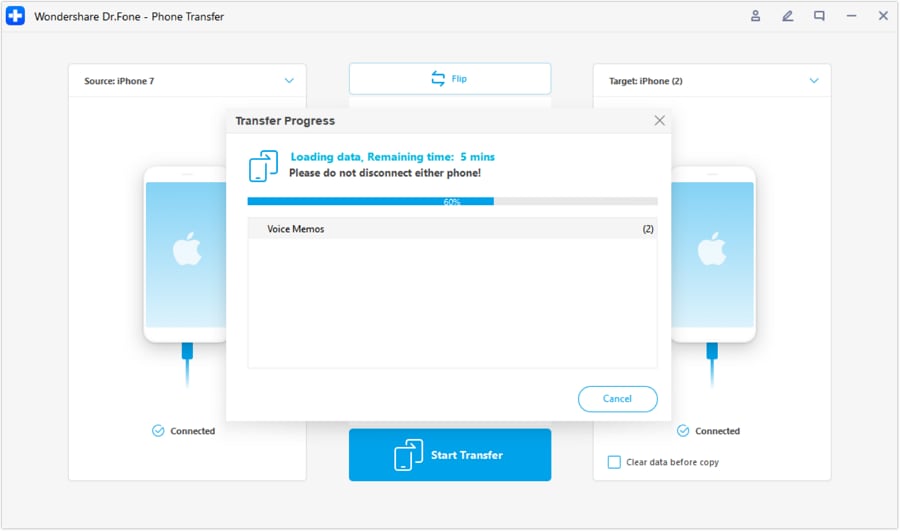
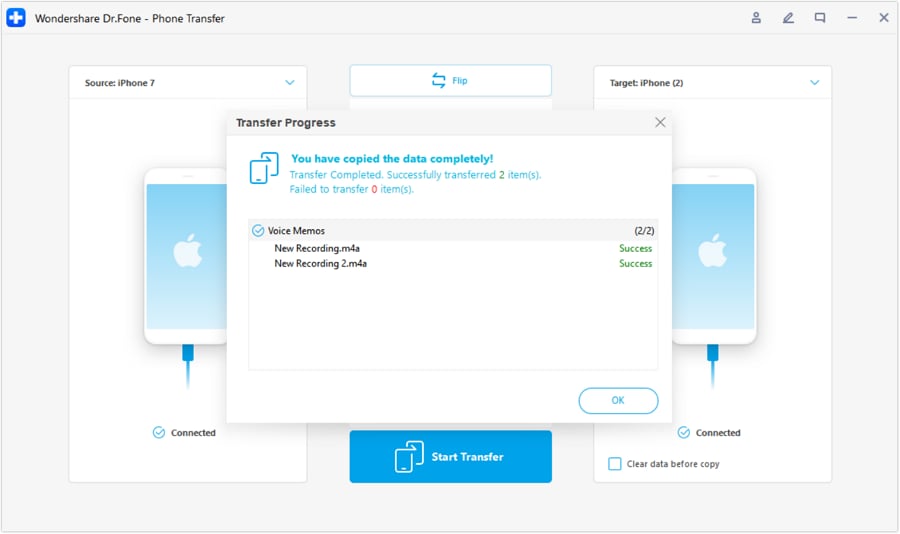
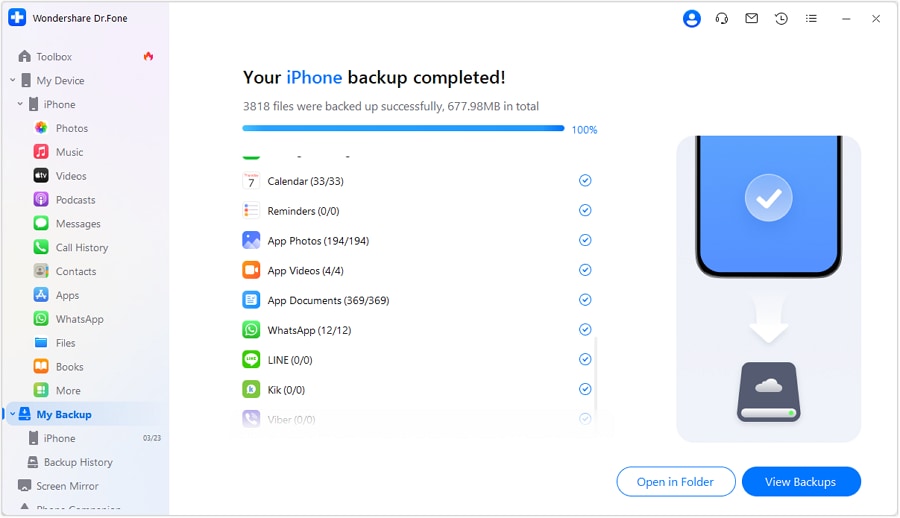
Method 5: Transfer photos from iPod to iPhone using Wondershare Dr.Fone.
Is there a more convenient option to transfer photos from iPod to iPhone? Fortunately, there is. You can easily facilitate this kind of procedure with the aid of third-party software. In this regard, Wondershare Dr.Fone can surely help you a lot. Do you want to try its powerful phone transfer feature? If so, check out the guide provided below.


BONUS TIP: Back Up Your iPod Photos Before the Data Transfer
We have seen from the previous discussions that there are many ways to transfer photos from iPod to iPhone. All of them are effective. Thus, don’t hesitate to try any methods above in case you need to transfer photos from an iPod. However, don’t forget that data transfer is a very sensitive procedure. It involves files that are vulnerable to data loss and other related problems. Hence, it’s best to back up your iPod first before you proceed with the data transfer. Don’t worry. Wondershare Dr.Fone has made it a lot easier for everyone. Do you want to try it now? Here’s a short guide for you.


Conclusion
There is no denying that iPods have truly served their purpose very well. They share a very significant contribution that further enhances our entertainment landscape. Unfortunately, Apple has already stopped the iPod production and software support. We cannot do anything about it but back up our iPods as soon as possible. Don’t wait until it is already too late. If you have some free time today, start to transfer your photos from your iPod to your iPhone. Refer to the discussions above and pick the best method that suits your preferences. The aforementioned tutorials on how to get photos off an iPod can surely help you a lot in this regard. Additionally, download Wondershare Dr.Fone on your computer for easily accessible and readily available smartphone assistance. Explore and take advantage of its powerful file backup and phone transfer features.


iPod Transfer
- Transfer from iPod
- 1. Transfer Your Photos from iPod
- 2. Transfer Music to Computer
- 3. Transfer Music to Computer or Mac
- 4. Transfer Music from iPod Classic
- 5. Transfer Music from iPod (Touch)
- 6. Transfer Music from Formatted iPod
- 7. Transfer Music from iPod to Mac
- 8. Sync iPod to New Computer
- 9. Transfer Music Without Losing Data
- 10. Transfer Pod to iTunes or Computer
- 11.Transfer Music to Hard Drive
- 12.Transfer iPod Music to MP3 Player
- 13.Transfer Music to USB Flash Drive
- 14.Transfer Music from Android to iPod
- 15.Upload iPod Music to Google Music
- 16.Transfer Music from iPod to iPad
- 17.Transfer Music to Samsung Galaxy
- Transfer to iPod
- 1. Transfer Music from iPod to iTunes
- 2. Transfer Music from iPod Classic
- 3. Transfer Music from iPod Nano
- 4. Transfer Music from iPod shuffle
- 5.Transfer Music from iTunes
- 6. Put music on iPod shuffle
- 7. Transfer Audiobooks to iPod
- 8. Transfer MP3 to iPod
- 9. Transfer Music From Window
- 10. Add Videos to iPod nano
- 11.Transfer Music from Hard Drive
- 12.Transfer Music from iMac
- 13.Transfer Music from Computer
- 14.Transfer Photos from Computer
- 15.Transfer Music from iPad
- 16.Transfer Music from iPod
- 17.Transfer Music from iPhone
- iPod Useful Tips
- ● Manage/transfer/recover data
- ● Unlock screen/activate/FRP lock
- ● Fix most iOS and Android issues
- Start Transfer Start Transfer Start Transfer

Daisy Raines
staff Editor