Teleport your device anywhere instantly with one click.


 100% Security Verified | No Subscription Required | No Malware

 :

 ChatGPT
 Perplexity
 Gemini
 Claude
 Grok
To enable location on Safari iPhone, allow Safari Websites to use Location Services while you browse. To deny that access, choose Never instead. These are permission controls: they decide whether Safari can request the device's location, not whether every website knows anything about you.
Consider someone searching a job portal who is repeatedly interrupted by irrelevant advertisements. Location may influence some recommendations, but pop-ups can also come from the website itself, advertising networks, or a previous browsing session. The practical response is to separate three tasks: choose Safari's location permission, limit repeated requests, and, only when needed, test a different GPS position. The instructions below retain the original examples and screenshots while explaining the differences.
In this article
A different GPS coordinate is not a substitute for browser privacy settings. Start with the controls built into iOS, especially if your objective is simply to stop sharing a precise position with an unfamiliar site.
Part 1: Enable or disable Safari location access on iPhone
Location permission is useful when a site needs a nearby reference point. Searching for a restaurant, hospital, cinema, or shopping center can produce more relevant local results if you voluntarily share your position. Without it, you can often enter a city or address manually. Choose the option that fits the particular task instead of treating access as a requirement for all browsing.
There is also a privacy trade-off: once an authorized website receives coordinates, its handling of that information depends on its policies. Denying access prevents Safari from obtaining Location Services information for that purpose. It does not erase account information, cookies, or an approximate area inferred from your internet connection. Nor does an advertisement prove that GPS was accessed.
Step 1 Open the iPhone privacy controls
Launch Settings from the Home Screen, then open Privacy & Security. Older iOS releases label this section Privacy, as shown in the preserved screenshot. The wording can differ without changing the purpose of the setting.

Step 2 Find the Safari Websites permission
Enter Location Services, make sure the master switch is enabled if you want to grant access, and look for Safari Websites. This page controls the browser's use of the device location; it is separate from permissions for Maps or other apps.

Step 3 Choose the appropriate level of access
Select While Using the App when you want location available during active Safari use. Choose Never when you want to deny it. If an ask-next-time option is offered, it provides a more case-by-case decision. Available choices depend on the iOS version. Where Precise Location is shown, disabling it shares an approximate rather than exact position.

The important correction is that While Using is not a single switch that both enables and disables Safari access on demand. It is an authorization category. Use Never to refuse access, or return to these settings when your preference changes. A site may still need its own permission before receiving location data.
Part 2: Stop Safari location requests on iPhone
Repeated requests can interrupt reading, shopping, or completing a form. If a website does not need your whereabouts, declining the request is reasonable. A blanket denial is convenient for users who would rather type an area themselves, although local search and other location-dependent features may then be less convenient.
Do not confuse an operating-system permission prompt with a message drawn by the webpage. iOS controls whether Location Services data is released. A website can still display its own explanation, ask you to enter a postcode, or show advertising after permission is denied. Blocking GPS access does not make the browsing session anonymous.
Step 1 Return to Privacy & Security
Open Settings and locate the privacy section again. On the older interface illustrated here, tap Privacy. There is no need to change unrelated permissions such as Contacts or Photos to manage Safari location.

Step 2 Review Safari in Location Services
Choose Location Services and open Safari Websites. Check that you are editing the browser entry rather than turning off the master location switch for every app. This narrower change avoids unnecessarily affecting navigation and other services.

Step 3 Deny access and check the result
Mark Never, return to Safari, and reload the page that was requesting your position. Safari should no longer be able to supply Location Services coordinates under that setting. If a site's own request panel remains, dismiss it or review that site's location preference in Safari's website settings where available.

You can reverse this decision later. For example, temporarily allowing access may help when you need directions from a trusted local service. Granting permission for that task does not mean you must leave precise access enabled indefinitely.
Part 3: Change the GPS position Safari may receive
 Set your map route to simulate GPS movement.
- Set your wanted movement speed.
- HD and large map view to check location.
- Fake GPS location to anywhere.
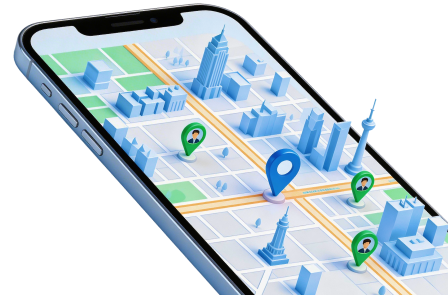
Dr.Fone - Virtual Location provides a desktop workflow for selecting a different device GPS coordinate and simulating movement on a map. Its relevant use here is checking location-dependent behavior, rather than toggling Safari's permission or changing the browser's network address.
A website must still be permitted to access device location, and its behavior can depend on IP-based estimates, saved preferences, or other signals. Consequently, changing GPS does not guarantee different advertisements, a different country on every service, or protection against tracking. Check device and operating-system compatibility before proceeding; the retained illustrations show an older interface.
The original article also supplied an older archive reference, Download for Mac. It is retained for reference, not presented as a verified current installer. Use the approved current download component after the completed instructions.
Step 1 Install and open the desktop software
Set up the application on a compatible computer and launch it. Connect your iPhone as instructed by the program, unlock it, and approve a trust request if one appears. Keep the connection available throughout the initial setup instead of assuming the phone can be changed remotely without preparation.
Step 2 Open the location workspace
Choose Virtual Location and follow the Get Started prompt when it is displayed. Complete the device-specific instructions before expecting the map controls to work. Button names and setup requirements can vary between versions.
Step 3 Inspect the current map position
Wait for the connected device to appear in the map view. Check the displayed starting position so that you can distinguish the original coordinate from the destination you choose next.
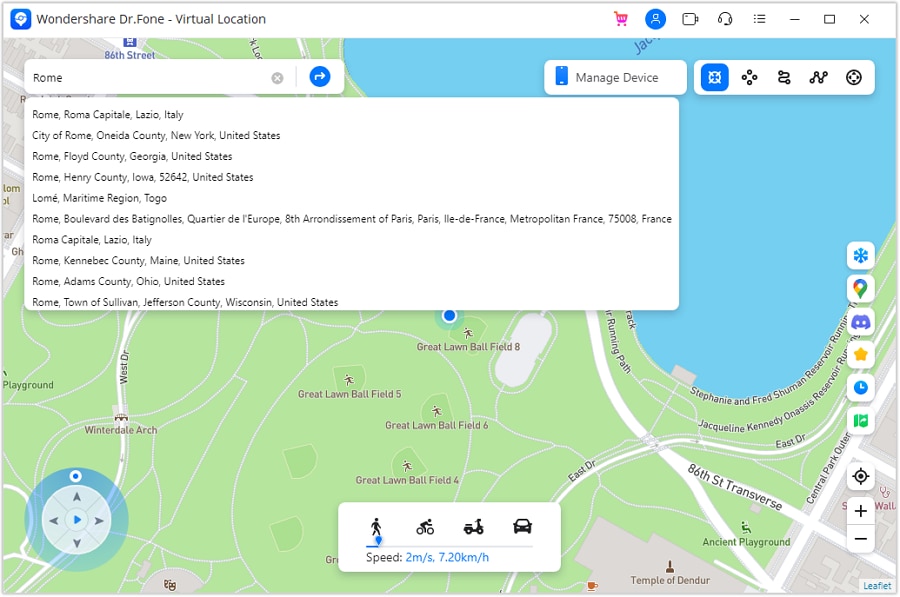
Step 4 Search in Teleport Mode
Activate Teleport Mode in the map toolbar. Type a place or coordinate in the search field and submit it with Enter or the displayed Go control. Review the search result carefully, since similarly named places can be in different regions.
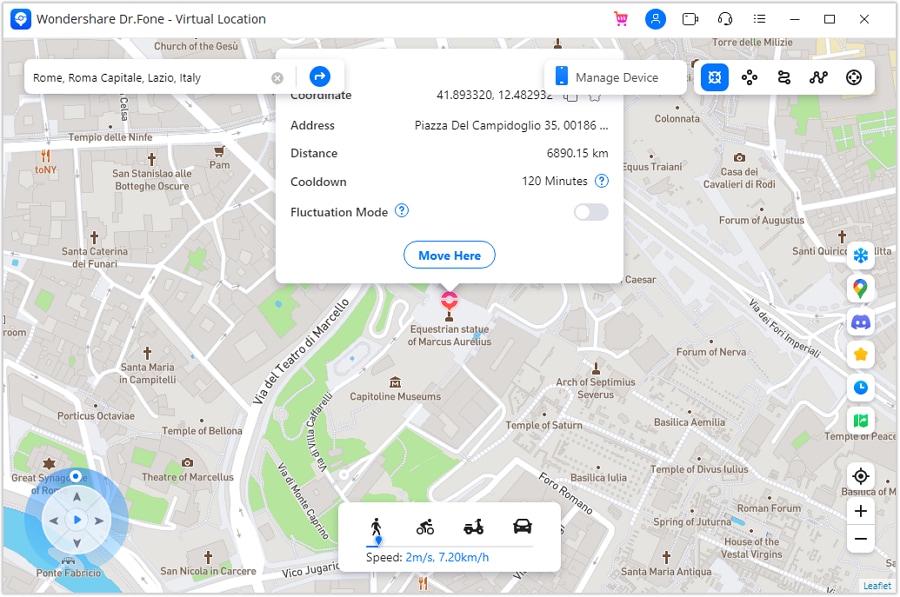
Step 5 Confirm the selected point
Examine the destination pin and select Move Here to apply the coordinate. Searching alone only locates a place on the map; the confirmation action is what requests the device-location change.
Step 6 Verify on the iPhone and in Safari
Open the phone's map app and inspect its current-position marker. Then reload the relevant Safari page and allow location only if you intend to share that position with the site. If the site displays another area, review its saved location and network-based behavior rather than assuming the GPS change failed.
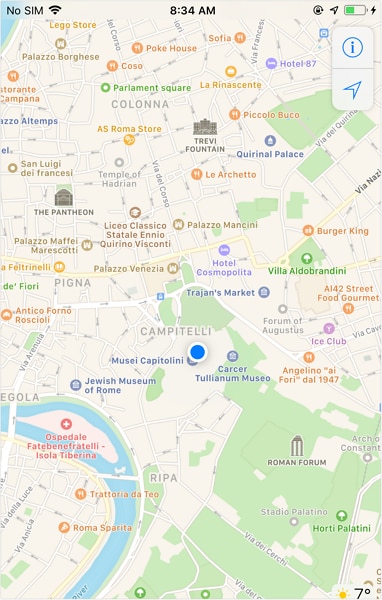
When testing is finished, restore the actual location using the application's instructions; the official guide describes restarting the device. Confirm the real position again before using navigation or another service that depends on accurate whereabouts.




Conclusion
Use Safari's permissions to decide whether a website can obtain location data. Use a GPS simulation tool only for the separate task of changing a supported device's reported coordinate. Dr.Fone - Virtual Location can support that test, but it does not replace permission management, block all pop-ups, or conceal your internet identity. Check the outcome on the phone and restore normal positioning afterward.
FAQ
1. Where are Safari location services on iPhone?
Open Settings, then Privacy & Security, Location Services, and Safari Websites. Older iOS versions use the shorter Privacy label.2. Does While Using turn location off for Safari?
No. It permits access during active use. Choose Never when the objective is to deny Safari access to Location Services.3. Why can a website still guess my area after I deny GPS?
Device coordinates are not the only signal. An internet address, a saved address, or a location selected in your account may still suggest an area.4. Will changing GPS stop every location pop-up?
No. A GPS change does not edit Safari permissions or prevent a website from drawing its own request message. Manage permission and website behavior separately.
 Add Wondershare Dr.Fone as a preferred source on Google